Tabla de contenido
Publicidad
Idiomas disponibles
Idiomas disponibles
Enlaces rápidos
O W N E R ' S M A N U A L
1. Read this manual carefully before starting assembly. Read each step completely before beginning
each step.
2. Some smaller parts may be shipped inside larger parts. Check inside all parts and cartons
before assembling or ordering parts.
3. To make assembly easier , use the Hardware Identifier on page 9 to identify and sort all
fasteners. Check all cartons for kits. All hardware may not be located in one kit.
4. Do not tighten hardware until instructed to do so. If hardware is tightened too soon, mounting holes
may not align and parts may not easily fit together. Leave locknuts slightly loose until you are instructed to
tighten them.
5. T ools required for assembly:
wrench may be substituted for the wrenches).
Please Do Not Return This Product To The Store!
Contact Escalade
Phone:
1-866-873-3528
Fax:
1-866-873-3533
E-mail:
tabletennis@escaladesports.com
Mailing Address (correspondence only):
Escalade Sports
PO Box 889
Evansville, IN 47706
Please visit our World Wide Web site at:
ON-LINE TROUBLE SHOOTING
ON-LINE PARTS REQUESTS
ADDITIONAL ESCALADE
Escalade® Sports products may be manufactured and/or licensed under the following patents.
6120397, 5816957, 5769744, 5119741, 4911085, 4717157, D460140, D420563
Additional patents may be pending. One or more of the listed patents and/or pending patents may cover specific product.
Phillips Screwdriver, T wo 7/16 Wrenches, One 3/8 Wrench (an adjustable
®
Sports customer service department at:
®
SPORTS PRODUCT INFORMATION
Toll – Free !
Toll – Free !
www.escaladesports.com
TECHNICAL ASSISTANCE
FREQUENTLY ASKED QUESTIONS
MODEL NOS.
T8125
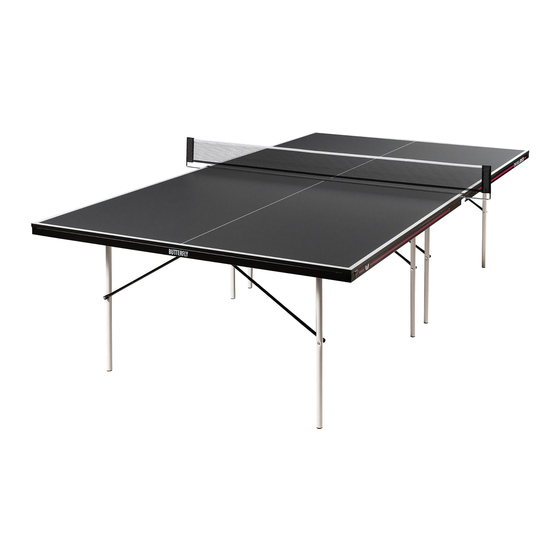
TABLE TENNIS TABLE
2L-7026-02
©
®
2010 Escalade Sports
Publicidad
Tabla de contenido

Manuales relacionados para Stiga T8125


Resumen de contenidos para Stiga T8125
- Página 1 MODEL NOS. T8125 TABLE TENNIS TABLE O W N E R ' S M A N U A L 1. Read this manual carefully before starting assembly. Read each step completely before beginning each step. 2. Some smaller parts may be shipped inside larger parts. Check inside all parts and cartons before assembling or ordering parts.
- Página 2 The middle of the table is the end that does not have the stripe on top. Lay table top #1 painted side down, on a smooth, flat Figure 1 U-Support surface. Use the shipping container to protect the painted surface of the table top. Assemble the two “L”...
- Página 3 Rotate U-support #7 until you see the screw hole in the Figure 3 slot of U-clip # 3. Slide U-support #7 side to side if This end will be the necessary. middle of the table when completely assembled. U-Support Note: Slide U-support back and forth until you Note: To aid in assembly you can use a cordless drill and see the hole if necessary.
- Página 4 Screw left hand hinge brackets #6 to table top follow- ing these steps: A. Push U-leg #2 and hinge assembly flat against top. See Figure 5. Figure 5 B. Place a spacer that is about 1/16” thick between hinge legs. Suggestion: either a nickel or a quarter Hinge is an ideal spacer.
- Página 5 Gently tap caster sockets #12 into U-support #7 until flange on sockets touches the edge of the tube. DO NOT HIT CASTER SOCKET DIRECTLY WITH A HAMMER! SET A PIECE OF WOOD ON CASTER SOCKET AND HIT PIECE OF WOOD TO DRIVE CASTER SOCKET INTO U-SUPPORT.
- Página 6 Place This Half First Table Half Against A Wall You Assembled Figure 11 Second Table Half You Assembled 17. Make sure the legs on the first table top half (the half with the name panel #5) are open and hinges are locked. With one person on each side of the table, lift and set table half on its legs.
- Página 7 Figure 12 SAFETY LATCH Top View Name Panel #5 Safety Latch #8 DO NOT OVERTIGHTEN (Flange extends over SAFETY LATCHES #8. Name Panel #5) THEY MUST PIVOT FREELY! INSTALL SAFETY LATCHES #8 AS SHOWN ABOVE FOR PROPER USE OF CAUTION: TABLE! DO NOT SKIP THIS STEP! DO NOT OPERATE TABLE UNTIL SAFETY LATCHES ARE INSTALLED AND ASSEMBLY IS COMPLETE! Figure 13...
- Página 8 ¡ ¡ ¢ £ ¤ ¥ ¦ § ¨ © § " § & § § © © & § § © © © § ¨ © & © © § § & & & & § § © & &...
- Página 9 90 DAY LIMITED WARRANTY This consumer warranty extends to the original consumer purchase of any ESCALADE ® SPORTS Product (hereinafter referred as the "Product"). WARRANTY DURATION: This Product is warranted to the original consumer purchase of a period of ninety (90) days from the original purchase.
-
Página 10: Care And Maintenance
CARE AND MAINTENANCE You have purchased a quality product that will give you years of enjoyment. By following these simple maintenance steps, you will add to the life of your new table. THE TABLE TOP The top (playing surface) of your table is made of particle board. Like all products made of wood, it can be affected by atmospheric changes in both temperature and humidity. - Página 11 20 16 PRODUCT PARTS LIST T8125 Key # T8125 Description Qty. Key # T8125 Description Qty. 701-1B #10-24 Washer 4A-5469-00 Table Top 701-141 #8-32 x 1 1/4 Sheet Metal Screw 8S-6754-00 U-Leg 1B-6451-00 #8 x 7/16 Sheet Metal Screw 2S-6879-01...
- Página 12 MESA DE TENIS NÚMERO DE MODELÓ T8125 M A N U A L D E L U S A R I O 1. Lea este manual cuidadosamente antes de empezar a ensamblar. Lea completamente cada uno de los pasos antes de empezar cada paso.
- Página 13 Este extremo ser el centro á Tablero de la mesa cuando esté Figura 1 Coloque el tablero #1 sobre una superficie plana y lisa con completamente Soporte en U ensamblada la cara pintada hacia abajo. Use la caja en donde venía la mesa para proteger la pintura de la superficie de la mesa.
- Página 14 Rote el soporte en forma de U #7 hasta que se Figura 3 vean los orificios a través de las ranuras de las Este extremo ser el centro á de la mesa cuando esté abrazaderas en U #3 donde irán los tornillos. completamente Mueva el Soporte en forma de U #7 de lado a ensamblada...
- Página 15 8. Atornille la bisagra de soporte del lado izquierdo #6 al tablero siguiendo estos pasos: Presione la pata en “U” #2 y la bisagra hasta que estén Figura 5 planas contra la mesa. Ver figura 5. Ponga un separador de alrededor de 1/16” de grueso Bisagra entre las patas de la bisagras.
- Página 16 Inserte cuidadosamente el casquillo de la llanta #12 dentro del soporte en forma de U #7 hasta que el borde del casquillo toque el borde del tubo. NO GOLPEE EL CASQUILLO DIRECTAMENTE CON EL MARTILLO! COLOQUE UN PEDAZO DE MADERA SOBRE EL CASQUILLO Y GOLPE SOBRE EL PEDAZO DE MADERA PARA INSERTAR EL CASQUILLO ADENTRO DEL SOPORTE EN FORMA DE U.
- Página 17 USTED TIENE QUE DETENER ESTOS EXTREMOS DE LOS TABLEROS. LAS MESAS NO SE VAN A PARAR SOLAS HASTA QUE ESTE CONECTADAS Recargue esta mitad La Primera Mitad de contra la pared. la mesa que Figura 11 La Segunda Mitad de ensamblo.
-
Página 18: Pasador De Seguridad
Figura 12 PASADOR DE SEGURIDAD Vista de Arriba Placa #5 Pasador de NO SOBRE AJUSTE EL Seguridad #8 PASADOR DE SEGURIDAD #8. (el borde se extiende sobre la placa #5) DEBE DE GIRAR LIBREMENTE! INSTALE LOS PASADORES DE SEGURIDAD #8 COMO SE MUESTRA ARRIBA PARA EL USO APROPIADO DE LA MESA! NO OMITA ESTE PASO! NO USE LA ADVERTENCIA: MESA HASTA QUE LOS PASADORES DE SEGURIDAD ESTÉN INSTALADOS Y... -
Página 19: Instrucciones Para Abrir Y Cerrar La Mesa
¡NO PERMITA QUE NIÑOS ABRAN LA MESA! NO DEBEN DE ADVERTENCIA! PARARSE, SUBIRSE O BRINCAR SOBRE LA MESA . PUEDEN OCURRIR LESIONES GRAVES O MORTALES. ¡ESTA MESA NO ES UN JUGUETE! ¡ÚNICAMENTE LOS ADULTOS DEBEN ABRIR O CERRAR LA MESA. DE NO CUMPLIR CON LAS INSTRUCCIONES PARA ABRIR Y CERRAR LA MESA PUEDE RESULTAR EN LESIONES PERSONALES O DAÑOS MATERIALES. - Página 20 GARANTÍA LIMITADA POR 90 DÍAS ® Esta garantía es aplicable para consumidores de la compra original de cualquier producto ESCALADE SPORTS (en adelante denominado el "Producto"). DURACIÓN DE LA GARANTÍA: Se garantiza este Producto al comprador original por un período de (90) días a partir de la fecha de compra.
-
Página 21: Cuidado Y Mantenimiento
CUIDADO Y MANTENIMIENTO Usted ha comprado un producto de calidad que podrá disfrutar muchos años. Si sigue estos simples pasos de mantenimiento, alargará la vida de la mesa. TABLERO El tablero (superficie de juego) está construido de aglomerado. Al igual que todos los productos de madera, se puede ver afectado por cambios de temperatura y humedad causando una leve deformación por expansión o contracción. -
Página 22: Lista De Partes Reemplazables T8125
LISTA DE PARTES REEMPLAZABLES T8125 # de Ref. # de Parte # de Ref. # de Parte Descripción Cant. Descripción Cant. 4A-5469-00 701-1B #10-24 Rondana Tablero 8S-6754-00 Pata en U 701-141 #8-32 x 1 1/4” Tornillo para lamina de metal...