Tabla de contenido
Publicidad
Idiomas disponibles
Idiomas disponibles
Enlaces rápidos
NEDERLANDS
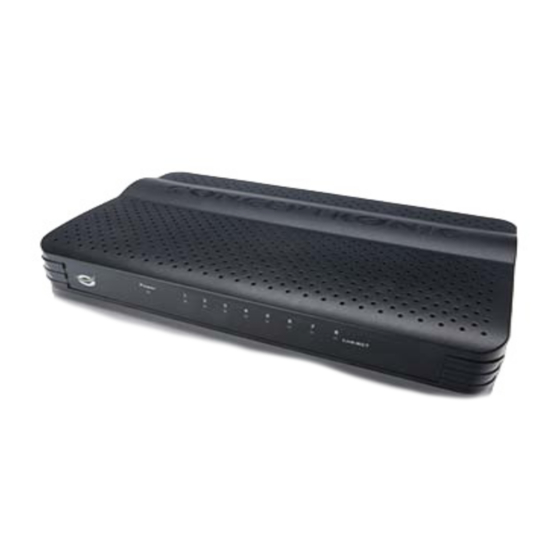
Conceptronic 8-poorts 10/100 Mbps ethernet switch.
In deze gebruiksaanwijzing vindt u stap-voor-stap instructies voor de installatie van de Conceptronic 8-
poorts 10/100 Mbps ethernet switch.
Bij problemen kunt u het beste naar onze support-site gaan (www.conceptronic.net - klik op 'Support').
Daar vindt u een database met veel gestelde vragen (FAQ).
Als u een vraag over dit product heeft die niet op onze website wordt beantwoord, kunt u ons gerust e-
mailen op support@conceptronic.net.
Ga voor meer informatie over Conceptronic producten naar de Conceptronic website:
www.conceptronic.net.
U vindt de volgende items in de verpakking van de Conceptronic 10/100 Mbps ethernet switch:
• Conceptronic 8-poorts 10/100 Mbps ethernet switch (C100S8A)
• Lichtnetadapter 7,5V gelijkstroom, 1A
• 4 rubberen pootjes voor bureaugebruik
• Wandmontagekit (2 zelftappende schroeven en 2 nylon pluggen)
• Deze meertalige gebruiksaanwijzing
• Garantiekaart
• Alle poorten zijn dual-speed 10/100 Mbps met NWay en full/half duplex.
• Store-and-forward schakeling zorgt voor gegevensintegriteit.
• Auto-polariteit corrigeert per poort eventuele verwisseling van de kabelparen voor verzenden en
ontvangen.
• Gegevenstransport met 100% kabelsnelheid (full wire speed) voor 100 Mbps snel ethernet en 10 Mbps
ethernet op alle poorten.
• Datafiltering verwijdert alle slechte pakketten (CRC align fouten, runts, fragmenten, etc.) op 100%
kabelsnelheid voor alle poorten.
• Half-duplex botsinggebaseerde back-pressure jamming en full-duplex IEEE 802.3x flow control.
• 2K zelflerende actieve tabel met MAC-adressen op basis van leeftijd (aging).
• 448 KBit buffergeheugen voor datapakketten.
Conceptronic C100S8A
Gebruiksaanwijzing
Gefeliciteerd met uw nieuwe
1. Inhoud verpakking
2. Mogelijkheden
1
Publicidad
Tabla de contenido

Manuales relacionados para Conceptronic C100S8A


Resumen de contenidos para Conceptronic C100S8A
- Página 1 In deze gebruiksaanwijzing vindt u stap-voor-stap instructies voor de installatie van de Conceptronic 8- poorts 10/100 Mbps ethernet switch. Bij problemen kunt u het beste naar onze support-site gaan (www.conceptronic.net - klik op ‘Support’). Daar vindt u een database met veel gestelde vragen (FAQ).
-
Página 2: Plaats Van De Onderdelen
NEDERLANDS 3. Plaats van de onderdelen Voorkant Beschrijving Status Betekenis status Aan/uit lampje Switch staat uit Switch staat aan en is klaar voor gebruik Link/ACT lampjes Geen netwerkverbinding aanwezig op de LAN-poort AAN - ORANJE Er is een 10 Mbit netwerkverbinding op de LAN-poort AAN - GROEN Er is een 100 Mbit netwerkverbinding op de LAN-poort KNIPPERT... - Página 3 NEDERLANDS 4. Switch installeren De 10/100 Mbps ethernet switch wordt geleverd met rubberen pootjes en wandmontagekit. Hiermee kunt u de switch op een bureau plaatsen of aan de muur hangen. Bureaugebruik: • Kleef de meegeleverde rubberen voetjes aan de onderkant van de switch op de vier hoeken. Dit voorkomt dat de switch van uw bureau glijdt.
- Página 4 NEDERLANDS 5. Switch aansluiten • Sluit de lichtnetadapter aan op de DC gelijkstroomingang van de switch en op een stopcontact. Alle lampjes van de switch knipperen even om aan te geven dat de switch wordt gestart. Wanneer het aan/uit-lampje blijft branden, staat de switch aan en is hij klaar voor gebruik. •...
-
Página 5: Package Contents
Congratulations on the purchase of your Conceptronic 8 Port 10/100 Mbps Ethernet Switch. This user manual gives you a step-by-step explanation of how to install the Conceptronic 8 Port 10/100Mbps Ethernet Switch. When problems occur, we advise you to go to our support-site (go to www.conceptronic.net and click ‘Support’. -
Página 6: Product Overview
ENGLISH 3. Product Overview Front View Description Status Status Explanation Power LED Switch is not powered Switch is powered and ready to use Link/ACT LED’s No Network Link is created to the LAN Port ON - ORANGE A 10 Mbit Network Link is created to the LAN Port ON - GREEN A 100 Mbit Network Link is created to the LAN Port BLINK... -
Página 7: Installing The Switch
ENGLISH 4. Installing the switch The 10/100 Mbps Ethernet Switch comes with rubber feet and a wall mount kit. This allows you to use the switch on your desk or mounted to the wall. Desk usage: • Stick the included rubber feet in each corner to the bottom of the switch. This will prevent the switch from moving on your desk. - Página 8 ENGLISH 5. Connecting the switch • Connect the power adapter to the DC input of the switch and to a free wall outlet. All LED’s of the switch will blink shortly, indicating that the switch is starting. When the power LED remains on, the switch is powered and active. •...
-
Página 9: Felicidades Por La Compra De Su Switch Ethernet De 10/100 Mbps Y 8 Puertos De Conceptronic
Conceptronic. Si se producen problemas, le aconsejamos que consulte a nuestro servicio técnico (en www.conceptronic.net y haga clic en “Support”). Aquí encontrará la base de datos de las preguntas más frecuentes o FAQ. Si tiene otras preguntas sobre su producto y no las encuentra en nuestro sitio web, póngase en contacto con nosotros por correo electrónico: apoyo@conceptronic.net... -
Página 10: Resumen Del Producto
ESPAÑOL 3. Resumen del producto Vista delantera Nº Descripción Estado Explicación del estado LED de encendido El switch está apagado El switch está encendido y listo para su uso LEDs de enlace/ACT No se ha creado ningún enlace de red en el puerto LAN ON –... -
Página 11: Instalar El Switch
ESPAÑOL 4. Instalar el switch El Switch Ethernet de 10/100 Mbps incluye una peana de goma y un kit de montaje en la pared, lo cual permite colocar el switch en su escritorio o instalarlo en la pared. Uso del switch en el escritorio: •... -
Página 12: Conectar El Switch
ESPAÑOL 5. Conectar el switch • Conecte el adaptador de alimentación a la entrada DC del switch y a un enchufe de pared libre. Todos los LEDs del switch parpadearán unos segundos, lo cual indica que el switch se está iniciando. Si el LED de encendido permanece iluminado significa que el switch está... - Página 13 Wir gratulieren Ihnen zum Kauf Ihres Conceptronic 10/100 Mbps 8-Port Ethernet Switches. In diesem Benutzerhandbuch wird Ihnen Schritt für Schritt gezeigt, wie der Conceptronic 10/100Mpbs 8- Port Ethernet Switch installiert werden muss. Wenn Probleme auftreten sollten, besuchen Sie unsere Support-Seite (unter www.conceptronic.net) und klicken Sie auf ‚Support’.
- Página 14 DEUTSCH 3. Gerätekomponenten Vorderseite Beschreibung Status Status-Erklärung Power LED-Anzeige Switch ist nicht an Strom angeschlossen Switch ist an Strom angeschlossen und betriebsbereit Link/ACT-LEDs Es besteht keine Netzwerkverbindung zum LAN-Port EIN - ORANGE Es besteht eine 10 Mbit- Netzwerkverbindung zum LAN- Port EIN - GRÜN Es besteht eine 100 Mbit- Netzwerkverbindung zum LAN-...
- Página 15 DEUTSCH 4. Installation des Switches Der 100/100 Mbps Ethernet Switch wird mit Gummifüßen und einem Wandhalterungsset geliefert. Dies ermöglicht es Ihnen, den Switch entweder auf Ihrem Schreibtisch aufzustellen oder an der Wand zu befestigen. Verwendung auf dem Schreibtisch: • Befestigen Sie auf der Unterseite des Switches an allen Ecken die im Lieferumfang enthaltenen Gummifüße.
- Página 16 DEUTSCH 5. Anschluss des Switches • Schließen Sie das Netzteil am DC-Eingang des Switches und an einer Steckdose an. Daraufhin blinken alle LED-Anzeigen auf dem Switch kurz und zeigen an, dass der Switch gestartet wird. Sobald die Power-LED-Anzeige ununterbrochen leuchtet, ist der Switch eingeschaltet und aktiv. •...
-
Página 17: Contenu Du Paquet
Pour toute autre question au sujet de notre produit, ou si vous ne trouvez pas l’information dont vous avez besoin sur notre site web, vous pouvez nous contacter par mail : support@conceptronic.net. Pour de plus amples informations sur les produits Conceptronic, merci de visiter notre site web : www.conceptronic.net. -
Página 18: Présentation Du Produit
FRANÇAIS 3. Présentation du produit Vue avant Nº Description État Explication de fonctionnement Voyant d’alimentation ÉTEINT L’interrupteur n’est pas alimenté ALLUMÉ L’interrupteur est alimenté et prêt à l’emploi Voyants Link/ACT ÉTEINT Aucune connexion au réseau vers le port LAN ORANGE Connexion réseau de 10 Mbit existante sur le port LAN VERT Connexion réseau de 100 Mbit existante sur le port LAN... - Página 19 FRANÇAIS 4. Comment installer le commutateur Le commutateur Ethernet 10/100 Mbps est fourni avec des pieds en caoutchouc et son kit de montage au mur. Cela vous permettra d’utiliser votre commutateur soit sur votre bureau, soit fixé au mur. Montage sur le bureau : •...
- Página 20 FRANÇAIS 5. Comment mettre le commutateur en marche • Branchez l’adaptateur électrique à la prise d’alimentation DC du commutateur et à une prise de courant disponible de votre maison/bureau. Tous les voyants du commutateur clignoteront rapidement, ce qui indique que le commutateur est en phase d’initialisation.
-
Página 21: Contenuto Della Confezione
In caso di domande e dubbi di altra natura riguardanti il prodotto e che non appariranno nel nostro sito web, potete contattarci via e-mail al seguente indirizzo: support@conceptronic.net Per maggiori informazioni sui prodotti di Conceptronic potete consultare la pagina web di Conceptronic: www.conceptronic.net 1. Contenuto della confezione... - Página 22 ITALIANO 3. Spiegazione del prodotto Vista frontale Descrizione Stato Spiegazione dello stato LED di alimentazione SPENTO Lo switch non viene alimentato ACCESO Lo switch viene alimentato ed è pronto per essere usato LED di attività / Link SPENTO Non esiste nessuna connessione di rete verso la porta LAN ACCESO-ARANCIONE Esiste nessuna connessione di rete 10 Mbit verso la porta LAN...
- Página 23 ITALIANO 4. Come installare lo switch Lo Switch Ethernet 10/100 Mbps è dotato di piedini in gomma e di un kit per montaggio a muro, perché in questo modo potrà essere usato sulla scrivania o appeso a una parete. Uso su scrivania: •...
- Página 24 ITALIANO 5. Come collegare lo switch • Collegare l’adattatore di corrente all’ingresso DC dello switch e a una presa a muro disponibile. Tutti i LED dello switch lampeggeranno per un breve momento, stando a indicare che lo switch è stato acceso.
-
Página 25: Conteúdo Da Embalagem
Ethernet de 8 portas 10/100 Mbps da Conceptronic. Quando tiver algum problema, aconselhamo-lo a consultar a nossa página de suporte (vá a www.conceptronic.net) e clicar em ‘Support’ (Suporte). Aí vai encontrar a Base de Dados das Perguntas Mais Frequentes. Quando tiver outras questões sobre o seu produto e não encontrar resposta para elas na nossa página, então contacte-nos por e-mail:... - Página 26 PORTUGUÊS 3. O produto Parte da frente Nº Descrição Estado Explicação do estado LED de Alimentação O switch não está ligado. O switch está ligado e pronto a usar. LED’s Link/ACT Não está criada uma ligação de rede na porta LAN ON - LARANJA Está...
- Página 27 PORTUGUÊS 4. Instalação do switch O switch de Ethernet 10/100 Mbps é fornecido com uns pés de borracha e com um kit de montagem na parede. Isto permite-lhe usar o switch na sua secretária ou montado na parede. Colocação na secretária: •...
- Página 28 PORTUGUÊS 5. Ligar o switch • Ligue o transformador à entrada CC do switch e a uma tomada livre. Todos os LED’s do switch irão ficar intermitentes por alguns instantes, indicando assim que o switch está a iniciar. Quando o LED de alimentação ficar acesso, o switch está ligado e activo. •...
-
Página 29: Kezelési Útmutató
Kezelési útmutató Köszönjük, hogy a Conceptronic 8 portos 10/100 Mb/s Ethernet kapcsolót választotta. Ez a kezelési útmutató lépésről lépésre elmagyarázza, miként kell a Conceptronic 8 portos 10/100 Mb/s Ethernet kapcsolóját telepítenie. Ha probléma jelentkezne, azt tanácsoljuk, keresse fel terméktámogatást nyújtó webhelyünket (látogasson el a www.conceptronic.net honlapra, majd ott kattintson a „Support”-ra). -
Página 30: A Termék Áttekintése
MAGYAR 3. A termék áttekintése Elölnézet Leírás Állapot Az állapotra vonatkozó magyarázat Áramellátást jelző LED A kapcsoló nincs áram alatt A kapcsoló áram alatt van és használatkész Kapcsolat-/ACT-jelző Nincs kialakítva hálózati kapcsolat a LAN port felé LED-ek BE – NARANCS- 10 Mbit-es hálózat kialakítva a LAN port felé SÁRGA BE - ZÖLD A 100 Mbit-es hálózat kialakítva a LAN port felé... - Página 31 MAGYAR 4. A kapcsoló telepítése A 10/100 Mb/s Ethernet kapcsoló gumilábakkal és a falra történő felszerelésre szolgáló készlettel együtt érkezik. Ezáltal a kapcsoló akár íróasztalon, akár falra szerelve használható. Asztali használat: • Ragassza fel a mellékelt gumilábakat mindegyik sarokra a kapcsoló alján. Ezáltal megakadályozható, hogy a kapcsoló...
- Página 32 MAGYAR 5. A kapcsoló csatlakoztatása • Csatlakoztassa a hálózati adaptert a kapcsoló egyenáramú bemenetéhez, valamint szabad falicsatlakozóhoz. A kapcsoló minden LED-je kis ideig villog, jelezve, hogy a kapcsoló működni kezd. Ha az áramellátást jelző LED folyamatosan világít, a kapcsoló áram alatt van és aktív. •...
-
Página 33: Paket İçeriği
Burada Sıkça Sorulan Sorular Veritabanını bulacaksınız. Ürününüzle ilgili başka sorularınız varsa ve bunların yanıtlarını web sitemizde bulamıyorsanız, bize e-posta ile ulaşın: support@conceptronic.net Conceptronic ürünleri ile ilgili daha fazla bilgi için, lütfen Conceptronic Web Sitesini ziyaret edin: www.conceptronic.net 1. Paket İçeriği Conceptronic 10/100 Mbps Ethernet Switch paketinin içeriği aşağıdaki gibidir:... -
Página 34: Ürüne Genel Bakış
TÜRKÇE 3. Ürüne Genel Bakış Ön Görünüm Tanım Durum Durum Açıklaması Güç LED’i OFF (KAPALI) Switch’te enerji yok ON (AÇIK) Switch’te enerji var ve kullanıma hazır Link/ACT LED’leri OFF (KAPALI) LAN Portunda hiçbir Ağ Linki oluşturulamadı ON (AÇIK) – TURUNCU LAN Portunda 10 Mbit Ağ... - Página 35 TÜRKÇE 4. Switch Kurulumu 10/100 Mbps Ethernet Switch’in yanında lastik ayaklar ve bir duvar montaj kiti de verilmektedir. Böylece switch’i masaüstünde ya da duvara monte edilmiş olarak kullanabilirsiniz. Masaüstü kullanımı: • Birlikte verilen lastik ayakları switch’in altına her bir köşeye yapıştırın. Bu ayakların sayesinde switch masanızda hareket etmeyecektir.
- Página 36 TÜRKÇE 5. Switch Bağlantıları • Güç adaptörünü switch’in DC girişine ve boş bir prize takın. Switch üzerindeki tüm LED’lerin kısa bir süre yanıp sönmesi switch’in çalışmaya başladığını gösterir. Güç LED’i sürekli yandığı zaman switch açılmıştır/enerji gelmiştir ve aktiftir. • Switch’in LAN portlarına ağ aygıtlarınızı (masaüstü bilgisayar, dizüstü bilgisayar, yazıcı, router vb.) bağlayın.
-
Página 37: Technical Specifications
TECHNICAL SPECIFICATIONS Appendix – Technical Specifications General Number of Ports: 8 x 10/100 Mbps MDI X ports Protocol: CSMA/CD Topology: Star Standards: Standards: IEEE 802.3 10BASE-T Ethernet IEEE 802.3u 100BASE-TX Fast Ethernet ANSI/IEEE Std 802.3 NWay auto-negotiation Data Transfer Rate: Ethernet: 10 Mbps (half duplex) 20 Mbps (full duplex) Fast Ethernet:...