Tabla de contenido
Publicidad
Idiomas disponibles
Idiomas disponibles
Enlaces rápidos
NEDERLANDS
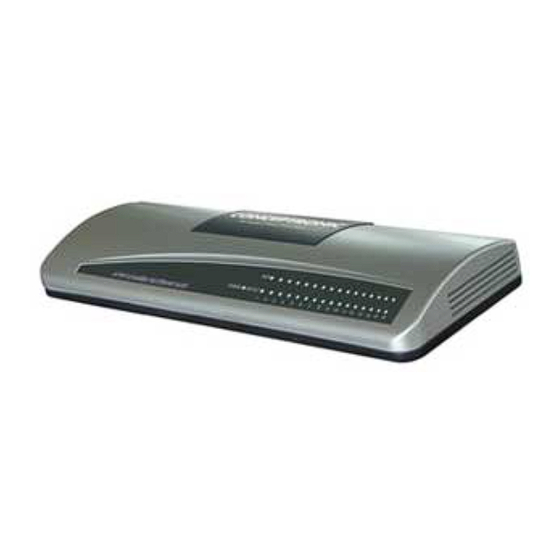
Conceptronic C100S16
Gebruiksaanwijzing
Gefeliciteerd met uw nieuwe
Conceptronic 16-poorts 10/100 Mbps ethernet switch
In deze gebruiksaanwijzing vindt u stap-voor-stap instructies voor de
installatie van de Conceptronic 16-poorts 10/100 Mbps ethernet switch.
Bij problemen kunt u het beste naar onze support-site gaan
(www.conceptronic.net - klik op 'Support'). Daar vindt u een database
met veel gestelde vragen (FAQ).
Als u een vraag over dit product heeft die niet op onze website wordt
beantwoord, kunt u ons e-mailen op support@conceptronic.net.
Ga voor meer informatie over Conceptronic producten naar de
Conceptronic website: www.conceptronic.net.
1. Inhoud verpakking
U vindt de volgende items in de verpakking van de Conceptronic 10/100
Mbps ethernet switch:
• Conceptronic 16-poorts 10/100 Mbps ethernet switch (C100S16)
• Lichtnetadapter 12V gelijkstroom, 1A
• 4 rubberen pootjes voor bureaugebruik
• Deze meertalige gebruiksaanwijzing
• Garantiekaart en boekje CE-verklaring
1
Publicidad
Tabla de contenido

Manuales relacionados para Conceptronic C100S16


Resumen de contenidos para Conceptronic C100S16
- Página 1 Ga voor meer informatie over Conceptronic producten naar de Conceptronic website: www.conceptronic.net. 1. Inhoud verpakking U vindt de volgende items in de verpakking van de Conceptronic 10/100 Mbps ethernet switch: • Conceptronic 16-poorts 10/100 Mbps ethernet switch (C100S16) • Lichtnetadapter 12V gelijkstroom, 1A •...
-
Página 2: Installatie En Gebruik
NEDERLANDS 2. Betekenis lampjes Beschrijving Betekenis Aan/uit lampje Switch staat uit Switch staat aan en is klaar voor gebruik Link/ACT lampjes Geen netwerkverbinding aanwezig op de LAN- poort Netwerkverbinding aanwezig op de LAN-poort KNIPPERT Gegevens ontvangen/verzonden via de LAN- poort 100M lampjes Er is een 10 Mbit netwerkverbinding op de LAN-poort... - Página 3 NEDERLANDS Bureaugebruik: • Kleef de meegeleverde rubberen voetjes aan de onderkant van de switch op de vier hoeken. Dit voorkomt dat de switch van uw bureau glijdt. • Zet de switch op uw bureau. Wandmontage: • Boor twee gaatjes in de muur met een tussenruimte gelijk aan de afstand tussen het midden van de openingen aan de onderkant van de switch.
-
Página 4: Package Contents
For more information about Conceptronic products, please visit the Conceptronic Web Site: www.conceptronic.net 1. Package contents The following items are present in the package of the Conceptronic 10/100 Mbps Ethernet Switch: • Conceptronic 16 Port 10/100 Mbps Ethernet Switch (C100S16) •... -
Página 5: Installing The Switch
ENGLISH 2. LED description Description Status Explanation Power LED Switch is not powered Switch is powered and ready to use Link/ACT LED’s No Network Link is created to the LAN Port A Network Link is created to the LAN Port BLINK Data is sent or received through the LAN Port... - Página 6 ENGLISH Desk usage: • Stick the included rubber feet in each corner to the bottom of the switch. This will prevent the switch from moving on your desk. • Place the switch on your desk. Wall mounted usage: • Drill two holes into the wall with the same distance as the screw support holes located on the bottom of the switch.
-
Página 7: Contenido Del Paquete
Si desea información adicional sobre los productos de Conceptronic, visite nuestro sitio web: www.conceptronic.net 1. Contenido del paquete El paquete del Switch Ethernet 10/100 Mbps de Conceptronic contiene los elementos siguientes: • Switch Ethernet de 16 puertos 10/100 Mbps de Conceptronic (C100S16) •... -
Página 8: Descripción De Los Led
ESPAÑOL 2. Descripción de los LED Nº Descripción Descripción del estado de los LED LED de encendido APAGADO Switch apagado ENCENDIDO Switch encendido y listo para ser utilizado LEDs Enlace/ACT APAGADO No se ha creado ningún enlace de red para este puerto LAN ENCENDIDO Se ha creado un enlace de red para este... -
Página 9: Conectar El Switch
ESPAÑOL En escritorio: • Pegue cada uno de los topes de goma (incluidos con el producto) en cada extremo de la base del switch. Esto impedirá que el switch se mueva una vez colocado en el escritorio. • Sitúelo donde usted desee en su escritorio. En pared: •... - Página 10 Detaillierte Informationen über Conceptronic Produkte finden Sie auf unserer Webseite: www.conceptronic.net 1. Packungsinhalt In der Verpackung des Conceptronic 10/100 Mbps Ethernet Switches ist Folgendes enthalten: • Conceptronic 10/100 Mbps 16-Port Ethernet Switch (C100S16) • Netzteil 12V Gleichstrom, 1A • 4 Gummifüße für das Aufstellen des Switches auf dem Schreibtisch •...
- Página 11 DEUTSCH 2. Beschreibung der LEDs Beschreibung Status-Erklärung Power LED-Anzeige Switch ist nicht an Strom angeschlossen Switch ist an Strom angeschlossen und betriebsbereit Link/ACT-LEDs Es besteht keine Netzwerkverbindung zum LAN-Port Es besteht eine Netzwerkverbindung zum LAN-Port BLINKT Es werden Daten über den LAN-Port gesendet oder empfangen 100M-LEDs Es besteht eine 10 Mbit-...
- Página 12 DEUTSCH Verwendung auf dem Schreibtisch: • Befestigen Sie auf der Unterseite des Switches an allen Ecken die im Lieferumfang enthaltenen Gummifüße. Dies verhindert ein Verrutschen des Switches auf dem Schreibtisch. • Stellen Sie den Switch auf Ihren Schreibtisch. Wandbefestigung: • Bohren Sie zwei Löcher in die Wand im gleichen Abstand wie die der Schraubenlöcher an der Halterung auf der Unterseite des Switches.
-
Página 13: Contenu Du Paquet
: support@conceptronic.net Pour de plus amples informations sur les produits Conceptronic, merci de visiter notre site web : www.conceptronic.net 1. Contenu du paquet Le paquet de ce répartiteur 10/100 Mbps Ethernet à... -
Página 14: Description Des Voyants
FRANÇAIS 2. Description des voyants Nº Description Explication de l’état de fonctionnement Voyant POWER ÉTEINT Le répartiteur est éteint ALLUMÉ Le répartiteur est allumé et prêt à être utilisé Voyant Link/ACT ÉTEINT Aucune connexion réseau détectée sur le port LAN ALLUMÉ... - Página 15 FRANÇAIS Pose sur votre bureau : • Collez les pieds en caoutchouc fournis aux quatre angles de l’arrière du répartiteur. Cela évitera qu’il ne glisse. • Placez-le sur votre bureau. Fixation au mur : • Percez deux trous dans le mur à la même distance que les trous du support de vis situé...
-
Página 16: Contenuto Della Confezione
La confezione contenente lo Switch Ethernet 10/100 Mbps di Conceptronic è composta dai seguenti elementi: • Switch Ethernet 16 porte 10/100 Mbps di Conceptronic (C100S16) • Adattatore di corrente, 12V DC, 1A • 4 piedini in gomma come supporto per un uso su scrivania •... -
Página 17: Descrizione Dei Led
ITALIANO 2. Descrizione dei LED Descrizione Spiegazione stato LED Power SPENTO Switch spento ACCESO Switch acceso e pronto per essere usato LED Link/ACT SPENTO Non esiste nessuna connessione di rete verso la porta LAN ACCESO Esiste una connessione di rete verso la porta LAN LAMPEGGIA I dati vengono inviati o ricevuti attraverso... - Página 18 ITALIANO Uso su scrivania: • Applicare i piedini in dotazione in ciascuno degli angoli della parte inferiore dello switch. In questo modo lo switch non si muoverà. • Posizionare lo switch sulla scrivania. Uso a muro: • Trapanare la parete per ottenere due buchi con la stessa distanza del supporto per le viti posto nella parte inferiore dello switch.
-
Página 19: Conteúdo Da Embalagem
1. Conteúdo da embalagem Existem os seguintes elementos na embalagem do switch de Ethernet 10/100 Mbps da Conceptronic: • Switch de Ethernet de 16 portas 10/100 Mbps da Conceptronic (C100S16) • Transformador, 12 V CC, 1A • 4 pés de borracha para colocar o switch na secretária •... - Página 20 PORTUGUÊS 2. Descrição das luzes Nº Descrição Explicação do estado Luz de alimentação APAGADA O switch não está ligado. ACESA O switch está ligado e pronto a usar. Luz Link/ ACT APAGADA Não está criada uma ligação de rede na porta LAN ACESA Existe uma ligação de rede na porta LAN...
- Página 21 PORTUGUÊS Colocação na secretária: • Cole os pés de borracha incluídos aos cantos da parte de baixo do switch. Isto vai impedir que o switch se mova na sua secretária. • Coloque o switch na secretária. Colocação do switch na parede: •...
-
Página 22: A Csomag Tartalma
1. A csomag tartalma A Conceptronic 10/100 Mb/s Ethernet kapcsolóját tartalmazó csomagban az alábbiak találhatók: • Conceptronic 16 portos 10/100 Mb/s Ethernet kapcsoló (C100S16) • Hálózati adapter, 12 V egyenáramú, 1 A-es • 4 gumiláb az asztali használathoz • Ez a többnyelvű használati utasítás... - Página 23 MAGYAR 2. A LED ismertetése Leírás Az állapot magyarázata Áramellátást jelző LED NEM VILÁGÍT A kapcsoló nincs áram alatt VILÁGÍT A kapcsoló áram alatt van és használatkész Kapcsolat-/ACT-jelző LED-ek NEM VILÁGÍT Nincs kialakítva hálózati kapcsolat a LAN- port felé VILÁGÍT Hálózati kapcsolat kialakítva a LAN-port felé...
- Página 24 MAGYAR Asztali használat: • Ragassza a készülékkel együtt szállított gumilábakat az egyes sarkokra a kapcsoló alján. Ezzel megakadályozható, hogy a kapcsoló az asztalon elmozduljon. • Tegye a kapcsolót az asztalára. A falra szerelt változat használata: • Fúrjon két lyukat a falba ugyanakkora távolságra egymástól, mint a csavartartó...
-
Página 25: Paket İçeriği
Ürününüzle ilgili başka sorularınız varsa ve bunların yanıtlarını web sitemizde bulamıyorsanız, bize e-posta ile ulaşın: support@conceptronic.net Conceptronic ürünleri ile ilgili daha fazla bilgi için, lütfen Conceptronic Web Sitesini ziyaret edin: www.conceptronic.net 1. Paket İçeriği Conceptronic 10/100 Mbps Ethernet Switch paketinin içeriği aşağıdaki gibidir: •... - Página 26 TÜRKÇE 2. LED’lerin Açıklaması Tanım Durum Açıklaması Güç LED’i OFF (KAPALI) Switch’te enerji yok ON (AÇIK) Switch’te enerji var ve kullanıma hazır Link/ACT LED’leri OFF (KAPALI) LAN Portunda hiçbir Ağ Linki oluşturulmadı ON (AÇIK) LAN Portunda bir Ağ Linki oluşturuldu YANIP SÖNME LAN Portundan veri gönderiliyor ya da alınıyor...
- Página 27 TÜRKÇE Masaüstü kullanımı: • Birlikte verilen lastik ayakları switch’in alt köşelerine yapıştırın. Bu ayakların sayesinde switch masa üzerinde hareket etmeyecektir. • Switch’i masanıza yerleştirin. Duvar montajlı kullanım: • Switch’in altında yer alan vida destek delikleri ile aynı mesafede olacak şekilde duvara matkapla iki adet delik açın. •...