Tabla de contenido
Publicidad
Idiomas disponibles
Idiomas disponibles
Enlaces rápidos
Publicidad
Tabla de contenido

Manuales relacionados para Bissell PROHEAT ADVANCED 1846 Serie


Resumen de contenidos para Bissell PROHEAT ADVANCED 1846 Serie
- Página 1 PROHEAT ® ADVANCED Deep Cleaner _______________ USER GUIDE 1846 SERIES...
-
Página 2: Important Safety Instructions
» Do not put any object into » Use indoors only. openings. Do not use with any » Use only BISSELL cleaning ® opening blocked; keep openings products intended for use »... -
Página 3: Tabla De Contenido
Thanks for buying a BISSELL® carpet cleaner! We love to clean and we’re excited to share one of our innovative products with you. This guide has important instructions on how your new carpet cleaner works, including using, maintaining, and if there is a problem, troubleshooting. -
Página 4: Product View
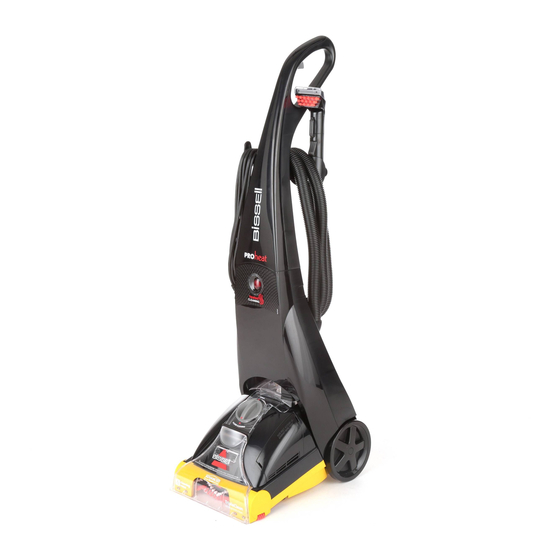
Quick Release™ Hose Wrap Belt Access Door 10 Ready-to-Use Hose 6 Rows DirtLifter® PowerBrush Extra Long Power Cord (under nozzle) Lower Hose Wrap Floor Nozzle 2-in-1 Tank Spray Trigger Recline Pedal Cord Clip Power Switch *Tools included may vary www.BISSELL.com... -
Página 5: Cleaning Formulas
» To reduce the risk of fire and electric shock when cleaning a hard floor, the BISSELL Bare Floor Tool must be used and is only to be used with BISSELL Hard Floor Solutions formula intended for use with this appliance. - Página 6 Attach Lower Hose Wrap by sliding it in place on the Wrap flex hose around lower body assembly and securing it with 2 short screws. hose wrap and secure it into notched out Attach Tough Stain Tool to end of hose. holder as shown. www.BISSELL.com...
-
Página 7: Special Features
Pretreating your carpet is recommended to improve cleaning effectiveness for heavily soiled carpet in heavy traffic areas such as entryways and hallways. a. Spray the BISSELL® Stain Pretreat formula onto high-traffic areas, soiled areas or stains. b. Allow to penetrate for at least 3 minutes. - Página 8 Remove the lid and turn it over to locate the measuring cup. 3-Fill with BISSELL® formula to the indicated fill line on the built-in measuring cup and pour it into the bladder. 4-Fill the bladder with clean hot tap water (140F/60C MAX).
- Página 9 NOTE: You may notice hair and debris deposits on the carpet or in the tank that were loosened by the cleaning action (especially with newer carpets that may have never been deep cleaned before). This debris should be picked up and thrown away. www.BISSELL.com...
-
Página 10: Important
Allow the hose and tool time to dry before storing. WARNING WARNING: To reduce the risk of injury, be extra careful when cleaning stairs. Make sure the machine is secure and level. www.BISSELL.com... - Página 11 Freezing will damage lint screen. internal components and void the warranty. WARNING To reduce the risk of fire, electric shock or injury, turn power OFF and disconnect plug from electrical outlet before performing maintenance or troubleshooting. www.BISSELL.com...
-
Página 12: Maintaining Your Machine
Always wrap the power get an extra rinse. Rinse removed from the nozzle cord and make sure the under and around the blad- and brushed out of the hose is securely wrapped. der as well as the lint screen. brush rolls. www.BISSELL.com... -
Página 13: Replacing The Belt
The door will slide into If the pump belt is place and snap shut. broken install a new one by looping the new belt around the red pump pulley and then stretch it to the silver motor shaft. www.BISSELL.com... - Página 14 ReadyTools™ and around the dial. Turn the dial Dial becomes about 10 times clockwise and 10 times difficult to turn counter-clockwise. This should free up debris. Wipe the diverter and nozzle dry and return it to the machine. www.BISSELL.com...
-
Página 15: Service
Subject to the *Exceptions and Exclusions from the Terms of the Limited Warranty, upon *Exceptions and Exclusions from the receipt of the product BISSELL will repair or Terms of the Limited Warranty replace (with new, refurbished, lightly used, or This warranty is exclusive and in lieu of remanufactured components or products), at any other warranties, either oral or written. -
Página 16: Parts & Supplies
Visit BISSELL.com/registration! Parts & Supplies For Parts and Supplies, go to www.BISSELL.com and enter your model number in the search field. We’re Waggin’ Our Tails! BISSELL® proudly supports BISSELL Pet Foundation® and its mission to help save homeless pets. When you buy a BISSELL product, you help save pets, too. -
Página 17: Limpiadora Profunda
PROHEAT ® ADVANCED Limpiadora profunda _______________ GUÍA DEL USUARIO SERIE 1846... -
Página 18: Instrucciones Importantes De Seguridad
ADVERTENCIA » Utilice solo las fórmulas de limpieza de no el cable. » No manipule el enchufe ni el BISSELL® que se diseñaron para usarse PARA DISMINUIR EL RIESGO DE INCENDIO, DESCARGAS electrodoméstico con las manos mojadas. con este electrodoméstico con el fin ELÉCTRICAS O LESIONES:... -
Página 19: Qué Hay En La Caja
6. Tornillos largos (2) (Fijados con cinta adhesiva al mango) Tornillos cortos (2) 8. Herramienta para la limpieza de la boquilla 9. Formula BISSELL tamaño de muestra NOTA: No todos los accesorios vienen con todos los modelos. Asegúrese de revisar la caja para ver si tiene herramientas adicionales. -
Página 20: Vista Del Producto
DirtLifter® PowerBrush Soporte inferior para de 6 hileras envolver la manguera Tanque 2-en-1 (bajo la boquilla) Boquilla para pisos Pedal de reclinar Gatillo para el rocío Interruptor de encendido Clip del cordón Mango superior *Las herramientas incluidas pueden variar www.BISSELL.com... -
Página 21: Fórmulas De Limpieza
Para reducir el riesgo de incendio y descarga eléctrica causados por el daño en los componentes internos, utilice solo las fórmulas de limpieza BISSELL® diseñadas para utilizarse con la limpiadora profunda. Tenga a mano una buen cantidad de la fórmula genuina BISSELL para poder limpiar y proteger en cualquier momento que tenga libre. -
Página 22: Ensamblaje
Instale el soporte inferior de la manguera en su sitio en el flexible alrededor del ensamblaje de cuerpo inferior y fije con 2 tornillos cortos. soporte de la manguera y fíjela en el soporte como Acople la herramienta para manchas rebeldes en el extremo de la se muestra. manguera. www.BISSELL.com... -
Página 23: Características Especiales
Se recomienda hacer un tratamiento previo a la alfombra para mejorar la eficacia de la limpieza en el caso de alfombras muy sucias en áreas de alto tráfico como entradas y pasillos. a. Rocíe la fórmula BISSELL Stain Pretreat sobre las áreas con mucho tráfico, áreas con suciedad o manchas. -
Página 24: Prepare La Máquina
(140F/60C MÁX.). *No hierva ni caliente el agua en un microondas pues puede destruir la cámara. **Si está usando fórmulas BISSELL Boost, mida la fórmula usando las instrucciones de la botella y agregue en este momento a la cámara. -
Página 25: Limpieza De La Alfombra
NOTA: Es posible que observe sobre la alfombra o en el tanque depósitos de pelo y suciedad que se ha soltado debido a la acción de limpieza (especialmente en las alfombras más nuevas a las que tal vez nunca se haya efectuado una limpieza profunda). Se debe recoger y desechar inmediatamente esta suciedad. www.BISSELL.com... -
Página 26: Limpieza De Tapizado Y De Manchas
Permita que la manguera y la herramienta tengan tiempo de secar antes de almacenarlas. ADVERTENCIA ADVERTENCIA: Para reducir el riesgo de lesiones, tenga cuidado adicional al limpiar escaleras. Asegúrese de que la máquina esté segura y nivelada. www.BISSELL.com... -
Página 27: Vacíe El Tanque 2-En
ADVERTENCIA Para reducir el riesgo de incendio, choque eléctrico o lesiones, apague (OFF) en el encendido y desconecte el enchufe del tomacorriente eléctrico antes de efectuar tareas de mantenimiento o identificar fallas. www.BISSELL.com... -
Página 28: Cuidado De La Máquina
Enjuague de la boquilla y se puede de que la manguera esté abajo y alrededor de la cámara y quitar cepillando los cepillos envuelta de manera segura. también el filtro para la pelusa. cilíndricos. www.BISSELL.com... -
Página 29: Reemplazo De La Correa
Para volver a instalar una correa nueva de la bomba, pase un extremo de la correa nueva alrededor de la polea roja de la bomba y luego estírela hasta el eje plateado del motor. www.BISSELL.com... -
Página 30: Identificación De Fallas
Examine la correa para ver si está rota. Si está rota, visite bissell.com para obtener información sobre un reemplazo. Es posible que la selección del Dial Ajuste el Dial ReadyTools™... -
Página 31: Garantía
Esta garantía es exclusiva y reemplaza cualquier nuevos, remanufacturados, ligeramente usados o otra garantía oral o escrita. Cualquier garantía renovados) a opción de BISSELL, gratis, a partir implícita que pueda surgir conforme a derecho, de la fecha de compra del comprador original, incluyendo garantías implícitas de aptitud e... -
Página 32: Piezas Y Suministros
¡Visite BISSELL.com/registration! Piezas y suministros Por piezas y suministros vaya a BISSELL.com e ingrese el número de su modelo en el campo de búsqueda. ¡Estamos moviendo nuestras colas! BISSELL® orgullosamente apoya a la BISSELL Pet Foundation®...