Tabla de contenido
Publicidad
Idiomas disponibles
Idiomas disponibles
Enlaces rápidos
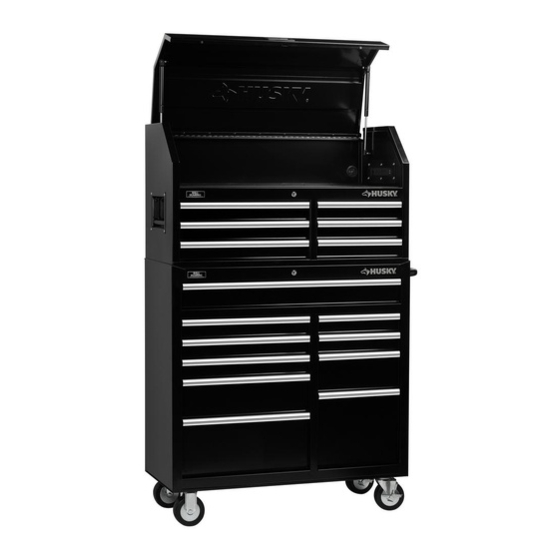
USE AND CARE GUIDE
41 INCH-16 DRAWER TOOL CHEST
AND CABINET SET
Questions, problems, missing parts?
Before returning to the store, call
Husky Customer Service
8 a.m – 7 p.m., EST, Monday-Friday
9 a.m – 6 p.m., EST, Saturday
1-888-434-8759
HUSKYTOOLS.COM
We appreciate the trust and co dence you have placed in Husky through the purchase of this chest/cabinet. We strive to continually
create quality products designed to enhance your home. Visit us online to see our full line of products available for your home
THANK YOU
improvement needs. Thank you for choosing Husky!
Item # 1001679384
Model # VRC-4116BK
Publicidad
Capítulos
Tabla de contenido

Manuales relacionados para Husky VRC-4116BK


Resumen de contenidos para Husky VRC-4116BK
- Página 1 THANK YOU We appreciate the trust and co dence you have placed in Husky through the purchase of this chest/cabinet. We strive to continually create quality products designed to enhance your home. Visit us online to see our full line of products available for your home...
-
Página 2: Tabla De Contenido
Table of Contents Table of Contents ..........2 Assembly ...............6 Safety Information ..........2 .............. Operation Warranty ..............4 Cordless Power Tool Battery Chargers ....8 Specifications ............4 Maintenance ............... Package Contents ..........4 Replacement Parts ..........9 Hardware Included ............ - Página 3 7. Extension cord □ Follow all Extension cord manufacturer’s Warnings and WARNING: expressly approved by the party responsible for Instructions. compliance could void the user’s authority to operate □ Do NOT insert extension cord through hole without grommet the equipment. in place.
-
Página 4: Warranty
Warranty The manufacturer warrants the product to be free from defects in materials and workmanship for a period of three (3) years from date of purchase. This warranty applies only to the original consumer and only to products used in normal use and service. If this product is found to be defective, the manufacturer’s only obligation, and your exclusive remedy, is the repair or replacement of the product at the manufacturer’s mishandling. - Página 5 Package Contents (continued) NOTE: Chest Keys are attached to gas strut. NOTE: Cabinet Keys are inside top drawer. Part Description Quantity Chest Cabinet Cabinet handle Fixed caster Swivel caster HUSKYTOOLS.COM Please contact 1-888-434-8759 for further assistance.
-
Página 6: Assembly
Assembly Two people are recommended for assembly. CAUTION: Attaching the casters □ Be sure the drawers are locked and lay the cabinet (B) Attaching the cabinet handle □ , t i □ Position the cabinet handle (C) over the holes on the side as the handle, inserting bolts (CC) through the swivel cabinet (B). -
Página 7: Operation
Operation Removing the drawers Re-inserting the drawers □ □ Fully extend the empty drawer. Extend the drawer slides. □ □ e l i pulling Insert the brackets on each side of the drawer into down on the other release lever. the slots in the slides, being careful that they are properly positioned. -
Página 8: Cordless Power Tool Battery Chargers
Cordless Power Tool Battery Chargers □ See Charger’s Owner’s Manual for proper use and care of charger and batteries. Follow all Warnings and Instructions provided with your battery charger. □ Place chargers and electrical connections in till. □ Chargers are Dry location use only. Do NOT expose to liquid, vapor, or rain. Should your charger become wet. -
Página 9: Replacement Parts
Replacement Parts For assistance with replacement parts please call 1-888-434-8759. Part Description Quantity Lid Handle Gas Strut Rubber Grommet Outlet Outlet Panel Cover Drawer Liner Drawer Slide Lock Plastic Foot Side Handle Badge Part Description Quantity Cabinet Handle Fixed Caster Swivel Caster Lock Badge... - Página 10 Questions, problems, missing parts? Before returning to the store call Husky Customer Service 8 a.m. - 7 p.m., EST, Monday-Friday 9 a.m. - 6 p.m., EST, Saturday 1-888-434-8759 HUSKYTOOLS.COM Retain this manual for future use.
- Página 11 DE 41 PLG (1.04 M) Preguntas, problemas o piezas faltantes? Antes de regresar a la tienda, llama al Servicio al Cliente de Husky, de 8 a.m. a 7 p.m., hora estándar del Este, de Lunes a Viernes al de 9 a.m. a 6 p.m., hora estándar del Este, Sábado...
-
Página 12: Índice
Índice Índice ..............2 Ensamblaje ............6 Información de Seguridad ........2 Funcionamiento ............Garantía ..............4 Cargadores de baterías para herramientas ..........8 eléctricas sin cable Especificaciones ............ 4 ........... Mantenimiento Contenido del Paquete ........ - Página 13 7. Prolongador □ Siga todas las advertencias e instrucciones del fabricante ADVERTENICA: unidad, que no estén directamente aprobados por el del prolongador. grupo responsible do conformidad, podría anular al □ Nunca retire la pata cilíndrica de conexión a tierra. autoridad otorgada al usuario para operar el equipo. □...
-
Página 14: Garantía
Garantía El fabricante garantiza que este producto no presentará defectos materiales o de fabricación durante tres (3) años a partir de la fecha original de compra Esta garantía es válida sólo para el consumidor original y sólo cubre productos en uso y funciones normales. Si se descubre algún defecto en este producto, la única obligación y solución exclusiva del fabricante, a criterio del mismo, será... - Página 15 Contenido del Paquete (continuación) Las llaves para el Gabinete están NOTA: NOTA: Las llaves para el Baúl se unen al dentro del cajón superior. puntal de gas. Pieza Descripción Cantidad Baúl Gabinete Manija del gabinete Rueda giratoria HUSKYTOOLS.COM Para obtener asistencia, llama al 1-888-434-8759.
-
Página 16: Ensamblaje
Ensamblaje Se recomienda que el montaje se haga PRECAUCIÓN: por two personas. Cómo montar las ruedas □ Acuesta el gabinete (B) sobre su parte trasera. Usa Cómo sujetar la manija del gabinete el material del empaque para proteger el acabado. □... -
Página 17: Funcionamiento
Funcionamiento Cómo quitar los cajones Volver a colocar los cajones □ □ Extiende completamente el cajón vacío. Extiende las correderas del cajón. □ □ Empuja hacia arriba una palanca de desenganche Inserta los soportes en ambos lados del cajón en las a la vez que hales hacia abajo la otra palanca ranuras de las correderas, teniendo cuidado de que de desenganche. -
Página 18: Cargadores De Baterías Para Herramientas Eléctricas Sin Cable
Cargadores de baterías para herramientas eléctricas sin cable □ Consulte el Manual del propietario del cargador para conocer el uso y cuidado correctos del cargador y las baterías. Siga todas las advertencias e instrucciones que acompañan a su cargador de baterías. □... -
Página 19: Piezas De Repuesto
Piezas de Repuesto Para obtener ayuda con piezas de repuesto, por favor llame al 1-888-434-8759 . Pieza Descripción Cantidad Manija de la Tap Puntal de Gas Arandela de Goma Toma de corriente Panel de Toma de Corriente Forros para Cajones Corredera del Cajón Cerradura Llave... - Página 20 Preguntas, problemas o piezas faltantes? Antes de regresar a la tienda, llama al Servicio al Cliente de Husky, de 8 a.m. a 7 p.m., hora estándar del Este, de Lunes a Viernes al de 9 a.m. a 6 p.m., hora estándar del Este, Sábado 1-888-434-8759 HUSKYTOOLS.COM...