Tabla de contenido
Publicidad
Idiomas disponibles
Idiomas disponibles
Enlaces rápidos
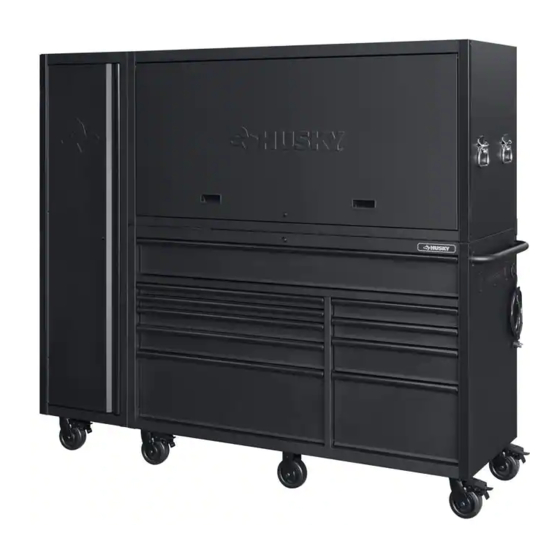
USE AND CARE GUIDE
80 IN. 10-DRAWER TOOL CHEST
WITH SIDE LOCKER
Questions, problems, missing parts?
Before returning to the store, call
Husky Customer Service
8 a.m - 7 p.m., EST, Monday-Friday,
9 a.m. - 6 p.m., EST, Saturday
1-888-HD-HUSKY
HUSKYTOOLS.COM
We appreciate the trust and confidence you have placed in Husky through the purchase of this chest/cabinet. We strive to continually
create quality products designed to enhance your home. Visit us online to see our full line of products available for your home
AND CABINET SET
THANK YOU
improvement needs. Thank you for choosing Husky!
SKU# 1003 103 121
THD.com# 1003 041 640
Model# HOTC8010BB1S
Publicidad
Capítulos
Tabla de contenido

Manuales relacionados para Husky HOTC8010BB1S


Resumen de contenidos para Husky HOTC8010BB1S
- Página 1 THANK YOU We appreciate the trust and confidence you have placed in Husky through the purchase of this chest/cabinet. We strive to continually create quality products designed to enhance your home. Visit us online to see our full line of products available for your home...
-
Página 2: Tabla De Contenido
Table of Contents Table of Contents..............2 Assembly.................6-8 Safety Information..............2-3 Operation................9 Warranty..................3 Maintenance..............10 Pre-Assembly................4 Care and Cleaning............10 Service Parts..............11 Tools Required................4 Hardware Included..............4 Specifications................4 Package Contents..............5 Safety Information 1. Do not open more than one drawer at a time. DANGER: Do not stand on this product. You 2. -
Página 3: Safety Information
The manufacturer specifically disclaims any liability and shall not be liable for any consequential or incidental loss or damage, including but not limited to any labor/expense costs involved in the replacement or repair of said product. Contact the Customer Service Team at 1-888- HD-HUSKY or visit www.huskytools.com. HUSKYTOOLS.COM... -
Página 4: Pre-Assembly
Pre-assembly TOOLS REQUIRED Phillips Safety screwdriver goggles HARDWARE INCLUDED NOTE: Hardware not shown to actual size. Part Description Quantity Bolt M6x15L Bolt M8x15L Bolt M8x15L Screw M4x10L 10 mm/13 mm wrench SPECIFICATIONS 1000 lbs. Maximum capacity (top chest) 1500 lbs. Maximum capacity (bottom cabinet) Maximum capacity (side locker) 500 lbs. -
Página 5: Package Contents
Pre-assembly (continued) PACKAGE CONTENTS Part Description Quantity Part Description Quantity Handle Lock Top chest Key (set) Bracket Drawer Liner Side handle Grommet Rolling cabinet Power strip Power strip bracket Side locker Swivel caster with brake Side locker shelf clip Regular caster Side locker shelf Drawer silde 120 lbs (pair) Portable LED work light... -
Página 6: Assembly
Assembly Attaching the side handle Placing the chest NOTE: Two people may be required to complete □ Attach the side handle (D) to the rolling cabinet (E) this step. using four bolts (AA). □ Attach two handles (A) to the top chest (B) for each side by using two bolts (BB) per handle. -
Página 7: Installing The Casters
Assembly (continued) Installing the casters Installing the drawer liner □ Place the drawer liners (L) in appropriately sized drawers CAUTION: Do not over tighten the screws. and the chest lid area to protect the surface. □ Lay the side locker (O) on its back. Use the packaging material to protect the finish. - Página 8 Assembly (continued) Tightening the side locker Installing the brackets on side locker □ Open the door of the side locker (O). NOTE: The holes in the cabinet are tapped and do not require nuts. □ Tighten all the bolts inside the panel by using a screwdriver.
-
Página 9: Operation
Operation Locking and unlocking the unit Removing/installing the drawers Removing the drawers - IMPORTANT : The drawers must be fully closed before □ Fully extend and empty the drawer. □ On the slide, lift up the plastic release lever on one slide locking / unlocking the unit. -
Página 10: Maintenance
Maintenance Maintaining the casters Maintaining the drawers □ Periodically clean the drawer trim, and □ Grease the casters annually using high quality inside the drawers with a mild detergent and water . bearing grease . □ Remove grease and oil with a standard, nonflammable cleaning fluid. -
Página 11: Service Parts
Service Parts PACKAGE CONTENTS Part Description Quantity Part Description Quantity Handle Key (set) Bracket Drawer Liner Side handle Grommet Power strip bracket Power strip Swivel caster with brake Side locker shelf clip Regular caster Side locker shelf Drawer silde 120 lbs (pair) Portable LED work light Lock Coat hook... - Página 12 Questions, problems, missing parts? Before returning to the store, call Husky Customer Service 8 a.m. - 7 p.m., EST, Monday-Friday, 9 a.m. – 6 p.m., EST, Saturday 1-888-HD-HUSKY HUSKYTOOLS.COM Retain this manual for future use.
- Página 13 GRACIAS POR TU COMPRA Apreciamos la confianza que has depositado en Husky al comprar este caja para herramientas/gabinete. Nos esforzamos continuamente para crear productos de calidad diseñados para mejorar tu hogar. Visítanos por Internet para ver nuestra línea completa de productos disponibles con vistas a las necesidades de mejoras de tu hogar ¡Gracias por elegir Husky...
- Página 14 Tabla de contenido Tabla de contenido ..........Ensamblaje ............Información de seguridad ........Funcionamiento ........... 2 - 3 Garantía ................ Mantenimiento ............. Preensamblaje ..........Cuidado y limpieza .......... Herramientas necesarias ......... Piezas de repuesto ........... 11 Herrajes incluidos ............Especificaciones ............Contenido del paquete ........
-
Página 15: Información De Seguridad
Comuníquese con el equipo de servicio al cliente por el 1-888-HD-HUSKY o visite www.huskytools.com. HUSKYTOOLS.COM... -
Página 16: Preensamblaje
Pre ensamblaje HERRAMIENTAS NECESARIAS Destornillador Gafas Phillips de seguridad HERRAJES INCLUIDOS NOTA: Los herrajes no se muestran en tamaño real. Pieza Descripción Cantidad Perno M6x15L Perno M8x15L Perno M8x15L Tornillo M4x10L Llave de 10 mm/13 mm ESPECIFICACIONES Capacidad máxima (baúl superior) 453 kg Capacidad máxima (gabinete inferior) 680 kg... -
Página 17: Contenido Del Paquete
Soporte para barra multicontacto Presilla para repisa de casillero lateral Rueda giratoria con freno Repisa de casillero lateral Rueda regular Luz de trabajo LED portátil Corredera de cajón para 54 kg (par) Gancho pulvirrevestido HUSKYTOOLS.COM Para obtener asistencia, llama al 1-888-HD-HUSKY. -
Página 18: Ensamblaje
Ensamblaje Cómo instalar el asa lateral Cómo colocar la caja para herramientas □ Instala el asa lateral (D) al gabinete con ruedas (E) NOTA: Pudieran requerirse dos personas para completar usando cuatro pernos (AA) . este paso. □ Fija dos asas (A) al baúl superior (B), una en cada lado, NOTA: Los orificios en el gabinete están roscados y no usando dos pernos (BB) por asa. -
Página 19: Cómo Instalar El Revestimiento De Los Cajones
Sujeta el casillero lateral (O) a los pernos en el lado izquierdo del baúl superior (B) y del gabinete con ruedas (E). □ Hala el casillero lateral (O) hacia abajo para asegurar que está bien instalado. HUSKYTOOLS.COM Para obtener asistencia, llama al 1-888-HD-HUSKY. -
Página 20: Cómo Ajustar El Casillero Lateral
Ensamblaje (continuación) Cómo ajustar el casillero lateral Cómo instalar los soportes en el casillero lateral □ Abre la puerta del casillero lateral (O). □ Aprieta con un destornillador todos los pernos dentro NOTA: Los orificios en el gabinete están roscados y no del panel. -
Página 21: Operación
□ Al fallar el suministro de energía, la luz se enciende automáticamente a mediana intensidad y permanece así por 30 minutos para enseguida apagarse automáticamente. También puedes oprimir el botón para cambiar de un modo de iluminación a otro. HUSKYTOOLS.COM Para obtener asistencia, llama al 1-888-HD-HUSKY. -
Página 22: Mantenimiento
Mantenimiento Cómo dar mantenimiento a las ruedas Cómo dar mantenimiento a los cajones □ Engrasa las ruedas anualmente usando grasa de □ Limpia periódicamente la moldura del cajón, y alta calidad para cojinetes de bola dentro de los cajones con un detergente suave y agua. -
Página 23: Piezas De Repuesto
Barra multicontacto Rueda giratoria con freno Presilla para repisa de casillero lateral Rueda regular Repisa de casillero lateral Corredera de cajón para 54 kg (par) Luz de trabajo LED portátil Cerradura Gancho pulvirrevestido HUSKYTOOLS.COM Para obtener asistencia, llama al 1-888-HD-HUSKY. - Página 24 ¿Preguntas, problemas o piezas faltantes? Antes de devolver a la tienda, llama al Servicio al cliente de Husky, de lunes a viernes, entre 8:00 a.m. y 7:00 p.m. (hora estándar del Este), y los sábados de 9:00 a.m. a 6:00 p.m. (hora estándar del Este).