Tabla de contenido
Publicidad
Idiomas disponibles
Idiomas disponibles
Publicidad
Capítulos
Tabla de contenido

Manuales relacionados para Honda WJR4025

Resumen de contenidos para Honda WJR4025
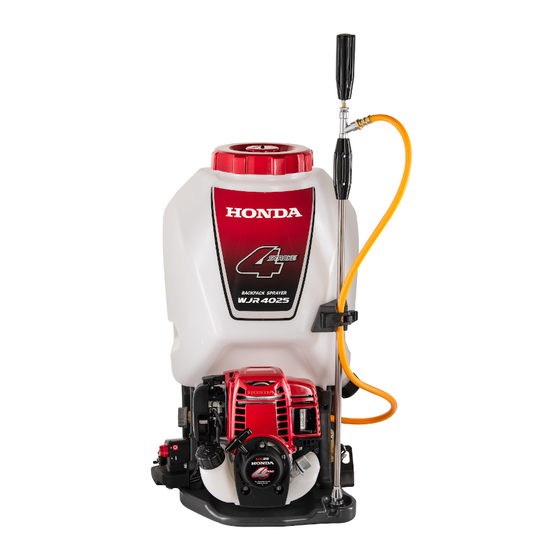
- Página 1 BACKPACK SPRAYER WJR4025 OWNER'S MANUAL MANUAL DEL PROPIETARIO...
- Página 2 Honda WJR4025 OWNER’S MANUAL MANUAL DEL PROPIETARIO...
- Página 3 All information in this publication is based on the latest product information available at the time of approval for printing. Honda Motor Co., Ltd. reserves the right to make changes at any time without notice and without incurring any obligation.
- Página 4 Disposal To protect the environment, do not dispose of this product, battery, engine oil, etc. carelessly by leaving them in the waste. Observe the local laws and regulations or consult your authorized Honda dealer for disposal.
-
Página 5: Tabla De Contenido
CONTENTS 1. SAFETY INSTRUCTION ......................3 2. SAFETY LABEL LOCATIONS ....................13 3. COMPONENT IDENTIFICATION ..................15 4. CONTROLS ..........................19 5. PREPARATION ........................23 6. PRE-OPERATION CHECK .....................27 7. STARTING THE ENGINE .......................37 • High altitude operation ....................41 8. STOPPING THE ENGINE ......................42 9. -
Página 6: Safety Instruction
1. SAFETY INSTRUCTION 1. Field of application The device is approval for agricultural use. Other possible fields of application: forestry, hops cultivation, fruit growing, specialized cultivation, viticulture, tree nurseries, vegetable farming, non-cropland, grassland, storage protection, greenhouse cultivation, cultivation of ornamentals. 2. - Página 7 4. Information about how long the backpack sprayer can be used • The same person should not perform spray operations for a long time or every day. • Do the operations while taking a moderate rest. 5. Information about the device operating and setting ranges The following must be entered individually for each nozzle assembly.
-
Página 8: Operator Responsibility
To ensure safe operation Operator Responsibility • Any part from the machine is a potential source of danger if the machine is used in abnormal conditions or if the maintenance is not done correctly. • Read the Owner’s Manual carefully. Be familiar with the controls and their proper use of the backpack sprayer. - Página 9 To ensure safe operation Operator Responsibility • Never operate the backpack sprayer while: – people, especially children or pets are nearby. – user is fatigued or under medication, or has swallowed substances known to affect judgement or reactions. • Keep in mind that the operator or user is responsible for accidents or hazards occurring to other people or their property.
- Página 10 To ensure safe operation How to handle agricultural chemicals When handling agricultural chemicals, follow the directions of the manufacturer or distributor. Also, follow the laws and regulations. • The person that spray agricultural chemicals, or who assist in spraying them, must put on protective clothes so they don’t inhale the chemicals or touch them directly.
- Página 11 To ensure safe operation How to handle agricultural chemicals • Before starting the engine, make sure that the sprayer hose is securely installed into the backpack sprayer, and that the shut-off valve is in the “CLOSED” position. If you fail to do so, agricultural chemicals may splash on you during operation.
- Página 12 To ensure safe operation How to handle agricultural chemicals • Do not spray the chemicals in the daytime while the temperature is high, or on a day of strong wind. Do not spray the chemicals in a busy place during a busy time especially when school children are likely to pass through.
- Página 13 To ensure safe operation How to handle agricultural chemicals • After using the backpack sprayer, store it in a place where children and domestic animals are locked out. Careless storage can cause exposure to children or animals, which could be harmful to their health.
- Página 14 To ensure safe operation Fire and Burn Hazard Gasoline is extremely flammable, and gasoline vapor can explode. Use extreme care when handling gasoline. Keep gasoline out of reach of children. • Store fuel in containers specifically designed for this purpose. •...
- Página 15 To ensure safe operation Carbon Monoxide Poisoning Hazard Exhaust contains poisonous carbon monoxide, a colorless and odorless gas. Breathing exhaust can cause loss of consciousness and may lead to death. • If you run the engine in an area that is confined or even partially enclosed, the air you breathe could contain a dangerous amount of exhaust gas.
-
Página 16: Safety Label Locations
These labels warn you of potential hazards that can cause serious injury. Read the labels and safety notes and precautions described in this manual carefully. If a label comes off or becomes hard to read, contact your Honda dealer for a replacement. - Página 17 • Honda backpack sprayer is designed to give safe and dependable service if operated according to instructions. Read and understand the Owner’s Manual before operating the backpack sprayer. Failure to do so could result in personal injury or equipment damage.
-
Página 18: Component Identification
3. COMPONENT IDENTIFICATION Nozzle and head types variation table • : Standard parts : Optional parts Model types WJR4025 Nozzle and head types Blue head 4-Head • • Long distance • Model types WJR4025 Connecting parts Shut-off valve Sprayer hose •... - Página 19 LONG DISTANCE TYPE SPRAYER HOSE ROLLER JOINT CHEMICAL TANK SHUT-OFF VALVE BLUE HEAD / 4-HEAD NOZZLE PIPE TYPES ROLLER JOINT SHUT-OFF VALVE PRESSURE DIAL THROTTLE LEVER ENGINE SWITCH 4-HEAD NOZZLE SPRAYER HOSE NOZZLE PIPE NOZZLE HOLDER HOLDER BAND...
- Página 20 CHEMICAL TANK TANK FILTER DRAIN CAP PUMP OIL INSPECTION WINDOW SHOULDER HARNESSES...
- Página 21 FRAME SERIAL NUMBER FUEL RETURN TUBE AIR CLEANER STARTER GRIP CHOKE LEVER MUFFLER OIL FILLER CAP PRIMING PUMP FUEL TUBE ENGINE TYPE FUEL TANK CAP FUEL TANK ENGINE SERIAL NUMBER Record the frame serial number and engine serial number in the space below. You will need these serial numbers when ordering parts, and when making technical or warranty inquiries.
-
Página 22: Throttle Lever
4. CONTROLS Engine switch The engine switch enables and disables the ignition system. The engine switch must be in the ON position for the engine to run. Turning the engine switch to the OFF position stops the engine. ENGINE SWITCH Throttle lever The throttle lever controls engine speed from SLOW to FAST, it will stay in any designated position. -
Página 23: Priming Pump
Choke lever The choke lever opens and closes the choke valve in the carburetor. The CLOSED position enriches the fuel mixture for starting a cold engine. The OPEN position provides the correct fuel mixture for operation after starting, and for restarting a warm engine. CHOKE LEVER CLOSED OPEN... -
Página 24: Shut-Off Valve
Shut-off valve Use the shut-off valve when spraying or stop spraying chemicals. LONG DISTANCE TYPE BLUE HEAD / 4-HEAD TYPES SHUT-OFF VALVE CLOSED SHUT-OFF OPEN VALVE CLOSED CLOSED CLOSED OPEN Nozzle handle (Long distance type only) Use the nozzle handle to adjust the spray angle and distance. •... - Página 25 Pressure dial Use the pressure dial when adjusting the spraying pressure and amount. • When you turn the pressure dial clockwise (HIGH), the spraying pressure and amount will increase. • When you turn the pressure dial counterclockwise (LOW), the spraying pressure and amount will decrease.
-
Página 26: Preparation
5. PREPARATION Before operation, assemble the nozzle and sprayer hose, then connect the sprayer hose into the pump chamber. 1. Assemble the nozzle and sprayer hose. For more information about the nozzle and head type variations, see page 15. Long distance type: Be sure to install packings and connect each part securely. - Página 27 Blue head / 4-head types: Be sure to install packings and connect each part securely. a. Connect the sprayer hose into the roller joint. b. Connect the roller joint into the nozzle handle. c. Connect the nozzle handle into the shut-off valve. d.
- Página 28 2. After assembling the nozzle and sprayer hose, connect the sprayer hose into the pump chamber. PUMP CHAMBER SPRAYER HOSE...
- Página 29 3. Check the shoulder harness. Make sure that the bottom hook of the shoulder harness is connected. BOTTOM HOOK SHOULDER HARNESS CAUTION: When you put the backpack sprayer on your back, make sure that the shoulder harness is not entangled with the throttle lever. :INCORRECT :CORRECT THROTTLE LEVER...
-
Página 30: Pre-Operation Check
6. PRE-OPERATION CHECK For safe and efficient spraying, always make a pre-operation inspection before operating: Before performing a pre-operation inspection, place the backpack sprayer on a level surface, stop the engine and make sure that the engine switch is in the OFF position to be certain the engine will not start accidentally. Before each use, look around and underneath the engine for signs of oil or gasoline leaks. -
Página 31: Recommended Oil
CAUTION: • Running the engine with insufficient oil can cause serious engine damage. • Be sure to check the engine on a level surface with the engine stopped. OIL FILLER CAP UPPER LIMIT LOWER LIMIT Recommended Oil Use 4-stroke motor oil that meets or exceeds the requirements for API service classification SE or later (or equivalent). - Página 32 2. Check the fuel level. Use automotive unleaded gasoline with a Research Octane Number of 91 or higher (a Pump Octane Number of 86 or higher). Never use gasoline that is stale, contaminated, or mixed with oil. Avoid getting dirt or water in the fuel tank. •...
- Página 33 Gasoline containing alcohol If you decide to use a gasoline containing alcohol (gasohol), be sure its octane rating is at least as high as that recommended by Honda. There are two types of “gasohol”: one containing ethanol, and the other containing methanol.
- Página 34 3. Check the air cleaner element. Never use gasoline or low flash point solvents for cleaning the air cleaner element. A fire or explosion could result. CAUTION: Never run the engine without the air cleaner. Rapid engine wear will result from contaminants, such as dust and dirt, being drawn through the carburetor, into the engine.
- Página 35 4. Check the throttle cable free play. a. Remove the air cleaner cover (see page 31). b. Check the throttle cable free play at the tip of the cable by pulling and releasing the throttle lever a few times. Free play: 0.5–2.5 mm If the free play is incorrect, loosen the lock nut and turn the adjusting nut in or out as required to obtain the correct free play.
- Página 36 5. Check the pump oil. Check if the pump oil is not contaminated and does not appear milky. Check that the oil level is not below from the middle level of the inspection window. If you notice either condition, consult your servicing dealer. PUMP OIL INSPECTION WINDOW MIDDLE LEVEL...
- Página 37 7. Check the chemical tank and tank filter. a. Remove the chemical tank cap and drain cap. Check the caps and packings for cracks or damage. If they are damaged, replace them. b. Remove the tank filter. Check the tank filter for clog or damage. •...
- Página 38 8. Fill agricultural chemicals into the tank. Read the instructions of the chemical carefully. Always follow the directions and precautions preparation and handling of the chemical. Make sure that the drain cap is securely tightened when filling agricultural chemicals into the tank. DRAIN CAP On a level surface, fill agricultural chemical into the tank by using the tank filter.
- Página 39 9. Check that all nuts, bolts, and screws are tightened. Tighten the bolts and nuts properly and securely, if necessary. 10.Check leaking from the pump. After starting the engine, look around each connection part for chemical leaks. BLUE HEAD / 4-HEAD TYPES LONG DISTANCE TYPE BLUE HEAD NOZZLE 4-HEAD NOZZLE...
-
Página 40: Starting The Engine
7. STARTING THE ENGINE • Exhaust gas contains poisonous carbon monoxide. Never run the engine in an enclosed area. Be sure to provide adequate ventilation. • Start the engine in a place away from the people, pets, and surrounding buildings. Be sure there are no obstacles in the working area. NOTE: Do not operate the backpack sprayer without sufficient amount of chemicals in the chemical tank. - Página 41 2. Turn the shut-off valve to the CLOSED position. LONG DISTANCE TYPE BLUE HEAD / 4-HEAD TYPES SHUT-OFF VALVE CLOSED SHUT-OFF VALVE CLOSED CLOSED CLOSED 3. To start a cold engine, move the choke lever to the CLOSED position. To restart a warm engine, leave the choke lever in the OPEN position. CHOKE LEVER CLOSED OPEN...
- Página 42 4. Press the priming pump several times until the priming pump is filled with fuel. Even if the priming pump is pressed too many times, the extra fuel will return to the fuel tank. If the priming pump is not pressed enough, the engine may not start. PRIMING PUMP 5.
- Página 43 7. Hold the engine top cover securely and pull the starter grip lightly until you feel resistance, then pull it briskly in the direction of the arrow as shown below. Return the starter grip gently. • Be sure that the people and pets are away from the backpack sprayer especially behind you, before pulling the starter grip.
-
Página 44: High Altitude Operation
High altitude performance can be improved by specific modifications to the carburetor. If you always operate the backpack sprayer at altitudes higher than 610 m above sea level, have your authorized Honda dealer perform these carburetor modifications. Even with suitable carburetor jetting, engine horsepower will decrease approximately 3.5% for each 300 m increase in altitude. -
Página 45: Stopping The Engine
8. STOPPING THE ENGINE To stop the engine in an emergency, simply turn the engine switch to the OFF position. Under normal conditions, use the following procedure. 1. Turn the shut-off valve to the CLOSED position. LONG DISTANCE TYPE BLUE HEAD / 4-HEAD TYPES SHUT-OFF VALVE CLOSED SHUT-OFF... -
Página 46: Before Operation
If you notice any abnormal sound, smell, vibration or other unusual signs, stop the engine immediately and consult your authorized Honda dealer. Before operation • Fill 1 Liter or more agricultural chemicals into the chemical tank while keeping the chemical tank in a level position (see page 35). - Página 47 4. Put the backpack sprayer on a flat table. 5. Make sure that the shoulder harness is not entangled with the throttle lever. :INCORRECT :CORRECT THROTTLE LEVER THROTTLE LEVER SHOULDER HARNESS SHOULDER HARNESS Then put the backpack sprayer on your back. •...
- Página 48 6. Turn the shut-off valve to the OPEN position. LONG DISTANCE TYPE BLUE HEAD / 4-HEAD TYPES SHUT-OFF VALVE SHUT-OFF VALVE OPEN OPEN 7. Turn the pressure dial towards clockwise (HIGH) to make the spraying pressure suited for the operating conditions. •...
- Página 49 8. Move the throttle lever at the desired position while observing the spray condition. NOTE: The centrifugal clutch is used in this backpack sprayer. When the engine is rotating in low speed range, the clutch is slipping and the pump does not operate. Do not use the backpack sprayer in this rotation range that makes the clutch slip.
-
Página 50: During Operation
During operation • Do not point the nozzle at others. • Pay attention to the rest of chemicals in the tank. To prevent the use of the backpack sprayer without sufficient amount of chemicals in the tank, as soon as the nozzle has stopped spraying chemicals, stop the engine, or the pump may be damaged. -
Página 51: After Operation
After operation When handling agricultural chemicals, follow the directions of the manufacturer or distributor. Also, follow the laws and regulations. 1. Stop the engine (see page 42). 2. After the engine cooled, remove the drain cap to drain the agricultural chemicals from the chemical tank. -
Página 52: Maintenance
OFF position to be certain the engine will not start accidentally. • The backpack sprayer should be serviced by an authorized Honda dealer unless the owner has proper tools and service data and feels he or she is mechanically qualified. -
Página 53: Maintenance Schedule
(2) These items should be serviced by your servicing dealer, unless you have the proper tools and are mechanically proficient. Refer to the Honda shop manual for service procedures. (3) For commercial use, log hours of operation to determine proper maintenance intervals. - Página 54 Tool kit The tools supplied are necessary for performing some periodic maintenance, simple adjustments and repairs. 4 mm HEX. WRENCH 16 × 17 mm BOX WRENCH...
- Página 55 Changing oil Drain the oil while the engine is still warm to assure rapid and complete draining. Place the backpack sprayer on a firm level surface with the engine stopped. 1. Check the fuel tank cap is tightened securely. 2. Remove the oil filler cap and drain the oil into the oil container by inclining the engine toward the oil filler neck.
- Página 56 Air cleaner service A dirty air cleaner will restrict air flow to the carburetor. To prevent carburetor malfunction, service the air cleaner regularly. Service more frequently when operating the backpack sprayer in extremely dusty areas. Never use gasoline or low flash point solvents for cleaning the air cleaner element.
- Página 57 4. Wash the element in a nonflammable or high flash point solvent and dry it thoroughly. Soak the element in clean engine oil and squeeze out the excess oil. Dip in Oil Clean Squeeze and Dry Squeeze Do not twist. Do not twist.
- Página 58 Spark plug service Recommended spark plug: CMR5H (NGK) CAUTION: Never use a spark plug of incorrect heat range. To ensure proper engine operation, the spark plug must be properly gapped and free of deposits. 1. Loosen the 4 mm hex. bolt, then remove the engine top cover. Do not pull the starter grip and start the engine without the engine top cover.
- Página 59 2. Remove the spark plug cap. Remove any dirt from around the spark plug area. 3. Use the 16 × 17 mm box wrench to remove the spark plug. If the engine has been running, the muffler will be very hot. Be careful not to touch the muffler.
- Página 60 7. After the spark plug is seated, tighten with the 16 × 17 mm box wrench to compress the washer. NOTE: When installing a new spark plug, tighten 1/2 turn after the spark plug seats to compress the washer. When reinstalling a used spark plug, tighten 1/8–1/4 turn after the spark plug seats to compress the washer.
- Página 61 Fuel filter and fuel tank cleaning Gasoline is extremely flammable and is explosive under certain conditions. Do not smoke or allow flames or sparks in the area. 1. Check the oil filler cap is tightened securely. 2. Remove the fuel tank cap and drain the fuel into the container by inclining the engine toward the fuel filler neck.
- Página 62 Supplying the pump grease to the pump Every 2 hours, turn the Grease cup on the right and left side from the dial stopper clockwise by two turns so that the both dials have the same number of revolutions, and supply grease to the pump. [LEFT SIDE] [RIGHT SIDE] GREASE CUP...
- Página 63 Refilling the pump grease to the Grease cup When the Grease cup has turned till GREASE CUP the end, refill both Grease cups with pump grease. 1. Remove the Grease cup by [LEFT SIDE] [RIGHT SIDE] turning counterclockwise. 2. Refill the pump grease till the top of the Grease cup. : Lithium based multi-purpose grease#3 or equivalent 3.
- Página 64 Cooling fin service Inspect the cooling fins visually through the cover. If there are dry grass, leaves and mud clogged, consult your authorized Honda dealer for cleaning it. COOLING FINS (inside the cover)
-
Página 65: Transporting/Storage
11. TRANSPORTING/STORAGE Transporting • If the backpack sprayer has been running, allow it to cool down before loading the backpack sprayer on the transport vehicle. A hot engine and exhaust system can burn you and can ignite some materials. • Always turn the engine switch to the OFF position. •... - Página 66 Storage Before storing the backpack sprayer for an extended period; 1. Follow the procedures of “After operation” (see page 48). 2. To prevent the water from freezing in winter, drain the water completely from pump chamber. a. Disconnect the sprayer hose from pump chamber. To prevent the nozzle pipe from being clogged, make sure that no dirt or dust is in the sprayer hose or the backpack sprayer after disconnecting the sprayer hose.
- Página 67 3. Drain the fuel. Gasoline is extremely flammable and is explosive under certain conditions. Do not smoke or allow flames or sparks in the area. a. Check the oil filler cap is tightened securely. b. Remove the fuel tank cap and drain the fuel into the container by inclining the engine toward the fuel filler neck.
- Página 68 6. Lubricate the cylinder. a. Loosen the 4 mm hex. bolt, then remove the engine top cover (see page 55). b. Remove the spark plug (see page 56). c. Apply a couple of drops of clean engine oil into the cylinder. d.
-
Página 69: Troubleshooting
12. TROUBLESHOOTING When the engine will not start: 1. Is the engine switch in the ON position? 2. Is there fuel in the fuel tank? 3. Is gasoline reaching the carburetor? To check, press the priming pump several times. 4. Is the spark plug in good condition? Remove and inspect the spark plug. -
Página 70: Specifications
13. SPECIFICATIONS Frame Model WJR4025T Frame type Power products description code WAFT 400 mm Length 415 mm Width 695 mm Height 12.5 kg Dry mass [weight] Chemical tank capacity 25 L *1 Without hose and nozzle *2 With pump oil Pump Model WJR4025T... - Página 71 Engine Model GX35T Engine type 4-stroke, overhead cam, single cylinder Displacement 35.8 cm Bore × Stroke 39.0 × 30.0 mm Engine net power 1.0 kW (1.4 PS) (in accordance with SAE J1349*) /7,000 rpm Engine max. net torque 1.6 N·m (0.16 kgf·m) /5,500 rpm (in accordance with SAE J1349*) Cooling system...
- Página 72 Honda WJR4025 MANUAL DEL PROPIETARIO...
- Página 73 Toda la información de esta publicación se basa en la más reciente información acerca del producto disponible en el momento de aprobarse su impresión. Honda Motor Co., Ltd. se reserva el derecho a efectuar cambios en cualquier momento sin previo aviso y sin incurrir en ningún tipo de obligación.
-
Página 74: Eliminación
Para proteger el medio ambiente, no tire el producto, la batería, el aceite de motor, etc. usados en un lugar de recolección de la basura. Observe las leyes y regulaciones de su localidad o consulte a un concesionario Honda autorizado cuando deba tirar tales partes. - Página 75 ÍNDICE 1. INSTRUCCIONES DE SEGURIDAD ..................3 2. UBICACIONES DE LAS ETIQUETAS DE SEGURIDAD ..........13 3. IDENTIFICACIÓN DE COMPONENTES ................15 4. CONTROLES ..........................19 5. PREPARACIÓN ........................23 6. VERIFICACIÓN PREVIA A LA OPERACIÓN ..............27 7. ARRANQUE DEL MOTOR ....................37 • Operación en altitudes elevadas ................41 8.
-
Página 76: Instrucciones De Seguridad
1. INSTRUCCIONES DE SEGURIDAD 1. Campo de aplicación Este dispositivo solo está autorizado para su uso agrícola. Otros campos de aplicación posibles: silvicultura, cultivos de lúpulo, fruticultura, cultivos especializados, viticultura, viveros, horticultura, fuera de tierras de cultivo, pastizales, protección de almacenamientos, cultivos en invernaderos, cultivos de plantas ornamentales. - Página 77 4. Información sobre cuánto tiempo puede utilizarse el pulverizador de mochila • La misma persona no debe realizar operaciones de pulverización durante un tiempo prolongado ni todos los días. • Efectúe las operaciones y realice descansos moderados. 5. Información sobre los rangos de ajuste y funcionamiento del dispositivo Lo siguiente debe introducirse individualmente en cada conjunto de boquilla.
- Página 78 Para una operación segura Responsabilidad del usuario • Cualquier parte de la máquina es una fuente potencial de peligro si se usa la máquina en condiciones anormales o si el mantenimiento no se realiza correctamente. • Lea atentamente el Manual del Propietario. Familiarícese con los controles y con la utilización correcta del pulverizador de mochila.
- Página 79 Para una operación segura Responsabilidad del usuario • Nunca utilice el pulverizador de mochila mientras: – hay gente, especialmente niños, o mascotas en las inmediaciones. – el usuario está fatigado o medicado, o ha ingerido sustancias que afecten a su juicio o sus reacciones. •...
- Página 80 Para una operación segura Cómo manipular compuestos químicos agrícolas A la hora de manipular compuestos químicos agrícolas, siga las instrucciones del fabricante o del distribuidor. De la misma forma, siga la legislación y las normativas. • La persona que pulveriza compuestos químicos agrícolas, o quien le ayuda en dicha labor, debe utilizar vestuario de protección que impida la inhalación de los compuestos o el contacto directo con ellos.
- Página 81 Para una operación segura Cómo manipular compuestos químicos agrícolas • Antes de poner el motor en funcionamiento, asegúrese de que la manguera del pulverizador está instalada con seguridad en el pulverizador de mochila y que la válvula de cierre está en la posición "CERRADO". De lo contrario, los compuestos químicos podrían salpicarle durante el funcionamiento.
- Página 82 Para una operación segura Cómo manipular compuestos químicos agrícolas • No pulverice los compuestos químicos a horas en las que la temperatura sea elevada o en días de fuerte viento. No pulverice los compuestos químicos en lugares y horas concurridos, en especial cuando sea posible que pasen escolares por la zona.
- Página 83 Para una operación segura Cómo manipular compuestos químicos agrícolas • Después de utilizar el pulverizador de mochila, guárdelo fuera del alcance de los niños y de los animales domésticos. El almacenamiento inadecuado puede dejar expuestos a los niños o los animales, lo que podría ser dañino para su salud.
- Página 84 Para una operación segura Peligro de fuegos y quemaduras La gasolina es extremadamente inflamable y los vapores de la gasolina pueden explotar. Extreme las precauciones cuando manipule gasolina. Mantenga la gasolina fuera del alcance de los niños. • Guarde el combustible en recipientes especialmente diseñados para ello. •...
- Página 85 Para una operación segura Peligro de envenenamiento por monóxido de carbono Los gases de escape contienen monóxido de carbono venenoso, que es un gas incoloro e inodoro. Respirar dicho gas puede producir pérdida de consciencia e incluso la muerte. • Si pone en funcionamiento el motor en lugares confinados o parcialmente cerrados, el aire que usted respire contendrá...
-
Página 86: Ubicaciones De Las Etiquetas De Seguridad
Lea atentamente las etiquetas y notas de seguridad, así como las precauciones descritas en este manual. Si se despega una etiqueta o resulta difícil de leer, póngase en contacto con su concesionario de Honda para el reemplazo. PRECAUCIONES PARA EL OPERARIO... - Página 87 • El pulverizador de mochila Honda está diseñado para proporcionar un servicio seguro y fiable si se opera de acuerdo con las instrucciones. Lea y comprenda el manual de instrucciones antes de operar el pulverizador de mochila. De no hacerlo así, pueden producirse daños personales o en el equipo.
-
Página 88: Identificación De Componentes
3. IDENTIFICACIÓN DE COMPONENTES Tabla de tipos de boquillas y cabezales • : Piezas estándar : Piezas opcionales Tipo de modelo WJR4025 Tipos de boquilla y cabezal Cabezal azul 4 cabezales • • Larga distancia • Tipo de modelo WJR4025 Piezas de conexión... - Página 89 TIPO DE LARGA DISTANCIA MANGUERA DEL PULVERIZADOR JUNTA MÓVIL DEPÓSITO DE COMPUESTOS VÁLVULA DE CIERRE QUÍMICOS TIPOS CON CABEZAL AZUL / TUBO DE LA BOQUILLA 4 CABEZALES JUNTA MÓVIL VÁLVULA DE CIERRE CALIBRADOR DE PRESIÓN PALANCA DEL INTERRUPTOR ACELERADOR DEL MOTOR BOQUILLA DE 4 CABEZALES MANGUERA DEL PULVERIZADOR...
- Página 90 TAPÓN DEL DEPÓSITO DE COMPUESTOS QUÍMICOS FILTRO DEL DEPÓSITO TAPÓN DE DRENAJE VENTANA DE INSPECCIÓN DEL ACEITE DE LA BOMBA ARNÉS PARA HOMBROS...
- Página 91 NÚMERO DE SERIE DEL BASTIDOR TUBO DE RETORNO DEL COMBUSTIBLE FILTRO DE AIRE EMPUÑADURA DEL ARRANCADOR PALANCA DEL ESTRANGULADOR SILENCIADOR TAPA DE RELLENO DE ACEITE BOMBA DE CEBADO TUBO DEL COMBUSTIBLE TIPO DE MOTOR TAPÓN DEL DEPÓSITO DE COMBUSTIBLE DEPÓSITO DE COMBUSTIBLE NÚMERO DE SERIE DEL MOTOR Anote el número de serie del bastidor y el número de serie del motor en el espacio siguiente.
-
Página 92: Interruptor Del Motor
4. CONTROLES Interruptor del motor El interruptor del motor activa y desactiva el sistema de encendido. El interruptor del motor debe de estar en la posición ENCENDIDO para que el motor funcione. Poniendo el interruptor del motor en la posición APAGADO se para el motor. - Página 93 Palanca del estrangulador La palanca del estrangulador abre y cierra la válvula de estrangulación del carburador. En la posición CERRADO se enriquece la mezcla del combustible para arrancar el motor frío. En la posición ABIERTO se suministra la mezcla correcta de combustible para funcionar después del arranque, o para volver a arrancar el motor caliente.
- Página 94 Válvula de cierre Utilice la válvula de cierre cuando pulverice o deje de pulverizar compuestos químicos. TIPO DE LARGA DISTANCIA TIPOS CON CABEZAL AZUL / 4 CABEZALES VÁLVULA DE CIERRE CERRADO VÁLVULA ABIERTO DE CIERRE CERRADO CERRADO CERRADO ABIERTO Asa de la boquilla (sólo tipo de larga distancia) Utilice el asa de la boquilla para ajustar el ángulo y la distancia de pulverización.
-
Página 95: Calibrador De Presión
Calibrador de presión Utilice el calibrador de presión cuando ajuste la presión y la cantidad de pulverización. • Cuando se gira el calibrador de presión hacia la derecha (ALTO), la presión y la cantidad de pulverización aumentan. • Cuando se gira el calibrador de presión hacia la izquierda (BAJO), la presión y la cantidad de pulverización disminuyen. -
Página 96: Preparación
5. PREPARACIÓN Antes de operar, monte la boquilla y la manguera del pulverizador, luego conecte la manguera del pulverizador a la cámara de la bomba. 1. Monte la boquilla y la manguera del pulverizador. Para obtener más información acerca de las variaciones del tipo de boquilla y del cabezal, consulte la página 15. - Página 97 Tipos con cabezal azul / 4 cabezales: No olvide conectar las empaquetaduras y conectar firmemente todas las piezas. a. Conecte la manguera del pulverizador a la junta móvil. b. Conecte la junta móvil al asa de la boquilla. c. Conecte el asa de la boquilla a la válvula de cierre. d.
- Página 98 2. Después de montar la boquilla y la manguera del pulverizador, conecte la manguera del pulverizador a la cámara de la bomba. CÁMARA DE LA BOMBA MANGUERA DEL PULVERIZADOR...
- Página 99 3. Compruebe el arnés. Asegúrese de que el gancho inferior del arnés está conectado. GANCHO INFERIOR ARNÉS ATENCION: Cuando coloque el pulverizador de mochila en su espalda, asegúrese de que el arnés no se enrede con la palanca del acelerador. :INCORRECTO :CORRECTO PALANCA DEL ACELERADOR...
-
Página 100: Verificación Previa A La Operación
6. VERIFICACIÓN PREVIA A LA OPERACIÓN Para pulverizar de manera segura y eficaz haga siempre una inspección previa de funcionamiento: Antes de llevar la inspección previa a su uso, ponga el pulverizador de mochila sobre una superficie nivelada, pare el motor y asegúrese de que el interruptor del motor esté... -
Página 101: Aceite Recomendado
ATENCION: • Si se hace funcionar el motor sin suficiente aceite se pueden causar serios daños al mismo. • Cerciorarse de comprobar el nivel de aceite estando el motor parado y sobre una superficie plana. TAPA DE RELLENO DE ACEITE LÍMITE SUPERIOR LÍMITE INFERIOR Aceite recomendado... - Página 102 2. Compruebe el nivel de combustible. Emplee gasolina sin plomo para automóviles con un número de octanos de investigación de 91 o más alto (un número de octanos de bomba de 86 o más alto). No emplee nunca gasolina pasada, contaminada ni mezclada con aceite. Evite la entrada de suciedad o agua en el depósito de combustible.
- Página 103 DE COMBUSTIBLE Gasolina con alcohol Si decide utilizar gasolina con alcohol (gasohol), asegúrese que el octanaje sea al menos tan alto como el recomendado por Honda. Existen dos tipos de "gasohol": uno que contiene etanol, y otro que contiene metanol.
- Página 104 3. Comprobar el elemento del filtro de aire. No emplee nunca gasolina ni solventes de bajo punto de inflamación para la limpieza del elemento del filtro de aire. Podrían producirse incendios o explosiones. ATENCION: Nunca ponga en marcha el motor sin el filtro de aire. El motor podría desgastarse con rapidez, debido al polvo y suciedad que ingresan al motor a través del carburador.
- Página 105 4. Compruebe el juego libre del cable del acelerador. a. Extraiga la cubierta del filtro de aire (vea la página 31). b. Compruebe el juego libre del cable del acelerador en la punta del cable tirando y soltando varias veces la palanca del acelerador. Juego libre: 0,5–2,5 mm Si el juego libre no fuese correcto, aflojar la contratuerca y girar la tuerca de ajuste hacia adentro o hacia afuera para obtener el juego libre correcto.
- Página 106 5. Compruebe el aceite de la bomba. Compruebe si el aceite de la bomba no está contaminado y no parece lechoso. Compruebe que el nivel de aceite no se encuentra por debajo del nivel intermedio de la ventana de inspección. Si se cumple alguna de estas condiciones, consulte a su concesionario de servicio.
- Página 107 7. Compruebe el depósito del compuesto químico y su filtro. a. Quite el tapón del depósito del compuesto químico y el de drenaje. Compruebe si los tapones y las empaquetaduras presentan roturas o daños. Si están dañados, reemplácelos. b. Extraiga el filtro del depósito. Compruebe los posibles daños y obstrucciones del filtro del depósito.
- Página 108 8. Llene el depósito de compuestos químicos agrícolas. Lea atentamente las instrucciones del compuesto químico. Siga siempre las instrucciones y las precauciones para la preparación y la manipulación del compuesto químico. Cuando llene el depósito de compuestos químicos agrícolas, asegúrese de que el tapón de drenaje está...
- Página 109 9. Compruebe que todas las tuercas, pernos y tornillos estén apretados. Si es necesario, apriete los pernos y las tuercas adecuadamente y con seguridad. 10.Compruebe si la bomba presenta fugas. Después de encender el motor, compruebe todas las conexiones en busca de fugas de componentes químicos.
-
Página 110: Arranque Del Motor
7. ARRANQUE DEL MOTOR • El gas de escape contiene monóxido de carbono que es venenoso. No ponga nunca en funcionamiento el motor en un lugar cerrado. Cerciórese de disponer siempre de la ventilación apropiada. • Ponga el motor en marcha en un lugar alejado de las personas, animales y edificios circundantes. - Página 111 2. Gire la válvula de cierre hasta la posición CERRADO. TIPO DE LARGA DISTANCIA TIPOS CON CABEZAL AZUL / 4 CABEZALES VÁLVULA DE CIERRE CERRADO VÁLVULA DE CIERRE CERRADO CERRADO CERRADO 3. Para arrancar el motor cuando está frío, mueva la palanca del estrangulador a la posición CERRADO.
- Página 112 4. Presione la bomba de cebo varias veces hasta que ésta se llene de combustible. Incluso aunque presione demasiadas veces la bomba de cebo, el combustible extra volverá al depósito de combustible. Si la bomba de cebo no se presiona las veces suficientes, el motor podría no arrancar.
- Página 113 7. Sujete con seguridad la cubierta superior del motor y tire ligeramente de la empuñadura del arrancador hasta notar resistencia, y entonces tire con fuerza en la dirección de la flecha como se muestra abajo. Deje que la empuñadura del arrancador retorne con suavidad. •...
-
Página 114: Operación En Altitudes Elevadas
Si opera el pulverizador de mochila en altitudes más elevadas que 610 m sobre el nivel del mar, permita que su concesionario autorizado Honda realice estas modificaciones en el carburador. Incluso con un surtidor de carburador adecuado, la potencia del motor disminuirá... -
Página 115: Parada Del Motor
8. PARADA DEL MOTOR Para parar el motor en un caso de emergencia, simplemente gire el interruptor del motor a la posición APAGADO. En situaciones normales, emplee el procedimiento siguiente. 1. Gire la válvula de cierre hasta la posición CERRADO. TIPO DE LARGA DISTANCIA TIPOS CON CABEZAL AZUL / 4 CABEZALES VÁLVULA DE CIERRE... -
Página 116: Funcionamiento
Si nota algún sonido, olor o vibración anómalos, u otras señales poco habituales, detenga el motor inmediatamente y consulte a su concesionario autorizado Honda. Antes de la utilización • Introduzca 1 litro o más de componentes químicos agrícolas en el depósito mientras mantiene éste en una posición nivelada (vea la página 35). - Página 117 4. Coloque el pulverizador de mochila en una mesa plana. 5. Asegúrese de que el arnés no está enredado con la palanca del acelerador. :INCORRECTO :CORRECTO PALANCA DEL ACELERADOR PALANCA DEL ACELERADOR ARNÉS ARNÉS Luego, coloque el pulverizador de mochila en su espalda. •...
- Página 118 6. Gire la válvula de cierre hasta la posición ABIERTO. TIPO DE LARGA DISTANCIA TIPOS CON CABEZAL AZUL / 4 CABEZALES VÁLVULA DE CIERRE VÁLVULA DE CIERRE ABIERTO ABIERTO 7. Gire el calibrador de presión hacia la derecha (ALTO) para adaptar la presión de pulverización a las condiciones de funcionamiento.
- Página 119 8. Mueva la palanca del acelerador a la posición deseada mientras observa el estado de la pulverización. NOTA: Este pulverizador de mochila utiliza un embrague centrífugo. Cuando el motor gira a baja velocidad, el embrague patina y la bomba no funciona.
-
Página 120: Durante La Operación
Durante la operación • No apunte la boquilla hacia otras personas. • Preste atención a los restos de componente químico del depósito. Para evitar el uso del pulverizador de mochila sin una cantidad suficiente de componentes químicos en el depósito, en el momento que la boquilla haya dejado de pulverizar, apague el motor o la bomba podría dañarse. - Página 121 Después del uso A la hora de manipular compuestos químicos agrícolas, siga las instrucciones del fabricante o del distribuidor. De la misma forma, siga la legislación y las normativas. 1. Detenga el motor (vea la página 42). 2. Después de que el motor se haya enfriado, quite el tapón de drenaje del depósito de compuestos químicos agrícolas.
-
Página 122: Mantenimiento
• Los servicios de mantenimiento del pulverizador de mochila deben ser realizados por un concesionario oficial de Honda, a menos que el propietario tenga las herramientas y los datos para el mantenimiento adecuados, y posea los conocimientos de mecánica necesarios. -
Página 123: Programa De Mantenimiento
Para ver los procedimientos de servicio, consulte el manual de taller Honda. (3) Cuando se trate de unidades de uso comercial, registre las horas de funcionamiento para determinar los intervalos de mantenimiento idóneos. - Página 124 Juego de herramientas Las herramientas suministradas son necesarias para realizar algunos de los trabajos de mantenimiento periódicos y reparaciones y ajustes sencillos. TORNILLO HEX. DE 4 mm LLAVE DE TUBO, 16 × 17 mm...
- Página 125 Cambio de aceite Drene el aceite mientras el motor está todavía caliente para asegurar un drenaje rápido y completo. Coloque el pulverizador de mochila en una superficie firme y nivelada con el motor parado. 1. Compruebe que la tapa del depósito de combustible esté apretada con seguridad.
- Página 126 Mantenimiento del filtro de aire Un filtro de aire sucio restringirá la circulación de aire hacia el carburador. Para evitar el mal funcionamiento del carburador, examine regularmente el filtro de aire. Limpie el filtro de aire con más frecuencia cuando el pulverizador de mochila funcione en lugares muy polvorientos.
- Página 127 4. Limpie el elemento con un disolvente no inflamable o de alto punto de inflamación y séquelo bien. Sumerja el elemento en aceite para el motor limpio y estrújelo para eliminar el exceso de aceite. Limpiar Escurrir y secar Bañar en aceite Escurrir No retorcer.
- Página 128 Mantenimiento de la bujía de encendido Bujía recomendada: CMR5H (NGK) ATENCION: No utilice nunca una bujía con una gama de calor inadecuada. Para asegurar el funcionamiento adecuado del motor, las bujías deben tener el entrehierro adecuado y estar exentas de depósitos. 1.
- Página 129 2. Retire el capuchón de la bujía. Saque la suciedad que haya en torno al área de la bujía. 3. Emplee una llave de cubo de 16 × 17 mm para extraer la bujía. Si el motor ha estado funcionando, el silenciador estará muy caliente. Tener cuidado de no tocar el silenciador.
- Página 130 7. Después de instalar la bujía, apriétela con una llave de cubo de 16 × 17 mm para comprimir la arandela. NOTA: Cuando instale una bujía nueva, apriétela 1/2 de vuelta después de haberse asentado la bujía para comprimir la arandela. Si se va a usar una bujía usada, se tiene que apretar solamente un 1/8–1/4 de vuelta después de asentarla para comprimir la arandela.
- Página 131 Limpieza del filtro de combustible y depósito de combustible La gasolina es muy inflamable y explosiva bajo ciertas condiciones. No fume ni permita que se produzcan llamas ni chispas en el lugar. 1. Compruebe que la tapa de relleno de aceite esté apretada con seguridad. 2.
- Página 132 Suministro de grasa a la bomba Cada 2 horas, gire hacia la derecha las copelas de grasa de la derecha e izquierda desde el tope del regulador hacia la derecha de forma que ambos reguladores tengan el mismo número de revoluciones y suministre grasa a la bomba.
- Página 133 Relleno de grasa para la bomba en la copela de grasa Cuando la copela de grasa se haya COPELA DE GRASA girado hasta el final, rellene ambas copelas con grasa para bomba. 1. Desmonte la copela de grasa [LADO IZQUIERDO] [LADO DERECHO] girándola hacia la izquierda.
- Página 134 Servicio de las aletas de enfriamiento Inspeccione visualmente las aletas de enfriamiento a través de la cubierta. Si tiene alguna hierba u hoja seca o barro atascado, consulte a su concesionario autorizado Honda para limpiarlo. ALETAS DE ENFRIAMIENTO (dentro de la cubierta)
-
Página 135: Transporte/Almacenaje
11. TRANSPORTE/ALMACENAJE Transporte • Si el pulverizador de mochila ha estado en funcionamiento, permita que se enfríe antes de cargarlo en el vehículo de transporte. Si el motor y el sistema de escape están calientes pueden causarle quemaduras y hacer que se enciendan algunos materiales. -
Página 136: Almacenaje
Almacenaje Antes de almacenar el pulverizador de mochila durante períodos prolongados de tiempo: 1. Siga los procedimientos indicados en la sección "Después del uso" (vea la página 48). 2. Para evitar que el agua se congele en invierno, drene completamente el agua de la cámara de la bomba. - Página 137 3. Drene el combustible. La gasolina es muy inflamable y explosiva bajo ciertas condiciones. No fume ni permita que se produzcan llamas ni chispas en el lugar. a. Compruebe que la tapa de relleno de aceite esté apretada con seguridad. b.
- Página 138 6. Lubrique el cilindro. a. Afloje el tornillo hexagonal de 4 mm y desmonte la tapa superior del motor (vea la página 55). b. Extraiga la bujía (vea la página 56). c. Aplique un par de gotas de aceite de motor limpio al cilindro. d.
-
Página 139: Localización Y Reparación De Averías
12. LOCALIZACIÓN Y REPARACIÓN DE AVERÍAS Cuando el motor no arranca: 1. ¿Está el interruptor del motor en la posición de ENCENDIDO? 2. ¿Hay combustible en el depósito de combustible? 3. ¿Llega la gasolina al carburador? Para comprobar, presione la bomba de cebo varias veces. 4. -
Página 140: Especificaciones
13. ESPECIFICACIONES Bastidor Modelo WJR4025T Tipo de bastidor Código de descripción de WAFT productos motorizados 400 mm Longitud 415 mm Anchura 695 mm Altura 12,5 kg Masa en seco [peso] Capacidad del depósito de 25 L componentes químicos *1 Sin manguera ni boquilla *2 Con aceite de la bomba Bomba Modelo... - Página 141 Motor Modelo GX35T Tipo de motor Cuatro tiempos, árbol de levas en cabeza, monocilíndrico Cilindrada 35,8 cm Diámetro × carrera 39,0 × 30,0 mm Potencia neta del motor 1,0 kW (1,4 PS)/7.000 rpm (según SAE J1349*) Par máx. neto del motor 1,6 N·m (0,16 kgf·m)/5.500 rpm (según SAE J1349*) Sistema de refrigeración...
- Página 142 WJR4025 Honda Motor Co., Ltd. 2020 4MYH3601 00X4M-YH3-6011 Printed in Thailand...