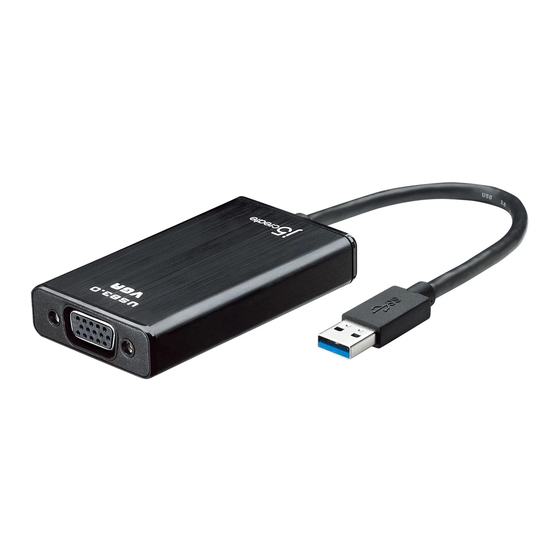
J5create JUA310 Guía De Instalación Rápida
Ocultar thumbs
Ver también para JUA310:
- Manual del usuario (426 páginas) ,
- Manual del usuario (410 páginas)
Resumen de contenidos para J5create JUA310
- Página 1 USB 3.0 DISPLAY ADAPTER QUICK INSTALLATION GUIDE GUÍA DE INSTALACIÓN RÁPIDA KURZANLEITUNG FÜR INSTALLATION GUIDE D'INSTALLATION RAPIDE クイックインストールガイド 日本語: 繁中文: 快速安裝 JUA310/JUA350...
-
Página 2: Getting Started
1. Insert the Driver CD into the drive; the setup program should launch automatically. • Make sure that the USB Display Adapter is NOT connected to your host computer. * Driver download is available at www.j5create.com in" support>download"area. PARA COMENZAR- Windows 1. -
Página 3: Pour Commencer
• Gehen Sie sicher, dass der USB Monitoradapter • ホストコンピューターに USB Display Adapter が接続し NICHT mit dem Host Computer verbunden ist. ていないことを確認してください。 * Treiber zum Herunterladen gibt es auf www.j5create. com unter "support >download". * www.j5create.com からドライバーをダウンロードする ことが可能です。“ サポート > ダウンロード ” エリア. 開始安裝- Windows POUR COMMENCER - Windows 1. - Página 4 2. Executing the Setup.exe application will launch the following screen. Click "Next" to continue. 2. Ejecutar la aplicación Setup.exe iniciará la siguiente pantalla. Clic en "Siguiente" para continuar. 2. Durch Aktivieren der Setup.exe-Funktion erscheint der folgende Bildschirm. Klicken Sie auf "Nächstes", um fortzufahren.
- Página 5 3. When the installation is complete, select "Yes, I want to restart my computer now" and click "Finish" to restart. 3. Cuando la instalación haya finalizado, seleccione "Si, deseo reiniciar el equipo ahora" . Haga clic en "Finalizar" para reiniciar 3.
-
Página 6: Instalación - Mac
1. Inserte el CD de controladores en la unidad de CD- ROM; y La página de instalación se abrirá. • Asegúrese que el USB Display Adapter NO está conectado a su computadora. * La descarga de los controladores está disponible en www.j5create.com en el área "support > download". - Página 7 1. Insérez le CD dans le lecteur de CD-ROM et La 1. 將驅動程式光碟片放入光碟機中,安裝視窗將會出現 page d'installation sera lancée. •驅動程式尚未安裝完成前,請勿將USB外接顯示卡接到 • Assurez-vous que l’adaptateur graphique USB n’est USB埠上 PAS connecté à votre ordinateur hôte. * 歡迎隨時造訪本公司官網www.j5create.com “技術支援” • Télécharger Pilote est disponible sur www.j5create. com dans la rubrique «soutien /téléchargement» 下載最新版驅動程式 domaine.
- Página 8 2. Click "Continue" to proceed 2. Clic "Continuar" para proceder. 2. Klicken Sie auf "Weitermachen", um fortzufahren. 2. Cliquez sur «Continuer» pour poursuivre 2. “ 継続 ” をクリックして続行します。 2. 開始進行安裝,按“繼續” 3. Type your password then click "OK". It will take few minutes to process. 3.
- Página 9 4. Click "Restart” to complete 4. Clic en "Reiniciar” para completer. 4. Klicken Sie auf "Neustart", um Prozess zu beenden. 4. Cliquez sur "Redémarrer" pour terminer 4. “ 再起動 ” をクリックし、終了します。 4. 當驅動程式已成功完成安裝,請按“重新啟動”...
-
Página 10: Instalación Del Hardware Del Dispositivo
DEVICE HARDWARE INSTALLATION INSTALACIÓN DEL HARDWARE DEL INSTALLATION VON GERÄTEHARDWARE DISPOSITIVO 1. After the computer has rebooted, 1. Nachdem der Computer neu connect the external display device gebootet hat, verbinden Sie die externen 1.Tras reiniciar el ordenador, conecte to the VGA/DVI/HDMI connector of Anzeigegeräte an die Verbindungstücke el dispositivo de pantalla externo al the USB Display Adapter. - Página 11 INSTALLATION DU MATÉRIEL DISPOSITIF デバイスハードウェアインストール 硬體安裝 1. Après le redémarrage de votre 1. コンピューター再起動後、 USB Display 1.電腦重新開機後,將USB外接顯示卡 ordinateur, connectez le périphérique AdapterのVGA/DVI/HDMIコネクタを d’affi chage externe à la VGA / DVI / 的VGA或DVI或HDMI接頭端連接至顯示 外部表示装置に接続してください。 HDMI connecteur USB Display Adapter. 裝置的VGA或DVI或HDMI連接埠,並開 2. USB Display Adapterをホストコンピュ 2.
- Página 12 Ausrichtung der Anzeige Drehen Sie das Anzeigegerät, welches angeschlossen ist. * Diese Funktion ist auf MAC nicht verfügbar Orientation de l’affichage Tourner le dispositif d’affichage qui est connecté. * Cette fonction n’est pas sur MAC Display Orientation 画面の向き Turn the connected display device USB Display Adapterに接続している表示装置の画面の表...
- Página 13 Extended mode Le mode étendu Modo Extendido 拡張表示モード Erweiterter Modus 延伸螢幕 Mirror mode Le mode miroir Modo Espejo ミラーモード Spiegelmodus 複製螢幕 Primary mode Le mode primaire Modo Primario プライマリーモード Primärer Modus 主螢幕...
- Página 14 Display Setting on Windows 7 Right click on the desktop and go to "Screen Resolution" Mostrar la configuración en Windows 7 Clic derecho en el escritorio y vaya a "Resolución de Pantalla" Anzeigeeinstellungen auf Windows 7 Klicken Sie mit rechter Maustaste auf den Desktop und gehen Sie zu "Bildschirmauflösung"...
- Página 15 Display Setting on Windows XP Display Setting on Windows XP Right click on the icon ( )on the lower right-hand side of the toolbar Mostrar la confi guración en Windows XP Mostrar la confi guración en Windows XP Clic derecho sobre el ícono ( ) en la barra de herramientas de la parte inferior derecha Anzeigeeinstellungen auf Windows XP...
- Página 16 Display Setting on MAC. Go to ( ) and then “System Preferences”. Choose the “Display” or “Arrangement” tab to adjust. Mostrar configuración en MAC Vaya a ( ) y luego “Preferencias de Sistema” Elija la etiqueta “Mostrar” o “Ajustar” para ajustar Display-Einstellungen auf MAC Gehen Sie auf ( ) und dann auf „Systempräferenzen“.
- Página 17 For complete instructions on Functions please refer to the User Manual. Para instrucciones sobre la totalidad de la función, refiérase al Manual del Usuario. Für alle Funktionen,bitte die Gebrauchsanleitung konsultieren. Pour l’instruction fonction entière, s’il vous plaît se référer au manuel utilisateur. 全部の機能の説明はユーザーマニュアルを参照して...
- Página 18 Required Environment Systemanforderungen • Microsoft Windows 7, XP (32-bit or 64-bit) • Microsoft Windows 7, XP(32-bit or 64-bit) • Mac OS X v10.6 (Snow Leopard) / v10.7 (Lion) • Mac OS X v10.6 (Snow Leopard) / v10.7 (Lion) • Verfügbarer USB 3.0 Port •...
-
Página 19: Soporte Técnico
Número gratuito: 888-689-4088 • マイクロソフトウインドー7, XP,2000 SP3(32ビットまたは64ビット) Horario de atención: • Mac OS X v10.6 (Snow Leopard) / v10.7 (Lion) Lun-Vier. 10:00 a.m – 6:00 U.S.A-E.S.T • 利用可能なUSB3.0ポート Email: service@j5create.com 1~2 ドングル 3~4 ドングル 数量 TECHNISCHER SUPPORT Intel 2 Quad 2.33 GHz Intel i5 3.10 GHz... - Página 20 2. Online Support Please visit the j5 create website (www.j5create.com) to find the latest software for your device. If you still experience behind our products and it is our goal to provide you world class support. 3. Telephone Support...

