Tabla de contenido
Publicidad
Idiomas disponibles
Idiomas disponibles
Enlaces rápidos
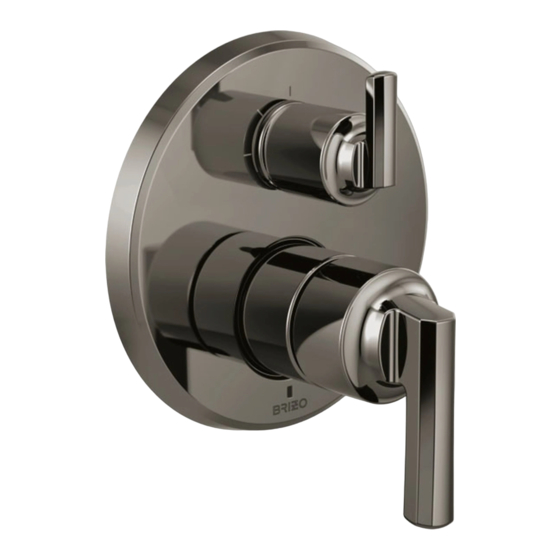
T75P598-pLHP
T75P698-pLHP
Write purchased model number here.
For easy installation of your Brizo
will need:
• To READ ALL the instructions completely
before beginning.
• To READ ALL warnings,care, and
maintenance information.
Table of Contents:
Warranty ............................................................................. Page 2
Installation Instructions ....................................................... Pages 3 - 6
Maintenance ....................................................................... Page 6
Replacement Parts ............................................................. Pages 8 - 9
CAUTION: This system/device must be set by the
installer to ensure safe, maximum temperature.
Any change in the setting may raise the discharge
temperature above the limit considered safe and
may lead to hot water burns.
NOTICE TO INSTALLER: CAUTION!–As the
installer of this valve, it is your responsibility
to properly INSTALL and ADJUST this valve
per the instructions given. This valve does
not automatically adjust for inlet temperature
changes, therefore, someone must make the
necessary temperature knob adjustments at
the time of installation and further adjustments
may be necessary due to seasonal water
temperature change. YOU MUST inform the
owner/user of this requirement by following the
instructions. If you or the owner/user are unsure
how to properly make these adjustments, please
refer to page 5 and if still uncertain, call us at
1-877-345-BRIZO (2749).
After installation and adjustment, you must affix
your name, company name and the date you
adjusted the temperature knob to the caution label
provided and apply or attach the label to the back
92785 Rev. A
Pressure-Balance Valve
Trim with Diverter
Installation Instructions
Owners Manual
75P Series
faucet you
®
You May Need
side of the closest cabinet door and the warning
label to the water heater. Leave this Instruction
Sheet for the owner's/user's reference.
WARNING: This thermostatic bath valve is
designed to minimize the effects of outlet water
temperature changes due to inlet pressure and
temperature changes, commonly caused by
dishwashers, washing machines, toilets and
the like. It may not provide protection from hot
water burns when there is a failure of other
temperature controlling devices elsewhere
in the plumbing system, if the temperature
knob is not properly set or if the hot water
temperature is changed after the settings
are made or if the water inlet changes due to
seasonal changes.
WARNING: Do not install a shut-off device on
either outlet of this valve. When this type of
device shuts off the water flow, it can defeat
the ability of the valve to balance the hot and
cold water pressures.
1
02/22/2018
Publicidad
Tabla de contenido

Manuales relacionados para Brizo 75P Serie


Resumen de contenidos para Brizo 75P Serie
- Página 1 Trim with Diverter Installation Instructions Owners Manual T75P598-pLHP T75P698-pLHP 75P Series Write purchased model number here. For easy installation of your Brizo faucet you ® will need: • To READ ALL the instructions completely before beginning. • To READ ALL warnings,care, and maintenance information.
-
Página 2: Cleaning And Care
® Brizo Kitchen & Bath Company shall not be liable for any damage to the faucet resulting from misuse, abuse, neglect or improper or incorrectly performed installation, maintenance or repair, including failure to follow the applicable care and cleaning instructions. - Página 3 75P Series Installation Cartridge Installation Rotate valve cartridge (1) so the words “HOT Turn off water supplies. Remove cover (1), bonnet nuts (2) and test caps (3) from the COLD” (2) appear on the top. Insert cartridge rough-in body (4). assembly into rough-in body.
- Página 4 75P Series Installation Diverter Cartridge Installation For Bonnet Installation FOR DIVERTER CARTRIDGE INSTALLATION: Slide bonnet nut (1) over diverter sleeve (2) and Apply silicone lube to the o-ring (2) to make the thread into rough-in body. diverter sleeve (3) easier to install on diverter Hand tighten securely.
- Página 5 75P Series Installation Adjusting the Rotational Limit Stop Hotter Cooler IMPORTANT: The Rotational Limit Stop is used to limit the amount • Place a thermometer in a plastic tumbler and of hot water available such that, if set properly, hold in the water stream. If the water temperature a scald injury is less likely to occur if the handle is above 120°F, the Rotational Limit Stop must be accidentally is rotated all the way to “hot”...
-
Página 6: Trim Installation
75P Series Installation Trim Installation Trim Sleeve Installation Escutcheon Installation Insert Spacer (3) into the sleeve (1) and push it to For finished wall thickness up to 1 1/8". Secure the front. Slide trim sleeve (1) over the bonnet (2), the backplate (1) to the rough-in body (2) using 4 valve cartridge and rough-in body. - Página 7 75P Series Installation Potential scald or thermal shock injury could result due to cross flow if outlet at the shower is blocked or restricted (e.g., pause control on showerhead). Be sure to point showerhead away from you when re-starting flow or install inlet check valves on both supply lines to prevent possible injury.
- Página 8 Diverter Handle Reference Sheet Water Flow For 3 Function Diverter / Flujo de agua para Desviadores de 3 posiciones / Écoulement de l’eau pour les inverseurs à 3 positions 1st Position 2nd Position * 3rd Position 1 ª posición Outlet 1 2 ª...
-
Página 9: Puede Necesitar
5 y si aún tiene duda, llámenos en cualquiera de las tuberías de salida de agua de al 1-877-345-BRIZO (2749). esta válvula. Cuando este tipo de dispositivo cierra el flujo del agua, pueda aminorar el propósito de la Después de la instalación y el ajuste, debe colocar su... -
Página 10: Garantía Limitada De Las Llaves De Agua/Grifos Brizo
Piezas y Acabado Todas las piezas (menos las piezas electrónicas y las pilas) y acabados de esta llave de agua - grifo Brizo® están garantizados al consumidor comprador original, de estar libres de defectos en materiales y mano de obra durante el tiempo que el comprador original sea dueño de la casa en la cual la llave de agua fue instalada por primera vez o,... -
Página 11: Instalación Del Cartucho
Instalación de la Series 75P Instalación del cartucho Gire el cartucho de la válvula (1) de forma que las palabras Cierre los suministros de agua. Quite la tapa (1), las "HOT COLD" estén en la parte superior. Inserte el cartucho tuercas tapas (2) y las tapas de prueba (3) del cuerpo de en el cuerpo de la tubería preliminar. -
Página 12: Instalación Del Cartucho Desviador
Instalación de la Series 75P Instalación del cartucho desviador Para la instalación del casquete PARA LA INSTALACIÓN DEL CARTUCHO DE DESVÍO: Deslice la tuerca tapa (1) sobre el casquillo desviador (2) Aplique lubricante de silicona a la junta tórica (2) para y enrosque en el cuerpo de la tubería preliminar. -
Página 13: Ajuste Del Tope Del Limite De La Temperatura
Instalación de la Series 75P Ajuste del tope del limite de la temperatura Hotter Cooler IMPORTANTE: El tope del límite de rotación se utiliza para limitar la debe reposicionar hacia la derecha para disminuir la cantidad de agua caliente disponible de manera que, si temperatura del agua de la válvula de salida a menos de se configura correctamente, una lesión por quemadura es 120°... -
Página 14: Instalación Del Accesorio
Instalación de la Series 75P Instalación del accesorio Instalación del casquillo del accesorio Instalación del chapetón Inserte el espaciador (3) en la manga (1) y empújelo Para paredes acabadas de un grosor hasta 1 1/8". Fije la hacia adelante. Deslice el manguito de ajuste (1) sobre el placa posterior (1) al cuerpo de la unidad de las tuberías bonete (2), el cartucho de la válvula y el cuerpo enrasado. -
Página 15: Mantenimiento De La Series 75P
Instalación de la Series 75P Existe la posibilidad de lesión por escaldadura o de choque térmico resultante de un flujo cruzado en el caso que la salida de la regadera/ducha está bloqueada o restringida (por ejemplo, pause el control de la cabeza de la regadera/ducha). -
Página 16: Hoja De Referencia Para La Manija Desviadora
Hoja de referencia para la manija desviadora Water Flow For 3 Function Diverter / Flujo de agua para Desviadores de 3 posiciones / Écoulement de l’eau pour les inverseurs à 3 positions 1st Position 2nd Position * 3rd Position 1 ª posición Outlet 1 2 ª... - Página 17 T75P598-pLHP Manuel d’utilisation T75P698-pLHP Série 75P Inscrivez le numéro du modèle acheté ici Pour installer votre robinet Brizo® facilement, vous devez: • LIRE TOUTES les instructions complètement avant de débuter. • LIRE TOUS les avertissements ainsi que toutes les instructions de nettoyage et d’entretien.
-
Página 18: Nettoyage Et Entretien
Pièces et finis Toutes les pièces et tous les finis de ce robinet Brizo® sont protégés contre les défectuosités du matériau et les vices de fabrication par une garantie qui est consentie au premier acheteur et qui demeure valide tant que celui-ci demeure propriétaire de la maison dans laquelle l’accessoire a été... -
Página 19: Installation De La Cartouche
Instructions d’installation - série 75P Installation de la cartouche Tournez la cartouche (1) de sorte que les mots « HOT Fermez les robinets d’alimentation. Retirez le capuchon et COLD » (2) se trouvent sur le dessus. Introduisez la (1), les écrous-chapeaux (2) et les capuchons d'essai (3) du cartouche dans le corps de robinetterie brute. - Página 20 Instructions d’installation - série 75P Installation de la cartouche de l’inverseur Installation du chapeau Glissez l'écrou-chapeau (1) sur le manchon de INSTALLATION DE LA CARTOUCHE DE L'INVERSEUR l'inverseur (2) et vissez-le sur le corps de robinetterie Ajoutez du lubrifiant à base de silicone au joint torique (2) brute.
-
Página 21: Réglage De La Butée De Température Maximale
Instructions d’installation - série 75P Réglage de la butée de température maximale Chaud Froid IMPORTANT: La butée de température maximale sert à limiter la quantité Placez la manette sur la tige (consultez l'étape 4C à la d’eau très chaude disponible. Ainsi, pour autant que la butée page 8) et tournez-la dans le sens inverse à... - Página 22 Instructions d’installation - série 75P Installation des pièces de finition Installation du manchon de finition Installation de la plaque de finition Insérer l'entretoise (3) dans le manchon (1) et le pousser Installation dans un mur fini d’une épaisseur maximale de 1 vers l'avant.
- Página 23 Instructions d’installation - série 75P Possibilité d’ébouillantage ou de choc thermique pouvant causer des lésions en raison d’une inversion de la circulation de l’eau si la sortie de la douche est bloquée ou limitée (p. ex. : circulation bloquée par la commande d’arrêt sur la pomme de douche).
- Página 24 Hoja de referencia para la manija desviadora Water Flow For 3 Function Diverter / Flujo de agua para Desviadores de 3 posiciones / Écoulement de l’eau pour les inverseurs à 3 positions 1st Position 3rd Position 2nd Position * 1 ª posición Outlet 1 2 ª...
- Página 25 T75P598 & T75P698 Models / Modelos / Modèles RP100385 BackPlate & Screws Placa trasera y tornillos Plaque arrière et vis RP90253p RP100386 Trim Nut Valve Seal Tuerca del accesorio Sello de la válvula Écrou de finition Joint de valve RP49088 Spacer Separadores Piéce D’espacement...
- Página 26 RP100160p Thick Wall Installation Kit Juego de piezas para la instalación en paredes gruesas Trousse d’installation pour mur épais For finished wall thickness over 1 1/8” up to 2 1/8” (Order Separately) Para paredes acabadas de un grosor mayor de 1 1/8” hasta 2 1/8”...
- Página 27 92785 Rev. A...
- Página 28 Brizo Kitchen & Bath Company Product Service 55 E. 111th Street Indianapolis, IN 46280 92785 Rev. A...
- Página 30 Después de la instalación, verifique que la perilla para el control de la 1-877-345-BRIZO. Esta válvula está diseñada para reducir el riesgo de lesión por cambios de temperatura en la válvula está ajustada para que cambios de presión y de temperatura del agua que entra o por los cambios de presión del agua que comúnmente son...