Tabla de contenido
Publicidad
Idiomas disponibles
Idiomas disponibles
Enlaces rápidos
INSTRUCTION MANUAL
Save this manual for future reference
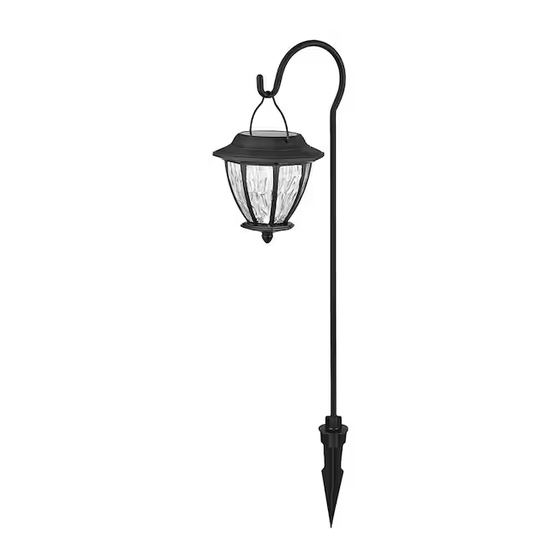
4-PACK SOLAR LED LANTERN LIGHTS
SKU # 986353
UPC # 873046001917
Thank you for purchasing this Hampton Bay solar light product.
This product has been manufactured with the highest standards
of safety and quality. The finish of this product is weather
resistant but over time will naturally weather and fade.
Questions, Problems, Missing Parts? Before returning to your
local Home Depot, please call our Customer Service Team at 1-
877-527-0313. Please reference the SKU # and keep your
receipt for Proof of Purchase.
1
Publicidad
Tabla de contenido
Solución de problemas

Manuales relacionados para HAMPTON BAY 986353


Resumen de contenidos para HAMPTON BAY 986353
- Página 1 4-PACK SOLAR LED LANTERN LIGHTS SKU # 986353 UPC # 873046001917 Thank you for purchasing this Hampton Bay solar light product. This product has been manufactured with the highest standards of safety and quality. The finish of this product is weather resistant but over time will naturally weather and fade.
-
Página 2: Package Contents
PACKAGE CONTENTS Part Quantity Description Pendant Hanging Ring Top Housing Diffuser Lens Adaptor Plastic Pole Metal Hanger Metal Pole Ground Spike BEFORE YOU START How solar lights work: Solar light has a solar panel that converts sunlight into electricity. During the day, the electricity converted by the solar panel is stored in the rechargeable battery. - Página 3 ASSEMBLY AND INSTALLATION INSTRUCTIONS No tools required for assembly and installation. Hanging Style Assembly Step 1 At the bottom of top housing (1), pull off isolation strip. (FIG.1) ⑴ Step 2 FIG. 1 Twist and secure hanging ring (2), diffuser (3) and lens (4) to top housing (1).
- Página 4 Standing Style Assembly Step 1 Similar to Step 1 and Step 2 in Hanging Style Assembly section, assemble light fixture first. Step 2 Replace decorative pendant (5) with adaptor (9). Connect pole (10) to the ⑼ light fixture. Step 3 ⑽...
-
Página 5: Replacing The Battery
REPLACING THE BATTERY For best performance, replace with rechargeable 1.2V Ni-CD battery every year or when performance diminishes. Step 1 Twist and remove lens (4) and diffuser (3) from top housing (1). (FIG.4) ⑴ ⑶ ⑷ FIG. 4 Step 2 Push the release tab and remove the battery compartment cover. -
Página 6: Troubleshooting And Tips
TROUBLESHOOTING AND TIPS If your solar light does not turn on at night or its nightly run time is shorter, it may be caused by one of the following conditions: 1. Battery is not fully charged. Make sure the solar light is located in an area where it can receive the maximum amount of full, direct sunlight everyday. -
Página 7: Replacement Parts
REPLACEMENT PARTS Part Description ⑴ Top Housing (including ⑵, ⑾ and ⑿) ⑵ Hanging Ring ⑶ Diffuser ⑷ Lens ⑸ Pendant ⑹ Metal Hanger ⑺ Metal Pole ⑻ Ground Spike ⑼ Adaptor ⑽ Plastic Pole ⑾ Rechargeable Battery ⑿ Battery Compartment Cover ⑼... - Página 8 LIMITED WARRANTY The Manufacturer warrants this product to be free from defects in materials and workmanship for a period of two (2) years from date of purchase. This warranty applies only to the original consumer purchaser and only to products used in normal use and service.
- Página 9 4 LANTERNES SOLAIRES À DEL UGS : 985353 CUP : 873046001917 Merci d’avoir acheté cette lampe solaire Hampton Bay. Cette lampe a été fabriquée selon les normes de sécurité et de qualité les plus strictes. Le fini de cette lampe résiste aux intempéries, mais avec le temps, il finira par s’altérer et se décolorer.
-
Página 10: Contenu De La Boîte
CONTENU DE LA BOÎTE Pièce Description Quantité Pendentif Anneau de suspension Boîtier supérieur Diffuseur Lentille Adaptateur Poteau de plastique Crochet de métal Poteau de métal Piquet de terre AVANT DE COMMENCER Principe de fonctionnement des lampes solaires: La lampe solaire est munie d’un panneau solaire qui convertit la lumière du soleil en électricité. - Página 11 fonctionnement pendant la nuit. L’endroit choisi ne doit pas se trouver à proximité d’autres sources d’éclairage nocturne, par ex. des lampadaires ou des lampes de porche. Ces sources de lumière peuvent empêcher l’allumage automatique des lampes solaires. DIRECTIVES D’ASSEMBLAGE ET D’INSTALLATION Aucun outil nécessaire pour l’assemblage et l’installation.
- Página 12 Étape 5 Accrochez la lanterne au crochet. (FIG.2) ⑹ ⑵ ⑴ ⑶ ⑺ ⑷ ⑸ ⑺ ⑻ FIG. 2 12 ...
- Página 13 Assemblage de lanterne sur poteau Étape 1 Suivez les Étape 1 et Étape 2 de la section Assemblage pour lanterne suspendue, pour assembler d’abord la lanterne. Étape 2 Remplacez le pendentif décoratif (5) ⑼ par l’adaptateur (9). Assemblez le poteau (10) et la lanterne. Étape 3 ⑽...
-
Página 14: Remplacement De La Batterie
REMPLACEMENT DE LA BATTERIE Pour un fonctionnement optimal, installez une nouvelle batterie rechargeable ni-cad de 1.2 V tous les ans ou lorsque l’éclairage diminue. Étape 1 Faites tourner la lentille (4) et le diffuseur (3) pour les retirer du ⑴ boîtier supérieur (1). - Página 15 DÉPANNAGE Si la lampe solaire ne s’allume pas le soir ou si sa durée de fonctionnement pendant la nuit raccourcit, cela peut être dû à plusieurs causes 1. La batterie n’a pas été entièrement rechargée. La lampe solaire doit être placée là où elle peut chaque jour recevoir la quantité...
-
Página 16: Pièces De Rechange
PIÈCES DE RECHANGE Pièce Description ⑴ Boîtier supérieur (avec ⑵, ⑾ et ⑿) ⑵ Anneau de suspension ⑶ Diffuseur ⑷ Lentille ⑸ Pendentif ⑹ Crochet de métal ⑺ Poteau de métal ⑻ Piquet de terre ⑼ Adaptateur ⑽ Poteau de plastique ⑾... -
Página 17: Garantie Limitée
GARANTIE LIMITÉE Le fabricant garantit cet article contre tout vice de fabrication pendant une durée de deux ans à partir de la date d’achat. Cette garantie n’est valable que pour le premier acheteur et ne couvre que les lampes utilisées en service normal. Si cette lampe s’avère défectueuse, la seule obligation du fabricant, et votre seul recours, se limite à... - Página 18 FAROLES SOLARES LED (JUEGO DE 4) SKU # 986353 UPC # 873046001917 Gracias por comprar esta lámpara solar Hampton Bay. Este producto ha sido fabricado según las normas más altas de seguridad y calidad. El acabado del producto es resistente al clima, pero se desgastará...
-
Página 19: Contenido Del Paquete
CONTENIDO DEL PAQUETE Cantidad Descripción Pieza Colgante Aro para colgar Cubierta superior Difusor Lente Adaptador Poste de plástico Soporte colgante de metal Poste de metal Estaca para tierra ANTES DE EMPEZAR Funcionamiento de las lámparas solares: Las lámparas solares cuentan con un panel solar que convierte la luz del sol en electricidad. -
Página 20: Instrucciones De Ensamblaje Y De Instalación
cual, a su vez, acortará las horas de funcionamiento durante la noche. Asegúrese de que el lugar elegido no se encuentre cerca de otras fuentes de luz nocturna como las luces de la calle o las luces del porche. La presencia de estas fuentes de luz puede ocasionar lámparas solares... - Página 21 soporte colgante en el hoyo central de la estaca para tierra (8). (FIG.2) Paso 5 Cuelgue el accesorio de luz del soporte colgante. (FIG.2) ⑹ ⑵ ⑴ ⑶ ⑺ ⑷ ⑸ ⑺ ⑻ FIG. 2 21 ...
- Página 22 Ensamblaje para el estilo de pie Paso 1 Similar a los pasos 1 y 2 de la sección Ensamblaje para el estilo colgante. Ensamble el accesorio de luz primero. Paso 2 Reemplace el colgante decorativo (5) ⑼ con el adaptador (9). Conecte el poste (10) al accesorio de luz.
-
Página 23: Recambio De La Batería
RECAMBIO DE LA BATERÍA Para lograr un mayor rendimiento, reemplace con una batería recargable Ni-CD de 1.2 V cada año o cuando disminuya el rendimiento. Paso 1 Desenrosque y saque el lente (4) y el difusor (3) de la cubierta superior (1). -
Página 24: Solución De Problemas
SOLUCIÓN DE PROBLEMAS Si en la noche la lámpara solar no se enciende o funciona por menos tiempo de lo habitual, es posible que ello se deba a una de las siguientes condiciones: 1. La batería no está completamente cargada. Asegúrese de que la lámpara solar esté... -
Página 25: Piezas De Repuesto
PIEZAS DE REPUESTO Pieza Descripción ⑴ Cubierta superior (incluye ⑵, ⑾ y ⑿) ⑵ Aro para colgar ⑶ Difusor ⑷ Lente ⑸ Colgante ⑹ Soporte colgante de metal ⑺ Poste de metal ⑻ Estaca para tierra ⑼ Adaptador ⑽ Poste de plástico ⑾... -
Página 26: Garantía Limitada
GARANTÍA LIMITADA El fabricante garantiza que este producto no presentará defectos en el material ni la mano de obra durante un plazo de dos (2) años a partir de la fecha de compra. La presente garantía se extiende únicamente al comprador original y únicamente a los productos utilizados según uso y servicio normales.