Tabla de contenido
Publicidad
Idiomas disponibles
Idiomas disponibles
Enlaces rápidos
Item #286-527
Model #AF-1032R
Item #1005 369 975
Model #AF-1032R/BK
Item #1005 662 273
Model #AF-1032R/CPR
Item #1005 662 278
Model #AF-1032R/WHT
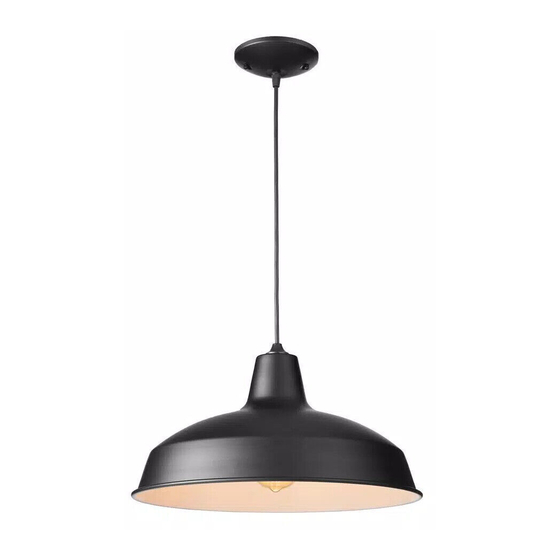
USE AND CARE GUIDE
1-LIGHT INTERIOR WAREHOUSE PENDANT
Questions, problems, missing parts? Before returning to the store,
8 a.m. - 7 p.m., EST, Monday - Friday, 9 a.m. - 6 p.m., EST, Saturday
We appreciate the trust and confidence you have placed in Hampton Bay through the purchase of this warehouse pendant.
We strive to continually create quality products designed to enhance your home. Visit us online to see our full line of
products available for your home improvement needs. Thank you for choosing Hampton Bay!
call Hampton Bay Customer Service
1-855-HD-HAMPTON
HAMPTONBAY.COM
THANK YOU
Item #1005 662 240
Model #AF-1032R/GRN
Item #1005 662 275
Model #AF-1032R/RED
Item #1005 662 231
Model #AF-1032R/LTB
Item #1005 662 280
Model #AF-1032R/DKB
Publicidad
Capítulos
Tabla de contenido
Solución de problemas

Manuales relacionados para HAMPTON BAY 286-527 AF-1032R


Resumen de contenidos para HAMPTON BAY 286-527 AF-1032R
- Página 1 THANK YOU We appreciate the trust and confidence you have placed in Hampton Bay through the purchase of this warehouse pendant. We strive to continually create quality products designed to enhance your home. Visit us online to see our full line of...
-
Página 2: Tabla De Contenido
Table of Contents Table of Contents ......... 2 Tools Required ..........3 Safety Information ........ 2 Hardware Included ........3 Warranty ..........2 Package Contents ........4 What is Covered ........... 2 What is Not Covered ........2 Installation ........... 5 Care and Cleaning ....... -
Página 3: Pre-Installation
Pre-Installation PLANNING INSTALLATION Read all instructions before assembly. Before starting installation of this fixture or removal of a previous fixture, disconnect the power by turning off the circuit breaker or by removing the fuse at the fuse box. To avoid damaging this product, assemble it on a soft, non-abrasive surface such as carpet or cardboard. -
Página 4: Package Contents
Pre-Installation (continued) PACKAGE CONTENTS Part Description Quantity Canopy Wire 77 in. Cover Hex Nut Nipple Socket Shade... -
Página 5: Installation
Installation Removing the strain relief, cover Assembling the light fixture and hex nut □ Use a flathead screwdriver (not included) to loosen □ Pull the wire (B) through the hole in the center of the shade (G) until the shade (G) is over the nipple (E). and then remove the strain relief (GG) from the wire □... -
Página 6: Making The Electrical Connections
Installation (continued) Making the electrical connections □ The wire (B) can be raised and lowered through the canopy (A) until the desired height is achieved. □ Once the desired height is achieved, pull the extra wire (B) through the canopy (A) and use a flathead screwdriver to tighten the strain relief (GG) against the canopy (A) to secure the wire (B) in place. -
Página 7: Care And Cleaning
Care and Cleaning □ Clean the fixture with a soft, dry cloth. □ Do not use any cleaners with chemicals, solvents or hash abrasives. CAUTION: Before attempting to clean the fixture, disconnect the power to the fixture by turning the breaker off or removing the fuse from the fuse box. - Página 8 Questions, problems, missing parts? Before returning to the store, call Hampton Bay Customer Service 8 a.m. - 7 p.m., EST, Monday - Friday, 9 a.m. - 6 p.m., EST, Saturday 1-855-HD-HAMPTON HAMPTONBAY.COM Retain this manual for future use.
-
Página 9: Pendiente Para Almacen Para Interiores De 1 Luz
GRACIAS POR TU COMPRA Agradecemos la confianza que ha tenido en Hampton Bay a traves de de la compra de este pendiente para almacen para interiores. Nos esforzamos para continuamente crear productos de calidad diseñ ados para mejorar tu hogar. Visí tanos por Internet para ver nuestra lí... -
Página 10: Í Ndice
Í ndice Í ndice ..........10 Herraminentas Necesarias ......11 Información de Seguridad ....10 Requiere de Hardware ....... 11 Garantí a ..........10 Contenido del Paquete ......12 Lo que esta Cubierto ........10 Lo que (no) esta Cubierto ......10 Instalación ..........13 Mantenimiento y Limpieza ....15 Pre-Instalación ........ -
Página 11: Planificació N De La Instalatió N
Pre-Instalatión PLANIFICACIÓ N DE LA INSTALACIÓ N Lee todas las instrucciones antes de ensamblar. Antes de comenzar la instalació n o de quitar la instalació n anterior, desconecte la alimentacion apagando el interruptor del circuito o quitando el fusible en la caja de fusible. Para evitar dañ ar el artí... -
Página 12: Pre-Instalación
Pre-Instalación (continuación) CONTENIDO DEL PAQUETE Parte Descripció n Cantidad Dosel Cable 77 in. Cubierta Tuerca Hexagonal Entrerrosca Portalá mpara Pantalla... -
Página 13: Instalación
Instalación Quite el retenedor del cable, Lá mpara accesorio d’assemblage cubierta, y tuerca hexagonal □ Use un destornillador de cabeze plana (no incluido) □ Estire el cable (B) a travé s del agujero que hay en el para aflojar y entonces quite el retenedor de cable (GG) centro de la pantalla (G) hasta que la pantalla (G) del cable (B). -
Página 14: Asegurar El Dosel
Instalación (continuación) Hacer las conexiones elé ctricos □ El cable (B) puede ser levantado y descendido travé s del dosel (A) hasta que se alcance la la altura deseada. □ Una vez que se haya alcanzado la altura deseada, estire el exceso de cable (B) a travé s del dosel (A) y use un destornillador de cabeze plana para apretar el retenedor de cable (GG) contra el dosel (A) para fijar el cable (B) en su lugar. -
Página 15: Mantenimiento Y Limpieza
Mantenimiento y Limpieza □ Limpie el accsesorio con un pañ o suave y seco. □ No use limpiadores con productos quí micos, solventes o abrasivos para hachí s. PRECAUCIÓN: Antes de intentar limpiar el accesorio, desconecte la alimentació n del accesorio apagando el interruptor o quitando el fusible de la caja de fusibles. - Página 16 Preguntas, problemas o piezas faltantes? Antes de regresar a la tienda, llama al Servicio al Cliente de Hampton Bay de Lunes a Viernes entre 8 a.m. y 7 p.m., El Sá bado entre 9 a.m. y 6 p.m., (hora del Este de EE. UU.) 1-855-HD-HAMPTON HAMPTONBAY.COM...
- Página 17 MERCI Nous vous remercions de la confiance que vous avez place en Hampton Bay en achetant ce suspension d’inté rieur pour entrepô t. Nous nous efforç ons en permanence de cré er des produits de qualité conç us pour perfectionner votre maison.
-
Página 18: Table Des Matiè Res
Table des Matiè res Table des Matiè res ......... 18 Outils Requis ..........19 Consignes de Sé curité ........18 Maté riel Inclus .......... 19 Garantie ............18 Contenus de l’Emballage ......20 Ce qui est couvert ........18 Installation ........... 21 Ce qui est couvert (et pas) ...... -
Página 19: Pré-Installation
Pré-Installation PLANIFICATION DE L’INSTALLATION Lisez toutes les instructions avant de procéder à l’assemblage. Avant de commencer à installer ce luminaire ou d’enlever l’ancien luminaire, dé connectez le courant en eteignant le disjoncteur ou en enlevant le fusible correspondent du coffret à fusibles. -
Página 20: Contenus De L'emballage
Pré-Installation (suite) CONTENUS DE L’EMBALLAGE Piè ce Description Quantité Pavillon Câ ble 77 pouce Capuchon É crou Hexagonal Embout Fileté Douille Abat-jour... -
Página 21: Installation
Installation Enlever le bague anti-traction, Assemblage de l’luminaire capuchó n, et é crou hexagonal □ Utiliser un tournevis à tê te plate (non incluse) pour □ Tirer le câ ble (B) par le trou situé au centre de l’abat- desserrer et puis enlever le bague anti-traction (GG) jour (G) jusqu’... -
Página 22: Faire Les Connexions É Lectriques
Installation (suite) Faire les connexions é lectriques □ Le câ ble (B) peut ê tre é levé et abaissé à travers la pavillon (A) jusqu 'à atteindre la hauteur souhaité e. □ Une fois la hauteur dé siré e atteinte, tirer le extra câ ble (B) à... -
Página 23: Entretien Et Nettoyage
Entretien et Nettoyage □ Nettoyer la lampe avec un linge doux, sec. □ N’utilisez jamais de nettoyants contenant des produits chimiques, des solvants ou des abrasifs. AVERTISSEMENT: Débrancher l’alimentation électrique avant de nettoyer le luminaire en enlevant les fusibles concernés ou en désactivant le disjoncteur. - Página 24 Questions, problè mes, piè ces manquantes? Avant de retourner au magasin, veuillez communiquer avec le service à la clientè le Hampton Bay entre 8h00 et 19h00 (HNE) du lundi au vendredi, entre 9h00 et 18h00 (HNE) du samedi 1-855-HD-HAMPTON HAMPTONBAY.COM...