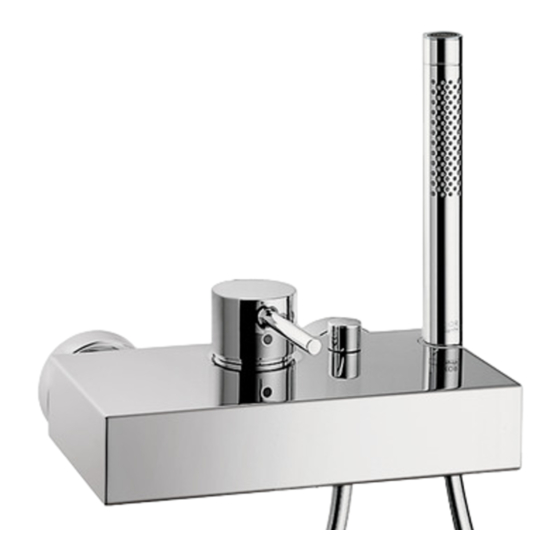
Hansgrohe AXOR Starck 10402001 Instrucciones De Montaje
Ocultar thumbs
Ver también para AXOR Starck 10402001:
- Manual del usuario (16 páginas) ,
- Instrucciones de instalación/garantía (16 páginas)
Resumen de contenidos para Hansgrohe AXOR Starck 10402001
- Página 1 Installation / User Instructions / Warranty Instructions de montage / Mode d'emploi / Garantie Instrucciones de montaje / Manejo / Garantía Starck 10402001...
-
Página 2: Technical Information
* Vous devez connaître et respecter tous les codes de plom- berie locaux applicables pour le réglage de la température Installation Considerations du chauffe-eau. • For best results, Hansgrohe recommends that this À prendre en considération pour unit be installed by a licensed, professional plumber. l’installation •... -
Página 3: Datos Tecnicos
Español Datos tecnicos Tools Required / Outiles Utiles / Herramientas Útiles Presión recomendada en servicio 15 - 75 PSI Presión en servicio max. 145 PSI Temperatura recomendada del 120° - 140° F* agua caliente Temperatura del agua caliente max. 176° F* Caudal - surtidor 5.75 GPM Caudal máximo - teleducha... - Página 4 2¼" 49¼" 3"-3⅛" 5⅝"-5⅞" 5⅞" 6¾"-6⅞" 9¼"...
- Página 5 Rough in / Pièce intérieure / Piezas interiores 5⅞" English Français Español Install ½" NPT female fittings, Installez deux raccords femelles Instale dos conexiónes hembras recessed ⅜" behind the surface of filetés NPT de ½ po NPT, encastré NPT de ½", embutidan ⅜" detrás the finished wall, for the hot and à...
- Página 6 Installation / Installation / Instalación 1 ⅜ " " 5 ⅞ 24 mm English Français Español Wrap the threads on the s-unions Enveloppez les filets des raccords Envuelva las roscas de las juntas with plumber's tape. unions en S avec du ruban de tipo s con cinta de plombería.
- Página 7 English Français Español Seal the wall around the Scellez le mur autour Selle la pared alrededor connectors with water- du raccord à l’aide d’un de las juntas tipo s con un proof sealant. agent d’étanchéité. sellador impermeable. Position the mixer over the s-unions. Placez le mélangeur sur les rac- Coloque el mezclador sobre las cords unions en S.
- Página 8 English Français Español Place the hose washer in one end Placez la rondelle de tuyau dans Coloque la arandela de la of the hose. Screw this end to the une extrémité du tuyau. Vissez manguera en un extremo de esta. handshower outlet.
- Página 9 Set the High Temperature Limit Stop (optional) / Réglage de la butée limite d’eau chaude (en option) / Ajuste el tope de límite de alta temperatura (opcional) 60° C 10° C 3 Bar 140° F 50° F 44 PSI 4 mm 3.6 ft-lb 5 Nm 4 mm...
- Página 10 Replacement Parts / Pièces détachées / Repuestos 10490000 96338000 96395000 04304000 96461000 94140001 96466000 92730000 94246000 96157000 95008000 96467000 97467000 94077000 94074000 28282000 check valve clapet anti-retour válvula antirretorno...
- Página 11 User Instructions / Instructions de service / Manejo ouvert fermé abierto cerrar...
- Página 12 Maintenance / Entretien / Mantenimiento...
- Página 13 Do not spray cleaners directly onto the product as drops could enter openings and gaps and cause damage. When • using spray cleaners, spray the cleaner onto a soft cloth or sponge. Always rinse your Hansgrohe product thoroughly with clear water and polish dry with a soft cloth after cleaning. • Important •...
-
Página 14: Recomendación De Limpieza Para Los Productos De Hansgrohe
No rocíe limpiadores directamente sobre el producto, ya que podrían caer gotas sobre las aberturas y espacios y causar daños. Cuando use limpiadores en spray, rocíe el limpiador sobre un paño suave o esponja. • Siempre enjuague su producto Hansgrohe con agua limpia y séquelo y lústrelo con un paño suave después de la limpieza. Importante •... - Página 15 Hansgrohe will replace at no charge for parts only or, at its option, replace any product or part of the product that proves defective because of improper workmanship and/or material, under normal installation, use, service and maintenance. If Hansgrohe is unable to provide a replacement and repair is not practical or cannot be made in timely fashion, Hansgrohe may elect to refund the purchase price in exchange for the return of the product.
-
Página 16: Exclusions And Limitations
Prior to installing, always carefully study the enclosed instructions on the proper installation and the care and maintenance of this product. If you have questions at any time about the use, installation or performance of your Hansgrohe product, or this warranty, please write us or call us toll-free at 800-334-0455.


