Tabla de contenido
Publicidad
Idiomas disponibles
Idiomas disponibles
Enlaces rápidos
USER MANUAL
MODEL:B0367STHR
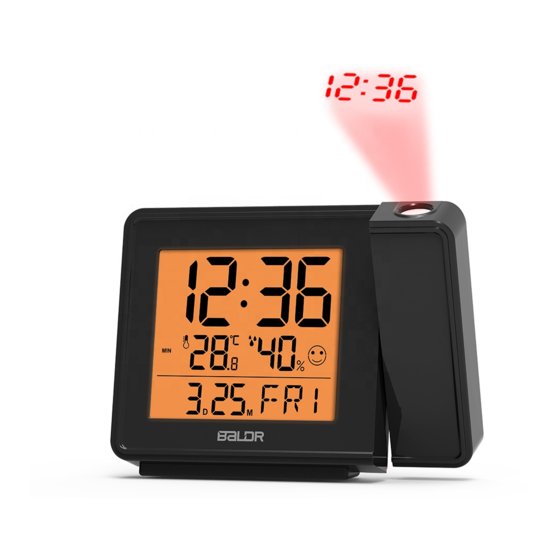
RADIO-CONTROLLED PROJECTION
ALARM CLOCK
We hereby thank you for purchasing Baldr Radio-Controlled Projec-
tion Alarm Clock .We design and manufacture the item using inno-
vative components and techniques to enable the perfect display of
time by this device.It is also equipped with backlight & projection
functions.Please read the instructions carefully to become familiar
with the properties and functions properly before usage.
English
Deutsche
Français
Italiano
Español
Publicidad
Tabla de contenido

Manuales relacionados para BALDR B0367STHR

Resumen de contenidos para BALDR B0367STHR
- Página 1 MODEL:B0367STHR RADIO-CONTROLLED PROJECTION ALARM CLOCK We hereby thank you for purchasing Baldr Radio-Controlled Projec- tion Alarm Clock .We design and manufacture the item using inno- vative components and techniques to enable the perfect display of time by this device.It is also equipped with backlight & projection functions.Please read the instructions carefully to become familiar...
- Página 2 CONTENTS English - - - - - - - - - - - - - - - - - - - - - - - - - - - - - - - - - - - - - - - - - - - 03~15 Deutsche - - - - - - - - - - - - - - - - - - - - - - - - - - - - - - - - - - - - - - - - - - - 16~29 Français - - - - - - - - - - - - - - - - - - - - - - - - - - - - - - - - - - - - - - - - - - - 30~42 Italiano...
-
Página 3: Product Overview
Product Overview Front View 1. Time Zone 8. Low battery indicator 2. AM/PM Selectable 9. Indoor Temperature 3. Current Time 10. Indoor Humidity 4. RCC indicator 11. Comfort Level Indicator 5. DST 12. Calendar Display / Alarm 6. Snooze indicator Display 7. - Página 4 Product Overview Front View 1. Focus Adjustment 4. Projection On/Off 2. Battery Compartment 5. DC Hole 3. Alarm On/Off Top View 1. Focus Adjustment 2. Snooze/Dimmer...
-
Página 5: Side View
Side View 1. “SET”Button 4. “ ”Button Short press to switch Short press to switch between month/date between calendar display display and year display and alarm time display Long press to enter into Long press to enter into time setting alarm setting 2. - Página 6 Note: The default year is 2020, if the weekday display is incorrect . Please confirm year was set correctly. (for manual setting only) The CR2032 cell battery is for memory function (included).Please do not used as power supply. If you need to replace the cell bat- tery, please take out the part device as shown in the figure below, load new battery matching the polarity (...
-
Página 7: Package Content
Measures indoor temperature(C/F) and humidity Projection focus adjustable Projection rotate function Calendar function Weekdays in 7 languages: GER (German), ENG (English), FRE (French),ITA(Italian), SPA(Spanish),DUT(Dutch),DRN(Denmark) Indoor temperature range:0℃~50℃ (32℉~122℉) Indoor humidity range:1%-99%RH Max/min record of temperature & humidity Comfort level indication(GOOD;DRY;HUMID) RCC in WWVB/DCF/MSF DST function Orange backlight with dimmer... - Página 8 MAIN UNIT SETUP When power on or reset, LCD will full display for 3 seconds with “BI” sound. The default value is : Weekday Time Weekday Time Language Display Language Key tone Display (WWVB/ (WWVB/ (DCF) (DCF) MSF) MSF) 12HR 24HR Tempera- Tempera-...
- Página 9 There are daily automatic RCC receiving at 1:00AM,2:00AM, 3:00AM, 4:00AM,5:00AM. It will first start receiving DCF/ WWVB/MSF time at 1:00AM, 2:00AM, 3:00AM each day. If DCF/ WWVB/MSF time is not received till 3:00AM, it will start receiving again at 4:00AM and 5:00AM. If the time is not successfully received at 5:00AM, there will be no receiving the day, It will start searching for signal at 1:00AM the next day.
- Página 10 Press and hold “SET ” button to enter into setting, press “SET ’’ button to skip setting steps or go to the next setting option,the setting data will be flashing in 1Hz. Press “ SET ’’ button to select Weekday Language. Press the “▲/C/F”...
- Página 11 Press “ SET ’’ button to select Hours. Press “▲/C/F” or “▼/ RCC” button to adjust the value. Press “ SET ’’button to select Minutes. Press “▲/C/F”or“▼/RCC” button to adjust the value. Press“ SET ’’button to confirm and exit. During the setting,if no operation for 20 seconds, it will automati- cally save and exit setting.
-
Página 12: Alarm Function
ALARM FUNCTION SET ALARM TIME: Press and hold “ ” button to enter into alarm time setting mode. Press “▲/C/F” or “▼/RCC” button to adjust data; press and hold “▲/C/F” or“▼/RCC”button will quickly change the data by 8 steps. The setting order is: Hour → Minute→Exit. During setting, touch top button to save and exit setting During setting,If no operation for 20 seconds, it will automatically save and exit setting. -
Página 13: Backlight Function
PROJECTION FUNCTION Slide the switch on the back of unit to turn on/off projection. ● Press the button to reverse the projection data with 90 degree ● from 0°→90°→180°→270°→0° Press and hold the button to switch the brightness of the ●... - Página 14 MAX AND MIN RECORD Press “MEM’’ to have maximum temperature and humidity(within 24 hours), the value will display for 5 seconds. Press “MEM’’ second time to have the minimum temperature and humidity(within 24 hours), the value will display for 5 seconds. Press “MEM’’third time will return to standard mode.
- Página 15 Do not dispose of this product as unsorted municipal waste. Collec- tion of such waste separately for special treatment is necessary. Warranty BALDR provides a 1-year limited warranty on this product against manufacturing defects in materials and workmanship. Warranty service can only be performed by our authorized service center.
- Página 16 Produkt-Übersicht Vorderansicht 1. Zeitzone 8. Anzeige für schwache 2. AM/PM wählbar Batterie 3. Aktuelle Zeit 9. Innentemperatur 4. RCC-Anzeige 10. Raumluftfeuchtigkeit 5. DST 11. Komfortniveau-Anzeige 6. Schlummer-Indikator 12. Kalenderanzeige / 7. Max/Min-Aufzeichnungen Alarmanzeige für Temperatur und 13. Alarmanzeige Luftfeuchtigkeit 14. Wochentag-Anzeige...
-
Página 17: Ansicht Von Oben
Rückansicht 1. Fokus-Anpassung 4. Projektion ein/aus 2. Batteriefach 5. DC-Loch 3. Alarm ein/aus Ansicht von oben 1. Projektionslinse 2.Snooze/Dimmer... - Página 18 Seitenansicht 4. “ "Schaltfläche 1. "SET"-Taste Kurz drücken, um zwischen Kurz drücken, um zwischen Kalenderanzeige und der Monats-/Datumsanzeige Alarmzeitanzeige und der Jahresanzeige umzuschalten umzuschalten Lang drücken, Lang drücken, um in die Alarmeinstellung zu um in die Zeiteinstellung zu gelangen gelangen 2.
- Página 19 Anmerkung: 1. Das Standardjahr ist 2020, wenn die Wochentagsanzeige nicht korrekt ist. Bitte bestätigen Sie, dass das Jahr korrekt eingestellt wurde. (nur bei manueller Einstellung) 2. Die CR2032-Zellenbatterie ist für die Speicherfunktion (im Lieferumfang enthalten). Bitte nicht als Stromversorgung verwenden. Wenn Sie die Zellenbatterie austauschen müssen, nehmen Sie bitte das Teilgerät wie in der Abbildung unten gezeigt heraus, legen Sie eine neue Batterie passend zu polarity (+and-) ein.
-
Página 20: Erste Schritte
4. Projektionsfokus einstellbar 5. Projektions-Drehfunktion 6. Kalender-Funktion 7. Wochentags in 7 Sprachen: GER (Deutsch), ENG (Englisch), FRE (Französisch),ITA(Italienisch), SPA(Spanisch),DUT (Niederländisch),DRN(Dänemark) 8. Innentemperaturbereich:0℃~50℃(32℉~122℉) 9. Raumluftfeuchtigkeitsbereich:1%-99%RH 10. Max/Min-Aufzeichnung von Temperatur und Feuchtigkeit 11. Komfortniveau-Anzeige(GUT;TROCKEN;FEUCHTIG) 12. RCC im WWVB/DCF/MSF 13. DST-Funktion 14. Orange Hintergrundbeleuchtung mit Dimmer 15. - Página 21 EINRICHTUNG DER HAUPTEINHEIT Beim Einschalten oder Zurücksetzen wird die LCD-Anzeige 3 Sekunden lang mit einem "BI"-Ton voll angezeigt. Der Standardwert ist : WochentagSprache Wochentag Zeit-Anzei Zeit-Anzeige Tastenton (WWVB/MSF) Sprache(DCF) ge(WWVB (DCF) /MSF) 12HR 24HR Temperatur-Einheit Temperatur RCC- Zeit zone Datum- (DCF/MSF) -Einheit Funktion...
- Página 22 3. Drücken Sie im normalen Zeitmodus die SET-Taste, um den RCC-Signalempfang zu aktivieren. 4. Drücken Sie während des RCC-Empfangs die Taste"SET '', um den RCC-Empfang zu beenden. 5. Die Zeit wird nach Erhalt der RCC in die aktuelle Zeit der entsprechenden Zeitzone umgewandelt (außer Zeitzone 0).
- Página 23 Sprachen auszuwählen: ENG、GER、ITA、FRE、FRE、DUT、 SPA、DAN wahlweise .(Englisch/Deutsch/Italienisch/ Französisch/Niederländisch/Spanisch/Dänisch), Standardeinstellung :GER(DCF),ENG( WWVB/MSF) 4. Drücken Sie die SET-Taste, um den Tastenton EIN/AUS zu wählen, drücken Sie die Taste "▲/C/F" oder "▼/RCC", um die Standardeinstellung zu wählen: Tastenton EIN 5. Drücken Sie die SET-Taste, um die Temperatureinheit zu wählen. Drücken Sie die Taste "℉/C/F"...
- Página 24 : 24-Stunden-Format(DCF)12-Stunden-Format(MSF/WWVB) 14. Drücken Sie die Taste "SET ", um Stunden zu wählen. Drücken Sie die Taste "▼/C/F" oder "▼/RCC", um den Wert einzustellen. 15. Drücken Sie die Taste "SET ", um Minuten zu wählen. Drücken Sie die Taste "▲/C/F" oder "▼/RCC", um den Wert einzustellen. 16.
-
Página 25: Alarmzeit Einstellen
ALARMFUNKTION ALARMZEIT EINSTELLEN: 1. Drücken und halten Sie die Taste " ", um in den Weckzeit- Einstellmodus zu gelangen. 2. Drücken Sie die Taste "▼/C/F" oder "▼/RCC", um die Daten anzupassen; drücken und halten Sie die Taste"▲/C/F"oder"▼/ RCC",um die Daten schnell um 8 Schritte zu ändern. 3. - Página 26 3. Wenn der Alarm ertönt, hält der aufsteigende "Bibi"-Alarmton 2 Minuten lang an, wenn keine Bedienung erfolgt. PROJEKTIONSFUNKTION ● Schieben Sie den Schalter auf der Rückseite des Geräts, um die Projektion ein-/auszuschalten. ● Drücken Sie den Knopf, um die Projektionsdaten mit 90 Grad von 0°→90°→180°→270°→0°...
- Página 27 Anmerkung: Die Ablesung ist genauer, wenn sie nach dem Einschalten eine halbe Stunde lang stillsteht. MAXIMAL- UND MINIMALEINTRAG 1. Drücken Sie "MEM'', um die maximale Temperatur und Luftfeuchtigkeit (innerhalb von 24 Stunden) zu erhalten; der Wert wird 5 Sekunden lang angezeigt. 2.
- Página 28 Entsorgen Sie dieses Produkt nicht als unsortierten Siedlungsabfall. Die getrennte Sammlung solcher Abfälle zur Sonderbehandlung ist notwendig. Garantie BALDR bietet eine 1-jährige beschränkte Garantie auf dieses Produkt gegen Herstellungsfehler in Material und Verarbeitung. Der Garantieservice kann nur von unserem autorisierten Servicezentrum durchgeführt werden. Der datierte Original- Kaufbeleg muss uns oder unserem autorisierten Servicezentrum auf Anfrage als Kaufbeleg vorgelegt werden.
- Página 29 Umständen ergeben. Um Garantieleistungen zu erhalten, muss sich der Käufer mit dem von BALDR benannten Servicezentrum in Verbindung setzen, um das Problem zu ermitteln und das Serviceverfahren durchzuführen. Vielen Dank für Ihre Wahl der BALDR-Produkte!
-
Página 30: Vue De Face
Aperçu des produits Vue de face 1. Fuseau horaire 8. Indicateur de batterie faible 2. AM/PM sélectionnable 9. Température intérieure 3. Heure actuelle 10. Humidité intérieure 4. RCC indicateur 11. Indicateur du niveau de 5. DST confort 6. Indicateur de répétition de 12. -
Página 31: Vue De Dessus
Vue de dos 1. Ajustement de la focalisation 4. Projection activée/ 2. Compartiment des piles désactivée 3. Alarme activée/désactivée 5. DC Hole Vue de dessus 1. Lentille de projection 2.Snooze/Dimmer... -
Página 32: Vue De Côté
Vue de côté 1. "Bouton"SET 4. “ "Bouton Brève pression pour passer Brève pression pour passer de de l'affichage du mois/date l'affichage du calendrier à à l'affichage de l'année l'affichage de l'heure d'alarme Longue pression pour entrer Longue pression pour entrer dans la programmation de dans le réglage de l'alarme l'heure... - Página 33 Note : 1. L'année par défaut est 2020, si l'affichage du jour de la semaine est incorrect . Veuillez confirmer que l'année a été définie correctement. (uniquement pour le réglage manuel) 2. La pile CR2032 est destinée à la fonction mémoire (incluse), mais ne doit pas être utilisée comme source d'alimentation.
-
Página 34: Contenu Du Paquet
6. Fonction calendrier 7. Les jours de la semaine en 7 langues : GER (allemand), ENG (anglais), FRE (français),ITA(italien), SPA(espagnol),DUT (néerlandais),DRN(Danemark) 8. Plage de température intérieure:0℃~50℃(32℉~122℉) 9. Plage d'humidité intérieure : 1 %-99 %HR 10. Enregistrement max/min de la température et de l'humidité 11. - Página 35 Jour de lasemaine Jour de la Affichage Affichage Tonalité Langue(WWVB/ semaine de l'heure de l'heure MSF) Langue(DCF) (WWVB/MSF) (DCF) 12HR 24HR Affichage Unité de Unité detempé Fonction Time zone de la date température rature(WWVB) (DCF) (DCF/MSF) 2020.01.01 ℃ ℉ Time zone Alarme Heure Format dela Format dela...
- Página 36 Remarque : ● Il quittera automatiquement la réception RCC lorsque l'alarme est effectuée pendant la réception RCC, vous pouvez répéter l'étape 3 pour entrer la réception du signal RCC après avoir éteint l'alarme. Affichage du symbole RCC : a. Lors de la réception du signal, l'icône RCC clignote avec "1HZ" b.
- Página 37 6. Appuyez sur la touche "SET " pour sélectionner le RCC. Appuyez sur la touche "▲/C/F" ou "▼/RCC" pour sélectionner OFF ou ON. Réglage par défaut : RCC ON. 7. Appuyez sur la touche "SET " pour sélectionner DST. Appuyez sur la touche "▲/C/F"...
- Página 38 17. Pendant le réglage, si aucune opération n'est effectuée pendant 20 secondes, il enregistre automatiquement et quitte le réglage. *Conseils : maintenez enfoncée la touche "▲/C/F"ou"▼/RCC" pour modifier rapidement la valeur par 8 étapes. Remarque : Il est possible de sélectionner 7 langues pour l'affichage en semaine : 、DUT、DRNFRE、SPA、ENGFRE、...
-
Página 39: Activer/Désactiver L'alarme
3. L'ordre de réglage est le suivant : Heure → Minute→Exit. 4. Pendant le réglage, appuyez sur le bouton du haut pour sauvegarder et quitter le réglage 5. Pendant le réglage, si aucune opération n'est effectuée pendant 20 secondes, il enregistre automatiquement et quitte le réglage. 6. -
Página 40: Fonction De Rétro-Éclairage
● Appuyez sur le bouton et maintenez-le enfoncé pour changer la luminosité de la projection. ● Maintenez le bouton "▲/C/F" enfoncé pour basculer les données de projection entre le temps et la température. ● Faites glisser l'interrupteur "focus" à l'arrière de l'appareil pour régler la mise au point de la projection. - Página 41 3. Appuyez sur "MEM" la troisième fois pour revenir au mode standard. 4. Appuyez et maintenez "MEM" pour effacer les enregistrements max et min et réactiver la mémoire. 5. Normalement, l'enregistrement Max et Min sera mis à jour toutes les 24 heures à 0h00. INDICATION DU NIVEAU DE CONFORT Humidité...
- Página 42 Garantie BALDR offre une garantie limitée d'un an sur ce produit contre les défauts de fabrication des matériaux et de la main-d'œuvre. Le service de garantie ne peut être effectué que par notre centre de service agréé. L'original de l'acte de vente daté doit être présenté...
-
Página 43: Vista Frontale
Panoramica del prodotto Vista frontale 1. Fuso orario 8. Indicatore di batteria scarica 2. AM/PM selezionabile 9. Temperatura interna 3. Indicatore di tempo 10. Umidità interna corrente 11. Indicatore del livello di 4. RCC comfort 5. DST 12. Display del calendario / 6. -
Página 44: Vista Posteriore
Vista posteriore 1. Regolazione della messa 3. Alarm On/Off a fuoco 4. Proiezione On/Off 2. Vano batteria 5. DC Foro Vista dall'alto 1. Obiettivo di proiezione 2. Snooze/Dimmer... -
Página 45: Vista Laterale
Vista laterale 1. "Pulsante"SET 4. “ "Pulsante Premere brevemente per Premere brevemente per passare dall'indicazione passare dalla visualizzazione del mese/data all'indicazione del calendario a quella dell'ora dell'anno dell'allarme Premere a lungo per entrare Premere a lungo per entrare nell'impostazione dell'ora nell'impostazione dell'allarme 5. -
Página 46: Caratteristiche
Nota: 1. L'anno di default è il 2020, se la visualizzazione dei giorni della settimana non è corretta. 2. Si prega di confermare che l'anno è stato impostato correttamente. (solo per l'impostazione manuale) 2. La batteria a celle CR2032 è per la funzione di memoria (inclusa). 3. -
Página 47: Contenuto Del Pacchetto
6. Funzione calendario 7. Giorni feriali in 7 lingue: GER (tedesco), ENG (inglese), FRE (francese),ITA(italiano),SPA(spagnolo),DUT(olandese),DRN (Danimarca) 8. Intervallo di temperatura interna:0℃~50℃(32℉~122℉) 9. Intervallo di umidità interna:1%-99%RH 10. Registrazione max/min di temperatura e umidità 11. Indicazione del livello di comfort(BUONO;ASCIUGATO;UMIDO) 12. RCC in WWVB/DCF/MSF 13. - Página 48 Giornoferiale Giorno feriale Visualizza Visua Tonodei Lingua(WWVB/ Lingua(DCF) zione del tempo lizzazione tasti MSF) (WWVB/MSF) deltempo(DCF) 12HR 24HR Visualizzazi Unità di Unità di Funzione Fuso orario one della temperatura temperatur (DCF) data (DCF/MSF) a (WWVB) 2020.01.01 ℃ ℉ Fuso orario Allarme Formatodata Formato...
- Página 49 Osservazione: Uscirà automaticamente dalla ricezione RCC quando l'allarme viene eseguito durante la ricezione RCC , è possibile ripetere il passo 3 per entrare nella ricezione del segnale RCC dopo aver spento l'allarme. Si prega di commutare la luminosità della retroilluminazione al 50% durante la ricezione dell'RCC.
- Página 50 5. Premere il tasto "SET" per selezionare l'unitàdi temperatura. Premere il tasto"▲/C/F" o"▼/RCC"per selezionare ℃ o ℉. Impostazione predefinita: ℃.(DCF/MSF) ℉(WWVB) 6. Premere il tasto "SET ''per selezionare l'RCC. Premere il tasto "▲/C/F" o "▼/RCC" per selezionare OFF o ON. Impostazione predefinita : RCC ON.
-
Página 51: Funzione Di Allarme
*Consigli: tenere premuto il tasto "▲/C/F"o"▼/RCC" per cambiare rapidamente il valore di 8 passi. Osservazione: Ci sono 7 lingue selezionabili per la visualizzazione nei giorni feriali: FRE、SPA、DRNFRE、SPA、ITA、DRN、DRN、 Italiano Francese Italiano Spagnolo Dani Lingua Tedesco olande marca Domenica FIGLIO SOLE ZONA FIGLIO Lunedì... -
Página 52: Attivare/Disattivare L'allarme
5. Durante l'impostazione, se non viene eseguita alcuna operazione per 20 secondi, salverà e uscirà automaticamente dall'impostazione. 6. L'allarme è attivo di default dopo aver impostato il tempo di allarme. Il simbolo dell'allarme viene visualizzato sullo schermo. ATTIVARE/DISATTIVARE L'ALLARME: 1. In modalità di visualizzazione dell'ora, premere il tasto " " per controllare tra l'ora dell'allarme e il calendario. -
Página 53: Funzione Di Retroilluminazione
● Tenere premuto il pulsante "▲/C/F" per commutare i dati di proiezione tra ora e temperatura. Far scorrere l'interruttore "focus" sul retro dell'unità per regolare la messa a fuoco della proiezione. FUNZIONE DI RETROILLUMINAZIONE ● Premere il tasto " " per accendere la retroilluminazione. ●... - Página 54 5. Normalmente, il record Max e Min si aggiorna ogni 24 ore alle ore 0:00. INDICAZIONE DEL LIVELLO DI COMFORT Umidità 1-39%RH (Troppo secca) Umidità 1-39%RH (Troppo secca) Umidità 76-99%RH(Troppo Umido) Precauzioni Non pulire nessuna parte del prodotto con benzene, diluente o altri prodotti chimici solventi.
- Página 55 Garanzia BALDR fornisce una garanzia limitata di 1 anno su questo prodotto contro difetti di fabbricazione neimateriali e nella lavorazione. Il servizio di garanzia può essere eseguito solo dal nostro centro di assistenza autorizzato. La fattura di vendita originale datata deve essere presentata su richiesta come prova di acquisto a noi, o al nostro centro di assistenza autorizzato.
-
Página 56: Vista Frontal
Resumen del producto Vista frontal 1. Zona horaria 8. Indicador de batería baja 2. AM/PM Seleccionable 9. Temperatura interior 3. Hora actual 10. Humedad interior 4. Indicador RCC 11. Indicador de nivel de confort 5. DST 12. Pantalla de calendario / 6. -
Página 57: Vista Trasera
Vista trasera 1. Ajuste de enfoque 3. Alarma On/Off 2. Compartimiento de la 4. Proyección On/Off batería 5. Agujero DC Vista superior 1. Lente de proyección 2. Snooze/Dimmer... -
Página 58: Vista Lateral
Vista lateral 1. Botón "SET" 4. “ "Botón Pulsación corta para cambiar Pulsación corta para cambiar entre la visualización del entre la pantalla del calendario mes/fecha y el año y la pantalla de la hora de la Pulsación larga para entrar alarma en la configuración de la hora Pulsación larga para entrar en... -
Página 59: Características
Nota: 1. El año por defecto es 2020, si la visualización del día de la semana es incorrecta. Por favor, confirme que el año fue configurado correctamente. (sólo para el ajuste manual) 2. La batería de la celda CR2032 es para la función de memoria (incluida). -
Página 60: Rcc En Wwvb/Dcf/Msf
6. Función de calendario 7. Los días de la semana en 7 idiomas: GER (alemán), ENG (inglés), FRE (francés),ITA(italiano),SPA(español),DUT (holandés),DRN(Dinamarca) 8. Rango de temperatura interior:0℃~50℃(32℉~122℉) 9. Rango de humedad interior:1%-99%RH 10. Máximo y mínimo registro de temperatura y humedad 11. Indicación del nivel de confort (BUENO, SECO, HUMEDO) 12. - Página 61 El valor por defecto es : Día de la semana Día de la Visualizac Pantalla Tono de Lenguaje semana ión de la hora de tiem po tecla (WWVB/MSF) Lenguaje(DCF) (WWVB/MSF) (DCF) 12HR 24HORAS Visualizaci ó Unidad de Unidad de Funció Tiempo n de la fecha temperatura...
- Página 62 5. La hora se convertirá en la hora actual del huso horario correspondiente después de recibir el CCR. (Excepto el huso horario 0) Observación: ● Saldrá de la recepción RCC automáticamente cuando la alarma se realice durante la recepción RCC , puede repetir el paso 3 para entrar en la recepción de la señal RCC después de apagar la alarma.
- Página 63 5. Pulse el botón "SET" para seleccionar la unidad de temperatura. Pulse el botón "▲/C/F" o "▼/RCC" para seleccionar ℃ o ℉. Ajuste predeterminado: ℃.(DCF/MSF) ℉(WWVB) 6. Presione el botón "SET " para seleccionar el RCC. Presione el botón "▲/C/F" o "▼/RCC" para seleccionar OFF u ON. Ajuste predeterminado : RCC ON.
-
Página 64: Función De Alarma
*Consejos: mantener pulsado el botón "▲/C/F"o"▼/RCC" cambiará rápidamente el valor en 8 pasos. Observación: Hay 7 idiomas seleccionables para la visualización de los días de la semana: 、ENG、DRN、DRN、GERFRE、 SPAFRE、SPA Francés Italiano Español La Idioma Alemán Inglés Dinam holandesa arca ZONA Domingo Lunes Lunes... -
Página 65: Función De Repetición
5. Durante el ajuste, si no se realiza ninguna operación durante 20 segundos, se guardará y saldrá del ajuste automáticamente. 6. La alarma se activa por defecto después de ajustar la hora de la alarma. El símbolo de la alarma aparecerá en la pantalla. ENCENDER/APAGAR LA ALARMA: 1. -
Página 66: Función De Retroiluminación
● Presione y mantenga presionado el botón "▲/C/F" para cambiar los datos de la proyección entre la hora y la temperatura. ● Deslice el interruptor de "enfoque" en la parte posterior de la unidad para ajustar el enfoque de la proyección. FUNCIÓN DE RETROILUMINACIÓN ●... -
Página 67: Indicación Del Nivel De Confort
3. Presione "MEM" por tercera vez y volverá al modo estándar. 4. Si mantiene pulsado "MEM" se borrará el registro de máximos y mínimos y se reactivará la memoria. 5. Normalmente, el registro de Max y Min se actualizará cada 24 horas a las 0:00. -
Página 68: Garantía
Garantía BALDR ofrece una garantía limitada de 1 año para este producto contra defectos de fabricación en materiales y mano de obra. El servicio de garantía sólo puede ser realizado por nuestro centro de servicio autorizado. La factura de venta original y fechada debe ser presentada a petición como prueba de compra a nosotros o a... - Página 69 service@baldr.com...