Tabla de contenido
Publicidad
Enlaces rápidos
Model/Modèle/Modelo
3534LF-
3534LF--LPU
Wynne
Series/Series/Seria
TM
▲Specify Finish
▲Précisez la Finition
▲Especifique el acabado
You may need/ Articles dont vous pouvez avoir besoin/ Usted puede necesitar
Installation Notes / Notes sur l'installation / Notas de Instalación
FOR EASY INSTALLATION OF YOUR DELTA FAUCET YOU WILL NEED:
•
To READ ALL the instructions completely before beginning.
•
To READ ALL warnings, care and maintenance information.
•
To purchase the correct water supply hook-up.
POUR INSTALLER VOTRE ROBINET DELTA FACILEMENT, VOUS DEVEZ:
•
LIRE TOUTES les instructions avant de débuter;
•
LIRE TOUS les avertissements ainsi que toutes les instructions de nettoyage et d'entretien;
•
Acheter le bon nécessaire de raccordement.
PARA INSTALACIÓN FÁCIL DE SU LLAVE DELTA USTED NECESITARÁ:
•
LEER TODAS las instrucciones completamente antes de empezar.
•
LEER TODOS los avisos, cuidados, e información de mantenimiento.
•
Comprar las conexiones correctas para el suministro de agua.
Please leave this instruction sheet with the installed faucet.
S.V.P., laissez cette fiche d'instructions avec la robinetterie nouvellement installée.
Deje esta hoja de instrucciones con la llave instalada.
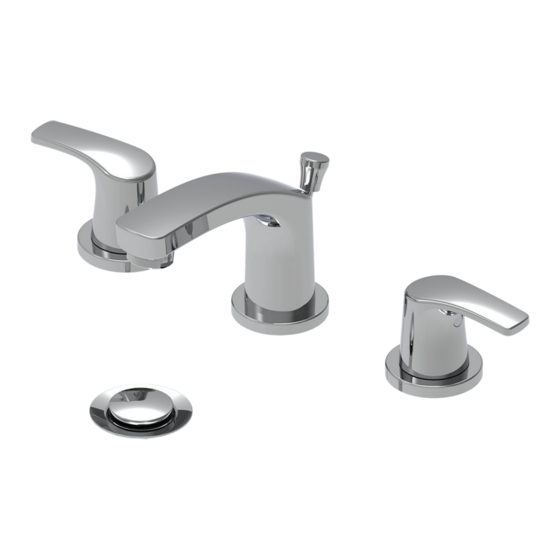
TWO HANDLE WIDESPREAD
LAVATORY FAUCET
ROBINETS À ENTRAXE LONG À DEUX
POIGNÉES POUR LAVABO
LLAVES DE LAVAMANOS
EXTENDIDAS DE DOS MANIJAS
1.25" (32mm)
5/16"
214820, Rev. C
Publicidad
Tabla de contenido

Manuales relacionados para Delta Wynne 3534LF Serie


Resumen de contenidos para Delta Wynne 3534LF Serie
- Página 1 You may need/ Articles dont vous pouvez avoir besoin/ Usted puede necesitar 1.25” (32mm) 5/16” Installation Notes / Notes sur l’installation / Notas de Instalación FOR EASY INSTALLATION OF YOUR DELTA FAUCET YOU WILL NEED: • To READ ALL the instructions completely before beginning. •...
- Página 2 Product Dimension / Dimensions du produit / Dimensiones del producto 4" to 14" (102 mm to 356 mm) 2.25” Centers (57mm) Les centres Centros 4.2” (107mm) 3.125” 3.125” 0.28” (80mm) 2.17” (80mm) 4.3” (7mm) (55mm) (109mm) Ø 2.0” Ø 2.0” (51mm) (51mm) 3x - Ø...
-
Página 3: Descripción
QTÉ CANT. Item Article Description Description Descripción Artículo Faucet body Corps du robinet Cuerpo de la llave Faucet body base gasket Joint de la base du corps du robinet Junta de la base del pico Mounting plate Plaque de montage Placa de montaje Écrou Tuerca... -
Página 4: Paso 1 - Colocación De La Llave
Installation / Installation / Instalación STEP 1 - FAUCET PLACEMENT Figure 1 (see Figure 1) 1. Position faucet body (A) and faucet body base gasket (B) on sink/ countertop. 2. Slide the mounting plate (C) onto the faucet body inlet (E) and tighten nut (D) using the tool provided (T2). -
Página 5: Paso 2 - Instalación De La Manija
STEP 2 - HANDLE INSTALLATION Figure 2 (see Figure 2) Valve Handle Stop - Hot Valve Handle Stop - Cold Ensure the handle sleeves (ZA) are installed in the handles. Contact Butée de manette de vanne - Chaud Butée de manette de vanne - Froid customer support if they are missing. -
Página 6: Paso 3 - Instalación De La Manguera T-2 T
STEP 3 - HOSE ASSEMBLY INSTALLATION Figure 3 (see Figure 3) 1. Install the blocks (U) onto the end body outlets (O) and the faucet body inlet (E) as shown in Figure 3. 2. Clip the hose assmebly oulet (T-1) to the faucet body inlet (E). 3. - Página 7 Figure 4 * Supplied by others / Fourni par d’autres / Suministrado por otros STEP 4 - DRAIN ASSEMBLY INSTALLATION (see Figure 4) 1. Flange Seal: a. Apply silicone to underside of flange (W). Insert flange (W) into sink drain hole. 2.
-
Página 8: Paso 4: Instalación Del Mecanismo De Drenaje
ÉTAPE 4 - INSTALLATION DE L’ENSEMBLE DE DRAIN (voir la Figure 4) 1. Joint de bride : a. Appliquer de la silicone sur le dessous de la bride (W). Insérez la bride (W) dans le drain de l’évier. 2. Installation du drain : a. -
Página 9: Paso 5 - Conexión De Las Líneas De Agua
STEP 5 - WATER LINE CONNECTIONS Figure 5 (see Figure 5) 1. Ensure all fittings and end connections are free of debris. 2. Using a wrench (T5) connect the supply lines (ZC* or ZD*) (not supplied) to the end body inlets (P). ... -
Página 10: Paso 6 - Purgue El Sistema/Revise Que No Tenga Fugas
STEP 6 - FLUSH SYSTEM/CHECK FOR LEAKS Figure 6 (see Figure 6) 1. Remove the aerator (F) from the faucet body (A). 2. Turn on the hot and cold water supplies (ZE*). 3. Turn the handles (H & I) to the full “ON” position and flush water lines for one minute. - Página 11 Repair Parts / Pièces De Rechange / Partes De Reparación Specify Finish Especifíque el Acabado RP101497 Handle assembly Précisez le Fini Montage de la manette RP101495 Conjunto de manija Lift rod assembly RP47422 Ensemble de tige de levage Cartridge Assembly Mecanismo de la &...
- Página 12 Maintenance / Entretien / Mantenimiento Figure 7 SHUT OFF WATER SUPPLIES prior to doing any maintenance. If Faucet Leaks From Under Handle (see Figure 7A) 1. Remove handle (H/I), by loosening set screw (J) located under the handle button (K) with the hex wrench (T1). 2.
- Página 13 Cleaning And Care / Instructions De Nettoyage / Limpieza Y Cuidada De Su Llave Care should be given to the cleaning of this product. Although its finish is extremely durable, it can be damaged by harsh abrasives or polishes. To clean, simply wipe gently with a damp cloth and blot dry with a soft towel.
- Página 14 What You Must Do To Obtain Warranty Service or Replacement Parts A warranty claim may be made and replacement parts may be obtained by calling 1 800 345 DELTA (3358) or by contacting us by mail or online as follows (please include your model number and date of purchase):...
- Página 15 Une réclamation de garantie peut être réalisée et des pièces de rechange peuvent être obtenues en appelant 1 800 345 DELTA (3358) ou en nous contactant par courrier ou en ligne comme suit (veuillez inclure votre numéro de modèle et la date d’achat):...
- Página 16 Delta Faucet Company para todos los reclamos de Todas las partes (diferentes a partes electrónicas y baterías) y acabados de este garantía a menos que el comprador haya registrado el producto con Delta Faucet grifo Delta ®...