Tabla de contenido
Publicidad
Idiomas disponibles
Idiomas disponibles
Enlaces rápidos
Installation
Instructions
If you have questions, visit our website at: cafeappliances.com.
BEFORE YOU BEGIN
Read these instructions completely and carefully.
IMPORTANT –
•
Save these instructions for local
inspector's use. Observe all governing codes and
ordinances.
Note to Installer –
•
with the Consumer.
Note to Consumer –
•
your Owner's Manual for future reference.
WARNING
Electrical Shock Hazard.
Plug into a grounded 3-prong outlet.
Do not remove the ground prong.
Do not use an adapter.
Immediately discontinue use of a damaged supply cord.
If the supply cord is damaged it must be replaced by a
qualified service professional with an authorized service
part from the manufacturer.
WARNING
and must be secured to prevent tipping forward which could result in death or serious injury. Read and follow the
entire installation instructions for securing the appliance with the anti-tip system.
WARNING
Keep flammable materials and vapors away from appliance. Failure to do so can result in fire, explosion, or death.
WARNING
To reduce the risk associated with choking, do not allow children under 3 years of age to have
access to small parts during the installation of this product.
CAUTION
Lifting Hazard
and installing this appliance, 3 people are required for proper installation.
CAUTION
Keep fingers out of the "pinch point" areas; clearances between the doors and between the doors
and cabinet are necessarily small. Be careful closing doors when children are in the area.
READ AND SAVE THESE INSTRUCTIONS
English • Français • Español
In Canada, visit: cafeappliances.ca
Be sure to leave these instructions
Keep these instructions with
Tip Over Hazard.
Fire or Explosion Hazard.
This unit is very heavy. To reduce the risk of person injury during maneuvering
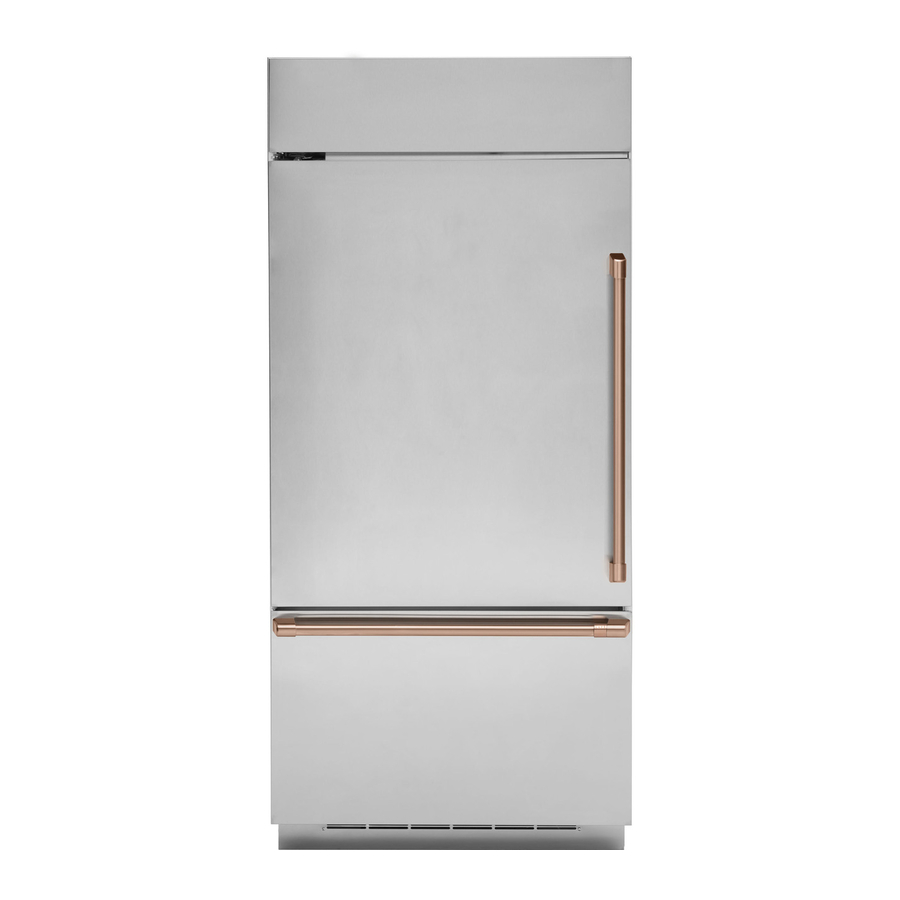
36" Built-In Bottom-Freezer
Refrigerators - CDB36
If you received a damaged unit, you should immediately
contact your dealer or builder.
S
kill Level –
mechanical, carpentry and plumbing skills. Proper
installation is the responsibility of the installer. Product
failure due to improper installation is not covered under
the Café Warranty. See the Owner's Manual for warranty
information.
Do not use an extension cord with this appliance.
Failure to follow these instructions can result in death,
fire, or electrical shock.
Follow the instructions in the section Grounding the unit.
This appliance must be installed with a means in the
fixed house wiring or circuit breaker for disconnecting the
appliance from the electrical supply after installation.
These appliances are top heavy, especially with any doors open,
TM
Installation of this unit requires basic
31-1000543 Rev. 0 10-20 GEA
Publicidad
Tabla de contenido

Manuales relacionados para Cafe CDB36


Resumen de contenidos para Cafe CDB36
- Página 1 Installation 36” Built-In Bottom-Freezer Instructions Refrigerators - CDB36 If you have questions, visit our website at: cafeappliances.com. In Canada, visit: cafeappliances.ca BEFORE YOU BEGIN Read these instructions completely and carefully. If you received a damaged unit, you should immediately contact your dealer or builder.
-
Página 2: The Installation Space
Design Guide - Stainless Steel Installation THE INSTALLATION SPACE DIMENSIONS AND CLEARANCES 35" * Shipping height. The 35-1/2" 23-5/8" Case Width refrigerator can be Case Depth Finished Width adjusted to fit into a Wall View 2-5/16" ” cutout that is 84-1/2 (214.63 cm) max. -
Página 3: Customization Basics
Design Guide - Stainless Steel Installation CUSTOMIZATION BASICS: REFRIGERATOR LOCATION • Do not install the refrigerator where the temperature The unit comes with the Stainless Steel Handle on it. will go below 55°F (13°C). It will not run often Optional Handle Kits are availabe enough to maintain proper temperatures. -
Página 4: Top View
Design Guide - Stainless Steel Installation Frameless Cabinets: The case trim overlaps cabinets at the top and sides. Therefore, frameless cabinets Refrigerator may require filler strips to prevent 23-7/8" From interference with cabinet door swing. Rear of The opening must allow for filler strips. Refrigerator 1"... - Página 5 Installation Instructions - Stainless Steel Installation TOOLS REQUIRED MATERIALS REQUIRED • 35” (88.9 cm) long 2x4 for Anti-Tip support • Tinsnips to cut banding • 1/4” copper water line tubing or SmartConnect ™ • Stepladder Refrigerator Tubing kits • Bucket •...
- Página 6 Installation Instructions - Stainless Steel Installation STEP 1 REMOVE PACKAGING NOTE: DO NOT ATTEMPT TO ROLL UNIT OFF SKID. WARNING • The support blocks Tip Over Hazard. on the bottom of the The refrigerator is much heavier at the top than at refrigeration case the bottom—be careful when moving.
-
Página 7: Electric Shock Hazard
NOTE: Commonwealth of Massachusetts Plumbing bend leading into the water line connection. Codes 248CMR shall be adhered to. Saddle NOTE: The only Cafe-approved plastic tubing is supplied valves are illegal and use is not permitted in in the SmartConnect ™... - Página 8 Installation Instructions - Stainless Steel Installation STEP 2A WATER LINE STEP 4 ANTI-TIP PROCEDURE INSTALLATION WITH A REVERSE WARNING OSMOSIS SYSTEM OR OTHER Tip Over Hazard. These refrigerators are top heavy, especially with any HOUSEHOLD FILTRATION SYSTEM doors open, and must be secured to prevent tipping forward which could result in death or serious injury.
- Página 9 Installation Instructions - Stainless Steel Installation STEP 4 ANTI-TIP PROCEDURE • Hold the metal channel flat against the plastic straps and slide the channel through the hole. (CONT) Plastic Straps • Place the bottom of the wall bracket with tabs on the horizontal line.
- Página 10 Installation Instructions - Stainless Steel Installation STEP 4 ANTI-TIP PROCEDURE STEP 6 SECURE UNIT TO WALL (CONT) • The “L” rod can be found in the upper left corner of the unit in the access compartment. Look through the Connect Power Cord: access compartment to make sure the rod lines up •...
- Página 11 Installation Instructions - Stainless Steel Installation STEP 7 ALTERNATE ANTI-TIP STEP 8 ADJUST DOOR SWING PROCEDURE NOTE: This refrigerator has a 3-position door stop. When space does not allow the door to swing open The refrigerator must be secured to prevent fully to 115°, you may change the door swing to a 90°...
- Página 12 Icemaker to check for leaks. SmartConnect ™ Tubing: NOTE: The only Cafe-approved plastic tubing is supplied in the SmartConnect ™ Refrigerator Tubing kits. Do not use any other plastic water supply line because the line is under pressure at all times. Other types of...
- Página 13 Notes 31-1000543 Rev. 0...
- Página 14 NOTE: While performing installations described in this book, safety glasses or goggles should be worn. NOTE: Product improvement is a continuing endeavor at Cafe Appliances. Therefore, materials, appearance and specifications are subject to change without notice. Printed in United States...
-
Página 15: Avant De Commencer
La responsabilité d’une installation adéquate relève de l’installateur. Note au consommateur • - Conservez ces instructions La garantie Cafe ne couvre pas les défectuosités du produit consultation ultérieure. avec votre manuel d’utilisation pour causées par une installation inadéquate. Consultez le manuel d’utilisation pour des renseignements sur la garantie. -
Página 16: Guide De Conception
Installation en acier inoxydable Guide de conception – DIMENSIONS ET DÉGAGEMENTS L’ESPACE D’INSTALLATION 23-5/8" 35” Largeur * Hauteur à la livraison. 35-1/2" du caisson Profondeur On peut ajuster le Largeur finie du caisson réfrigérateur pour le placer dans une ouverture de 2-5/16"... -
Página 17: Emplacement Du Réfrigérateur
Installation en acier inoxydable Guide de conception – Principes de base de la EMPLACEMENT DU RÉFRIGÉRATEUR personnalisation: • N’installez pas le réfrigérateur à un endroit où la température peut descendre en dessous de 55 °F (13 L’unité est livrée avec la poignée en acier inoxydable °C). -
Página 18: Vue De Dessus
Installation en acier inoxydable Guide de conception – Armoires sans cadre: La garniture de caisson chevauche les armoires dans le haut et les côtés. Par conséquent, les armoires sans cadre peuvent nécessiter des fourrures pour ne pas gêner Réfrigérateur l’ouverture de la porte d’armoire. L’ouverture doit 23 7/8”... -
Página 19: Outils Requis
Instructions d’installation - Installation en acier inoxydable MATÉRIEL REQUIS OUTILS REQUIS • Support antibasculement 2x4, 35 po long • Cisaille pour couper le cerclage • Tuyau de cuivre 1/4 po pour conduite d’eau ou trousse • Escabeau SmartConnect™ pour réfrigérateur •... - Página 20 Instructions d’installation - Installation en acier inoxydable ÉTAPE 1 RETRAIT DE L’EMBALLAGE AVERTISSEMENT Risque de basculement REMARQUE : NE TENTEZ PAS DE ROULER L’APPAREIL Le réfrigérateur est beaucoup plus lourd en haut qu’en bas. Il faut HORS DU PATIN. être prudent lors des déplacements. Si un diable est utilisé, il faut •...
- Página 21 REMARQUE: Les seuls tuyaux en plastique approuvés par REMARQUE : Les codes de plomberie 248CMR du Cafe sont ceux inclus dans les trousses de tuyaux pour Commonwealth du Massachusetts doivent être satisfaits. réfrigérateur SmartConnect™. N’utilisez pas d’autres tuyaux Les robinets à...
- Página 22 Instructions d’installation - Installation en acier inoxydable ÉTAPE 2A INSTALLATION DE LA STEP 4 DISPOSITIF CONDUITE D’EAU AVEC SYSTÈME ANTIBASCULEMENT D’OSMOSE INVERSE OU AUTRE WARNING SYSTÈME DE FILTRATION DOMESTIQUE Risque de basculement Ces réfrigérateurs présentent une partie supérieure lourde, en Passez cette étape si vous n’utilisez pas de système particulier avec une porte ouverte;...
- Página 23 Instructions d’installation - Installation en acier inoxydable STEP 4 DISPOSITIF ANTI-BASCULE (suite) • Placez le bas du support mural avec ses languettes sur la • Tenez le profilé métallique à plat contre les bandes en ligne horizontale. Alignez l’encoche centrale du support sur la plastique et glissez le profilé...
- Página 24 Instructions d’installation - Installation en acier inoxydable ÉTAPE 4 DISPOSITIF ÉTAPE 6 FIXER L’APPAREIL AU MUR ANTIBASCULEMENT (suite) • La tige en « L » se trouve dans le coin supérieur gauche de l’appareil dans le compartiment d’accès. Regardez dans le Brancher le cordon d’alimentation : compartiment d’accès pour vous assurer que la tige s’aligne •...
- Página 25 Installation Instructions - Stainless Steel Installation ÉTAPE 7 AUTRES DISPOSITIFS ÉTAPE 8 AJUSTER L’OUVERTURE DE ANTIBASCULEMENT PORTE Le réfrigérateur doit être fixé afin de prévenir le REMARQUE: Ce réfrigérateur est doté d’une butée de basculement. S’il est impossible d’utiliser le support porte à...
- Página 26 • Pour mettre la machine à glaçons hors tension, glissez REMARQUE : Les seuls tuyaux en plastique approuvés l’interrupteur à la position O (OFF). par Cafe sont ceux inclus dans les trousses de tuyaux pour Machine réfrigérateur SmartConnect™. N’utilisez pas d’autres tuyaux à...
- Página 27 Notes 31-1000543 Rev. 0...
- Página 28 REMARQUE: Lors des installations décrites dans ce manuel, des lunettes de sécurité ou des lunettes doivent être portées. REMARQUE: l’amélioration du produit est un effort continu Appareils électroménagers Cafe. Par conséquent, les matériaux, l’apparence et les spécifications peuvent être modifiés sans préavis. Imprimé aux États-Unis...
-
Página 29: Antes De Comenzar
Garantía de Nota para el Consumidor • – Guarde estas instrucciones Cafe no cubrirá las mismas. Para obtener información sobre la con su Manual del Propietario para referencia futura. garantía, consulte el Manual del Propietario. ADVERTENCIA Riesgo de Descarga Eléctrica Enchufe en un tomacorriente con conexión a tierra... -
Página 30: Guía De Diseño - Instalación De Acero Inoxidable
Guía de Diseño - Instalación de Acero Inoxidable EL ESPACIO DE INSTALACIÓN DIMENSIONES Y ESPACIOS LIBRES *Altura del embalaje. El Ancho 35-1/2" Profundidad de la Carcasa de 35” refrigerador puede ser de la Carcasa Ancho Final ajustado para caber en de 23 5/8”... -
Página 31: Fundamentos De Personalización
Guía de Diseño - Instalación de Acero Inoxidable FUNDAMENTOS DE PERSONALIZACIÓN: UBICACIÓN DEL REFRIGERADOR • No instale el refrigerador en lugares donde la temperatura La unidad viene con el mango de acero inoxidable. sea inferior a los 55°F (13°C). Éste no funcionará Hay kits de mangos opcionales disponibles. -
Página 32: Vista Superior
Guía de Diseño - Instalación de Acero Inoxidable Gabinetes sin Marco: El marco de la carcasa se superpone con los gabinetes en la parte superior y los costados. Por lo tanto, los gabinetes sin marco podrán requerir de tiras Refrigerador de relleno para evitar interferencias con el giro 23 7/8”... -
Página 33: Herramientas Requeridas
Guía de Diseño - Instalación de Acero Inoxidable HERRAMIENTAS REQUERIDAS MATERIALES REQUERIDOS • Tijeras cortachapa para cortar bandas • Soporte anti volcaduras de 2 x 4 de 35” de longitud • Escalera de dos hojas • Tubería de cobre para suministro de agua de ¼” o kits de •... -
Página 34: Paso 1 Retire El Embalaje
Guía de Diseño - Instalación de Acero Inoxidable PASO 1 RETIRE EL EMBALAJE ADVERTENCIA Riesgo de Caídas • Los bloques de soporte de la parte inferior de la carcasa de El refrigerador es mucho más pesado en su parte superior refrigeración deberán ser que en su parte inferior –... -
Página 35: Paso 2 Instale El Suministro De Agua
NOTA: Se deberá cumplir con los Códigos de Plomería NOTA: La única tubería de plástico aprobada por Cafe es del Commonwealth de Massachusetts 248CMR. Las suministrada en los Kits de Tuberías para Refrigerador de válvulas tipo montura son ilegales y su uso está... - Página 36 Guía de Diseño - Instalación de Acero Inoxidable STEP 4 PROCEDIMIENTO ANTITIP PASO 2A INSTALACIÓN DE LA TUBERÍA DE AGUA CON SISTEMA DE ADVERTENCIA ÓSMOSIS INVERSA U OTRO SISTEMA Riesgo de Caídas Estos refrigeradores son inestables, especialmente DE FILTRACIÓN HOGAREÑO cuando una puerta se encuentre abierta, y deberán estar asegurados a fin de evitar caídas hacia adelante que Saltee este paso si no usará...
-
Página 37: Paso 4 Procedimiento Anti-Volcaduras
Guía de Diseño - Instalación de Acero Inoxidable PASO 4 PROCEDIMIENTO ANTI-VOLCADURAS • Coloque la parte inferior del soporte de pared con las • Sostenga el canal metálico de forma plana contra las cintas lengüetas en la línea horizontal. Alinee la abertura central de plástico y deslice el canal a través del agujero. -
Página 38: Paso 5 Nivele El Refrigerador
Guía de Diseño - Instalación de Acero Inoxidable PASO 4 PROCEDIMIENTO PASO 6 ASEGURE LA UNIDAD A LA (Cont) ANTI-VOLCADURAS PARED • La varilla en “L” se podrá encontrar en la esquina superior CONECTE EL CABLE DE CORRIENTE: izquierda de la unidad, en el compartimiento de acceso. •... -
Página 39: Paso 7 Procedimiento Anti- Volcaduras Alternativo
Guía de Diseño - Instalación de Acero Inoxidable PASO 7 PROCEDIMIENTO ANTI- PASO 8 AJUSTE EL GIRO DE LA VOLCADURAS ALTERNATIVO PUERTA El refrigerador deberá quedar asegurado a fin de NOTA: El refrigerador cuenta con una detención de la puerta evitar volcaduras. -
Página 40: Paso 12 Instale El Zócalo
Tubería SmartConnect™: de hielo, deslice el de hielo interruptor a OFF NOTA: La única tubería de plástico aprobada por Cafe es (Apagado). suministrada en los Kits de Tuberías para Refrigerador de SmartConnect™. No use ninguna otra tubería de suministro de agua plástica, ya que la tubería se encuentra bajo presión en todo momento. - Página 41 Notas 31-1000543 Rev. 0...
- Página 42 Notas 31-1000543 Rev. 0...
- Página 43 Notas 31-1000543 Rev. 0...
- Página 44 NOTA: Al realizar las instalaciones descriptas en este libro, se deberán usar anteojos o gafas de seguridad. NOTA: Cafe se esfuerza de forma constante para mejorar sus productos. Por lo tanto, los materiales, el aspecto y las especificaciones están sujetos a cambios sin aviso previo.