Tabla de contenido
Publicidad
Idiomas disponibles
Idiomas disponibles
Enlaces rápidos
Publicidad
Tabla de contenido
Solución de problemas

Manuales relacionados para K2 Pumps PPV10001SPK


Resumen de contenidos para K2 Pumps PPV10001SPK
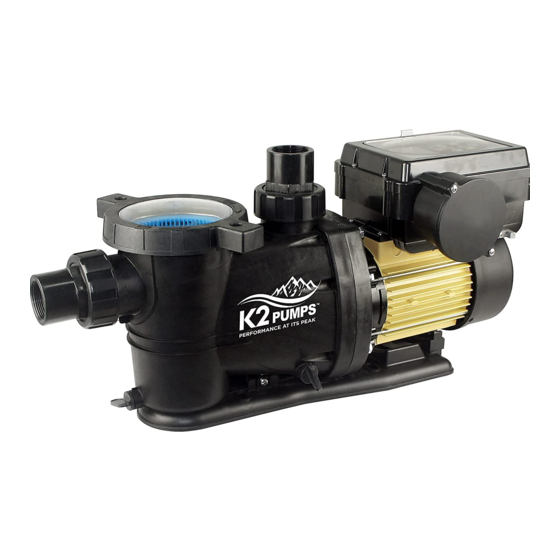
- Página 1 Model: PPV10001SPK PPV15001SPK OWNER’S MANUAL VARIABLE SPEED POOL PUMP Questions, problems, missing parts? Before returning to the store call K2 Customer Service 8 a.m. - 6 p.m., EST, Monday-Friday 1-844-242-2475 www.K2pumps.com Copyright © 2021, GP Enterprises Co., Ltd. K2Man-32 (Rev. 2/18/21)
-
Página 2: Safety Instructions
GPM of Water @ Total Feet of Lift Max. Lift 0 ft. 10 ft. 20 ft. 30 ft. 40 ft. 50 ft. 3500 72.0 65.0 56.0 44.0 25.0 48 ft. PPV10001SPK 2000 39.0 20.0 16 ft. 1200 22.0 7 ft. 3500 95.0 88.0 80.0 70.0 56.0 40.0 65 ft. -
Página 3: Pre-Installation
17. CAUTION: Use a supplier recommended primer to ensure glued joints are secure. Many local codes require primer with a purple tracer to verify primer use. 18. CAUTION: Consider climatic conditions when applying adhesives. Atmospheric conditions with high humidity will make the adhesive action of certain glues less effective. - Página 4 PACKAGE CONTENTS Part Description Pump Union Nut Union Adapter O-ring MATERIALS REQUIRED (NOT INCLUDED) Additional items needed Teflon tape As needed Rigid pipe As needed Ball Valve As needed Union As needed Elbow As needed Adapter As needed PVC cement IAPMO Certified Anti-entrapment Cover As needed SPECIFICATIONS...
- Página 5 PUMP PLUMBING Suction pipe should be as large as or larger than discharge pipe. Avoid using a suction pipe smaller than the pump connection. The pump is designed to accept 1-1/2 in. suction piping. 1. Keep the piping as straight and short as possible, and of suitable size. 2.
- Página 6 Suction inlets must be designed so that water is drawn simultaneously. A vacuum relief device can be installed in line leading to the pump suction. All suction outlet covers must conform to ASME/ANSI A112.19.18M; or must be a minimum 18 x 23 grate or larger; or must have an approved channel drain system.
- Página 7 Connect a No. 8 AWG solid copper bonding wire to the pressure wire connector provided on the motor housing and to all metal parts of the swimming pool, spa, or hot tub and to all electrical equipment, metal piping or conduit within 5 feet of the inside walls of swimming pool, spa, or hot tub.
-
Página 8: Priming Pump
OPERATION Avoid running pump dry. Fill pump with water before starting motor. Before removing trap cover: STOP PUMP before proceeding. CLOSE GATE VALVES in suction and discharge pipes. RELEASE ALL PRESSURE from pump and piping system. If pump is being pressure tested, be sure pressure has been released before removing trap cover. WARNING: Do not block pump suction. -
Página 9: Draining The Pump
4. Clean and inspect lid O-ring; then reinstall the ring and cover assembly. 5. Prime the pump (see priming instructions). Draining the Pump A. Pump down water level below all inlets to the pool. WARNING: To avoid dangerous or fatal electrical shock hazard, turn OFF power to the motor before draining pump. - Página 10 1. Pump operation mode Power on default manual mode Press AUTO to start manually Put AUTO manual mode on again and stop Press AUTO again Press AUTO again to close the auto mode In the automatic mode,4 working periods can be set every day, and the rotation speed of the four working periods can be set to different speeds, among which the rotation speed is adjustable 600RPM~3500RPM.If the current time is within the period set by the user, the pump will work according to the start and stop time and the set rotation speed set by the user.
- Página 11 2. Set pump parameters Long press the set key for 3 seconds Set time mode Set the time and speed of time period 1 Set the time and speed of time period 2 Set the time and speed of time period 3 Set the time and speed of time period 4 To exit the setting mode, do not press the button for 10 seconds...
-
Página 12: Care And Cleaning
, also can adjust speed by ,when press ,automatic recording speed and enter the set period 2,and so on. The first time period can be set to a maximum of 0:00-23:59. The second time period can be set as the maximum time period (stop time of the first time period-23:59). Time periods 3 and 4 are turned off by default and can be turned on by either .When the settings are complete, wait 10 seconds for the system to automatically save the settings. - Página 13 Pump Disassembly/Removing Old Seal Before disassembly, disconnect power to pump motor. Be sure gate valves on suction and return piping are closed. Release all pressure by opening all vents. 1. Drain pump by removing drain plugs on bottom of pump body and trap body. 2.
-
Página 14: Troubleshooting
TROUBLESHOOTING Read and understand safety and operating instructions in this manual before doing any work on pump! Only qualified personnel should electrically test the pump motor! FAILURE TO PUMP; REDUCED CAPACITY OR DISCHARGE PRESSURE. Problem Possible Cause Corrective Action 1. Pump must be primed. Make sure that pump The pump is not priming. - Página 15 September 1, 2020. K2 Pumps (K2) warrants to the original consumer purchaser (You) that its products are free from original defects in material and workmanship for at least one year (warranty varies depending on model; see box or K2 website for specific warranty information) from the date of purchase (the Warranty Period).
-
Página 17: Bomba De Velocidad Variable Para Piscinas
Modelo: PPV10001SPK PPV15001SPK MANUAL DEL PROPIETARIO BOMBA DE VELOCIDAD VARIABLE PARA PISCINAS ¿Preguntas, problemas, piezas faltantes? Antes de regresar a la tienda, comuníquese con el servicio de atención al cliente de K2 de 8 a.m. a 6 p.m., hora del este (EST), de lunes a viernes 1-844-242-2475 www.K2pumps.com... -
Página 18: Rendimiento
Elevación Modelo máx. pies pies pies pies pies 50 f pies 3500 72.0 65.0 56.0 44.0 25.0 48 ft. PPV10001SPK 2000 39.0 20.0 16 ft. 1200 22.0 7 ft. 3500 95.0 88.0 80.0 70.0 56.0 40.0 65 ft. PPV15001SPK 1-1/2 2000 50.0... -
Página 19: Antes De La Instalación
18. PRECAUCIÓN: Tenga en cuenta las condiciones climáticas al aplicar los adhesivos. Las condiciones atmosféricas con alta humedad harán que la acción adhesiva de ciertos pegamentos sea menos eficaz. Siga las instrucciones del fabricante. 19. PRECAUCIÓN: Esta bomba debe ser instalada y reparada solo por un profesional calificado de servicio de piscinas. Los instaladores, operadores de piscinas y propietarios deben leer las advertencias y todas las instrucciones del manual del propietario antes de usar esta bomba. -
Página 20: Especificaciones
CONTENIDO DEL PAQUETE Pieza Descripción Cant. Bomba Tuerca de unión Adaptador de unión Junta tórica MATERIALES NECESARIOS (NO INCLUIDOS Elementos adicionales necesarios Cant. Cinta de teflón Según sea necesario Tubo rígido Según sea necesario Válvula de bola Según sea necesario Unión Según sea necesario Codo... -
Página 21: Protección Contra Atrapamiento
TUBERÍAS DE LA BOMBA La tubería de succión debe ser tan grande o más grande que la tubería de descarga. Evite usar una tubería de succión más pequeña que la conexión de la bomba. La bomba está diseñada para aceptar tuberías de succión de 1-1/2 pulgadas. 1. -
Página 22: Electricidad
Las entradas de succión deben diseñarse de modo que el agua se extraiga simultáneamente. Se puede instalar un dispositivo de alivio de vacío en la tubería que conduzca a la succión de la bomba. Todas las cubiertas de las salidas de succión deben cumplir con las normas ASME/ANSI A112.19.18M, deben tener una rejilla mínima de 18 x 23 o más o deben tener un sistema de drenaje de canal apropiado. - Página 23 Conecte un cable de unión de cobre sólido número 8 AWG al conector del cable de presión provisto en la carcasa del motor y a todas las partes metálicas de la piscina, hidromasaje o jacuzzi y a todos los equipos eléctricos, tuberías o conductos metálicos dentro de los 5 pies de la parte interior de las paredes de la piscina, hidromasaje o jacuzzi.
-
Página 24: Operación
OPERACIÓN ADVERTENCIA: riesgo de explosión. Antes de quitar la cubierta de la trampa: AVISO: NUNCA haga funcionar la bomba en seco. Hacer funcionar la bomba en seco puede dañar los sellos y causar fugas e inundaciones. Llene la bomba con agua antes de arrancar el motor. 1. -
Página 25: Funcionamiento Del Panel De Control
2. Retire el conjunto de anillo y cubierta girándolo en sentido contrario a las agujas del reloj. Si es necesario, golpee suavemente las manijas con un mazo de goma. 3. Retire la cesta y límpiela. Inspeccione los agujeros para ver si hay obstrucciones. Limpie la cesta con agua y colóquela en la trampa. -
Página 26: Modo De Funcionamiento De La Bomba
1. Modo de funcionamiento de la bomba Encender el modo manual predeterminado Presionar AUTOMÁTICO para arrancar manualmente Volver a activar el modo manual AUTOMÁTICO y detener Volver a presionar AUTOMÁTICO Presionar AUTOMÁTICO de nuevo para cerrar el modo automático En el modo automático, se pueden configurar 4 períodos de trabajo cada día y la velocidad de rotación de dichos períodos se puede configurar a diferentes velocidades, entre las cuales la velocidad de rotación es ajustable entre 600 RPM y 3500 RPM. -
Página 27: Configuración De Los Parámetros De La Bomba
2. Configuración de los parámetros de la bomba Mantener presionada la tecla de configuración durante 3 segundos Configurar el modo de tiempo Configurar la hora y la velocidad del período 1 Configurar la hora y la velocidad del período 2 Configurar la hora y la velocidad del período 3 Configurar la hora y la velocidad del período 4 Para salir del modo de configuración, no presione... -
Página 28: Cerrar/Encender La Retroiluminación De La Pantalla Lcd
de los botones o ajustar la velocidad con , se debe presionar para confirmar la velocidad de grabación automática e ingresar el período establecido 2, y así sucesivamente. El primer período se puede establecer en un máximo de 0:00-23:59. El segundo período se puede establecer como el período máximo (hora de detención del primer período: 23:59). -
Página 29: Desmontaje De La Bomba/Remoción Del Sello Antiguo
Desmontaje de la bomba/remoción del sello antiguo Antes del desmontaje, desconecte la energía del motor de la bomba. Asegúrese de que las válvulas de compuerta en las tuberías de succión y retorno estén cerradas. Abra todas las rejillas de ventilación para liberar la totalidad de la presión. -
Página 30: Solución De Problemas
SOLUCIÓN DE PROBLEMAS Lea y comprenda las instrucciones de seguridad y funcionamiento de este manual antes de realizar cualquier trabajo en la bomba. riesgo de descarga eléctrica. Puede dar un choque eléctrico, quemar o matar. ADVERTENCIA: Desconecte la energía antes de trabajar en la bomba o el motor. ... -
Página 31: Garantia
1 de septiembre de 2020. K2 Pumps (K2) le garantiza al comprador original (Usted) que sus productos no tendrán defectos de origen en términos de materiales y fabricación durante un año como mínimo (la garantía varía en función del modelo; consultar la caja o el sitio web de K2 para obtener información específica sobre la garantía) a partir de la fecha de la compra (el Plazo de la Garantía).