Tabla de contenido
Publicidad
Idiomas disponibles
Idiomas disponibles
Enlaces rápidos
Publicidad
Tabla de contenido

Resumen de contenidos para Steren CCTV-030
- Página 2 Intercomunicador con monitor blanco y negro alámbrico. Por favor, revíselo completamente para estar seguro de cómo utilizar apropiadamente el producto. Para apoyo, compras y todo lo nuevo que tiene Steren, visite nuestro sitio web: www.steren.com La información que se muestra en este manual sirve únicamente como referencia sobre el producto.
- Página 3 IMPORTANTE Para reducir el riesgo de fuego o un choque eléctrico, no exponga el monitor al agua o a la humedad. Lea todas las instrucciones de seguridad y operación antes de instalar y operar el equipo. Únicamente conecte el equipo a una toma de corriente que cumpla con las especificaciones señaladas en el manual de instrucciones.
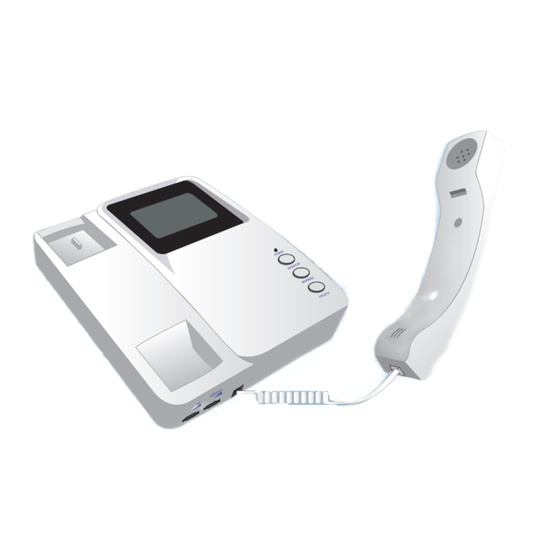
- Página 4 1. CONTROLES Pantalla Auricular Indicador de uso Altavoz Botón de monitor Botón de advertencia Botón de apertura Cable de conexión Micrófono Volumen Contraste Lente de la CALL cámara Botón de llamada Altavoz...
-
Página 5: Instalación
2. INSTALACIÓN 2.1 Cámara 1. Se recomienda que fije la cámara a una altura de entre 1,45 y 1,60 m para un correcto monitoreo. 2. Puede conectar los 2 cables (negro/rojo) a una cerradura eléctrica (no incluida) para la apertura de puerta. 3. -
Página 6: Intercomunicador
2.2 Intercomunicador Se recomienda que fije el intercomunicador a una altura de entre 1,45 y 1,6 m. 1. Fije la placa de metal a la altura deseada utilizando tornillos y taquetes. 2. En el intercomunicador, conecte el extremo del cable de la cámara de acuerdo a los siguientes colores: INTERCOMUNICADOR COLOR DEL CABLE... -
Página 7: Operación
3. OPERACIÓN 3.1 Sección interna 1. Cuando el visitante presione el botón de “llamada”, se escuchará un timbre en el equipo interior. La imagen del visitante se mostrará de forma simultánea en la pantalla. 2. Levante el auricular para hablar con la persona que está afuera de su casa u oficina. -
Página 8: Sección Externa
5. Presione el botón de advertencia si desea activar la alarma externa. Hay 2 formas de activar la alarma: a) Presionando el botón de llamada de la cámara y después el botón de advertencia b) Presionando el botón de monitor y después el botón de advertencia. -
Página 9: Especificaciones
5. ESPECIFICACIONES Monitor Alimentación: 100-240 V~ 60/50 Hz 18 W Consumo: 10 W en operación, 5W en reposo Frec. Horiz.:15,625 kHz Frec. Vertical: 50 Hz Tono de llamada: Ding-Dong Dimensiones: 22,4 x 19 x 6,1 cm Consumo nominal: 9,309 kWh / mes Consumo en espera: 8,322 kWh / año Cámara Alimentación: 12 V - - -... -
Página 10: Póliza De Garantía
1.- Para hacer efectiva la garantía, presente esta póliza y el producto, en donde fue adquirido o en Electrónica Steren S.A. de C.V. 2.- Electrónica Steren S.A de C.V. se compromete a reparar el producto en caso de estar defectuoso sin ningún cargo al consumidor. Los gastos de transportación serán cubiertos por el proveedor. - Página 12 CCTV-030 Thank You on purchasing your new Steren product. This manual includes all the feature operations and troubleshooting necessary to install and operate your new Steren´s B/W video doorphone system. Please review this manual thoroughly to ensure proper installation and operation of this product. For support, shopping, and everything new at Steren, visit our website: www.steren.com...
- Página 13 IMPORTANT To reduce the risk of fire or electric shock, do not expose the monitor to water or moisture. All the safety and operating instructions should be read before using this device. The device should only be connected to the power supply specified in the operating instructions or as marked in it.
- Página 14 1. CONTROLS Screen Handset Power LED Loud Monitor button speaker Warning button Unlock button Receiver’s connecting wire Microphone Volume Contrast Camera CALL lens Call button Loud speaker...
- Página 15 2. INSTALLATION 2.1 Camera 1. Select the place where you wish to install the camera. It is recommended that you install the camera at a 4.5 – 5 feet height. 2. Connect the two cables (black/red) to an lectric door latch (not included) in order to be able to open a door.
- Página 16 2.2 Intercom It is recommended that the intercom be placed at a 4.5-5 feet height 1. Fix the metal plate using screws at the desired height. 2. On the intercom, connect the camera´s cables according to the colors on the following chart: INTERCOM CABLE COLOR BLACK...
-
Página 17: How To Use
3. HOW TO USE 3.1 Indoor section 1. When the visitor presses the call button, a ring will be heard in the indoor device. Then you can view the image in the screen at the same time. 2. Pick up the headset up to talk with the visitor. The system will turn off after you hang up. - Página 18 5. Press Warning if you want to activate the outside alarm. There are 2 ways to turn on the alarm: A) Press the camera´s button then press the warning´s button B) Press the monitor´s button then press the warning´s button 6.
- Página 19 5. SPECIFICATIONS Monitor Input: 100-240 V~ 60/50 Hz 18 W Consumption: 10 W in operation, 5 W in stand-by mode Horizontal Frec.:15.625 kHz Vertical Frec.: 50 Hz Ringtone: Ding-Dong Dimensions: 22.4 x 19 x 6.1 cm Nominal consumption: 9.309 kWh / month Stand-by power consumption: 8.322 kWh / year Camera Input: 12V - - -...
- Página 20 Part number: CCTV-030 Brand: Steren WARRANTY This Steren product is warranted under normal usage against defects in workmanship and materials to the original purchaser for one year from the date of purchase. CONDITIONS 1. This warranty card with all the required information, invoice, product box or package, and product, must be presented when warranty service is required.


