Resumen de contenidos para Steren INT-300
- Página 1 STEREN INT-300 Sistema de intercomunicación para ventanillas Manual de instrucciones V0.1 0816a...
-
Página 2: Sistema De Intercomunicación Para Ventanillas
Sistema de intercomunicación para ventanillas Steren. Por favor revise este manual completamente para estar seguro de instalar y poder operar apropiadamente este producto. Para apoyo, compras y todo lo nuevo que tiene Steren, visite nuestro sitio Web en: www.steren.com... -
Página 3: Características
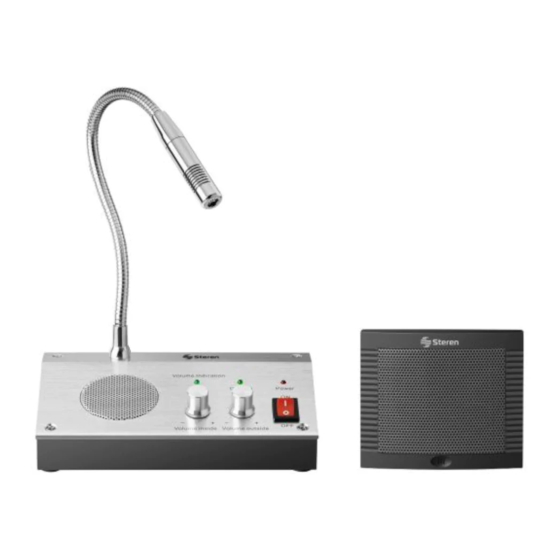
IMPORTANTE • Siempre utilice un paño suave y seco para limpiar el equipo. No utilice solventes. • No intente abrir su equipo puede dañarlo y se anulará la garantía. • Si el cordón de alimentación del eliminador es dañado, éste debe ser reemplazado por el fabricante o su agente de servicio o por personal calificado para evitar algún riesgo. - Página 4 CONTROLES 1. Micrófono del intercomunicador interno. 2. Cuello flexible multi-posición. 3. Altavoz del intercomunicador interno. 4. Control de volumen para interior. 5. Control de volumen para exterior. 6. Interruptor de encendido / apagado. 7. LED indicador de señal interior. 8. LED indicador de señal exterior. 9.
- Página 5 INSTRUCCIONES 1. Desprenda el papel protector de una tira adherible. 2. Pegue la tira adherible en la parte posterior del intercomunicador externo. 3. Repita los pasos 1 y 2 para colocar la otra tira adherible. 4. Desprenda el papel de las tiras adheribles para poder fijar el intercomunicador en el cristal de la ventanilla.
-
Página 6: Especificaciones
10. Encienda el intercomunicador interno. 11. Ajuste la posición del micrófono del intercomunicador interno. 12. Ajuste el nivel de volumen interno y externo de acuerdo a sus necesidades. VISTA TRASERA INT-300 CONTACTO ESPECIFICACIONES Alimentación: 9V - - - 500mA Convertidor Altavoz Alimentación: 110V~ 60Hz 7W... - Página 7 1.- Para hacer efectiva la garantía, presente ésta póliza y el producto, en donde fue adquirido o en Electrónica Steren S.A. de C.V. 2.- Electrónica Steren S.A de C.V. se compromete a reparar el producto en caso de estar defectuoso sin ningún cargo al consumidor. Los gastos de transportación serán cubiertos por el proveedor.
- Página 9 Steren product. This manual includes all the feature operations and troubleshooting necessary to install and operate your new Steren´s Window intercom system. Please review this manual thoroughly to ensure proper installation and operation of this product.
- Página 10 IMPORTANT • Always use a soft dry cloth in order to clean this device. • Do not attempt to open this device. Doing so could cause malfunctions and warranty voiding. • If the adapter´s power cord is damaged, it must be replaced. Contact the manufacturer, a service agent, or qualified personnel in order to replace the power cord.
- Página 11 CONTROLS 1. Inside intercom´s microphone 2. Multi-position gooseneck microphone 3. Inside intercom´s speaker 4. Inside volume control 5. Outside volume control 6. On/off switch 7. Inside signal LED indicator 8. Outside signal LED indicator 9. Power LED indicator 10. Power: AC/DC power adapter input REAR VIEW 11.
- Página 12 INSTRUCTIONS 1. Remove the adhesive tape cover. 2. Paste the adhesive tape in outside intercom´s back. 3. Repeat steps 1 and 2 for the second adhesive tape. 4. Remove the cover and fix the outside intercom in the glass. 5. Place outside intercom´s cable use the wire holder (included).
- Página 13 9. Turn to left the volume controls to a minimum. 10. Turn on the inside intercom. 11. Adjust the position from inside intercom microphone. 12. Adjust the volume level according to your needs. REAR VIEW INT-300 OUTLET SPECIFICATIONS Power adapter Input: 9V - - - 500mA...
- Página 14 NOTAS / NOTES...
- Página 15 Part number: INT-300 Brand: Steren WARRANTY This Steren product is warranted under normal usage against defects in workmanship and materials to the original purchaser for one year from the date of purchase. CONDITIONS 1.- This warranty card with all the required information, invoice, product box or package, and product, must be presented when warranty service is required.
- Página 16 Este instructivo puede mejorar con tu ayuda, llámanos a: Help us to improve this instruction manual, call us to: 01800 500 9000 Centro de Servicio a Clientes Customer Service Center...


