Publicidad
Idiomas disponibles
Idiomas disponibles
049-238
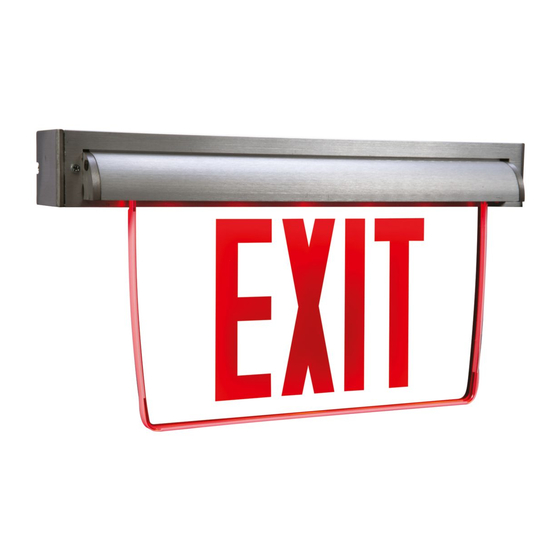
Installation Instructions for the EUX Universal Edge Lit Exit Lens
Instructions d'installation pour la lentille lumineuse de Sortie
universelle EUX
Instrucciones de instalación para Lentes con Salida universal de
iluminación de borde EUX
WARNING
Risk of Fire/Electric Shock
If not qualified, consult an electrician.
Important Safeguards
WHEN USING ELECTRICAL EQUIPMENT, BASIC
SAFETY PRECAUTIONS SHOULD ALWAYS BE
OBSERVED INCLUDING THE FOLLOWING.
1. READ AND FOLLOW ALL SAFETY
INSTRUCTIONS
2. Dry location only. Do not use outdoors.
3. Do not use in hazardous locations, or near gas
or electric heaters.
4. Do not let power supply cords touch hot
surfaces.
5. Do not use this equipment for other than the
intended use.
6. Installation is to be performed only by qualified
personnel.
7. Install in accordance with National Electric Code
and local regulatory agency requirements.
8. The use of accessory equipment not
recommended by the manufacturer may cause
an unsafe condition.
9. Equipment should be mounted in locations and
at heights where it will not readily be subjected
to tampering by unauthorized personnel.
10. SAVE THESE INSTRUCTIONS
WARNING
Risk of Electric Shock
Disconnect power at fuse or circuit breaker before
installing or servicing.
Installation
1. Install electronics housing as described in the
instructions included in the fixture.
2. Determine the configuration of the lens: single
sided or double sided; chevrons required or
not required; and mirror background, white
background, or clear.
The lens is packaged in a single sided
configuration with a clear background.
NOTE: If using the lens with the default
transparent background (instead of the provided
white or mirror backgrounds) it must be installed
only where there is adequate color contrast
between the sign legend and the interior wall
finish behind the sign, to provide for sufficient
visibility. If a change to double sided, or a
different background, is desired, then the lenses
must be separated by peeling off the clip on lens
reflector (See Figure 1).
Step 6.
Peel off clip on reflector to separate panels
Figure 1.
INS #
Otherwise, proceed to
Publicidad
Tabla de contenido

Resumen de contenidos para Eaton Cooper Lighting SURE-LITES EUX
- Página 1 INS # 049-238 Installation Instructions for the EUX Universal Edge Lit Exit Lens Instructions d’installation pour la lentille lumineuse de Sortie universelle EUX Instrucciones de instalación para Lentes con Salida universal de iluminación de borde EUX WARNING WARNING Risk of Fire/Electric Shock Risk of Electric Shock If not qualified, consult an electrician.
- Página 2 (See Figure 3) Otherwise, proceed to step 9. Lens Assembly Chevron Guide Apply Chevrons through windows Figure 3. as needed Installation Instructions for the EUX Universal Edge Lit Exit Lens 049-238 ADX141171 www.eaton.com...
-
Página 3: Mesures De Protection Importantes
être séparées en retirant l’attache du réflecteur de la lentille (voir figure 1). Sinon, passez à l’étape 6. Instructions d’installation pour la lentille lumineuse de Sortie universelle EUX 049-238 ADX141171 www.eaton.com... - Página 4 8. Insérez la lentille dans le boîtier jusqu’à ce que les deux fermoirs s’enclenchent (voir figure 4). Figure 4. 9. Allumez le panneau selon les instructions du boîtier. Instructions d’installation pour la lentille lumineuse de Sortie universelle EUX 049-238 ADX141171 www.eaton.com...
-
Página 5: Lea Y Siga Todas Las Instrucciones De Seguridad
(Ver la figura 1). De lo contrario, pase al Paso 6. Instrucciones de instalación para Lentes con Salida universal de iluminación de borde EUX 049-238 ADX141171 www.eaton.com... -
Página 6: Garantie Et Limitation De Responsabilité
All trademarks are property Eaton’s Cooper Lighting Business of their respective owners. 1121 Highway 74 South Peachtree City, GA 30269 Eaton est une marque de commerce Cooperlighting.com déposée. Toutes les autres marques de commerce sont la propriété de leur © 2014 Eaton propriétaire respectif.


