Publicidad
Idiomas disponibles
Idiomas disponibles
Enlaces rápidos
AUTOMOTIVE PRODUCTS, INC.
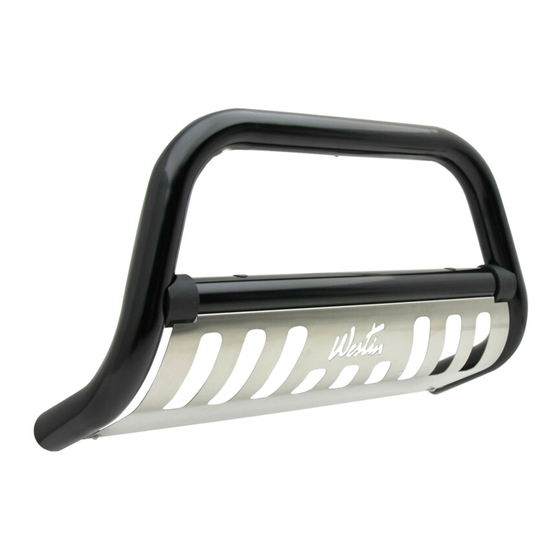
BULL BAR ASSEMBLY
ENSAMBLE DE PARRILLA
DELANTERA CON TIRÓN
BARRE PARE-CHOC SAFARI
32-1750
32-1755
ITEM
QTY
1
1
BULL BAR ASSEMBLY
2, 3
2
BRACKET, PASSENGER (2) AND DRIVER (3)
4
2
PLASTIC PLUG
5
4
RUBBER BUMPER
6
2
1/2-13 X 2.00" HEX HEAD BOLT
7
2
1/2" FLAT WASHER
8
2
1/2" LOCK WASHER
1
1
ENSAMBLE DE PARRILLA DELANTERA CON TIRÓN
2,3
2
PIEZA DE SUJECIÓN, LADO DEL ACOMPAÑANTE
4
2
TAPONES DE PLÁSTICO
5
4
PARACHOQUES DE HULE
6
2
PERNOS CON CABEZA HEXAGONAL DE 1/2-13 X 2,00
7
2
ARANDELA PLANA SAE DE 1/2"
8
2
ARANDELAS DE PRESIÓN DE 1/2
1
1
BARRE PARE-CHOCS SAFARI
2,3
2
SUPPORT,COTE PASSAGER (2) ET COTE CONDUCTEUR (3)
4
2
BOUCHON DE PLASTIQUE
5
4
PARE-CHOCS EN CAOUTCHOUC
6
2
BOULON A TETE HEXAGONALE
7
2
RONDELLE PLATE SAE 1/2 PO
8
2
RONDELLE A FREIN 1/2 PO
STEP 1.
Remove the contents from box and check for damage. Verify all parts are present. Read instructions
completely before beginning.
NOTE:
STEP 2.
It will be necessary to remove the front license plate and bracket. If local/state laws requires a license
plate, license plate relocation kit 32-0055 is available.
STEP 3.
Install brackets one side at a time. Two people may be required for installation since alignment of the bumper
may be necessary after installation.
STEP 4.
Remove the two driver's side bumper nuts from the backside of the bumper. Attach driver's side mount bracket
to vehicle using the existing nuts. Leave loose. Repeat for passenger side.
STEP 5.
Attach bull bar hoop to brackets with 1/2" fasteners. If vehicle is equipped with an air dam below the bumper,
a hole must be cut to allow the Bull Bar to be attached to the vehicle. The bracket can be attached to the
backside of the bumper and the location can be drilled to allow the bolt to pass through. Bolt the Bull Bar on
the vehicle and mark the location of the edges of the tube where it contacts the air dam. Be sure Bull Bar is
adjusted and level. Remove Bull Bar and cut out the area for the Bull Bar to pass through the air dam. Torque
all fasteners to 65 Ft.Lbs.
LIGHT INSTALLATION:
and socket for correct size of nut supplied, insert through large clearance hole in bottom of cross tube. Thread
nut and washers on stud and tighten.
to get the nut started.
NOTE:
Fits most 6" round or rectangle lights. Some lights may require replacing included mount/isolator with rubber
bumpers provided. Mounting stud of 1/2" or less required. Plug mount holes with caps provided if not
installing lights.
INSTRUCTIONS-INSTRUCCIONES-CONSIGNES
APPLICATION: 1992-96 FORD F-150/250 & 1992-97 F-350
APLICACIÓN: 1992-96 FORD F-150/250 & 1992-97 F-350
APPLICATION: 1992-96 FORD F-150/250 & 1992-97 F-350
1
CONTENTS -
CONTENIDO
"
1/2-13 X 2.00
SEE FIGURE 2.
Insert threaded stud on base of the light through hole in cross tube. Using a ratchet, extension
SEE FIGURE 1. NOTE:
- CONTENU
(2)
Y EL CONDUCTOR
"
PO
WO:
2
TOOLS -
HERRAMIENTA
3/4'' SOCKET
21MM SOCKET
3/4'' WRENCH
21MM WRENCH
DRILL
RATCHET
TORQUE WRENCH
UTILITY KNIFE
DADO DE
3/4''
(3)
DADO DE 21MM
LLAVE DE TUERCAS DE
LLAVE DE TUERCAS DE 21MM
TALADRO
MANERAL
LLAVE DE TORQUE
NAVAJA
DOUILLE 3/4 PO
DOUILLE 21MM
CLEF
3/4 PO
CLEF 21MM
PERCEUSE
CLIQUET
CLE DE COUPLE
COUTEAU
SEE FIGURE 2.
A short socket, not a deep well, works best
75-0756 REVISION A 9/25/06
3
- OUTILS
3/4''
Publicidad

Manuales relacionados para Westin 32-1750


Resumen de contenidos para Westin 32-1750
- Página 1 APLICACIÓN: 1992-96 FORD F-150/250 & 1992-97 F-350 APPLICATION: 1992-96 FORD F-150/250 & 1992-97 F-350 AUTOMOTIVE PRODUCTS, INC. BULL BAR ASSEMBLY ENSAMBLE DE PARRILLA DELANTERA CON TIRÓN BARRE PARE-CHOC SAFARI 32-1750 32-1755 ITEM CONTENTS - CONTENIDO - CONTENU TOOLS - HERRAMIENTA...
- Página 2 FINISH PROTECTION Westin products have a high quality finish that must be cared for like any other exposed finish on the vehicle. Protect the finish with a non-abrasive automotive wax, (e.g. Pure Carnauba) on a regular basis. The use of any soap, polish or wax that contains an abrasive is detrimental, as the compounds scratch the finish and open it to corrosion.
- Página 3 PROTECTION DE LA FINISSION Les produits Westin ont une finission de haute qualité qui requiert des soins, comme toute autre finission du véhicule exposée aux éléments. Protégez la finission à l’aide d’une cire non-abrasive (par exemple, Pure Carnauba) de façon régulière. L ’usage de tout savon, pâte à polir ou cire contenant un abrasif est nuisible, puisque les composantes strient la finission et la laissent vulnérable à...