Publicidad
Enlaces rápidos
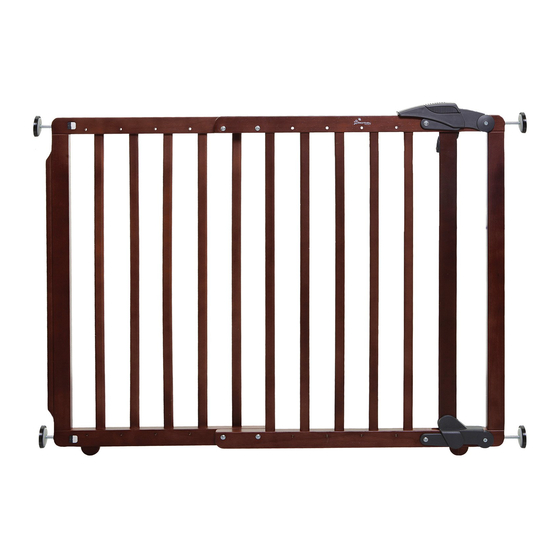
INSTRUCTIONS: Dual Fix - Wall Mounted Gate or Pressure Fit Barrier
Important: Keep instructions for future reference. Read INSTRUCTIONS thoroughly before assembling and installing gate. Complies with Standards: ASTM F1004-18
INSTRUCCIONES: Barrera con sujeción por fijación a la pared o barrera ajustada a presión
Importante: Conserve estas instrucciones para futura referencia. Lea las INSTRUCCIONES totalmente antes de ensamblar e instalar la compuerta. Cumple con las Normas: ASTM
F1004-18
Page 2
WALL-MOUNTED GATE INSTALLATION
Página 2
BARRERA DE MONTAJE CON FIJACIÓN A LA PARED
27.5 - 41 Inch
69.5 - 104 cm
IMPORTANT! READ AND FOLLOW THESE INSTRUCTIONS
CAREFULLY AND KEE P FOR F UTURE REFERENCE
If you sell or give away this product, make sure you give this
WARNING
Children have died or been seriously injured
when gates are not securely installed.
ALWAYS install and use gates as directed using
all required parts.
MUST
escape.
STOP
engaged.
NEVER
Read INSTRUCTIONS thoroughly before installing as incorrect
installation can be dangerous.
NEVER
DO NOT
For customers in US only:
Do Not Return to Store, if you have any
questions, please call us on
336-454-5716,
Toll free: 1-888-271-6959 or email us at
info@tee-zed.com
28 Inch
71 cm
instruction to the new owner.
NOT
Page 6
PRESSURE BARRIER INSTALLATION
Página 6
BARRERA DE MONTAJE A PRESIÓN
27.5 - 41 Inch
69.5 - 104 cm
¡IMPORTANTE! LEA Y SIGA PROPIETARIO ESTAS
INSTRUCCIONES Y GUÁRDELAS PARA REFERENCIA FUTURA
Si vende o regala este producto, asegúrese de darle estas instrucciones al nuevo dueño.
ADVERTENCIA
Niños han muerto o se han lesionado
gravemente cuando las compuertas de
seguridad no están instaladas correctamente.
SIEMPRE
DEBE
DE
Lea las INSTRUCCIONES antes de instalar el producto por que una
instalación incorrecta puede ser peligrosa.
NUNCA
NO INSTALE
Solo para clientes en los EE. UU .:
No devuelva a la tienda, si tiene cualquier
pregunta por favour llamenos a
(336) 454 5716.
Llamada gratuita: (888) 271-6959 o envíenos
un correo electrónico a info@tee-zed.com
1
Nottingham Gro-Gate
28 Inch
71 cm
L891
L2065
®
Publicidad

Resumen de contenidos para Dreambaby Nottingham Gro-Gate L891
- Página 1 L891 L2065 Nottingham Gro-Gate ® INSTRUCTIONS: Dual Fix - Wall Mounted Gate or Pressure Fit Barrier Important: Keep instructions for future reference. Read INSTRUCTIONS thoroughly before assembling and installing gate. Complies with Standards: ASTM F1004-18 INSTRUCCIONES: Barrera con sujeción por fijación a la pared o barrera ajustada a presión Importante: Conserve estas instrucciones para futura referencia.
- Página 2 27.5 - 41 Inch 69.5 - 104 cm Before you start - Antes de empezar 28 Inch 4x25 mm 4x55 mm 4x12 mm 5/32 inch (4mm) 71 cm Wood use only - 41 inch (104cm) Úselos solo en madera Step 1 Measure the width of the opening of where you intend to install the gate.
- Página 3 Step 3 Place in position the templates (Q) and (R) and carefully follow the installation instructions on each template. Template (Q): NOTE: Wall cup will be installed off-center as shown. 1. Place this side of template face up on side of opening opposite hinges.
- Página 4 Step 4 (4A) Install the wall fittings (C) using wood screws (L) with plugs (K) and double-sided adhesive pads (J) provided. For concrete/masonry or brick surfaces use multi-use dowel and concrete/cement screws (not included). For metal surfaces use metal screws (not included). (4B) Fix the hinges (F) using the appropriate fixings depending on the surface available: wood screws (L) with plugs (K) for wooden surfaces, multi-use dowel and concrete screws for concrete...
- Página 5 Step 7 Unlock the gate by sliding the latch towards the wall (1) and then lifting the latch (2) this will retract the screw adjusters (D). Desbloquear la puerta deslizando el pestillo hacia la pared (1) y luego levantando el pestillo (2), esto replegará los ajustadores de los tornillos (D).
- Página 6 PRESSURE BARRIER INSTALLATION BARRERA DE MONTAJE A PRESIÓN 27.5 - 41 Inch 69.5 - 104 cm Before you start - Antes de empezar 28 Inch 71 cm 5/32 inch (4mm) 4x25 mm 4x12 mm 4x55 mm - 41 inch (104cm) Step 1 Measure the width of the opening of where you intend to install the barrier.
- Página 7 Step 3 Screw the two short screw adjusters (D) into the holes on the latch side of the barrier. Position the round nut (I) into the side holes on the hinge side of the barrier. Insert the two long screw adjusters (H) into the gate and screw them into the round nut (I).
- Página 8 Step 5 Install the wall fittings (C) using wood screws (L) with plugs (K) and/ or double-sided adhesive pads (J) provided. For concrete/masonry or brick surfaces use multi-use dowel and concrete/cement screws (not included). For metal surfaces use metal screws (not included). *If there is a skirting board (baseboard) see page 10 Asegure los fijadores de pared (C) utilizando tornillos para madera (L) con enchufe (K) y/o parches adesivos de doble cara...
- Página 9 Step 9 Place the barrier into the desired opening. Ubique la puerta en la abertura deseada. Step 10 Push the latch downwards gently. The screw adjusters (D) will extend and the latch should ‘click’ into place indicating that the barrier is secure. Mueva cuidadosamente el pestillo.
- Página 10 Si la compuerta no se mantiene en posición o no cierra correctamente, puede ser que no esté instalada correctamente. Any additional and replacement parts should be obtained from Tee-Zed Products. Only use original Dreambaby® Sáquela y vuelva a instalarla, asegurándose de que la compuerta quede vertical.


