Tabla de contenido
Publicidad
Idiomas disponibles
Idiomas disponibles
Enlaces rápidos
Publicidad
Capítulos
Tabla de contenido
Solución de problemas

Manuales relacionados para auna Stockton


Resumen de contenidos para auna Stockton
-
Página 3: Tabla De Contenido
Sehr geehrter Kunde, wir gratulieren Ihnen zum Erwerb Ihres Gerätes. Lesen Sie die folgenden Hinweise sorgfältig durch und befolgen Sie diese, um möglichen Schäden vorzubeugen. Für Schäden, die durch Missachtung der Hinweise und unsachgemäßen Gebrauch entstehen, übernehmen wir keine Haftung. Scannen Sie den folgenden QR-Code, um Zugriff auf die aktuellste Bedienungsanleitung und weitere Informationen rund um das Produkt zu erhalten:... -
Página 4: Sicherheitshinweise
SICHERHEITSHINWEISE • Lesen Sie sich die Bedienungsanleitung vor der Installation und Inbetriebnahme des Geräts aufmerksam durch und bewahren Sie diese für den zukünftigen Gebrauch auf. • Stellen Sie sicher, dass das Gerät in einem gut belüfteten Bereich aufgestellt wird und dass zu den Seiten und der Oberseite des Geräts ein Mindestabstand von 10 cm eingehalten wird. - Página 5 • Verwenden Sie ausschließlich das im Lieferumfang enthaltene oder explizit vom Hersteller empfohlenes Zubehör. Verwenden Sie den Netzadapter ausschließlich für seinen vorgesehenen Verwendungszweck. • Ziehen Sie den Netzstecker aus Sicherheitsgründen bei Gewitter aus der Steckdose und wenn Sie das Gerät längere Zeit nicht benutzen. •...
-
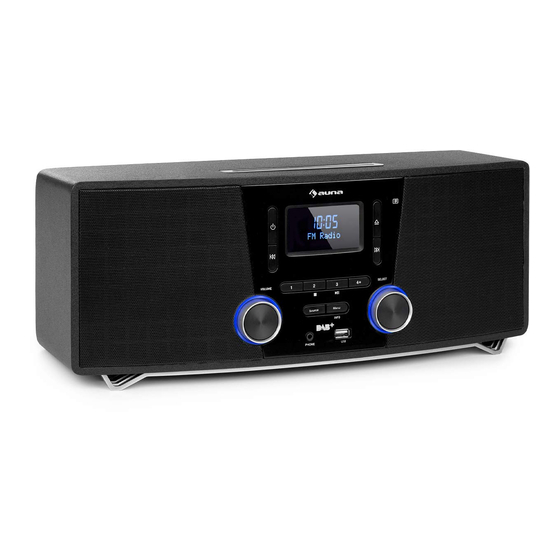
Página 6: Geräteübersicht
GERÄTEÜBERSICHT... - Página 7 20 21 22 Titel überspringen, vorspulen MENU/INFO (Menü/Info) Standby SOURCE (Quelle) LCD-Bildschirm Telefonanschluss CD-Fach öffnen Speicherplatz 1 Fernbedienungssensor Lautstärkeregelung Titel überspringen, zurückspulen Linker Lautsprecher Rechter Lautsprecher Speicherplatz 2, Stopp (USB-/CD-Modus) Wiedergabe/Pause/Speicherplatz 3 CD-Fach Auswahlregler 20 FM-/ DAB-Antenne Speichern DC-IN-Anschluss USB-Anschluss 22 AUDIO-IN-Anschluss...
-
Página 8: Fernbedienung
FERNBEDIENUNG Einschalten / Standby DAB-/FM-Menü Nach oben überspringen, schnell vorspulen, Zifferntasten 10 Öffnen Zeit hinzufügen Wiederholen / Speichern 18 CD / USB / BT Zufallswiedergabe Lautstärke senken Einen Speicherplatz / 19 Stummschalten Ordner nach oben Stopp, Verbinden 20 EQ / X-BASS (Radiomodus) Nach unten überspringen, Lautstärke erhöhen... -
Página 9: Installation
INSTALLATION Batterien in die Fernbedienung einlegen Öffnen Sie die Abdeckung des Batteriefachs. 2. Legen Sie die im Lieferumfang enthaltenen Batterien, der richtigen Polarität entsprechend, in das Batteriefach ein. Drücken Sie die Batterien beim Einlegen oder Entnehmen in Richtung des Minuspols (-). 3. -
Página 10: Inbetriebnahme Und Bedienung
Systemanschlüsse Hinweis: Ziehen Sie das Netzkabel des Gerätes aus der Steckdose, bevor Sie Anschlüsse vornehmen. Wandsteckdose AC 230 V Netzadapter INBETRIEBNAHME UND BEDIENUNG Stummschalten Durch Drücken der MUTE-Taste auf der Fernbedienung oder durch Drücken des Lautstärkereglers des Geräts wird die Lautstärke kurzzeitig stummgeschaltet. - Página 11 Drücken Sie zum Einschalten des Geräts die STANDBY-Taste des Geräts. Drücken Sie zum Ausschalten erneut die STANDBY-Taste DAB/FM/CD/AUX/BT Drücken Sie die DAB/FM-Taste auf der Fernbedienung oder mehrfach die SOURCE-Taste auf dem Gerät, um die verschiedenen Quellen auszuwählen. Anpassung der Antenne Die Antenne an der Rückseite des Geräts sollte vollständig ausgefahren werden, um einen guten DAB-/FM-Empfang zu gewährleisten.
- Página 12 Sendereinstellung (DAB) Drehen und drücken Sie den Auswahlregler des Geräts oder drücken Sie die Tasten oder auf der Fernbedienung, um die Informationen des nächsten Senders anzuzeigen. Drücken Sie die SELECT-Taste, um diesen Sender innerhalb von wenigen Sekunden einzustellen. FM-RADIO-BEDIENUNG Automatische Sendersuche (FM) Schalten Sie das Gerät ein und stellen Sie den FM-Modus ein.
-
Página 13: Dab-Radio-Funktionen
• Um den gespeicherten Sender direkt aufzurufen, können Sie ebenfalls die Zifferntasten verwenden. Wenn Sie beispielsweise die Ziffer „3“ und dann die SELECT-Taste drücken, wird der auf Speicherplatz 3 gespeicherte Sender aufgerufen. Wenn Sie die Ziffer „1“ und anschließend die Ziffer „2“ sowie die SELECT-Taste drücken, wird der auf Speicherplatz 12 gespeicherte Sender aufgerufen. - Página 14 Weitere DAB-Optionen Drücken Sie die MENU-Taste, um in das Menü zu gelangen. Drehen und drücken Sie den Auswahlregler oder verwenden Sie die Tasten oder auf der Fernbedienung, um eine der im weiteren Verlauf folgenden Optionen auszuwählen: Dynamikbereichssteuerung (DRC) In lauter Umgebung können mithilfe von DRC leise Töne hörbarer gemacht werden.
-
Página 15: Fm-Radio-Funktionen
3. Drehen und drücken Sie den Auswahlregler des Geräts oder drücken Sie die Tasten oder auf der Fernbedienung, um „<YES>“ auszuwählen und drücken Sie anschließend zum Bestätigen die SELECT- Taste. 4. Drücken Sie zum Verlassen des Menüs erneut die MENU-Taste. FM-RADIO-FUNKTIONEN Auswahl Stereo/Force Mono Drücken Sie, während Sie einen Stereo-FM-Sender empfangen, die FM ST.-... -
Página 16: Cd/Usb
Audio-Einstellung Drücken Sie die MENU-Taste, um in das Menü zu gelangen. 2. Drehen und drücken Sie den Auswahlregler des Geräts oder drücken Sie die Tasten oder auf der Fernbedienung, bis auf dem Bildschirm „Audio setting“ angezeigt wird und drücken Sie anschließend zum Bestätigen die SELECT-Taste. - Página 17 Titel-Direktwahl Verwenden Sie die Zifferntasten, um den gewünschten Titel direkt für die Wiedergabe auszuwählen. Wenn Sie beispielsweise die Taste „3“ drücken und dann die SELECT-Taste drücken, startet die Wiedergabe unmittelbar bei Titel 3. Oder wenn Sie erst die Tasten „1“ und „2“ und dann die SELECT- Taste drücken, startet die Wiedergabe von Track 12.
-
Página 18: Aux-In
Gerät nicht verfügbar ist, blinkt das BT-Symbol weiterhin auf dem Bildschirm auf. Aktivieren Sie die BT-Funktion Ihres mobilen BT-Geräts und suchen Sie in der Geräteliste nach „Stockton“. Wählen Sie zur Kopplung „Stockton“ aus. Geben Sie, falls erforderlich, das Passwort „0000“... -
Página 19: Weitere Funktionen Und Einstellungen
WEITERE FUNKTIONEN UND EINSTELLUNGEN Sie können über diese Funktion verschiedene Toneffekte einstellen. • Drücken Sie mehrfach die EQ-Taste, um einen der verschiedenen Effekte auszuwählen: FLAT/CLASSIC/ROCK/POP/JAZZ. X-BASS Über diese Funktion können Sie den Basseffekt der Musik verstärken. • Halten Sie die X-BASS-Taste gedrückt, um den X-Bass-Effekt ein- und auszuschalten. - Página 20 Timer ein-/ausschalten Versetzen Sie das Gerät in den Standby-Modus. 2. Halten Sie die TIMER-Taste gedrückt, um den Timer ein-/auszuschalten. Auf dem Bildschirm wird „On Timer“ angezeigt. 3. Drücken Sie zum Einstellen des Stundenwerts, an dem der Timer aktiviert werden soll, die Tasten oder und bestätigen Sie durch Drücken der TIMER-Taste.
- Página 21 Softwareversion prüfen Sie können die Softwareversion überprüfen. Stellen Sie den FM- oder DAB-Modus ein. 2. Drücken Sie die MENU-Taste, um in das Menü zu gelangen. 3. Drehen und drücken Sie den Auswahlregler oder drücken Sie die Tasten oder auf der Fernbedienung bis „SW version“ angezeigt wird und drücken Sie zum Anzeigen der Softwareversionsnummer die SELECT-Taste.
-
Página 22: Reinigung Und Pflege
REINIGUNG UND PFLEGE CD-Reinigung CDs sind gegenüber Schäden ziemlich resistent, es kann jedoch durch Verschmutzungen auf der CD-Oberfläche zu Störungen bei der CD-Wiedergabe kommen. Befolgen Sie die nachfolgend genannten Pflegehinweise, um das bestmögliche Ergebnis bei der CD-Wiedergabe zu erzielen. • Schreiben Sie auf keine der beiden CD-Seiten, insbesondere nicht auf die nicht-beschriftete Seite, da von dieser die Signale ausgelesen werden. -
Página 23: Fehlersuche Und Fehlerbehebung
Gehäusereinigung • Reiben Sie das Gehäuse regelmäßig mit einem weichen Tuch und einer milden Seifenlösung und reiben Sie es anschließend mit einem trockenen Tuch ab. • Verwenden Sie keine Chemikalien zur Reinigung (Benzin, Verdünner, etc.). Es besteht die Gefahr, dass das Gehäuse beschädigt wird. •... - Página 24 Problem Mögliche Ursache USB-Gerät wird nicht erkannt. • Befinden sich MP3/WMA- Dateien auf dem USB-Gerät? • Wurde das Gerät richtig angeschlossen? • Handelt es sich um ein MTP- Gerät? • Enthält das Gerät nur AAC- Dateien? Die USB-Wiedergabe startet nicht. •...
-
Página 25: Technische Daten
TECHNISCHE DATEN Artikelnummer 10034517 Stromversorgung Netzteil-Adapter (mitgeliefert) Eingang: AC 100-240 V ~ 50/60 Hz Ausgang: DC 12 V 3.0 A Standby-Verbrauch < 1 W Lautsprecherimpedanz 4 Ω Ausgangsleistung 2 x 10 W RMS Tuner: Frequenzbereich: FM 87,5 - 108 MHz, DAB 174,928 - 239,2 MHz Frequenzband: 2,400 GHz - 2,480 GHz BT-Kompatibilitätsprofil:... -
Página 26: Konformitätserklärung
HINWEISE ZUR ENTSORGUNG Befindet sich die linke Abbildung (durchgestrichene Mülltonne auf Rädern) auf dem Produkt, gilt die Europäische Richtlinie 2012/19/EU. Diese Produkte dürfen nicht mit dem normalen Hausmüll entsorgt werden. Informieren Sie sich über die örtlichen Regelungen zur getrennten Sammlung elektrischer und elektronischer Gerätschaften. - Página 27 Dear Customer, Congratulations on purchasing this device. Please read the following instructions carefully and follow them to prevent possible damages. We assume no liability for damage caused by disregard of the instructions and improper use. Scan the QR code to get access to the latest user manual and more product information.
-
Página 28: Safety Instructions
SAFETY INSTRUCTIONS • Read the operating instructions carefully before installing and commissioning the device and keep them for future use. • Ensure that the equipment is positioned in a well ventilated area and ensure that there is at least 10 cm (4”) of free space along the sides and top of the equipment. - Página 29 • Use only power supply listed in these user manual/user instructions to power the equipment and do not use the power supply for any other purpose. • In case of an electrical storm, unplug the unit for safety and when not in use for long periods of time.
-
Página 30: Device Overview
DEVICE OVERVIEW... - Página 31 20 21 22 Skip up, Fast forward button MENU/INFO button Standby button SOURCE button LCD display Phone jack CD open button Preset 1 Remote sensor Volume control Skip down, Fast reverse button L-speakers R-speakers Preset 2 button, USB / CD stop button Play/Pause, Preset 3 button CD door Select dial...
-
Página 32: Remote Control
REMOTE CONTROL ON / STANDBY button DAB / FM menu button Skip up button, Fast forward button, Numeric button 10 Open button Time up button REPEAT / RANDOM button Memory button 18 CD/USB/BT button Volume down button Tuner preset up button, 19 MUTE button Folder up button STOP / PAIR button... -
Página 33: Installation
INSTALLATION Putting the batteries into the remote Open the battery cover. Insert the supplied battery according to the terminal indicated in the battery compartment. When inserting or removing the battery, push it towards the (–) battery terminals. Close the cover. Safety notes for the use of batteries •... -
Página 34: Initial Use And Operation
System conncections Note: Make sure to unplug the AC/DC power lead before making any connections WALL SOCKET AC 230 V AC/DC ADAPTER INITIAL USE AND OPERATION Muting The volume is muted temporarily when pressing the MUTE button on the remote control. Press again to restore the volume. Volume control Turn the Volume dial or press the Volume +/- buttons on the remote to increase or decrease the volume. - Página 35 DAB/FM/CD/AUX/BT Press the DAB/FM button on the remote control or SOURCE button repeatedly on the main unit to select different sources. Adjusting the antenna The antenna at the rear panel of the unit should be extended to ensure a good DAB/FM reception. Alter the antenna position for the best reception. DAB Radio Operation The first time the DAB mode is selected, it will automatically scan for available DAB stations.
-
Página 36: Fm Radio Operation
FM RADIO OPERATION Auto scan (FM) Turn on the unit in FM mode. 2. Press and hold the SCAN button to start auto-scanning and saving the available stations (max. 20 storage). Manual scan (FM) Press the PREVIOUS or NEXT button or use the TUNE TUNE button on the remote control repeatedly to tune to a different frequency. -
Página 37: Dab Radio Functions
B) Using the front panel controls: To quick-store a station to a preset button (1 – 3) • Tune to the DAB, FM radio station you want to store. • Press and hold one of the numbered Preset buttons (1-3) for two seconds until you see a message to confirm that the preset has been stored. - Página 38 Dynamic Range Control (DRC) DRC can make quieter sounds easier to hear when the unit is used in a noisy environment. The DRC level of a broadcast is set by the broadcaster and transmitted with the service. Changing the DRC value on your unit enables you to apply a scaling factor to this level.
-
Página 39: Fm Radio Functions
FM RADIO FUNCTIONS Stereo/Force Mono Selection When receiving a Stereo FM radio station, press the FM ST. button will switch between stereo audio and force mono audio. Displaying FM station information Radio Text: Scrolling text which shows information on music titles or program details provided by the radio station. -
Página 40: Cd/Usb
CD/USB Loading and playing CD disc Insert your CD label side front. When you first insert a CD, Displays ‘Reading’ for a few seconds while the CD loads. After a few seconds, your CD will start to play automatically. Reading and playing USB device Insert a USB device into the USB input jack. - Página 41 Repeat/random playing • During playback press the REPEAT /RANDOM button once the display shows “REP_ONE”. The current track will be played repeatedly. Press the REPEAT /RANDOM button again the display shows “REP_ ALL”. All tracks will be played repeatedly. • Press the REPEAT /RANDOM button again The display will show “RANDOM”...
-
Página 42: Aux In
BT status indicator will keep on flashing. Turn on the BT function of your device and enable the search until “Stockton” is found. Select “Stockton” on the BT device to make connection. Enter the pass code “0000” if required. -
Página 43: Further Functions And Settings
FURTHER FUNCTIONS AND SETTINGS EQ operation You can enjoy different EQ sound effect modes. • Press the EQUALIZER button will change to different sound effects of FLAT/CLASSIC/ROCK/POP/JAZZ. X-BASS This function allows you to boost the bass effect of the music. •... - Página 44 Timer on/off setup Turn off the unit in Standby mode. 2. Press and hold the TIMER button to set the timer on/off. It will display “On Timer”. 3. Press the PREVIOUS or NEXT button to set the on timer hour value.
- Página 45 Software version check You can check the unit software version. Turn on the unit in DAB mode or FM mode. 2. Press the MENU button to access the menu control. 3. Turn and press the Select dial or use the TUNE or TUNE button on the remote control until “SW version”...
-
Página 46: Cleaning And Care
CLEANING AND CARE CD cleaning Compact discs are fairly resistant to damage, however mistracking can occur due to an accumulation of dirt on the disc surface. Follow the guidelines below for maximum enjoyment from your CD collection and player. • Do not write on either side of the disc, particularly the non-label side from which signals are read. -
Página 47: Troubleshooting
Cleaning the cabinet • Periodically wipe the cabinet with a soft cloth and a diluted soap solution, then with a dry cloth. • Do not use chemicals for cleaning (petrol, paint thinner, etc.). It may damage the cabinet. • Do not apply oil to the inside of the unit. It may cause malfunctions. TROUBLESHOOTING Problem Possible Cause... - Página 48 Problem Possible Cause USB playback does not start. • Is it a copyright protected WMA file? • Is it a false MP3 file? Bluetooth sound is interrupted or • Is the unit too near to a device distorted. that generates electromagnetic radiation? •...
-
Página 49: Technical Data
TECHNICAL DATA Item number 10034517 Power supply AC/DC adapter (included) Input AC 100-240 V ~ 50/60 Hz Output DC 12 V 3.0 A Power standby: < 1 W Speaker impedance 4 Ω Output power 2 x 10 W RMS Tuner: Frequency range: FM 87.5 - 108 MHz, DAB 174.928 - 239.2 MHz Frequency band: 2.400 GHz - 2.480 GHz... -
Página 50: Hints On Disposal
HINTS ON DISPOSAL According to the European waste regulation 2012/19/ EU this symbol on the product or on its packaging indicates that this product may not be treated as household waste. Instead it should be taken to the appropriate collection point for the recycling of electrical and electronic equipment. - Página 51 Chère cliente, cher client, Toutes nos félicitations pour l’acquisition de ce nouvel appareil. Veuillez lire attentivement et respecter les instructions de ce mode d’emploi afin d’éviter d’éventuels dommages. Nous ne saurions être tenus pour responsables des dommages dus au non-respect des consignes et à...
-
Página 52: Consignes De Sécurité
CONSIGNES DE SÉCURITÉ • Lisez attentivement le mode d‘emploi avant d‘installer et de mettre en service l‘appareil et conservez-le pour vous y référer ultérieurement. • Assurez-vous que l’appareil est placé dans un endroit bien ventilé et que ses côtés et le haut de l’appareil se trouvent à au moins 10 cm des autres objets ou murs. - Página 53 • Utilisez uniquement les accessoires fournis ou explicitement recommandés par le fabricant. Utilisez l’adaptateur secteur uniquement pour l’usage auquel il est destiné. • Pour des raisons de sécurité, débranchez le cordon d’alimentation de la prise en cas d’orage ou si vous prévoyez de ne pas utiliser l’appareil pendant une période prolongée.
-
Página 54: Aperçu De L'appareil
APERÇU DE L’APPAREIL... - Página 55 20 21 22 Saut de titre, avance rapide MENU/INFO Veille SOURCE Ecran LCD Prise téléphone Ouverture du tiroir à CD Emplacement mémoire 1 Capteur de la télécommande Réglage du volume Saut de titre, retour rapide Enceinte de gauche Enceinte de droite Emplacement mémoire 2, Stop (modes USB/CD) Lecture/Pause/Emplacement mémoire 3...
-
Página 56: Télécommande
TÉLÉCOMMANDE Allumer / Veille Menu DAB/FM Saut vers le haut, Avance rapide, Touches numériques 10 Ouvrir augmenter la durée Lecture / lecture aléatoire Mémoriser 18 CD / USB / BT Diminuer le volume Un emplacement mémoire / 19 Fonction Muet dossier vers le haut (mode Stop, connecter 20 EQ / X-BASS radio) -
Página 57: Installation
INSTALLATION Insertion des piles dans la télécommande Ouvrez le couvercle du compartiment à piles. 2. Insérez les piles fournies dans le compartiment en respectant la polarité. Lors de l‘insertion ou du retrait, poussez les piles vers le pôle négatif (-). 3. -
Página 58: Adaptateur Secteur
Connexions du système Remarque : Débranchez le cordon d’alimentation avant d’effectuer les connexions. Prise de secteur AC 230 V Adaptateur secteur MISE EN MARCHE ET UTILISATION Fonction muet Appuyez sur la touche MUTE de la télécommande ou sur la commande de volume de l‘appareil pour couper le son momentanément. -
Página 59: Fonctionnement De La Radio Dab
Pour allumer l‘appareil, appuyez sur la touche STANDBY de l‘appareil. Appuyez à nouveau sur la touche STANDBY pour l‘éteindre. DAB/FM/CD/AUX/BT Appuyez sur la touche DAB / FM de la télécommande ou plusieurs fois sur la touche SOURCE de l’appareil pour sélectionner les différentes sources. Réglage de l‘antenne L‘antenne à... -
Página 60: Fonctionnement De La Radio Fm
Réglage d‘une station (DAB) Tournez et appuyez sur le sélecteur de l‘appareil ou appuyez sur les touches de la télécommande pour afficher les informations relatives à la station suivante. Appuyez sur la touche SELECT pour régler cette station en quelques secondes. FONCTIONNEMENT DE LA RADIO FM Recherche automatique des stations (FM) Allumez l‘appareil et choisissez le mode FM. -
Página 61: Fonctions De La Radio Dab
• Vous pouvez également utiliser les touches numériques pour rappeler directement la station mémorisée. Par exemple, si vous appuyez sur le chiffre « 3 » puis sur le bouton SELECT, vous rappelez la station mémorisée dans la mémoire 3. Si vous appuyez sur le chiffre « 1 » suivi du chiffre « 2 »... - Página 62 Autres options DAB Appuyez sur la touche MENU pour accéder au menu. Tournez et appuyez sur le sélecteur, ou utilisez les touches de la télécommande pour sélectionner l’une des options ci-dessous : Contrôle de plage dynamique (DRC) Dans un environnement bruyant, le DRC peut rendre des sons faibles plus audibles.
-
Página 63: Fonctions De La Radio Fm
FONCTIONS DE LA RADIO FM Sélection Stéréo/ Mono forcé Lorsque vous recevez une station FM stéréo, appuyez sur la touche FM ST. L‘appareil bascule ensuite entre stéréo et mono. Informations de la station FM Plusieurs informations sont fournies par la station. Appuyez plusieurs fois sur la touche INFO pour parcourir les informations affichées : Radio texte : affiche le titre de la chanson ou des détails sur le programme. -
Página 64: Cd/Usb
3. Tournez et appuyez sur le sélecteur de l‘appareil ou appuyez sur les touches de la télécommande pour sélectionner « Stereo allowed » ou « Forced mono », puis appuyez sur la touche SELECT pour confirmer. CD/USB Insertion et lecture d‘un CD Insérez un CD avec l‘étiquette vers le haut dans le lecteur CD. L‘écran affiche « Reading »... - Página 65 Sélection directe d‘un titre Utilisez les touches numériques pour sélectionner directement la piste que vous souhaitez écouter. Par exemple, si vous appuyez sur la touche « 3 » puis sur la touche SELECT, la lecture commence immédiatement à partir de la piste 3. Sinon, si vous appuyez sur les touches « 1 » et « 2 », puis sur la touche SELECT, la lecture de la piste 12 commence.
-
Página 66: Aux-In
à l‘écran. Activez la fonction BT de votre appareil mobile BT et recherchez « Stockton » dans la liste des appareils. Sélectionnez « Stockton » pour l‘appariement. Si nécessaire, entrez le mot de passe « 0000 ». 3. Une fois l’appariement terminé, le voyant BT s’allume en permanence sur l’écran. -
Página 67: Autres Fonctions Et Paramètres
AUTRES FONCTIONS ET PARAMÈTRES Cette fonction vous permet de régler différents effets audio. • Appuyez plusieurs fois sur la touche EQ pour sélectionner l’un des différents effets : FLAT/CLASSIC/ROCK/POP/JAZZ. X-BASS Cette fonction cous permet de renforcer les basses de votre musique. •... - Página 68 Activer/désactiver la minuterie Mettez l‘appareil en mode veille. 2. Maintenez la touche TIMER pour activer / désactiver la minuterie. L‘écran affiche « On Timer ». 3. Pour définir l‘heure à laquelle le minuteur doit être activé, appuyez sur et confirmez en appuyant sur la touche TIMER. 4.
- Página 69 Vérification de la version de logiciel Vous pouvez vérifier la version de logiciel. Activez le mode FM ou DAB. 2. Appuyez sur la touche MENU pour accéder au menu. 3. Tournez et appuyez sur le sélecteur ou appuyez sur les touches de la télécommande jusqu‘à...
-
Página 70: Nettoyage Et Entretien
NETTOYAGE ET ENTRETIEN Nettoyage des CD Les CD sont assez résistants mais des poussières peuvent entraîner des parasites pendant la lecture du CD en raison de la contamination de sa surface. Suivez les instructions d’entretien ci-dessous pour obtenir les meilleurs résultats possibles lors de la lecture d’un CD. •... -
Página 71: Identification Et Résolution Des Problèmes
Nettoyage de l‘appareil • Essuyez régulièrement l‘appareil avec un chiffon doux et une solution de savon doux, puis essuyez-le avec un chiffon sec. • N‘utilisez pas de produits chimiques pour le nettoyage (essence, diluant, etc.). Vous risquez d‘endommager le boîtier. •... - Página 72 Problème Cause possible L‘appareil USB n‘est pas reconnu. • Le périphérique USB contient-il des fichiers MP3 / WMA ? • L’appareil a-t-il été connecté correctement ? • Est-ce un périphérique MTP ? • Le périphérique contient-il uniquement des fichiers AAC ? La lecture en USB ne démarre pas.
-
Página 73: Fiche Technique
FICHE TECHNIQUE Numéro d‘article 10034517 Alimentation Adaptateur secteur (fourni) Entrée : AC 100-240 V ~ 50/60 Hz Sortie : DC 12 V 3.0 A Consommation en veille < 1 W Impédance des enceintes 4 Ω Puissance de sortie 2 x 10 W RMS Tuner : Plage de fréquences : FM 87,5 - 108 MHz, DAB 174,928 - 239,2 MHz... -
Página 74: Informations Sur Le Recyclage
INFORMATIONS SUR LE RECYCLAGE Vous trouverez sur le produit l’image ci-contre (une poubelle sur roues, barrée d‘une croix), ce qui indique que le produit se trouve soumis à la directive européenne 2012/19/UE. Renseignez-vous sur les dispositions en vigueur dans votre région concernant la collecte séparée des appareils électriques et électroniques. - Página 75 Estimado cliente, Le felicitamos por la adquisición de este producto. Lea atentamente las siguientes instrucciones y sígalas para evitar posibles daños. No asumimos ninguna responsabilidad por los daños causados por el incumplimiento de las instrucciones y el uso inadecuado. Escanee el siguiente código QR para obtener acceso a la última guía del usuario y más información sobre el producto.
-
Página 76: Indicaciones De Seguridad
INDICACIONES DE SEGURIDAD • Lea con detenimiento las instrucciones antes de la instalación y puesta en marcha del aparato y consérvelas para consultas posteriores. • Asegúrese de que el aparato se encuentre en una zona bien ventilada y se cumpla la distancia mínima de 10 cm hacia todos los lados del aparato. - Página 77 • Utilice exclusivamente los accesorios contenidos en el envío o explícitamente recomendados por el fabricante. Utilice exclusivamente el adaptador de red para el fi n concebido. • Desconecte el enchufe de la toma de corriente cuando haya tormenta o si no lo usa durante un periodo prolongado de tiempo. •...
-
Página 78: Descripción Del Aparato
DESCRIPCIÓN DEL APARATO... - Página 79 20 21 22 Saltar pista, avanzar MENU/INFO (Menú/Info) Standby SOURCE (Fuente) Monitor LCD Conexión telefónica Abrir/cerrar compartimento de CD Espacio de memoria 1 Sensor del mando a distancia Regulador de volumen Saltar pista, retroceder Altavoz izquierdo Altavoz derecho Espacio de memoria 2, Stop (Modo USB/CD) Reproducción/Pausa/Espacio de Compartimento para CD memoria 3...
-
Página 80: Mando A Distancia
MANDO A DISTANCIA Encender/Standby Menú DAB/FM Ir hacia arriba, avanzar rápidamente, Teclado numérico 10 Abrir añadir tiempo Repetir/ Guardar 18 CD/USB/BT reproducción aleatoria Bajar volumen Espacio de memoria/ 19 Silencio carpeta hacia arriba Stop, conectar 20 EQ/X-BASS (modo radio) Ir hacia abajo, Subir volumen Hora/Temporizador retroceder rápidamente,... -
Página 81: Instalación
INSTALACIÓN Colocación de las pilas en el mando a distancia Abra la tapa del compartimento de las pilas. 2. Coloque las pilas incluidas en el envío en su compartimento con la polaridad correcta. Para quitar o encajar las pilas, presiónelas en dirección al polo negativo (-). -
Página 82: Puesta En Marcha Y Uso
Conexiones del sistema Nota: Desconecte el cable de alimentación del aparato de la toma de corriente antes de realizar cualquier conexión. Toma de corriente CA 230 V Fuente de alimentación PUESTA EN MARCHA Y USO Silencio Pulsando el botón MUTE en el mando a distancia o presionando el regulador de volumen del aparato, el volumen se silencia temporalmente. -
Página 83: Uso De Radio Dab
Para encender el aparato, pulse el botón STANDBY . Pulse de nuevo STANDBY para apagarlo. DAB/FM/CD/AUX/BT Pulse el botón DAB/FM del mando a distancia o varias veces el botón SOURCE del aparato para elegir entre las distintas fuentes. Ajustar la antena La antena de la parte trasera del aparato debe desplegarse completamente para garantizar una buena recepción DAB/FM. -
Página 84: Control De Radio Fm
Sintonización de emisoras (DAB) Gire y presione el regulador de selección del aparato o pulse los botones del mando a distancia para mostrar la información de la siguiente emisora. Pulse el botón SELECT para sintonizar dicha emisora en pocos segundos. CONTROL DE RADIO FM Búsqueda automática de emisoras (FM) Encienda el aparato y seleccione el modo FM. -
Página 85: Funcionamiento De La Radio Dab
• Para acceder directamente a las emisoras guardadas también puede utilizar el teclado numérico. Si, por ejemplo, pulsa la tecla „3“ y luego SELECT, se accederá al espacio de memoria 3 de las emisoras guardadas. Si, por ejemplo, pulsa la tecla „1“, luego „2“ y por último SELECT, se accederá... - Página 86 Otras opciones DAB Pulse el botón MENU para acceder al menú. Gire y presione el regulador de selección del aparato o pulse los botones del mando a distancia para elegir entre las opciones que aparecen a continuación: Compresión del Rango Dinámico (DRC) En entornos ruidosos puede hacer que los tonos más débiles sean más audibles gracias al DRC.
-
Página 87: Funcionamiento De La Radio Fm
FUNCIONAMIENTO DE LA RADIO FM Selección Stereo/Forced Mono Mientras se recibe una emisora FM Stereo, pulse el botón FM ST. El aparato cambia entre estéreo y mono. Información de las emisoras FM Las emisoras facilitan varias informaciones. Para navegar entre toda la información mostrada, pulse varias veces el botón INFO: Radiotexto: Muestra las pistas de música o detalles de un programa. -
Página 88: Cd/Usb
3. Gire y presione el regulador de selección del aparato o pulse los botones del mando a distancia para elegir entre las opciones „Stereo allowed“ o „Forced mono“ y pulse SELECT para confirmar la acción. CD/USB Introducir y reproducir CD Introduzca un CD con la cara impresa hacia arriba dentro del compartimento. - Página 89 Búsqueda rápida de música Durante la reproducción, mantenga pulsados los botones para iniciar la búsqueda rápida. Cuando suelte el botón se continúa con la reproducción musical en el punto correspondiente. Repetir /reproducción aleatoria • Pulse durante la reproducción el botón REPEAT /RANDOM.
-
Página 90: Aux-In
último dispositivo conectado no está disponible, el símbolo BT continúa parpadeando en el monitor. Active la función BT de su dispositivo BT móvil y busque “Stockton“ en la lista de dispositivos. Seleccione “Stockton“ para sincronizar. Introduzca la contraseña “0000“ si fuera necesario. -
Página 91: Otras Funciones Y Ajustes
OTRAS FUNCIONES Y AJUSTES Puede regular varios efectos de sonido con esta función. • Pulse varias veces el botón EQ para seleccionar uno de los siguientes efectos: FLAT/CLASSIC/ROCK/POP/JAZZ. X-BASS Con esta función puede intensificar el efecto de los graves de la música. •... - Página 92 Apagar/encender temporizador Cambie el aparato al modo standby. 2. Mantenga pulsado el botón TIMER para activar/desactivar el temporizador. En pantalla aparece “ON Timer“. 3. Para configurar el valor de la hora a la que se debe activar el temporizador, pulse los botones y confirme pulsando TIMER.
- Página 93 Comprobar versión de software Puede comprobar la versión de software. Seleccione el modo FM o DAB. 2. Pulse el botón MENU para acceder al menú. Gire y presione el regulador de selección o pulse los botones del mando a distancia hasta que aparezca en pantalla “SW Version“ y, a continuación, pulse SELECT para visualizar el número de versión de software.
-
Página 94: Limpieza Y Cuidado
LIMPIEZA Y CUIDADO Limpieza del CD Los CD son bastante resistentes a los daños; no obstante, pueden producirse interferencias en su reproducción debido a la suciedad en su superficie. Siga las indicaciones de cuidado que aparecen a continuación para obtener el mejor resultado posible al reproducir un CD. •... -
Página 95: Detección Y Resolución De Problemas
Limpieza de la carcasa • Limpie regularmente la carcasa con un paño suave y con una solución jabonosa y, a continuación, séquela con un paño seco. • No utilice productos químicos para limpiarla (gasolina, disolvente, etc.) Existe el peligro de que la carcasa se dañe. •... - Página 96 Problema Posible causa No se inicia la reproducción de • ¿Se trata de un archivo WMA USB. protegido? • ¿Se trata de un archivo MP3 erróneo? En el modo BT se interrumpe la • ¿El aparato se encuentra reproducción del sonido o presenta demasiado cerca de otros interferencias.
-
Página 97: Datos Técnicos
DATOS TÉCNICOS Número de artículo 10034517 Suministro eléctrico Adaptador de red (incluido) Entrada: CA 100-240 V ~ 50/60 Hz Salida: CC 12 V 3.0 A Consumo en standby < 1 W Impedancia de altavoces 4 Ω Potencia de salida 2 x 10 W RMS Sintonizador: Respuesta de frecuencia: FM 87,5 - 108 MHz,... -
Página 98: Retirada Del Aparato
RETIRADA DEL APARATO Si el aparato lleva adherida la ilustración de la izquierda (el contenedor de basura tachado) entonces rige la normativa europea, directiva 2012/19/UE. Este producto no debe arrojarse a un contenedor de basura común. Infórmese sobre las leyes territoriales que regulan la recogida separada de aparatos eléctricos y electrónicos. - Página 99 Gentile cliente, La ringraziamo per aver acquistato il dispositivo. La preghiamo di leggere attentamente le seguenti istruzioni per l’uso e di seguirle per evitare possibili danni tecnici. Non ci assumiamo alcuna responsabilità per danni scaturiti da una mancata osservazione delle avvertenze di sicurezza e da un uso improprio del dispositivo.
-
Página 100: Avvertenze Di Sicurezza
AVVERTENZE DI SICUREZZA • Leggere attentamente il manuale d’uso prima di installazione e messa in funzione del dispositivo e conservarlo per future consultazioni. • Assicurarsi di posizionare il dispositivo in un’area ben ventilata e di mantenere una distanza minima di 10 cm su lati e parte superiore. •... - Página 101 • Utilizzare solo accessori inclusi in consegna o espressamente consigliati dal produttore. Utilizzare l’adattatore solo per gli scopi previsti. • In caso di temporale e se il dispositivo non viene utilizzato per lunghi periodi di tempo, staccare la spina dalla presa elettrica per motivi di sicurezza.
-
Página 102: Descrizione Del Dispositivo
DESCRIZIONE DEL DISPOSITIVO... - Página 103 20 21 22 Saltare titolo, avanzare velocemente MENU/INFO Standby SOURCE (fonte) Schermo LCD Connessione telefono Aprire vano CD Posizione di salvataggio 1 Sensore telecomando Regolazione volume Saltare titolo, tornare indietro velocemente Altoparlante sinistro Altoparlante destro Posizione di salvataggio 2, Stop (modalità USB/CD) Play/Pausa/Posizione di salvataggio 3 Vano CD Manopola di selezione...
-
Página 104: Telecomando
TELECOMANDO Accendere/Standby Menu DAB/FM Saltare verso l’alto, avanzare velocemente, Tasti numerici 10 Aprire aumentare il tempo Ripetere/ Salvare 18 CD/USB/BT Riproduzione casuale Abbassare il volume Una posizione di 19 Muto salvataggio/ Stop, Collegare 20 EQ/X-BASS Cartella verso l’alto (modalità radio) Saltare verso il basso, Alzare il volume Ora/Timer... -
Página 105: Installazione
INSTALLAZIONE Inserire le batterie nel telecomando Aprire la copertura del vano delle batterie. 2. Inserire le batterie incluse in consegna nel vano, rispettando la polarità. Quando si inseriscono e si tolgono le batterie, premere in direzione del polo negativo (-). 3. -
Página 106: Messa In Funzione E Utilizzo
Connessioni dell’impianto Nota: staccare la spina prima di effettuare collegamenti. Presa elettrica a parete AC 230 V Adattatore MESSA IN FUNZIONE E UTILIZZO Muto Premere MUTE sul telecomando o premere la manopola del volume sul dispositivo per disattivare temporaneamente il volume. Premere di nuovo per riattivare il volume. -
Página 107: Utilizzo Della Radio Dab
Premere STANDBY (POWER) per accendere il dispositivo. Premere di nuovo STANDBY (POWER) per spegnere il dispositivo. DAB/FM/CD/AUX/BT Premere DAB/FM sul telecomando o premere più volte SOURCE sul dispositivo per selezionare tra le diverse fonti. Regolare l’antenna L’antenna sul retro del dispositivo deve essere estratta completamente per garantire una buona ricezione DAB/FM. - Página 108 Impostare un’emittente (DAB) Ruotare e premere la manopola di selezione o premere telecomando per selezionare l’emittente per mostrare le informazioni dell’emittente successiva. Premere SELECT entro qualche secondo per impostare tale emittente. UTILIZZO DELLA RADIO FM Ricerca automatica delle emittenti (FM) Accendere il dispositivo e selezionare la modalità...
-
Página 109: Funzioni Radio Dab
B) Con il pannello di controllo sul lato frontale del dispositivo: Salvataggio rapido delle emittenti (1 – 3) • Impostare l’emittente DAB/FM che si desidera salvare. • Tenere premuto uno dei tasti Preset numerati (1 – 3) per due secondi, fino a quando compare un messaggio sullo schermo che indica il salvataggio dell’emittente in questa posizione. - Página 110 Ulteriori opzioni DAB Premere MENU per accedere al menu. Ruotare e premere la manopola di selezione o premere sul telecomando per selezionare una delle seguenti opzioni: Controllo della gamma dinamica (DRC) Con l’aiuto del DRC è possibile rendere udibili suoni a basso volume in ambienti rumorosi.
-
Página 111: Funzioni Radio Fm
FUNZIONI RADIO FM Selezionare Stereo/Force Mono Premere FM ST. mentre si riceve un’emittente FM. Il dispositivo cambia tra Stereo e Mono. Informazioni emittente FM Le emittenti mettono a disposizione diverse informazioni. Premere più volte INFO per mostrare le diverse informazioni: Radio testo: mostra il titolo musicale o dettagli del programma. -
Página 112: Cd/Usb
CD/USB Inserire e riprodurre CD Inserire un CD nel vano con il lato stampato verso l’alto. Lo schermo mostra “Reading” per alcuni secondi mentre viene caricato il CD. La riproduzione inizia poi automaticamente. Inserire il dispositivo USB nell’apposito ingresso. Premere USB sul telecomando o premere più... - Página 113 Ripetizione/Riproduzione casuale • Premere una volta REPEAT /RANDOM. Lo schermo mostra “REP_ONE” e il titolo attuale viene ripetuto in loop. • Se si preme nuovamente REPEAT /RANDOM, lo schermo mostra “REP_ALL” e vengono ripetuti tutti i titoli. • Se si preme nuovamente REPEAT /RANDOM, lo schermo mostra “Random”...
-
Página 114: Aux-In
è disponibile, il simbolo BT continua a lampeggiare sullo schermo. Attivare la funzione BT sul dispositivo mobile BT e cercare nella lista “Stockton”. Se necessario, inserire la password “0000”. 3. Una volta realizzato l’accoppiamento, il simbolo BT resta acceso sullo schermo. -
Página 115: Ulteriori Funzioni E Impostazioni
ULTERIORI FUNZIONI E IMPOSTAZIONI Con questa funzione è possibile impostare diversi effetti sonori: • Premere più volte EQ per selezionare tra: FLAT/CLASSIC/ROCK/POP/ JAZZ. X-BASS Con questa funzione si incrementa la potenza dei bassi. • Tenere premuto X-BASS per accendere o spegnere l’effetto X-Bass. Funzione sleep A dispositivo acceso, premere più... - Página 116 Accendere/spegnere il timer Mettere il dispositivo in standby. 2. Tenere premuto TIMER per accendere/spegnere il timer. Sullo schermo compare “On Timer”. 3. Premere REW o FFW per impostare le ore a cui attivare il timer. Confermare con TIMER. 4. Premere REW o FFW per impostare i minuti a cui attivare il timer.
- Página 117 Controllare la versione del software È possibile controllare la versione del software. Attivare la modalità DAB o FM. 2. Premere MENU per accedere al menu. 3. Ruotare e premere la manopola di selezione o premere telecomando fino a quando sullo schermo compare “SW Version” e premere SELECT per mostrare il numero della versione del software.
-
Página 118: Pulizia E Manutenzione
PULIZIA E MANUTENZIONE Pulire i CD I CD sono abbastanza resistenti, ma eventuale sporcizia sulla superficie del CD può causare malfunzionamenti nella riproduzione. Seguire queste indicazioni per ottenere la migliore riproduzione possibile. • Non scrivere su nessun lato del CD, in particolare sul lato non stampato, dato che è... -
Página 119: Ricerca E Correzione Degli Errori
Pulire l’alloggiamento • Strofinare regolarmente l’alloggiamento con un panno morbido e una soluzione saponosa. Procedere poi ad asciugarlo con un panno asciutto. • Non utilizzare prodotti chimici per la pulizia (benzina, solventi, ecc.). Si corre il rischio di danneggiare l’alloggiamento. •... - Página 120 Problema Possibile causa La riproduzione USB non si avvia. • Si tratta di file WMA protetto? • SI tratta di un file MP3 corrotto? Audio interrotto o disturbato in • Il dispositivo è troppo vicino modalità BT. a un altro dispositivo elettrico che causa interferenza? •...
-
Página 121: Dati Tecnici
DATI TECNICI Numero articolo 10034517 Alimentazione Adattatore (incluso in consegna) Ingresso: AC 100-240 V ~ 50/60 Hz Uscita: DC 12 V 3.0 A Consumo in standby < 1 W Impedenza altoparlanti 4 Ω Potenza di uscita 2 x 10 W RMS Tuner: Intervallo di frequenza: FM 87,5 - 108 MHz, DAB 174,928 - 239,2 MHz Banda di frequenza:... -
Página 122: Smaltimento
SMALTIMENTO Se sul prodotto è presente la figura a sinistra (il cassonetto dei rifiuti mobile sbarrato), si applica la direttiva europea 2012/19/UE. Questi prodotti non possono essere smaltiti con i rifiuti normali. Informarsi sulle disposizioni vigenti in merito alla raccolta separata di dispositivi elettrici ed elettronici. Non smaltire i vecchi dispositivi con i rifiuti domestici.