Tabla de contenido
Publicidad
Idiomas disponibles
Idiomas disponibles
Enlaces rápidos
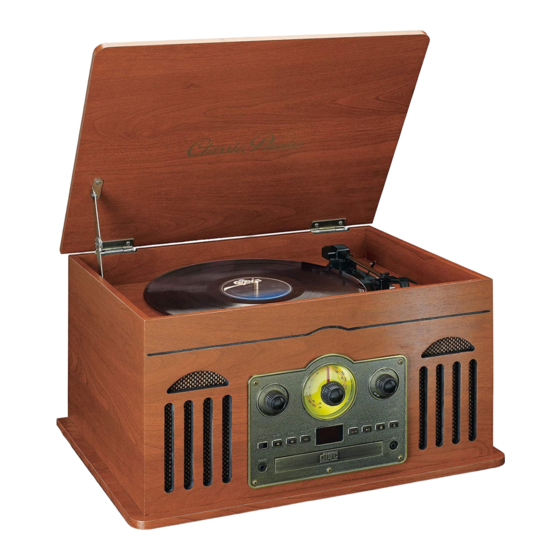
Model: TCD-2600
USER MANUAL- Turntable with bluetooth and built-in speakers
GEBRUIKERSHANDLEIDING- Platenspeler met bluetooth en ingebouwde
luidsprekers
BEDIENUNGSANLEITUNG – Plattenspieler mit Bluetooth und integrierten
Lautsprechern
MODE D'EMPLOI - Tourne-disque avec enceintes intégrées et Bluetooth
MANUAL DE USUARIO- Tocadiscos con bluetooth y altavoces integrados
1
Publicidad
Tabla de contenido

Manuales relacionados para Lenco Classic Phono TCD-2600


Resumen de contenidos para Lenco Classic Phono TCD-2600
- Página 1 Model: TCD-2600 USER MANUAL- Turntable with bluetooth and built-in speakers GEBRUIKERSHANDLEIDING- Platenspeler met bluetooth en ingebouwde luidsprekers BEDIENUNGSANLEITUNG – Plattenspieler mit Bluetooth und integrierten Lautsprechern MODE D’EMPLOI - Tourne-disque avec enceintes intégrées et Bluetooth MANUAL DE USUARIO- Tocadiscos con bluetooth y altavoces integrados...
-
Página 2: Tabla De Contenido
Index: English ................................. 3 Nederlands ..............................20 Deutsch ..............................38 Français ..............................57 Español ..............................76 Version: 1.0... -
Página 3: English
English TCD-2600 CAUTION: Usage of controls or adjustments or performance of procedures other than those specified herein may result in hazardous radiation exposure. This unit should not be adjusted or repaired by anyone except qualified service personnel. PRECAUTIONS BEFORE USE KEEP THESE INSTRUCTIONS IN MIND: Do not use this device near water. - Página 4 27. * To completely disconnect the power input, the mains plug of the apparatus shall be disconnected from the mains, as the disconnect device is the mains plug of apparatus. 28. If the unit works with battery, Battery shall not be exposed to excessive heat such as sunshine, fire or the like.
-
Página 5: Getting Started
GETTING STARTED CONNECTING THE AC POWER CORD 1. Unwind the AC POWER CORD (30) fully and connect it to any convenient household 230V ~ 50Hz outlet 2. Rotate the POWER/VOLUME ON/OFF SWITCH (5) clockwise to turn on the TCD-2600. LOCATION OF CONTROLS 19 6 11 20 SPEAKERS... -
Página 6: Radio Operation
LED DISPLAY CD DOOR EARPHONE JACK B. SKIP BUTTON AM/FM SELECTOR F, SKIP BUTTON PROGRAM BUTTON REPEAT ONE SONG LED INDICATOR REPEAT ALL PLAYBACK PROGRAMMED SONG LED INDICATOR PLAYBACK NON-PROGRAMMED SONG LED INDICATOR CASSETTE EJECT/FAST FORWARD BUTTON CASSETTE SLOT TURNTABLE SHAFT TURNTABLE PLATTER 45 RPM ADAPTOR LIFT LEVER... - Página 7 CD OPERATION NOTE: THIS UNIT NOT ONLY PLAYS COMMERCIAL COMPACT DISCS BUT ALSO SELF-COMPILED CD-RW DISCS. PLEASE READ THIS IMPORTANT INFORMATION: CD mechanisms used in devices like this are designed to fully read all commercial CDs. They will also read self-compiled CD-R/CD-RW discs but it may take up to 10 seconds for playback to start. If playback does not start, it is likely due to the quality of the CD-R/RW disc and/or the compatibility of the CD compilation software.
-
Página 8: Phono Operation
2. Make sure the unit is in STOP mode. 3. Press the PROGRAM BUTTON (17) once, location "P01" will show on the LED DISPLAY (11). 4. Press F. SKIP BUTTON (16) or B. SKIP BUTTON (14) until the desired track number is reached. 5. -
Página 9: Bluetooth Operation
NOTES: Certain types of records may have an auto-stop area outside the preset limit, so the turntable may stop before the last track finishes. If this occurs, set the AUTO-STOP SWITCH (28) to the “OFF” position. This allows the record to play to the end, but please note that it will not stop automatically. You must manually raise the TONE ARM (29) and place it back in the TONE ARM REST (31) and then turn off the power to stop the turntable from spinning. -
Página 10: Auxiliary Input
4. Select the Bluetooth pairing name, to connect the unit. Once connected, the blue LED light will stop flashing. 5. You are now connected to your external device via Bluetooth. 6. Rotate the VOLUME CONTROL KNOB(5) to adjust the sound level AUXILIARY INPUT The TCD-2600 provides an LINE IN JACK (10) for connecting external audio devices like MP3 players, CD players etc to listen through the speakers of this system. - Página 11 Playback Control Toolbar Playback Control Toolbar Playback Control Toolbar Playback Control Toolbar Playback Control Toolbar Playback Control Toolbar Playback Control Toolbar Playback Control Toolbar Playback Control Toolbar Audacity will display a control toolbar for you to edit an Audacity will display a control toolbar for you to edit an Audacity will display a control toolbar for you to edit an Audacity will display a control toolbar for you to edit an Audacity will display a control toolbar for you to edit an...
- Página 12 7. Rec Recording ording ording Select the RECORD button Select the RECORD button Select the RECORD button Select the RECORD button Select the RECORD button Select the RECORD button Select the RECORD button Select the RECORD button Select the RECORD button Select the RECORD button to start recording while your record is playing.
- Página 13 8. Editing your Recording Audio Levels Select your entire recording by selecting “Edit,” then “Select…” then click “All.” Select the “Effect” menu and choose the desired effect. There are various types of effects which are described further on Audacity’s website. Selecting “Normalize”...
- Página 14 Noise Reduction Drag your cursor over a portion of the audio track which contains unwanted noise. We recommend using the beginning or end of a track where there is no music and only noise.
- Página 15 Select “Effect” and then “Noise Removal” from the drop down menu to bring up the “Noise Removal Window” Click “Get Noise Profile” and the window will close automatically. Select the entire track of audio you wish to remove noise from. Adjust the amount of audio that you would like to filter by moving the slider in the “Noise Removal”...
- Página 16 The Editing Toolbar Button Action removes selected audio data and places it on the clipboard. The Cut button copies the selected audio data to the clipboard without removing it from the track. The Copy button pastes whatever is in the clipboard into the track at the position of the selection cursor. The Paste button deletes all of the track except the current selection.
- Página 17 To extend or contract your selection, hold down the SHIF To extend or contract your selection, hold down the SHIF To extend or contract your selection, hold down the SHIF To extend or contract your selection, hold down the SHIF To extend or contract your selection, hold down the SHIF To extend or contract your selection, hold down the SHIF To extend or contract your selection, hold down the SHIF...
-
Página 18: Care And Maintenance
CARE AND MAINTENANCE 1. Avoid operating your unit under direct sunlight or in hot, humid or dusty places. 2. Keep your unit away from heating appliances and sources of electrical noise such as fluorescent lamps or motors. 3. Unplug the unit from the electrical power outlet immediately in case of malfunction. CLEANING THE UNIT ... - Página 19 TCD-2600 Guarantee Lenco offers service and warranty in accordance with the European law, which means that in case of repairs (both during and after the warranty period) you should contact your local dealer. Important note: It is not possible to send products that need repairs to Lenco directly.
-
Página 20: Nederlands
Nederlands TCD-2600 LET OP: Gebruik van bedieningen of afstellingen of uitvoer van procedures anders dan gespecificeerd in deze documentatie kan leiden tot blootstelling aan schadelijke straling. Dit apparaat dient uitsluitend te worden aangepast of gerepareerd door gekwalificeerd onderhoudspersoneel. VOORZORGSMAATREGELEN VOOR GEBRUIK ONTHOUD DE VOLGENDE INSTRUCTIES: Gebruik dit apparaat niet in de buurt van water. - Página 21 23. De leverancier is niet verantwoordelijk voor schade of verloren gegevens veroorzaakt door storing, misbruik, modificatie van het apparaat of batterijvervanging. 24. Onderbreek nooit de verbinding wanneer het apparaat formatteert of bestanden overdraagt. De gegevens kunnen anders corrupt of verloren raken. 25.
-
Página 22: Aan De Slag
AAN DE SLAG AANSLUITEN VAN HET NETSNOER 1. Rol het NETSNOER (30) volledig af en sluit deze aan op een passend 230V ~ 50Hz stopcontact 2. Draai de AAN-/UITSCHAKELAAR/VOLUME (5) rechtsom om de TCD-2600 aan te zetten. PLAATS VAN DE BEDIENINGSORGANEN LUIDSPREKERS FUNCTIETOETS AFSTEMSCHAAL... - Página 23 KLEPJE VOOR CD HOOFDTELEFOONAANSLUITING TOETS VORIGE KEUZETOETS AM/FM TOETS VOLGENDE PROGRAMMATOEST LED-INDICATOR ÉÉN NUMMER HERHALEN ALLES HERHALEN LED-INDICATOR GEPROGRAMMEERD NUMMER AFSPELEN LED-INDICATOR NIET-GEPROGRAMMEERD NUMMER AFSPELEN TOETS CASSETTE UITWERPEN/VOORUITSPOELEN CASSETTEHOUDER PLATENSPELER-AS PLATENSPELERPLATEAU ADAPTER 45 TPM LIFTMECHANISME AUTOSTOP-SCHAKELAAR TOONARM SNELHEIDSKNOP 33/45/78 TPM TOONARMSTEUN LICHTCIRCULATIE FM-ANTENNE...
- Página 24 BEDIENING CD OPMERKING: DIT APPARAAT SPEELT NIET ALLEEN COMMERCIËLE COMPACT DISCS AF, MAAR OOK ZELF-SAMENGESTELDE CD-RW-SCHIJVEN. LEES DEZE BELANGRIJKE INFORMATIE: CD-mechanismen die in apparaten zoals deze worden gebruikt, zijn ontworpen om alle commerciële CD's volledig te lezen. Ze kunnen ook zelf-samengestelde CD-R/CD-RW-schijven lezen, maar het kan 10 seconden duren voordat het afspelen begint.
- Página 25 AFSPEELMODUS CD-PROGRAMMA Met deze functie kunnen de cd-tracks in geprogrammeerde volgorde worden afgespeeld. OPMERKING: Het programma kan alleen in de STOP-modus worden ingesteld. 1. Laad de cd-schijf die u wilt programmeren. 2. Zorg ervoor dat het apparaat in de STOP-modus staat. 3.
- Página 26 5. Til de TOONARM (29) van de TOONARMSTEUN (31) met behulp van het LIFTMECHANISME (27) en beweeg deze langzaam over de langspeelplaat. Het PLATENSPELERPLATEAU (25) begint te draaien. 6. Plaats de TOONARM (29) op de gewenste positie van de plaat. 7.
-
Página 27: Bluetooth-Bediening
BLUETOOTH-BEDIENING 1. Draai de FUNCTIETOETS (2) om stand TAPE/LINE te selecteren. 2. Selecteer de functie Bluetooth door de KEUZETOETS FUNCTIE BLUETOOTH/CASSETTE (35) in de stand BT te drukken. Het blauwe LED-lampje (aan de onderkant van de afstemschaal) begint te knipperen 3. - Página 28 Audacity installeren Audacity installeren Audacity installeren Audacity installeren Audacity installeren Audacity installeren Audacity installeren Audacity installeren Plaats de installatie Plaats de installatie Plaats de installatie Plaats de installatie Plaats de installatie Plaats de installatie Plaats de installatie Plaats de installatie-cd. Uw computer zal het programma automatisch s cd.
- Página 29 Ingang en uitgang aanpassen Ingang en uitgang aanpassen Ingang en uitgang aanpassen Ingang en uitgang aanpassen Ingang en uitgang aanpassen Ingang en uitgang aanpassen Ingang en uitgang aanpassen Ingang en uitgang aanpassen Ingang en uitgang aanpassen Ingang en uitgang aanpassen Ingang en uitgang aanpassen Pas het uitgang Pas het uitgang...
- Página 30 Selecteer de Selecteer de Selecteer de bestemming en bestandsnaam voor het project en klik op “Save” (opslaan) Selecteer de Selecteer de bestemming en bestandsnaam voor het project en klik op “Save” (opslaan) bestemming en bestandsnaam voor het project en klik op “Save” (opslaan) bestemming en bestandsnaam voor het project en klik op “Save”...
- Página 31 Noise Reduction (Ruisonderdrukking) Sleep uw cursor over een deel van de audiotrack dat ongewenste ruis bevat. Wij raden u aan het begin of einde van een track te bewerken waar er geen muziek is en alleen ruis.
- Página 32 Selecteer “Effect” en vervolgens “Noise Removal” (ruisonderdrukking) in het menu dat verschijnt om het venster “Noise Removal”” (ruisonderdrukking) op te roepen Klik op “Get Noise Profile” (krijg ruisprofiel) en het venster zal automatisch sluiten. Selecteer de gehele track van de audio waarvan u de ruis wilt verwijderen. Pas de hoeveelheid audio aan die u wilt filteren door de schuifbalk in het venster “Noise Removal””...
- Página 33 Klik op ‘Remove Noise’ (ruis verwijderen). De taakbalk Bewerking Toets Actie verwijdert geselecteerde audiogegevens en plaatst deze op het klembord. De toets Cut (Knippen) kopieert de geselecteerde audiogegevens naar het klembord zonder deze uit de track te De toets Copy (kopiëren) verwijderen.
-
Página 34: De Koptelefoon Gebruiken (Niet Meegeleverd)
U kunt uw selectie uitbreiden of samentrekken door de toets SHIFT ingedrukt te houden en op U kunt uw selectie uitbreiden of samentrekken door de toets SHIFT ingedrukt te houden en op U kunt uw selectie uitbreiden of samentrekken door de toets SHIFT ingedrukt te houden en op U kunt uw selectie uitbreiden of samentrekken door de toets SHIFT ingedrukt te houden en op U kunt uw selectie uitbreiden of samentrekken door de toets SHIFT ingedrukt te houden en op U kunt uw selectie uitbreiden of samentrekken door de toets SHIFT ingedrukt te houden en op... -
Página 35: Onderhoud En Reiniging
3. Houd het volume op een redelijk niveau, zelfs als uw hoofdtelefoon van het type openlucht is, ontworpen om u geluiden van buitenaf te laten horen. Houd er rekening mee dat een te hoog volume nog steeds geluiden van buitenaf kan blokkeren. ONDERHOUD EN REINIGING 1. - Página 36 Koppelnaam Bluetooth: TCD-2600 Garantie Lenco biedt service en garantie aan overeenkomstig met de Europese wetgeving. Dit houdt in dat u, in het geval van reparaties (zowel tijdens als na de garantieperiode), contact moet opnemen met uw lokale handelaar. Belangrijke opmerking: Het is niet mogelijk om producten die moeten worden gerepareerd rechtstreeks naar Lenco te sturen.
- Página 37 (Afgedankte Elektrische en Elektronische Apparatuur). Service Bezoek voor meer informatie en helpdeskondersteuning www.lenco.com Lenco Benelux BV, Thermiekstraat 1a, 6361 HB, Nuth, Nederland.
-
Página 38: Deutsch
Deutsch TCD-2600 ACHTUNG: Die zweckentfremdete Bedienung, Benutzung oder Einstellung der Prozeduren kann zu gefährlichen Unfällen durch Strahlen führen. Dieses Gerät darf außer von qualifizierten Fachleuten von niemand anderem repariert oder eingestellt werden. VORSICHTSMASSNAHMEN VOR DER BENUTZUNG BEFOLGEN SIE IMMER FOLGENDE ANWEISUNGEN: Benutzen Sie das Gerät nicht in der Nähe von Wasser. - Página 39 23. Der Hersteller haftet nicht für Schäden oder Verluste durch Fehlfunktion, Zweckentfremdung oder Modifikation des Geräts oder durch Wechseln der Batterien. 24. Unterbrechen Sie die Verbindung nicht während einer Formatierung oder einer Datenübertragung. Bei Unterbrechung drohen Datenverlust und Datenbeschädigung. 25. Wenn das Gerät eine USB-Wiedergabefunktion besitzt, dann stecken Sie den USB-Stick direkt in das Gerät.
-
Página 40: Bedienelemente
KURZANLEITUNG DAS WECHSELSTROMKABEL ANSCHLIESSEN 1. Wickeln Sie das WECHSELSTROMKABEL (30) vollständig ab und schließen Sie dieses an eine übliche Haushaltssteckdose 230V ~ 50Hz an 2. Drehen Sie den NETZSCHALTER/LAUTSTÄRKESCHALTER EIN-/AUS-SCHALTER (5) im Uhrzeigersinn, um den TCD-2600 einzuschalten. BEDIENELEMENTE LAUTSPRECHER FUNKTIONSAUWAHL SKALENSCHEIBE KNOPF DREHEN NETZSCHALTER/LAUTSPRECHER EIN-/AUSSCHALTER... -
Página 41: Bedienung Des Radios
LINE-IN BUCHSE LED-Display CD-FACH KOPFHÖRERBUCHSE B. SKIP-TASTE AM/FM AUSWAHL F, SKIP-TASTE PROGRAMM-TASTE LED ANZEIGE EIN LIED WIEDERHOLEN ALLE WIEDERHOLEN LED ANZEIGE WIEDERGABE PROGRAMMIERTES LIED LED ANZEIGE WIEDERGABE NICHT-PROGRAMMIERTES LIED TASTE KASSETTE AUSWERFEN / SCHNELLER VORLAUF KASSETTENEINSCHUB DREHTELLER-WELLE DREHTELLER PLATTER ADAPTER 45 U/MIN HUBHEBEL AUTO STOPP SCHALTER TONARM... - Página 42 CD BETRIEB HINWEIS: DIESES GERÄT SPIELT NICHT NUR HANDELSÜBLICHE CDS AB, SONDERN AUCH SELBST ERSTELLT CD-RW. LESEN SIE BITTE DIESE WICHTIGEN INFORMATIONEN: Der in den Geräten verwendete CD-Mechanismus ist so konzipiert, dass er alle handelsüblichen CDs liest. Sie lesen auch selbst erstellte CD-R/CD-RW, aber es kann bis zu 10 Sekunden dauern, bis die Wiedergabe gestartet wird.
- Página 43 CD PROGRAMM WIEDERGABE MODUS Diese Funktion erlaubt es, CD-Titel in einer programmierten Reihenfolge wiederzugeben. HINWEIS: Das Programm kann nur im STOPP-Modus eingestellt werden. 1. Legen Sie die CD ein, die Sie programmieren möchten. 2. Dabei muss die Musikwiedergabe gestoppt sein. 3.
- Página 44 3. Legen Sie eine Schallplatte auf die DREHTELLERPLATTE (25), verwenden Sie gegebenenfalls den Adapter 45 U/MIN (26). 4. Stellen Sie den GESCHWINDIGKEITSWAHLSCHALTER U/MIN (30) auf die richtige Position, je nachdem welche Schallplatte wiedergegeben wird. 5. Heben Sie den TONARM (29) von der TONARMAUFLAGE (31) hoch, indem Sie den HUBHEBEL (27) verwenden und diesen langsam über die Schallplatte bewegen.
-
Página 45: Verwendung Von Bluetooth
WIEDERGABE SCHNELLER VORLAUF AUSWERFEN VERWENDUNG VON BLUETOOTH 1. Drehen Sie den FUNKTIONSWAHLSCHALTER (2), um die TAPE/LINE Position auszuwählen. 2. Wählen Sie die Bluetooth-Funktion aus, indem Sie die AUSWAHLTASTE BLUETOOTH/KASSETTE (35) auf die Position BT zu stellen. Die blaue LED-Leuchte (unten auf der Skalascheibe) beginnt zu blinken 3. - Página 46 Drehen Sie den NETZSCHALTER/LAUTSTÄRKESCHALTER EIN Drehen Sie den NETZSCHALTER/LAUTSTÄRKESCHALTER EIN Drehen Sie den NETZSCHALTER/LAUTSTÄRKESCHALTER EIN Drehen Sie den NETZSCHALTER/LAUTSTÄRKESCHALTER EIN Drehen Sie den NETZSCHALTER/LAUTSTÄRKESCHALTER EIN Drehen Sie den NETZSCHALTER/LAUTSTÄRKESCHALTER EIN Drehen Sie den NETZSCHALTER/LAUTSTÄRKESCHALTER EIN Drehen Sie den NETZSCHALTER/LAUTSTÄRKESCHALTER EIN Drehen Sie den NETZSCHALTER/LAUTSTÄRKESCHALTER EIN Drehen Sie den NETZSCHALTER/LAUTSTÄRKESCHALTER EIN Drehen Sie den NETZSCHALTER/LAUTSTÄRKESCHALTER EIN...
- Página 47 Taste Taste Funktion Funktion Funktion Bewegt den Cursor zum Start des Schutzes. Bewegt den Cursor zum Start des Schutzes. Bewegt den Cursor zum Start des Schutzes. Bewegt den Cursor zum Start des Schutzes. Bewegt den Cursor zum Start des Schutzes. Bewegt den Cursor zum Start des Schutzes.
- Página 48 Drücken Sie die Stopp Drücken Sie die Stopp Drücken Sie die Stopp Drücken Sie die Stopp Drücken Sie die Stopp Drücken Sie die Stopp Drücken Sie die Stopp Drücken Sie die Stopp- -Taste Taste Taste SPEICHERN SIE NUN DIE DATEI, indem Sie auf „File“ (Datei) und anschließend auf „Save SPEICHERN SIE NUN DIE DATEI, indem Sie auf „File“...
- Página 49 Öffnen Sie das Menü „Effect“ (Effekt) und wählen Sie dann den gewünschten Effekt aus. Das System bietet eine Vielzahl an Effekten, die auf der Webseite von Audacity näher erläutert werden. Wenn Sie die Option „Normalize“ (Normalisieren) auswählen, korrigiert Audacity automatisch die Lautstärke der Aufnahme.
- Página 50 Rauschunterdrückung Ziehen Sie Ihren Cursor über einen Bereich des Audiotitels, auf dem unerwünschte Geräusche zu hören sind. Es wird empfohlen, den Anfang oder das Ende des Titels zu verwenden, da dort keine Musik und nur Störungen vorhanden sind. Wählen Sie im Aufklappmenü „Effect“ (Effekt) und anschließend „Noise Removal“...
- Página 51 Klicken Sie auf „Get Noise Profile“ (Rauschprofil erfassen); das Fenster wird automatisch geschlossen. Wählen Sie den gesamten Audiotitel, aus dem Sie Störungen entfernen möchten. Wählen Sie die Audiodatenmenge, die Sie filtern möchten, indem Sie den Regler im Fenster „Noise Removal“ (Rauschunterdrückung) entsprechend verschieben. Es wird empfohlen, für einen optimalen Sound die Mindestrauschunterdrückung auszuwählen.
- Página 52 Toolbar für die Bearbeitung Taste Funktion entfernen Sie ausgewählte Audiodaten und legen diese im Clipboard ab. Mit der Taste Cut (Schneiden) kopieren Sie ausgewählte Audiodaten und legen diese im Clipboard ab, ohne sie aus dem Titel zu Mit der Taste Copy (Kopieren) entfernen.
- Página 53 Dieser Bereich ist dunkler als die umliegenden Bereiche des Clips. Obwohl Sie Bereiche Dieser Bereich ist dunkler als die umliegenden Bereiche des Clips. Obwohl Sie Bereiche Dieser Bereich ist dunkler als die umliegenden Bereiche des Clips. Obwohl Sie Bereiche Dieser Bereich ist dunkler als die umliegenden Bereiche des Clips. Obwohl Sie Bereiche Dieser Bereich ist dunkler als die umliegenden Bereiche des Clips.
-
Página 54: Pflege Und Wartung
KOPFHÖRER VERWENDEN (NICHT IM LIEFERUMFANG ENTHALTEN) Wenn Sie den Stecker Ihrer Kopfhörer in die OHRHÖRERBUCHSE (13) einstecken, können Sie alleine hören. LESEN SIE DIESE WICHTIGEN INFORMATIONEN, BEVOR SIE IHRE KOPFHÖRER VERWENDEN 1. Vermeiden Sie es, über längere Zeit mit sehr hoher Lautstärke Musik zu hören, dies kann Ihr Gehör schädigen. -
Página 55: Technische Daten
Bluetooth Verbindungsname: TCD-2600 Garantie Lenco bietet Leistungen und Garantien im Einklang mit Europäischem Recht. Im Falle von Reparaturen (sowohl während als auch nach Ablauf der Garantiezeit) sollten Sie deshalb Ihren Einzelhändler kontaktieren. Wichtiger Hinweis: Es ist nicht möglich, Geräte für Reparaturen direkt an Lenco zu schicken. - Página 56 Dabei helfen Sie, natürliche Ressourcen zu schonen und Umweltschutzstandards zur Verwertung und Entsorgung von Altgeräten aufrecht zu halten (Waste Electrical and Electronic Equipment Directive). Service Besuchen Sie bitte für weitere Informationen und unseren Kundendienst unsere Homepage www.lenco.com Lenco Benelux BV, Thermiekstraat 1a, 6361 HB Nuth, The Netherlands.
-
Página 57: Français
Français TCD-2600 ATTENTION : L’utilisation de commandes ou de réglages ou l’exécution de procédures autres que ceux spécifiés dans ce manuel peut entraîner une exposition à des rayonnements dangereux. Cet appareil ne doit pas être réglé ou réparé par quiconque d’autre que du personnel qualifié. PRÉCAUTIONS AVANT UTILISATION GARDEZ CES INSTRUCTIONS À... - Página 58 24. N’interrompez pas la connexion lorsque l’appareil formate ou transfère des fichiers. Sinon, les données pourraient être endommagées ou perdues. 25. Si l'appareil a une fonction de lecture USB, il faut brancher la clé USB directement sur l’appareil. N’utilisez pas de rallonge USB, car cela peut causer des interférences provoquant une perte de données.
-
Página 59: Emplacement Des Boutons
GUIDE DE PRISE EN MAIN BRANCHEMENT DU CORDON D’ALIMENTATION SECTEUR 1. Déroulez entièrement le CORDON D’ALIMENTATION SECTEUR (30) et branchez-le à une prise secteur de 230V ~ 50Hz pratique. 2. Tournez L’INTERRUPTEUR MARCHE-ARRÊT/VOLUME (5) dans le sens horaire pour mettre en marche le TCD-2600. -
Página 60: Utilisation De La Radio
PRISE D’ENTRÉE DE LIGNE ÉCRAN LED PORTE CD PRISE CASQUE BOUTON PRÉCÉDENT SÉLECTEUR AM/FM BOUTON SUIVANT BOUTON PROGRAMME VOYANT LUMINEUX DE RÉPÉTITION D’UNE PISTE RÉPÉTER TOUTES LES PISTES VOYANT LUMINEUX DE LECTURE DE PISTE PROGRAMMÉE VOYANT LUMINEUX DE LECTURE DE PISTE NON PROGRAMMÉE BOUTON D’ÉJECTION DE CASSETTE/AVANCE RAPIDE FENTE DE CASSETTE AXE DU TOURNE-DISQUE... -
Página 61: Mode De Répétition
UTILISATION D’UN CD REMARQUE : CET APPAREIL LIT NON SEULEMENT LES DISQUES COMPACTS COMMERCIAUX, MAIS EGALEMENT LES DISQUES CD-RW COMPILES PAR LES UTILISATEURS. VEUILLEZ LIRE CES INFORMATIONS IMPORTANTES : Les mécanismes de CD utilisés dans de tels appareils sont conçus pour lire entièrement tous les CD du commerce. -
Página 62: Mode De Lecture Programmée De Cd
MODE DE LECTURE PROGRAMMÉE DE CD Cette fonction permet de lire les pistes d’un CD dans un ordre programmé. REMARQUE : Vous ne pouvez programmer des pistes qu'en mode ARRÊT. 1. Chargez le CD à programmer. 2. Vérifiez que l’appareil est en mode arrêt. 3. -
Página 63: Fonctionnement De La Cassette
4. Réglez le SÉLECTEUR DE VITESSE (30) sur la position appropriée en fonction du disque à lire. 5. Levez le BRAS DE LECTURE (29) hors du SUPPORT DU BRAS DE LECTURE (31) en utilisant le LEVIER DE LEVAGE (27) et déplacez-le lentement au-dessus du disque. -
Página 64: Avance Rapide
LECTURE AVANCE RAPIDE ÉJECTION UTILISATION PAR BLUETOOTH 1. Tournez le SÉLECTEUR DE FONCTION (2) pour sélectionner la position TAPE/LINE. 2. Sélectionnez la fonction Bluetooth en appuyant sur le BOUTON DE SÉLECTION DE FONCTION BLUETOOTH/CASSETTE (35) en position BT. Le voyant bleu (en bas du cadran) commence à clignoter. 3. - Página 65 avez fini d’écouter avez fini d’écouter avez fini d’écouter avez fini d’écouter avez fini d’écouter la musique. N’oubliez pas de mettre hors tension votre appareil externe avez fini d’écouter avez fini d’écouter la musique. N’oubliez pas de mettre hors tension votre appareil externe la musique.
- Página 66 Un appui sur le bouton enregistrement enregistre une nouvelle piste à partir du périphérique Un appui sur le bouton enregistrement enregistre une nouvelle piste à partir du périphérique Un appui sur le bouton enregistrement enregistre une nouvelle piste à partir du périphérique Un appui sur le bouton enregistrement enregistre une nouvelle piste à...
- Página 67 Appuyez sur Arrêt Appuyez sur Arrêt Appuyez sur Arrêt Appuyez sur Arrêt Appuyez sur Arrêt Appuyez sur Arrêt Appuyez sur Arrêt SAUVEGARDEZ VOTRE FICHIER MAINTENANT en cliquant sur « SAUVEGARDEZ VOTRE FICHIER MAINTENANT en cliquant sur « SAUVEGARDEZ VOTRE FICHIER MAINTENANT en cliquant sur « SAUVEGARDEZ VOTRE FICHIER MAINTENANT en cliquant sur «...
- Página 68 Sélectionnez le menu « Effect » (Effet) et choisissez l’effet voulu. Il y a divers types d’effets qui sont décrit plus en détail sur le site web d’Audacity. Sélectionnez « Normalize » (Normaliser) si vous souhaitez qu’Audacity corrige automatiquement le volume sur l’enregistrement.
- Página 69 Noise Reduction (Réduction du bruit) Glissez le curseur sur une portion de la piste audio qui contient un bruit indésirable. Nous recommandons d’utiliser le début ou la fin d’une piste où il n’y a pas de musique et uniquement de bruit.
- Página 70 Cliquez sur « Get Noise Profile » (Prendre le profil du bruit) et la fenêtre se fermera automatiquement. Sélectionnez toute la piste audio sur laquelle vous voulez réduire le bruit. Réglez la quantité de son à filtrer en glissant le curseur dans la fenêtre « Noise Removal Window » (Réduction du bruit).
- Página 71 La barre de modification Touche Action Supprime les données audio sélectionnées et les place dans le presse-papier. Le bouton Cut (Coupe) Copie les données audio sélectionnées dans le presse-papiers sans les enlever de la piste. Le bouton Copy (Copier) Colle ce qui est dans le presse-papier sur la piste à la position du curseur de sélection. Le bouton Paste (Coller) Supprime toute la piste sauf la sélection en cours.
- Página 72 Pour étendre ou raccourcir votre sélection, maintenez enfoncé la touche SHIFT (MAJ) et cliquez Pour étendre ou raccourcir votre sélection, maintenez enfoncé la touche SHIFT (MAJ) et cliquez Pour étendre ou raccourcir votre sélection, maintenez enfoncé la touche SHIFT (MAJ) et cliquez Pour étendre ou raccourcir votre sélection, maintenez enfoncé...
-
Página 73: Entretien Et Maintenance
3. Gardez le volume à un niveau raisonnable, même si votre casque a une conception ouverte prévue pour vous permettre d’entendre les sons extérieurs. Sachez qu’un volume excessivement élevé peut couvrir les bruits extérieurs. ENTRETIEN ET MAINTENANCE 1. Évitez d'utiliser l'appareil au soleil ou dans des endroits chauds, humides ou poussiéreux. 2. - Página 74 TCD-2600 Garantie Lenco propose un service et une garantie conformément à la législation européenne, ce qui signifie qu’en cas de besoin de réparation (aussi bien pendant et après la période de garantie), vous pouvez contacter votre revendeur le plus proche.
- Página 75 électriques (directive sur les déchets des équipements électriques et électroniques). Service après-vente Pour en savoir plus et obtenir de l’assistance, visitez www.lenco.com Lenco Benelux BV, Thermiekstraat 1a, 6361 HB, Nuth, Pays-Bas.
-
Página 76: Español
Español TCD-2600 PRECAUCIÓN: El uso de los controles o ajustes o el funcionamiento de los procedimientos excepto a aquellos especificados aquí pueden provocar una exposición peligrosa a la radiación. Esta unidad no debe ajustarse o repararse por ninguna persona salvo personal de servicio cualificado. -
Página 77: Instalación
24. No interrumpa la conexión cuando el dispositivo esté formateando o transfiriendo archivos. En caso contrario, los datos se pueden estropear o perder. 25. Si la unidad dispone de función de reproducción USB, se debe conectar la memoria USB directamente en la unidad. No use un cable de extensión USB ya que puede causar interferencias lo que puede provocar un fallo en los datos. -
Página 78: Puesta En Marcha
PUESTA EN MARCHA CONEXIÓN DEL CABLE DE ALIMENTACIÓN CA 1. Desenrolle el CABLE DE ALIMENTACIÓN CA (30) completamente y conéctelo a cualquier toma conveniente doméstica de 230V ~ 50Hz 2. Gire el interruptor POWER/VOLUME ON/OFF (5) en sentido horario para encender el TCD-2600. SITUACIÓN DE LOS CONTROLES ALTAVOCES SELECTOR DE FUNCIÓN... -
Página 79: Funcionamiento De La Radio
PANTALLA LED TAPA DEL CD CONECTOR DE AURICULARES BOTÓN SALTAR B. SELECTOR AM/FM BOTÓN SALTAR F, BOTÓN PROGRAMA INDICADOR LED DE REPETIR UNA CANCIÓN REPETIR TODAS INDICADOR LED DE REPRODUCCIÓN DE CANCIÓN PROGRAMADA INDICADOR LED DE REPRODUCCIÓN DE CANCIÓN NO PROGRAMADA BOTÓN DE AVANCE RÁPIDO / EYECCIÓN DEL CASETE RANURA DEL CASETE EJE DEL TOCADISCOS... -
Página 80: Funcionamiento Del Cd
FUNCIONAMIENTO DEL CD NOTA: ESTA UNIDAD NO SOLO REPRODUCE DISCOS COMPACTOS COMERCIALES SINO TAMBIÉN DISCOS CD-RW AUTOCOMPLIADOS. LEA ESTA INFORMACIÓN IMPORTANTE: Los mecanismos de CD usados en dispositivos como este están diseñados para leer completamente todos los CD comerciales. Asimismo leerán discos CD-R/CD-RW autocompilados pero puede tardar hasta 10 segundos para que se inicie la reproducción. -
Página 81: Funcionamiento Del Fonógrafo
Esta función permite que las pistas del CD se reproduzcan en una secuencia programada. NOTA: Solo se puede configurar el programa en modo PARADA. 1. Cargue el disco CD que desee programar. 2. Compruebe que la unidad se encuentre en el modo parada. 3. -
Página 82: Funcionamiento Del Casete
5. Levante el BRAZO (29) del SOPORTE DEL BRAZO (31) usando la PALANCA DE LEVANTAMIENTO (27) y lentamente muévalo sobre el disco. El PLATO DEL TOCADISCOS (25) empezará a girar. 6. Coloque el BRAZO (29) en la posición del disco que desee. 7. -
Página 83: Funcionamiento Del Bluetooth
FUNCIONAMIENTO DEL BLUETOOTH 1. Gire el SELECTOR DE FUNCIÓN (2) para seleccionar la posición TAPE/LINE. 2. Seleccione la función Bluetooth pulsando el BOTÓN BLUETOOTH/CASSETTE FUNCTION SELECTOR (35) hasta la posición BT. La luz LED azul (situada en la parte inferior de la escala del dial) empezará a parpadear 3. - Página 84 Instalación de Audacity Instalación de Audacity Instalación de Audacity Instalación de Audacity Instalación de Audacity Instalación de Audacity Instalación de Audacity Instalación de Audacity Instalación de Audacity Inserte el CD de instalación. Su ordenador iniciará automáticamente el programa. Siga las Inserte el CD de instalación.
- Página 85 Ajuste de la entrada y Ajuste de la entrada y Ajuste de la entrada y Ajuste de la entrada y Ajuste de la entrada y Ajuste de la entrada y Ajuste de la entrada y Ajuste de la entrada y salida salida Ajuste el volumen de entrada y salida.
- Página 86 Una vez que haya Una vez que haya Una vez que haya Una vez que haya Una vez que haya finalizado la grabación, la pantalla debe mostrar la grabación tal y como se Una vez que haya Una vez que haya finalizado la grabación, la pantalla debe mostrar la grabación tal y como se finalizado la grabación, la pantalla debe mostrar la grabación tal y como se finalizado la grabación, la pantalla debe mostrar la grabación tal y como se...
- Página 87 Noise Reduction (Reducción del ruido) Arrastre el cursor sobre una parte de la pista de audio que contenga el ruido no deseado. Recomendamos que use el principio o el final de una pista donde no haya música y solo haya ruido.
- Página 88 Seleccione “Effect”(Efecto) y después “Noise Removal”(Retirada de ruido) del menú desplegable para que aparezca la “Noise Removal Window”(la Ventana de eliminación de ruido) Haga clic en “Get Noise Profile”(Obtener el perfil de ruido) y la ventana se cerrará automáticamente. Seleccione toda la pista de audio de la que desee eliminar el ruido. Ajuste la cantidad de audio que desee filtrar moviendo el deslizador en la ventada “Noise Removal”(Retirada de ruido).
- Página 89 Haga clic en “Remove Noise”(Eliminar ruido). La barra de herramientas de edición Botón Acción Retira los datos de audio seleccionados y los coloca en el portapapeles. El botón Cut (Corte) Copia los datos de audio seleccionados al portapapeles sin eliminarla de la pista. El botón Copy (Copiar) Pega lo que esté...
-
Página 90: Utilizar Auriculares (No Incluidos)
Para aumentar o disminuir su selección, mantenga pulsado el botón SHIFT Para aumentar o disminuir su selección, mantenga pulsado el botón SHIFT Para aumentar o disminuir su selección, mantenga pulsado el botón SHIFT Para aumentar o disminuir su selección, mantenga pulsado el botón SHIFT Para aumentar o disminuir su selección, mantenga pulsado el botón SHIFT Para aumentar o disminuir su selección, mantenga pulsado el botón SHIFT Para aumentar o disminuir su selección, mantenga pulsado el botón SHIFT... -
Página 91: Cuidado Y Mantenimiento
CUIDADO Y MANTENIMIENTO 1. Evite operar la unidad bajo la luz solar directa o en lugares cálidos, húmedos o polvorientos. 2. Mantenga la unidad alejada de electrodomésticos térmicos y fuentes de ruido eléctrico como lámparas fluorescente o motores. 3. Desenchufe la unidad de la toma de corriente eléctrica inmediatamente en caso de un funcionamiento incorrecto. -
Página 92: Especificaciones
TCD-2600 Garantía Lenco ofrece servicio y garantía en cumplimiento con las leyes de la Unión Europea, lo cual implica que, en caso de que su producto precise ser reparado (tanto durante como después del periodo de garantía), deberá contactar directamente con su distribuidor.