Publicidad
Idiomas disponibles
Idiomas disponibles
Enlaces rápidos
PACKAGE CONTENTS
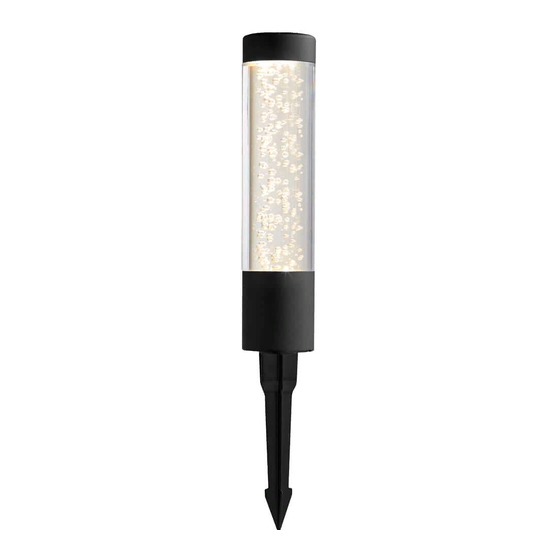
A
A - Fixture bollard x 1
Assembly and Installation
1
Attaching and installing the light
WARNING: Risk of electric shock. Do not install the light
within 10 ft. (3.05 m) of a pool, spa or fountain.
NOTE: Do not use a hammer. If the ground is hard, use water
to soften it or a trowel to loosen the soil.
Option 1: with extension post
□ Twist the connector (2) out at the bottom of the extension post (B), and
remove the connector (2).
□ Attach the fixture bollard (A) to the extension post (B) by routing the fixture
wire (1) through the extension post (B) and placing the fixture bollard
(A) onto the threaded end of the extension post (B) and then twisting
clockwise.
□ Route fixture wire (1) through the the connector (2) and twist the
connector (2) back into the bottom of the extension post (B).
□ Insert the fixture wire (1) into the groove located on the top of ground
stake (C).
□ Attach the extension post (B) to the stake (C) by placing the bottom of the
extension post (B) onto the top of the stake (C) and twisting clockwise.
Option 2: without extension post
□ Twist the connector (2) out at the bottom of the extension post (B), and
remove the extension post (B). Route the fixture wire (1) through the
connector (2), and then twist the connector (2) into the bottom of the
fixture bollard (A).
□ Attach the fixture bollard (A) to the stake (C) by placing the bottom of the
fixture bollard (A) onto the top of the stake (C) and twisting clockwise.
Option 1:
with extension post
A
3
B
2
2
1
C
Use and Care Guide
LED Low Voltage Path Light
B
B - Extension post x 1
Option 2:
without extension post
1
C
C - Stake x 1
D - Connector with 12 in. wire length
2
Connecting the wires
□ Install the fixture in the ground by pushing the stake (C).
□ Detach and place the wire connector (D) on opposite sides of the low
voltage cable (not included) where the fixture will be located.
□ Align and fit the main low voltage cable vertically in the slot of the wire
connector as shown.
□ Press the wire connector (D) together until it is fully seated and locked
around the cable. Pre-set prongs will pierce the cable insulation and
establish contact. Turn on the power unit. If the light fixture does not turn
on, repeat operations 2 and 3.
□ Once the clip-on connector is in place, we recommend wrapping it in
electrical tape (not included) for additional protection.
A
3
Remote Control
□ Prior to using the remote, remove the pull
tab (4) at the base of the remote control
(E) to allow battery contact.
□ Press the buttons on the remote (E) to
select the desired mode or push the
1
button (3) on the fixture bollard to select
the desired mode.
C
Please contact 1-855-HD-HAMPTON for further assistance.
D
(attached to fixture) x 1
WARNING: The connector contacts (D) have sharp edges
for piercing the main low voltage cable. To avoid injury,
do not touch the metal contacts.
CAUTION: The wire from the low voltage power unit shall be
12-16 AWG type underground Low Energy Circuit Cable.
IMPORTANT: Protect the wiring by routing it in close
proximity to the light or next to a building structure such as
a house or deck.
Do not bury the wiring by more than 6 in. (15.24 cm) in order
to connect to the main secondary wire.
Do not submerge fixtures in water.
D
Item #1005 697 369
Model #62909
E
E - Remote control x 1
E
4
HAMPTONBAY.COM
Publicidad

Manuales relacionados para HAMPTON BAY 62909


Resumen de contenidos para HAMPTON BAY 62909
- Página 1 Item #1005 697 369 Model #62909 Use and Care Guide LED Low Voltage Path Light PACKAGE CONTENTS A - Fixture bollard x 1 B - Extension post x 1 C - Stake x 1 D - Connector with 12 in. wire length...
- Página 2 Maintenance Replacing the battery □ Push the tab (5) at the base of the remote CAUTION: When replacing the battery, use one (1) (E) and pull the battery holder (6) out of the CR2025 battery. remote. Replace the old battery with a new CR2025 battery.
- Página 3 Artículo Núm. 1005 697 369 Guía de uso y cuidado Modelo Núm.62909 Lámpara para sendero de luz LED y bajo voltaje CONTENIDO DEL PAQUETE A - Bolardo de la C - Extensión de poste x 1 C - Estaca x 1 D - Conector con cable de 30.5 cm (12 plg)
- Página 4 Mantenimiento Cómo reemplazar la batería □ Empuja la pestaña (5) en la base del control PRECAUCIÓN: Al reemplazar la batería, usa una (1) remoto (E) y saca el soporte de la batería (6) del batería CR2025. control remoto. Reemplaza la batería vieja por una nueva CR2025.