Tabla de contenido
Publicidad
Idiomas disponibles
Idiomas disponibles
Enlaces rápidos
Harbor Breeze
is a registered trademark
®
of LF, LLC. All Rights Reserved.
ATTACH YOUR RECEIPT HERE
Serial Number ____________
Questions, problems, missing parts? Before returning to your retailer, call our customer
service department at 1-800-643-0067, 8 a.m. - 6 p.m., EST, Monday - Thursday,
8 a.m. - 5 p.m., EST, Friday.
EB1360
®
Purchase Date ____________
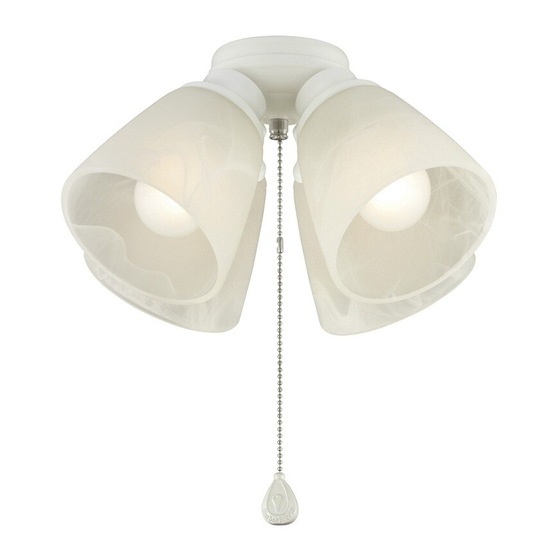
CEILING FAN LIGHT KIT
1
ITEM #0429784
#0429785
#0429786
#0429787
#0429788
MODEL #40314
#40315
#40316
#40317
#40318
Español p. 9
Lowes.com/harborbreeze
Publicidad
Tabla de contenido
Solución de problemas

Manuales relacionados para Harbor Breeze 40314


Resumen de contenidos para Harbor Breeze 40314
- Página 1 #0429785 #0429786 #0429787 ® #0429788 CEILING FAN LIGHT KIT Harbor Breeze is a registered trademark ® MODEL #40314 of LF, LLC. All Rights Reserved. #40315 #40316 #40317 #40318 Español p. 9 ATTACH YOUR RECEIPT HERE Serial Number ____________ Purchase Date ____________ Questions, problems, missing parts? Before returning to your retailer, call our customer service department at 1-800-643-0067, 8 a.m.
-
Página 2: Package Contents
PACKAGE CONTENTs PART DEsCRIPTION QTY. Light Kit Fitter Glass Shade Pull Chain Extension Bulb HARDwARE CONTENTs (not shown actual size) Hex Nut Lock Washer Qty.1 Qty.1 Lowes.com/harborbreeze... -
Página 3: Safety Information
sAFETY INFORmATION Please read and understand this entire manual before attempting to assemble, operate or install the product. • Before you begin installing the light kit, disconnect the power by removing fuses or turning off the circuit breakers. • Make sure that all electrical connections comply with local codes, ordinances, the National Electrical Code, and ANSI/NFPA 70-199. Hire a qualified electrician or consult a do-it-yourself wiring handbook if you are unfamiliar with installing electrical wiring. - Página 4 sAFETY INFORmATION CAUTION: • TURN OFF ELECTRICITY at the main fuse box (or circuit breaker box) before beginning installation by removing the fuse (or switching the circuit breaker off). If you are not sure the lighting system has a grounding means, DO NOT attempt to install this fixture. Contact a qualified, licensed electrician for information regarding the proper grounding methods as required by the local electrical code in your area. •...
- Página 5 AssEmbLY INsTRUCTIONs 2. Remove three switch housing screws and lower the switch housing from the existing fan housing. If applicable, disconnect the male plug from the motor Motor Housing housing and the female plug from the switch housing. Remove the switch housing from the switch housing Switch Switch Housing...
- Página 6 AssEmbLY INsTRUCTIONs 5. Remove the existing wire connectors from the white and blue wires labeled FOR LIGHT in the switch White White housing. Connect the white wire from the light kit Black Blue fitter (A) to the white wire from the fan. Connect the black wire from the light kit fitter (A) to the blue wire Male Plug from the fan. (Fig. 5a/Fig. 5b) If applicable, reconnect Switch Female Plug the male plug from the motor housing to the female...
-
Página 7: Care And Maintenance
AssEmbLY INsTRUCTIONs 8. Attach the glass shades (B) to the light kit fitter (A) by screwing them in a clockwise direction onto the threaded ends of the light kit (A). Note: Do not overtighten as glass may crack or break. 9. Install the four bulbs (D). CAUTION: When replacing bulbs, please allow bulb(s) and glass shade(s) to cool down before touching. -
Página 8: Troubleshooting
For replacement parts, call the customer service department at 1-800-643-0067, 8 a.m. - 6 p.m., EST, Monday - Thursday, 8 a.m. - 5 p.m., EST, Friday. PART DEsCRIPTION Glass Shade Pull Chain Extension Hex Nut Lock Washer Printed in China Harbor Breeze is a registered trademark ® of LF, LLC. All Rights Reserved. Lowes.com/harborbreeze... -
Página 9: Kit De Iluminación Para Ventilador De Techo
KIT DE ILUMINACIÓN PARA Harbor Breeze es una marca registrada ® VENTILADOR DE TECHO de LF, LLC. Todos los derechos reservados. MODELO # 40314 # 40315 # 40316 # 40317 # 40318 ADJUNTE SU RECIBO AQUÍ Número de serie ____________ Fecha de compra ____________ ¿Preguntas, problemas, piezas faltantes? Antes de volver a la tienda, llame a nuestro... -
Página 10: Contenido Del Paquete
CONTENIDO DEL PAQUETE PIEZA DESCRIPCIÓN CANT. Soporte del kit de iluminación Pantalla de vidrio Extensión para la cadena de tiro Bombilla ADITAMENTOS (no se muestran en tamaño real) Tuerca Arandela de hexagonal seguridad Cant.1 Cant. 1 Lowes.com/harborbreeze... -
Página 11: Información De Seguridad
INfORMACIÓN DE SEgURIDAD Lea y comprenda completamente este manual antes de intentar ensamblar, usar o instalar el producto. • Antes de comenzar a instalar el kit de iluminación, desconecte la alimentación eléctrica; para esto retire los fusibles o coloque el interruptor de circuito en la posición de apagado. •... -
Página 12: Preparación
INfORMACIÓN DE SEgURIDAD PRECAUCIÓN: • DESCONECTE EL SUMINISTRO DE ELECTRICIDAD en la caja de fusibles principal (o desde la caja del interruptor de circuito) antes de comenzar la instalación; para hacerlo, retire el fusible (o apague el interruptor de circuito). NO intente instalar esta lámpara si no está seguro de que su sistema de iluminación tiene una puesta a tierra. Póngase en contacto con un electricista calificado y certificado para obtener información sobre los métodos adecuados de puesta a tierra exigidos por el código local de electricidad de su área. -
Página 13: Aditamentos Utilizados
INSTRUCCIONES DE ENSAMBLAJE 2. Retire tres tornillos de la carcasa del interruptor y baje la carcasa del interruptor de la carcasa del ventilador existente. Si corresponde, desconecte Carcasa del motor el conector macho de la carcasa del motor y el conector hembra de la carcasa del interruptor. - Página 14 INSTRUCCIONES DE ENSAMBLAJE Retire los conectores de cables existentes de los conductores blanco y azul etiquetados como PARA LA Blanco Blanco LUZ en la carcasa del interruptor. Conecte el Negro Azul conductor blanco del soporte del kit de iluminación (A) con el conductor blanco del ventilador.
-
Página 15: Cuidado Y Mantenimiento
INSTRUCCIONES DE ENSAMBLAJE 8. Fije las pantallas de vidrio (B) al soporte del kit de iluminación (A) atornillándolas en dirección de las manecillas del reloj y en los extremos roscados del kit de iluminación (A). Nota: No apriete demasiado ya que el vidrio podría agrietarse o quebrarse. -
Página 16: Solución De Problemas
8 a.m. a 6 p.m., y los viernes de 8 a.m. a 5 p.m., hora estándar del Este. PIEZA DESCRIPCIÓN Pantalla de vidrio Extensión para la cadena de tiro Tuerca hexagonal Arandela de seguridad Impreso en China Harbor Breeze es una marca registrada de ® LF, LLC. Todos los derechos reservados. Lowes.com/harborbreeze...