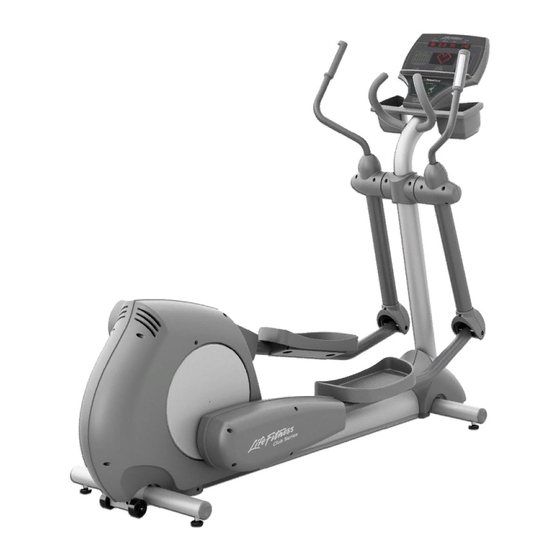
Resumen de contenidos para LifeFitness 91Xi
- Página 1 91Xi Total Body Trainers a s s e m b ly i n s t r u c t i o n s 91Xi Total Body Trainers I N S T R U C T I O N S M O N T A G E...
- Página 2 Congratulations... and welcome to the world of The following Parts List and the step-by-step assembly procedures have been assembled to make the set-up of the Total Body Trainer as quick and easy as possible. Please take special note of the following important points prior to choosing a location and beginning assembly of the Total Body Trainer.
-
Página 3: Important Safety Instructions
IMPORTANT SAFETY INSTRUCTIONS! DO NOT locate the cross-trainer outdoors, near swimming pools, or in areas of high humidity. DO NOT operate your cross-trainer if it has been dropped, damaged, or even partially immersed in water. If this occurs, contact life fitness customer support services at the number in the operation manual. DO NOT locate the cross-trainer any closer than 30 inches (76 cm ) to a television set. - Página 4 Magnetic #2 Bit Phillips Screwdriver, 5/16" & 3/16" Hex Key Wrench, 1/2" Open End Wrench OOLS EQUIRED FOR SSEMBLY Tournevis cruciforme magnétique nº2, clé hexagonale T-45, clé plate de 16 mm UTILS NÉCESSAIRES AU MONTAGE Destornillador magnético con punta Phillips No. 2, llave para tuercas hexagonales T-45, ERRAMIENTAS REQUERIDAS PARA EL MONTAJE llave de boca de 16 mm Parts Description...
- Página 5 LEASE READ THIS PRIOR TO ASSEMBLY This product is preconfigured to accept the addition of the Life Fitness Entertainment System. A POWER CABLE and COAXIAL CABLE have been pre-installed. If this product is to be installed in conjunction with the Life Fitness Entertainment System, please read both the product assembly instructions and Entertainment Ready assembly instructions (included with the Life Fitness Entertainment System) prior to assembly.
- Página 6 Before proceeding, familiarize yourself with the parts of the Cross-Trainer and make sure that you have received all the items described in the Parts List. Locate the left and right FRONT COVER (#9, #10). Using two PHILLIPS PAN HEAD SCREWS (#3), mount the USER LEFT FRONT COVER (#9) to the FRAME (A).
- Página 7 1. Avant de poursuivre, familiarisez-vous avec les par- Antes de proceder a armar la unidad, familiarícese con las piezas del Cross-Trainer y verifique que haya ties de l'appareil et vérifiez si vous avez reçu toutes recibido todos los artículos descritos en la lista de les pièces mentionnées dans la liste.
- Página 8 Attach the 4-PIN (4P), 3-PIN (3P), and 16-PIN (16P) CON- NECTORS to the corresponding JACKS on the back of the CONSOLE ASSEMBLY (#4). Feed any excess WIRE HARNESS (E) down into the CONSOLE SUPPORT ASSEMBLY (#7). Secure the CON- SOLE ASSEMBLY (#4) to the CONSOLE SUPPORT ASSEMBLY using four PHILLIPS PAN HEAD SCREWS (#2).
- Página 9 Branchez les CONNECTEURS À 4 BROCHES (4P), 3 Fije los conectores de 3 PATILLAS (3P) y 10 PATILLAS BROCHES (3P) et à 10 BROCHES (10P) sur les prises (10P) a los jacks correspondientes en la parte trasera correspondantes à l'arrière de la console (nº 4). del CONJUNTO DE CONSOLA (N°...
-
Página 10: Physical Dimensions
PHYSICAL DIMENSIONS: Length: 83 inches / 211 centimeters Width: 28 inches / 71 centimeters Height: 61 inches / 155 centimeters Weight: 235 pounds / 106.5 kilograms DIMENSIONS HORS TOUT : Longueur : 211 centimètres Largeur : 71 centimètres Hauteur : 155 centimètres Poids : 106,5 kilogrammes... -
Página 12: Pre-Operation Checklist
PRE-OPERATION CHECKLIST • Ensure that all fasteners are tight. • Make sure the CROSS-TRAINER is properly leveled and stable. (Refer to the Operation Manual) • Ensure that the Leveler Jam Nuts are tight. (Refer to the Operation Manual) • Read the entire Operation manual before using the Cross-Trainer. LISTE DES VÉRIFICATIONS À...

