Tabla de contenido
Publicidad
Idiomas disponibles
Idiomas disponibles
Enlaces rápidos
Publicidad
Tabla de contenido

Manuales relacionados para Proline STCM15P

Resumen de contenidos para Proline STCM15P
- Página 1 STCM15P COFFEE MAKER CAFETIÈRE KOFFIEZETAPPARAAT CAFETERA...
- Página 2 WARNINGS This appliance is intended to be used in household and similar applications such as: staff kitchen areas in shops, offices and other working environments; farm houses; by clients in hotels, motels and other residential type environments; bed and breakfast type environments. If the supply cord is damaged, it must be replaced by the manufacturer, its service agent or similarly qualified persons in order to avoid a hazard. The appliance must not be EN-1...
- Página 3 immersed. This appliance can be used by children aged from 8 years and above if they have been given supervision or instruction concerning use of the appliance in a safe way and if they understand the hazards involved. Cleaning and user maintenance shall not be made by children unless they are older than 8 and supervised. Keep the appliance and its cord out of reach of children aged less than 8 years. Appliances can be used by persons with reduced physical, sensory or mental capabilities or lack of experience and knowledge if they have been EN-2...
- Página 4 given supervision or instruction concerning use of the appliance in a safe way and understand the hazards involved. Children shall not play with the appliance. For the details on how to clean surfaces in contact with food and descaling please see section “Cleaning and descaling” on page EN‐11. WARNING: Risks of injuries if you don't use this appliance correctly. The heating element surface is subject to residual heat after use. EN-3...
-
Página 5: Important Safety Instructions
IMPORTANT SAFETY INSTRUCTIONS Switch off and unplug the appliance from the mains socket when not in use or before cleaning. Allow the appliance to cool before cleaning. Be careful not to get scalded by steam. Never switch on the appliance without water in the water tank. Only use the carafe supplied with this appliance. Never use it on a cooking surface. Do not use the carafe if it is cracked or the handle is loose. Do not operate the appliance without water in the tank. Scalding may occur if the cover is opened during the brewing cycles. Never leave the empty carafe on the warming plate when the appliance is operating, otherwise the carafe is liable to crack. EN-4... -
Página 6: Before Using The Appliance For The First Time
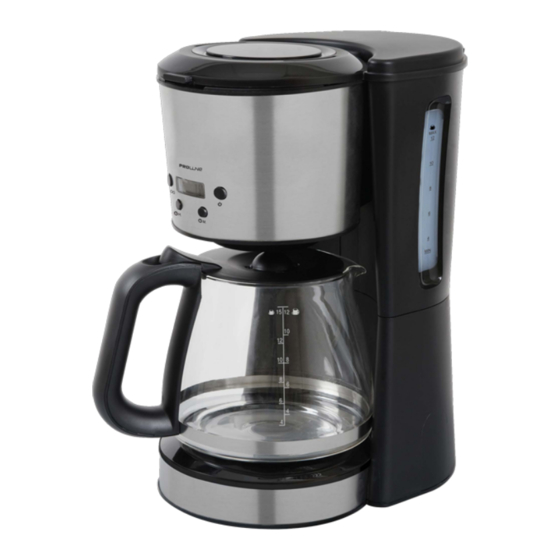
DESCRIPTION 1. Cover 2. Mesh filter 3. Filter holder 4. Control panel buttons and display 5. Carafe 6. Base 7. Water level indicator 8. Water tank Control panel Buttons: PROG: Programme button : ON/OFF button : Hour button ... - Página 7 Switch off the coffee maker and allow 5 minutes to cool before refilling with cold water. MAKING DRIP COFFEE 1. Place the appliance on dry, level and heat‐resistant surface, away from any edge. 2. Open the cover. 3. Fill the water tank with the required amount of fresh, cold water using the water level indicator as a guide. The markings on the water tank window and carafe indicate level of water required to brew the desired number of cups. To avoid overflow, do not fill the water tank with water past the 12‐cup line. 4. Place the mesh filter into the filter holder, making sure it is assembled correctly. 5. Place a 1X4 filter paper (not supplied) into the mesh filter. 6. Add the desired ground coffee in the paper filter by spreading it evenly. It is recommended to use a level spoon of ground coffee (approximately 6g) for every cup of coffee. 7. Close the cover. 8.
- Página 8 10. Press to turn on the coffee maker. The numbers “00 00” will stop flashing. The power symbol will appear on the display, indicating that the appliance is brewing coffee. 11. The coffee will begin to flow from the filter holder after a short time. During brewing, you can remove the carafe from the warming plate. The brewing process does not stop during this period and only the flow of coffee from the filter holder stops. Do not remove the carafe for longer than 15 seconds or the coffee may overflow the filter holder. ...
- Página 9 40 minutes and then the appliance will be turned off automatically. To turn off the appliance press . The power symbol will disappear from the display. Programming the Automatic Start and Automatic Stop Time The appliance can be programmed to make drip coffee automatically. First, make sure the time is set correctly. To set the clock in 24‐hour cycle 1. When the appliance is plugged in, the numbers “00 00” will flash on the display. 2. Press to enter the clock setting mode. 3. Press PROG. The clock symbol will flash on the display. 4. While the clock symbol is flashing, repeatedly press and respectively to set the correct time. To speed up time setting, press and hold ...
- Página 10 To set the automatic start time 1. Repeatedly press PROG until the automatic start symbol flashes on the display. 2. While the automatic start symbol is flashing, repeatedly press and respectively to set the time you want to start brewing coffee. To speed up time setting, press and hold to scroll through numbers quickly. 3. The time setting will be saved automatically after approximately 5 seconds. The automatic start symbol will stop flashing and the display will show the current time. You can check the set time by pressing PROG twice. You may cancel the automatic start function by pressing . The symbol will disappear from the display. ...
- Página 11 To set the automatic stop time 1. Press to turn on the coffee maker. 2. Repeatedly press PROG until the automatic stop symbol flashes on the display. The numbers “00 00” will appear on the display. 3. While the automatic stop symbol is flashing, repeatedly press to set the time you want to stop brewing coffee from 1 minute to 40 minutes in 1‐minute increments. To speed up time setting, press and hold to scroll through numbers quickly. 4. The time setting will be saved automatically after approximately 5 seconds. The automatic stop symbol will stop flashing and the display will show the current time. You can check the set time by pressing PROG twice. You may cancel the automatic stop function: ...
-
Página 12: Cleaning And Descaling
5. When the set time is reached, the appliance will stop brewing coffee. The automatic start symbol and the power symbol will disappear from the display. CLEANING AND DESCALING Turn off and unplug the appliance from the mains socket. Allow the appliance to cool down before cleaning. Clean the outside of the appliance with a slightly damp cloth. Dry thoroughly. Clean the removable parts in warm soapy water then rinse them thoroughly. Never immerse the appliance in water. Do not use abrasive or chemical cleaning agents. Descaling Regularly descale the appliance using a specific descaler. 1. Fill the tank with water and descaler to the 12‐cup line. (Refer to the descaler instructions for the scale of water and descaler.) 2. Place the carafe onto the warming plate. EN-11... - Página 13 3. Plug in the appliance and then press . 4. After descaling, rinse out the appliance by operating the appliance using water at least twice (two full tanks of water). SPECIFICATIONS Ratings: 220V‐240V~ 50/ 60Hz 915W‐1080W We apologise for any inconvenience caused by minor inconsistencies in these instructions, which may occur as a result of product improvement and development. Darty Holdings SNC © Bondy 93140 France 20 / 03 / 2015 EN-12...
- Página 14 ATTENTION Cet appareil est destiné à être utilisé dans des applications domestiques et analogues telles que: des coins cuisines réservés au personnel dans des magasins, bureaux et autres environnements professionnels; des fermes; l’utilisation par les clients des hôtels, motels et autres environnements à caractère résidentiel; des environnements du type chambres d’hôtes. Si le câble d'alimentation est endommagé, il doit être remplacé par le fabricant, son service après vente ou des personnes de qualification similaire afin d'éviter un danger. FR-1...
- Página 15 L'appareil ne doit pas être immergé. Cet appareil peut être utilisé par des enfants âgés d'au moins 8 ans, à condition qu'ils bénéficient d'une surveillance ou qu'ils aient reçu des instructions quant à l'utilisation de l'appareil en toute sécurité et qu'ils comprennent bien les dangers encourus. Le nettoyage et l'entretien par l'utilisateur ne doivent pas être effectués par des enfants, à moins qu'ils ne soient âgés de plus de 8 ans et qu'ils soient sous la surveillance d'un adulte. Conserver l'appareil et son câble hors de portée des enfants âgés de moins de 8 ans. Cet appareil peut être utilisé par des personnes dont les FR-2...
- Página 16 capacités physiques, sensorielles ou mentales sont réduites ou dont l'expérience ou les connaissances ne sont pas suffisantes, à condition qu'ils bénéficient d'une surveillance ou qu'ils aient reçu des instructions quant à l'utilisation de l'appareil en toute sécurité et en comprennent bien les dangers potentiels. Les enfants ne doivent pas utiliser l'appareil comme un jouet. Les informations détaillées sur la manière de nettoyer les surfaces en contact avec les aliments et du détartrage sont définis en page FR‐11&12 dans la section “NETTOYAGE ET DETARTRAGE”. MISE EN GARDE: Risques de FR-3...
-
Página 17: Mises En Garde Importantes
blessures en cas de mauvaise utilisation du produit. La surface de l'élément chauffant présente une chaleur résiduelle après utilisation. MISES EN GARDE IMPORTANTES Éteignez et débranchez toujours l'appareil après usage et avant de le nettoyer. Laissez l'appareil refroidir avant de le nettoyer. Faites attention à ne pas vous brûler avec la vapeur. N'allumez en aucun cas l'appareil avec le réservoir vide. N'utilisez pas d'autre carafe que celle fournie avec l'appareil. Ne mettez jamais la carafe sur une plaque de cuisson. N'utilisez pas la carafe si elle est fissurée ou si la poignée tient mal. Ne faites pas fonctionner l'appareil sans eau dans le réservoir. Il existe un risque de brûlure si le couvercle est ouvert pendant que FR-4... - Página 18 l'appareil fonctionne. Ne laissez en aucun cas la carafe vide sur la plaque chauffante pendant que l'appareil fonctionne: elle risquerait de se briser. DESCRIPTION 1. Couvercle 2. Filtre en mailles 3. Porte‐filtre 4. Panneau de commande avec boutons et écran 5. Carafe 6. Base 7. Indicateur de niveau d’eau 8. Réservoir Panneau de commande Boutons: PROG: Bouton de programme : Bouton Marche/Arrêt ...
-
Página 19: Avant La Première Utilisation De L'appareil
AVANT LA PREMIÈRE UTILISATION DE L'APPAREIL Déballez délicatement l'appareil et enlevez tous les matériaux d'emballage. Frottez l’appareil avec un chiffon légèrement imbibé d'eau. Séchez bien. Il est recommandé de laver le système de café filtre avant la première utilisation de l'appareil. Remplissez le réservoir avec de l'eau froide et suivez les instructions comme pour faire du café filtre (donc sans café en poudre); faites au moins deux carafes de cette manière. Éteignez la machine à café et laissez‐la refroidir 5 minutes avant d'y remettre de l'eau froide. PRÉPARATION DE CAFÉ FILTRE 1. Placez l'appareil sur une surface plane, sèche et résistante à la chaleur. Ne le mettez pas près d'un rebord. 2. Ouvrez le couvercle. 3. Remplissez le réservoir avec la quantité d'eau douce froide requise, en utilisant l'indicateur de niveau comme repère. Les traits figurant sur la carafe et sur l'indicateur de niveau d'eau indiquent la quantité d'eau requise pour le nombre de tasses correspondant. Ne remplissez jamais le réservoir au‐delà du trait de 12 tasses; la carafe risquerait de déborder. 4. Placez le filtre à mailles dans le porte‐filtre, en vous assurant qu'il est FR-6... - Página 20 monté correctement. 5. Mettez un filtre en papier 1x4 (non fourni) dans le filtre à mailles. 6. Mettez la quantité de café en poudre requise dans le filtre en papier, et étalez‐la uniformément. La quantité conseillée est d'1 cuillère rase de café en poudre (soit env. 6g) par tasse. 7. Remettez le couvercle en place. 8. Remettez la carafe dans son emplacement; assurez‐vous qu'elle est parfaitement centrée sur la plaque chauffante. 9. Branchez la machine à café. Les nombres "00 00" clignotent à l'écran. 10. Appuyez sur pour allumer la machine. Les nombres "00 00" arrêtent de clignoter. Le témoin d'alimentation apparaît à l'écran, indiquant que la préparation de café est en cours. ...
- Página 21 porte‐filtre risquerait de déborder. Bien que votre machine à café soit équipée de cette fonction, nous vous recommandons de ne pas de verser du café tant qu’il n’est pas entièrement passé car son goût risquerait d'en être affecté. Il est normal que l'appareil produise de la vapeur quand la préparation de café est en cours. 12. Une fois le café terminé, servez‐le à votre goût. Cette machine peut préparer jusqu'à 12 grandes tasses (125 ml) ou 15 petites tasses (100 ml) de café à la fois. 13. Afin de garder le café au chaud une fois la préparation terminée, laissez la carafe sur la plaque chauffante. L'appareil est conçu pour garder le café au chaud environ 40 minutes, après quoi il s'éteint automatiquement. Pour éteindre l'appareil, appuyez sur . Le symbole d'alimentation disparaît de l'écran. Programmation du démarrage et de l'arrêt automatiques L'appareil peut être programmé pour préparer du café filtre automatiquement. Commencez par régler l'horloge correctement. Réglage de l'horloge en format 24 h 1. Branchez l'appareil; les chiffres "00 00" clignotent à l'écran. 2. Appuyez sur ...
- Página 22 Le symbole d'horloge clignote à l'écran. 4. Une fois que ce symbole clignote, réglez l'heure en appuyant sur les touches et le nombre de fois nécessaire. Pour accélérer la vitesse du réglage, vous pouvez garder le doigt sur les touches : les chiffres défileront plus vite. 5. Le réglage de l'horloge est mémorisé automatiquement au bout de 5 secondes environ. Le symbole d'horloge arrête de clignoter. Réglage de l’heure du démarrage automatique 1. Appuyez sur PROG le nombre de fois nécessaire jusqu'à ce que le symbole de démarrage automatique ...
- Página 23 Appuyez deux fois sur PROG pour vérifier l'heure de départ réglée. Pour annuler la fonction de démarrage automatique, appuyez sur . Le symbole disparaît de l'écran. 4. Une fois arrivée l'heure en question, l'appareil lance automatiquement la préparation du café. Le symbole de démarrage automatique disparaît de l'écran et le symbole d'alimentation apparaît à l'écran. Réglage de l’heure de l’arrêt automatique 1. Appuyez sur pour allumer la machine. 2. Appuyez sur PROG le nombre de fois nécessaire jusqu'à ce que le symbole d'arrêt automatique clignote à l'écran. Les nombres "00 00" apparaissent à l'écran. 3.
-
Página 24: Nettoyage Et Détartrage
Le symbole d'arrêt automatique arrête de clignoter et l'écran affiche l'heure en cours. Appuyez deux fois sur PROG pour vérifier l'heure de départ réglée. Pour annuler la fonction automatique: Appuyez sur PROG le nombre de fois nécessaire pour que le symbole d'arrêt automatique commence à clignoter. Une fois que le symbole clignote, appuyez sur le nombre de fois nécessaire pour que "00 00" s’affiche à l'écran. Au bout d'environ 5 secondes, le réglage est mémorisé et le symbole disparaît de l'écran. 5. Une fois arrivée l'heure en question, l'appareil arrête automatiquement la préparation du café. ... - Página 25 Lavez les pièces amovibles dans de l'eau chaude savonneuse, puis rincez‐les bien. Ne mettez jamais l’appareil dans l’eau. N'utilisez pas des produits de nettoyage chimiques ou abrasifs. Détartrage L'appareil doit être régulièrement détartré au moyen d'un produit détartrant spécifique. 1. Remplissez le réservoir avec de l'eau et du produit détartrant jusqu'au niveau de 12 tasses. (pour les proportions d'eau et de détartrant à utiliser, veuillez vous référer à la notice du produit en question). 2. Mettez la carafe sur la plaque chauffante. 3. Branchez l'appareil et appuyez sur . 4. Une fois le détartrage terminé, rincez l'appareil en le faisant tourner à au moins deux reprises avec de l'eau (2 réservoirs pleins d'eau). SPÉCIFICATIONS Caractéristiques nominales: 220V‐240V~ 50/60Hz 915W‐1080W En raison des mises au point et améliorations constamment apportées à ...
- Página 26 WAARSCHUWING Dit apparaat is bedoeld voor huishoudelijk en gelijkaardig gebruik, zoals: In personeelskeukens van winkels, kantoren en andere werkomgevingen; Boerderijen; Door klanten in hotels, motels en andere omgevingen van het residentiële type; In omgevingen zoals van een bed‐en‐breakfast. Een beschadigd netsnoer mag uitsluitend worden vervangen door de fabrikant, een erkende reparatieservice of personen met gelijkwaardige kwalificaties om gevaar te voorkomen. Dit apparaat mag niet worden ondergedompeld. Dit apparaat kan worden gebruikt door kinderen vanaf 8 NL-1...
- Página 27 jaar als zij onder toezicht verblijven of instructies betreffende het veilige gebruik van dit apparaat hebben ontvangen en inzicht hebben in de gevaren die het gebruik ervan kan inhouden. Reinigen en gebruiksonderhoud mogen uitsluitend worden gedaan door kinderen ouder dan 8 jaar die onder toezicht staan. Houd het apparaat en het snoer ervan buiten het bereik van kinderen jonger dan 8 jaar. Dit apparaat kan worden gebruikt door personen met een beperkt lichamelijk, zintuiglijk of geestelijk vermogen of een gebrek aan ervaring of kennis als zij onder toezicht verblijven of instructies hebben ontvangen betreffende het veilige gebruik van het apparaat en inzicht NL-2...
-
Página 28: Belangrijke Veiligheidsvoorzorgen
hebben in de gevaren die het gebruik ervan kan inhouden. Kinderen mogen niet met dit apparaat spelen. Verwijs naar het hoofdstuk “Reinigen en ontkalken” op pagina 11 y 12 voor details over het ontkalken en het reinigen van oppervlakken die in contact komen met levensmiddelen. WAARSCHUWING: gevaar van verwonding als dit apparaat niet correct wordt gebruikt. Het oppervlak van het warmte‐element blijft na gebruik onderhevig aan restwarmte. BELANGRIJKE VEILIGHEIDSVOORZORGEN Schakel het apparaat uit en haal de stekker uit het stopcontact wanneer het niet wordt gebruikt en voordat u het gaat reinigen. Laat het apparaat afkoelen voordat u het reinigt. Wees voorzichtig voor de stoom, deze kan brandwonden veroorzaken. Schakel dit apparaat nooit in zonder water in het waterreservoir. NL-3... -
Página 29: Beschrijving Van Het Apparaat
Gebruik uitsluitend de meegeleverde koffiekan bij dit apparaat. Zet deze kan nooit op een kookplaat. Gebruik de kan niet wanneer deze is gebarsten of de handgreep loszit. Schakel dit apparaat nooit in zonder water in het waterreservoir. Wees voorzichtig voor brandwonden als het deksel tijdens het koffiezetten wordt geopend. Laat een lege kan nooit op de warmhoudplaat staan terwijl het apparaat in werking is, omdat de koffiekan hierdoor kan barsten. BESCHRIJVING VAN HET APPARAAT 1. Klep 2. Gaasfilter 3. Filterhouder 4. Bedieningspaneel met toetsen en display 5. Koffiekan 6. - Página 30 Bedieningspaneel Toetsen: PROG: Programmatoets : AAN/UIT‐toets : UUR‐toets : MINUTEN‐toets VOOR DE EERSTE INGEBRUIKNAME VAN HET APPARAAT Neem het apparaat voorzichtig uit de verpakking en verwijder alle verpakkingsmateriaal. Veeg het apparaat schoon met een licht bevochtigde doek. Droog zorgvuldig. Het is raadzaam voor de eerste ingebruikname het druppelsysteem voor koffie te reinigen. Vul het waterreservoir met koud water, volg de aanwijzingen voor het maken van druppelkoffie en laat ten minste twee koffiekannen vol lopen zonder gemalen koffie. Schakel het koffiezetapparaat en laat 5 minuten afkoelen voordat u het hervult met koud water. ...
- Página 31 DRUPPELKOFFIE ZETTEN 1. Zet het apparaat op veilige afstand van een rand neer op een droge, vlakke en hittebestendige ondergrond. 2. Open the klep. 3. Vul het waterreservoir met de gewenste hoeveelheid vers, koud water, waarbij u de indicator van het waterpeil als richtlijn gebruikt. De markeringen op het watervenster en op de kan geven de hoeveelheid benodigd water aan voor het zetten van het gewenste aantal koffiekoppen. Vul het waterreservoir nooit voorbij de markering voor 12 koppen om overlopen te voorkomen. 4. Zet de gaasfilter in de filterhouder en controleer of het geheel correct is gemonteerd. 5. Zet een 1X4 papieren filter (niet meegeleverd) in de gaasfilter. 6. Doe de gewenste hoeveelheid gemalen koffie in the papieren filter en verspreid gelijkmatig over de filter. Gebruik een afgestreken lepel gemalen koffie (ongeveer 6g) per kopje koffie. 7. Sluit de klep. 8. Schuif de kan in het apparaat en controleer of de kan correct op de warmhoudplaat staat. 9. Stop de stekker van het koffiezetapparaat in een stopcontact. De cijfers “00 00” gaan op de display knipperen. 10.
- Página 32 De cijfers “00 00” stoppen met knipperen. Het stroomicoon verschijnt op de display, aangevend dat het apparaat koffie zet. 11. De koffie begint even later uit de filterhouder te druppelen. U kunt tijdens het koffiezetten de kan van de warmhoudplaat nemen. Het proces van koffiezetten stopt hierdoor niet, alleen het druppelen uit de filterhouder houdt op. Verwijder daarom de kan nooit langer dan 15 seconden uit het apparaat om te voorkomen dat de filterhouder overloopt. Hoewel het koffiezetapparaat is uitgerust met bovengenoemd kenmerk, is het niet raadzaam koffie uit te gieten voordat de cyclus is voltooid, omdat dit een invloed kan hebben op het aroma van de koffie. Het is normaal dat stoom uit het apparaat komt tijdens het koffiezetten. ...
- Página 33 houden, waarna het automatisch uitschakelt. 14. Druk op om het apparaat eerder uit te schakelen. Het controlelampje op de display dooft. Programmeren voor automatisch opstarten en stoppen Dit apparaat kan worden geprogrammeerd om automatisch druppelkoffie te zetten. Controleer eerst of de tijd correct is ingesteld. Om de klok in de 24‐uurcyclus in te stellen 1. Wanneer de stekker van het apparaat in een stopcontact is gestopt, gaan de cijfers “00 00” op de display knipperen. 2. Druk op om de instelmodus voor de klok binnen te gaan. 3. Druk op PROG. Het klokicoon gaat op de display knipperen. 4. Druk terwijl het the klokicoon knippert herhaaldelijk op en dan op ...
- Página 34 Om een starttijd voor het automatisch koffiezetten in te stellen 1. Druk herhaaldelijk op PROG tot het automatische starticoon op de display begint te knipperen. 2. Druk terwijl het automatische starticoon knippert herhaaldelijk op en dan op om de gewenste tijd voor het koffiezetten in te stellen. U kunt ingedrukt houden om snel doorheen de cijfers te verrollen en de tijd versneld in te stellen. 3. De instelling van de timer wordt na ongeveer 5 seconden automatisch in het geheugen opgeslagen. Het automatische starticoon stopt met knipperen en de huidige tijd wordt op de display aangegeven. U kunt de ingestelde timer controleren door tweemaal op PROG te drukken. U kunt de automatische startfunctie annuleren door te drukken op . Het icoon ...
- Página 35 4. Het apparaat begint koffie te zetten wanneer de ingestelde tijd is bereikt. Het automatische starticoon dooft en het stroomicoon verschijnt op de display. Om een automatische stoptijd in te stellen 1. Druk op om het koffiezetapparaat in te schakelen. 2. Druk herhaaldelijk op PROG tot het automatische stopicoon op de display knippert. De cijfers “00 00” verschijnen op de display. 3. Druk terwijl het automatische stopicoon knippert herhaaldelijk op om de tijd in te stellen waarna u het koffiezetten wilt stoppen. U kunt hiervoor een tijd instellen tussen 1 minuut en 40 minuten in stappen van 1 minuut. U kunt ingedrukt houden om snel doorheen de cijfers te verrollen en de tijd versneld in te stellen. 4. De instelling van de timer wordt na ongeveer 5 seconden automatisch in het geheugen opgeslagen. ...
-
Página 36: Reinigen En Ontkalken
stopicoon knippert. Terwijl het automatische stopicoon herhaaldelijk te drukken op tot “00 00” op de display verschijnt. De instelling wordt na ongeveer 5 seconden in het geheugen opgeslagen en het icoon dooft. 5. Het apparaat stopt met koffie zetten als de ingestelde tijd is bereikt. Het automatische starticoon en het stroomicoon op de display doven. REINIGEN EN ONTKALKEN Schakel het apparaat uit en haal de stekker uit het stopcontact. Laat het apparaat afkoelen voordat u het gaat reinigen. ... -
Página 37: Technische Gegevens
Ontkalken Het apparaat dient regelmatig te worden ontkalkt met een specifieke ontkalker. 1. Vul het reservoir met water en ontkalker tot op de markering voor 12 koppen. (Verwijs naar de instructies op de ontkalker voor de verhouding water/ontkalker.) 2. Zet de kan neer op de warmhoudplaat. 3. Stop de stekker van het apparaat in een stopcontact en druk dan op . 4. Spoel het apparaat na het ontkalken door tenminste twee keer (twee volle reservoirs) water te laten doorlopen zonder koffie. TECHNISCHE GEGEVENS Nominale waarden: 220‐240V~ 50/60Hz 915W‐1080W Onze verontschuldiging voor eventueel ongemak als gevolg van kleine ... - Página 38 ADVERTENCIA Este aparato ha sido concebido para ser utilizado en un entorno doméstico y aplicaciones similares, por ejemplo: En cocinas para el personal de tiendas, oficinas y otras zonas de trabajo; En granjas; Los clientes de hoteles, moteles y otros tipos de alojamientos; En establecimientos tipo bed and breakfast. Cuando el cable de alimentación resulte dañado, deberá ser sustituido por el fabricante, el servicio técnico o persona con formación similar para evitar cualquier peligro. Nunca se debe sumergir el aparato. Este aparato puede ser utilizado por niños a partir de los 8 años de edad siempre que ES-1...
-
Página 39: Estos Electrodomésticos
hayan recibido supervisión o instrucciones referentes al uso seguro del aparato y comprendan los peligros asociados. La limpieza y el mantenimiento del aparato no debe ser realizada por niños a menos que tengan más de 8 años y estén bajo supervisión. Mantenga el aparato y el cable de alimentación fuera del alcance de los niños menores de 8 años. Estos electrodomésticos pueden ser utilizados por personas con facultades físicas, sensoriales o mentales reducidas o sin experiencia ni conocimiento del producto siempre que hayan recibido supervisión o instrucciones sobre el uso seguro del aparato y comprendan los peligros asociados. Los niños no deben jugar con el aparato. ES-2... -
Página 40: Instrucciones Sobre Seguridad Importantes
Puede consultar la información sobre cómo limpiar las superficies en contacto con los alimentos y sobre descalcificación, en la sección “Limpieza y descalcificación” de la página ES‐10&11. ADVERTENCIA: Podría sufrir lesiones si no utiliza este aparato correctamente. La superficie de la placa térmica se mantendrá caliente después del uso. INSTRUCCIONES SOBRE SEGURIDAD IMPORTANTES Apague y desenchufe el aparato de la toma de alimentación eléctrica cuando no lo utilice y antes de limpiarlo. Antes de limpiar el aparato, espere hasta que se haya enfriado. Tome precauciones para no quemarse con el vapor. Nunca ponga en marcha el aparato sin agua en el depósito de agua. Utilice exclusivamente la jarra suministrada con este aparato. Nunca la utilice sobre una superficie de cocción. No utilice la jarra si está agrietada o si el asa está floja. No utilice el aparato sin agua en el depósito. ES-3... -
Página 41: Descripción
Si se abre la tapa durante el ciclo de ebullición, podría sufrir quemaduras. Nunca deje la jarra vacía sobre la placa calefactora cuando el aparato esté en marcha, o de lo contrario la jarra podrá agrietarse. DESCRIPCIÓN 1. Tapa 2. Filtro de malla 3. Portafiltro 4. Botones del panel de control y visualizador 5. Jarra 6. Base 7. Indicador del nivel de agua 8. Depósito de agua Panel de control ... -
Página 42: Antes De Utilizar El Aparato Por Primera Vez
ANTES DE UTILIZAR EL APARATO POR PRIMERA VEZ Desembale cuidadosamente el aparato y retire todos los materiales de embalaje. Limpie el aparato con un paño ligeramente húmedo. Séquelo minuciosamente. Es aconsejable lavar el sistema de percolación del café antes de utilizarlo por primera vez. Llene el tanque de agua con agua fría y siga las indicaciones para elaborar café elaborando por lo menos dos jarras de café sin utilizar café molido. Antes de volver a llenar de agua fría, apague la cafetera y espere 5 minutos. ELABORACIÓN DE CAFÉ 1. Coloque el aparato sobre una superficie seca, nivelada y resistente al calor, lejos de cualquier borde. 2. Abra la tapa. 3. Llene el depósito de agua con la cantidad necesaria de agua fría, utilizando como guía el indicador de nivel del agua. Las marcas en la ventana para el agua y en la jarra indican el nivel de agua necesario para elaborar el número deseado de tazas. Para evitar que rebose, no llene el depósito de agua con agua por encima de la línea 12‐cup (12 tazas). 4. Coloque el filtro de malla en el portafiltro, comprobando que está correctamente colocado. ES-5... - Página 43 5. Coloque un filtro de papel 1X4 (no suministrado) dentro del filtro de malla. 6. Añada la cantidad deseada de café molido en el filtro de papel distribuyéndolo de modo uniforme. Es aconsejable utilizar una cucharada rasa de café molido (aproximadamente 6g) por cada taza de café. 7. Cierre la tapa. 8. Deslice la jarra en el aparato asegurándose de quede correctamente colocada sobre la placa calefactora. 9. Enchufe la cafetera en la toma de corriente. Los números “00 00” parpaderán en el visualizador. 10. Pulse para encender la cafetera. Los números “00 00” dejarán de parpadear. El símbolo de conexión aparecerá en el visualizador, indicando que el aparato está preparando café. ...
- Página 44 podría rebosar el soporte para el filtro. Aunque la cafetera incluya la prestación anterior, no es aconsejable verter café antes de haber completado el ciclo ya que de hacerlo podría afectar el sabor del café. Es normal que el aparato emita vapor mientras está elaborando café. 12. Cuando el café esté hecho, puede servirlo. Esta cafetera puede hacer hasta 12 tazas grandes de café (125 ml) o 15 tazas pequeñas (100 ml) de café. 13. Para mantener el café caliente una vez concluido el proceso de elaboración, coloque la jarra sobre la placa calefactora. El aparato está diseñado para mantener el café caliente durante aproximadamente 40 minutos y entonces el aparato se apagará automáticamente. 14. Para apagar el aparato, pulse . El símbolo de conexión desaparecerá del visualizador. Programación de la Hora de Inicio y Detención Automáticos El aparato puede ser programado para elaborar café automáticamente. En primer lugar, asegúrese de que la hora esté correctamente ajustada. Para ajustar el reloj en ciclos de 24 horas 1. Al enchufar el aparato, los números “00 00” parpadearán en el visualizador. 2.
- Página 45 El símbolo del reloj parpadeará en el visualizador. 4. Mientras el símbolo del reloj esté parpadeando, pulse varias veces y respectivamente para ajustar la hora correcta. Para acelerar el ajuste del reloj, pulse y mantenga pulsado para que los números se desplacen rápidamente. 5. El ajuste del reloj será memorizado automáticamente, después de aproximadamente 5 segundos. El símbolo del reloj dejará de parpadear. Programación de la hora de inicio automático 1. Pulse varias veces PROG hasta que el símbolo de inicio automático parpadee en el visualizador. 2. Mientras el símbolo de inicio automático parpadea, pulse varias veces ...
- Página 46 Puede consultar la hora programada, pulsando dos veces PROG. Puede cancelar la función de inicio automática pulsando . El símbolo desaparecerá del visualizador. 4. Cuando haya llegado la hora ajustada, el aparato comenzará a elaborar café. El símbolo de inicio automático desaparecerá mientras el símbolo de conexión aparecerá en el visualizador. Programación de la Hora de Detención Automática 1. Pulse para encender la cafetera. 2. Pulse varias veces PROG hasta que el símbolo de detención automática parpadee en el visualizador. Los números “00 00” aparecerán en el visualizador. 3.
-
Página 47: Limpieza Y Descalcificación
El símbolo de detención automática dejará de parpadear y el visualizador mostrará la hora actual. Puede consultar la hora memorizada pulsando dos veces PROG. Puede cancelar la función de detención automática: Pulsando varias veces PROG hasta que el símbolo de detención automática parpadee. Mientras el símbolo esté parpadeando, pulse varias veces hasta ver “00 00” en el visualizador. El ajuste del reloj será memorizado automáticamente, después de aproximadamente 5 segundos y el símbolo desaparecerá. 5. Cuando se alcance la hora programada, el aparato se detendrá. El símbolo de inicio automático y el símbolo de conexión desaparecerán del visualizador. ... -
Página 48: Especificaciones
Lave los componentes extraíbles con agua caliente y jabón y aclárelos después minuciosamente. Nunca sumerja el aparato en agua. No utilice detergentes abrasivos o químicos. Descalcificación Descalcifique con regularidad mediante un descalcificador específico. 1. Llene el depósito con agua y descalcificador hasta la línea 12‐cup. (Consulte las instrucciones del descalcificador para las proporciones de agua y descalcificador.) 2. Coloque la jarra sobre la placa calefactora. 3. Enchufe el aparato y pulse . 4. Después de la descalcificación, enjuague el aparato poniéndolo en funcionamiento con agua al menos dos veces (dos depósitos llenos de agua). ESPECIFICACIONES Características: 220V‐240V~ 50/60Hz 915W‐1080W Rogamos disculpen cualquier inconveniencia causada por inconsistencias ...