Publicidad
Enlaces rápidos
Consejo para un correcto montaje del kit: No apretar los tornillos del todo hasta asegurarse que el KIT está correctamente colocado y
alineado. Nota: el soporte KIT TOP SOBR45ST no se podrá montar si su moto ya posee el soporte KIT RESPALDO S0BR45RN.
Advice for correct fitting of the kit: Do not fully tighten the screws until it is ensured that the KIT is correctly attached and aligned.
Note: the KIT TOP support SOBR45ST cannot be assembled if your motorcycle already has the KIT RESPALDO support S0BR45RN.
Conseil pour un montage correct du kit: Ne pas serrer les vis avant d'être sûr que le KIT est correctement monté et ajusté. Note: le
support KIT TOP SOBR45ST ne pourra pas être monté si votre moto dispose déjà du support KIT DOSSIER S0BR45RN.
Hinweis für einen korrekten Einbau des Bausatzes: Bevor Sie die Schrauben ganz anziehen vergeweisern sie sich der richtigen posi-
tion des KIT. Wenn ihr Motorrad schon den KIT RESPALDO (Rückenlehne) SOBR45RN hat, kann die Halterung KIT TOP SOBR45ST
nicht montiert werden.
Consiglio per un montaggio corretto del kit: Non stringere del tutto le viti fin tanto non si è sicuri che il kit è collocato correttamente e
allineato. Nota: il supporto KIT TOP SOBR45ST non potrà essere montato se la sua moto possiede già il supporto KIT SCHIENALE
S0BR45RN.
1.
A
2.
3.
C
B
E
Ø 18
1
E
Abrir el asiento (A). Desmontar el embellecedor
interior (B), la tapeta posterior (C) del agarradero y
el embellecedor trasero (D).
Desmontar el mecanismo de cierre del asiento.
Desmontar la estructura interior refuerzo (E) del
agarradero posterior.
Ouvrir le siège (A). Démonter l'enjoliveur intérieur
(B), le chapeau postérieur (C) de la poignée et l'en-
joliveur arrière (D). Démonter le mécanisme de fer-
meture du siège. Démonter la structure intérieure
de renfort (E) de la poignée postérieure.
Open the seat (A). Dismantle the intern wheel cover
(B), the back cap (C) the handle and the back
D
wheel cover (D). Dismantle the seat opening mecha-
nism. Dismantle the reinforcement intern structure
(E) of the back handle.
Sitz (A) öffnen. Innere Verziehrung (B), hinterer
Deckel (C) der Griffe und hintere Verziehrung(D)
abmontieren. Versclussmechanismuss des Sitzes
abmontieren. Innere Verstärkung (E) des hinteren
Griffes abmontieren.
Aprire il sedile (A). Smontare l'accessorio ornamen-
tale interiore (B), il tappo posteriore (C) della mani-
glia e l'accessorio ornamentale posteriore (D).
Smontare il meccanismo di chiusura del sedile.
Smontare la struttura interiore rinforzo (E) della
maniglia posteriore.
Recortar la plantilla y colocarla según dibujo. A con-
tinuación realizaremos cuatro agujeros Ø18 mm;
Nota: aconsejamos ir realizando varios agujeros de Ø
inferior hasta llegar al diámetro de 18 mm.
Cut the pattern and place it as the picture. Then we
will make four holes of Ø18; Note: we suggest
making several holes of inferior Ø until you get to
the 18 mm diameter.
Découper le gabarit et le placer selon le dessin.
Ensuite effectuer quatre trous de Ø18 mm; Note:
nous recommandons d'effectuer plusieurs trous de Ø
inférieur jusqu'à arriver à Ø18 mm.
Die im Kit beiligenden Schablonen auschneiden (E)
und diese so ausrichten wie in der Zeichnung, 4
Löcher von Ø18 machen. (Notiz: sicherheitshalber
schlagen wir vor zuerst Löcher von einem kleinerem
Ø zu machen bis der erforderliche Durchmesser Ø18
erreicht ist).
Ritagliare la sagoma e sistemarla secondo il diseg-
no. In seguito effettuare quatro buchi di Ø18 mm;
Nota: si consiglia di effettuare vari bucchi di Ø infe-
riore fino ad arrivare a 18 mm.
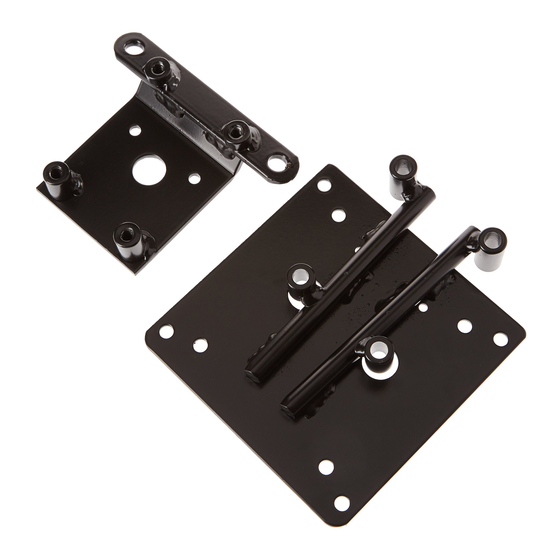
Montaremos el soporte interior kit (1), en el soporte
estructura interior refuerzo (E).
We will assemble the kit interior support(1), in the
reinforcement intern structure support (E).
Monter le support intérieur kit (1), dans le support
structure intérieure renfort (E).
Den inneren Befestigungselement des Kit(1) an die
innere Verstärkung (E) montieren.
Montare il supporto interiore kit (1), nel supporto
struttura interiore rinforzo (E).
Publicidad

Manuales relacionados para Shad S0BR45ST


Resumen de contenidos para Shad S0BR45ST
- Página 1 Consejo para un correcto montaje del kit: No apretar los tornillos del todo hasta asegurarse que el KIT está correctamente colocado y alineado. Nota: el soporte KIT TOP SOBR45ST no se podrá montar si su moto ya posee el soporte KIT RESPALDO S0BR45RN. Advice for correct fitting of the kit: Do not fully tighten the screws until it is ensured that the KIT is correctly attached and aligned.
- Página 2 Lo fijaremos en zona delantera mediante los tornillos (2), las arandelas (3) y las tuercas (4). Y en zona trasera mediante los tornillos (5), las arandelas (6) y las tuercas (7). We will fix it in the front area using the screws (2), the was- hers (3) and the nuts(4).
- Página 3 Plantilla. Pattern. Gabarit. Schablonen. Sagoma. REF. 500479 Edición 1ª...