Tabla de contenido
Publicidad
Idiomas disponibles
Idiomas disponibles
Enlaces rápidos
Publicidad
Tabla de contenido

Manuales relacionados para Axis Communications Q8752-E


Resumen de contenidos para Axis Communications Q8752-E
- Página 1 AXIS Q8752-E Bispectral PTZ Camera Installation Guide...
- Página 3 English France: Français Deutschland: Deutsch Italia: Italiano España: Español 日本: 日本語 中文: 简体中文...
- Página 4 A copy of the original declaration of conformity furnishing, performance or use of this material. This may be obtained from Axis Communications AB. See product is only to be used for its intended purpose. Contact information on page 6.
- Página 5 (STP) that is properly grounded. 20-28 V AC/DC, and a max current rating of 10.5 A. Contact information We recommend the use of Axis power supply DIN PS24 Axis Communications Inc. 480 W. 300 Apollo Drive Disposal and recycling...
-
Página 6: Warranty Information
Contact information Axis Communications AB Emdalavägen 14 223 69 Lund Sweden Tel: +46 46 272 18 00 Fax: +46 46 13 61 30 axis.com Warranty information For information about Axis’ product warranty and thereto related information, go to axis.com/warranty. Support Should you require any technical assistance, please contact your Axis reseller. -
Página 7: Package Contents
AXIS Q8752-E Bispectral PTZ Camera Package contents... -
Página 8: Product Overview
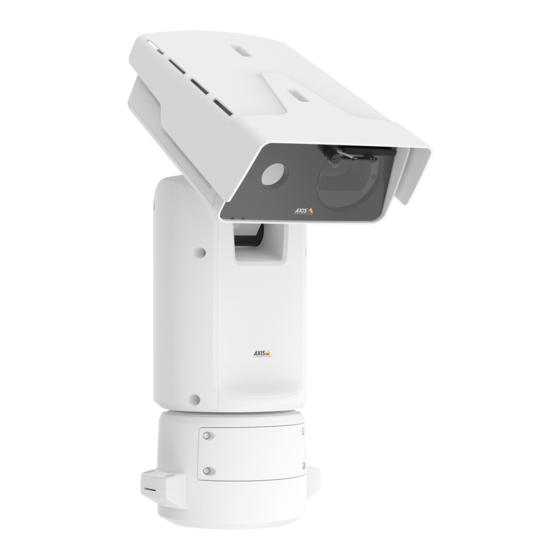
AXIS Q8752-E Bispectral PTZ Camera Product overview Weathershield Top cover Inner cover Positioning unit Base unit screws Base unit Wiper Front with protective foil Visual lens 10 Thermal lens 11 Lid... - Página 9 AXIS Q8752-E Bispectral PTZ Camera Top cover connector RS485 connector Power connector Control button RJ45 connector Status LED Audio IN 3.5 mm connector SD card slot (microSD, card not included) Input power connector 10 I/O connector 11 RJ45 connector 12 SFP slot for SFP module (not included)
- Página 10 AXIS Q8752-E Bispectral PTZ Camera How to install the product DANGER Risk of electric shock. All cables shall be de-energized before installing the product. CAUTION The electrical connections and conduit installations shall be made by a certified electrician and in compliance with local regulations.
- Página 11 AXIS Q8752-E Bispectral PTZ Camera NO TICE TICE TICE Do not use sharp tools when you remove the transparent base unit cover. 4. Remove the transparent base unit cover. Conduit cover clip Conduit cover...
- Página 12 AXIS Q8752-E Bispectral PTZ Camera Screw hole (x4) 5. For conduit installations only: remove the two conduit cover clips followed by the conduit cover. 6. Attach the base unit to the mounting surface with appropriate fasteners in the four screw holes.
- Página 13 AXIS Q8752-E Bispectral PTZ Camera 1. Install the optional conduit adapters (not included). 2. Connect the grounding braid to the grounding screw. 3. Insert the power cable, I/O cable and network cable through the hole in the base unit as shown in the illustration above.
- Página 14 AXIS Q8752-E Bispectral PTZ Camera Power cable (not included) I/O cable (optional, not included) Network cable (not included) Cable gasket Transparent base unit cover 8. Fit cable gaskets on the cables. See Cable thickness on page 22. 9. Insert the power, I/O and network cables including the cable gaskets through the holes in the transparent base unit cover and arrange the cables as shown in the illustration above.
- Página 15 AXIS Q8752-E Bispectral PTZ Camera 10. Place the transparent base unit cover on the base unit and fit the cable gaskets inside the holes. I/O connector Power connector O-ring NO TICE TICE TICE To not accidentally disconnect the unit from power if the cable is pulled, let the protective grounding wire be about 10 mm (0.4 in) longer than the other two wires (in the power...
- Página 16 AXIS Q8752-E Bispectral PTZ Camera 13. Place the positioning unit on the base unit. Make sure that the arrows on the two units are aligned. 14. Turn the positioning unit clockwise back to its original position and tighten the four base unit screws (torque 3.0 Nm).
- Página 17 AXIS Q8752-E Bispectral PTZ Camera Install the network link You can choose between different options when you install the network link: • A: via an optical fiber or RJ45 cable connected to the SFP module (with a respective connector) in the SFP slot.
-
Página 18: Connect The Cables
AXIS Q8752-E Bispectral PTZ Camera Connect the cables 1. Loosen the four lid screws (T20) and remove the lid. Input power connector I/O connector RJ45 connector SFP slot for SFP module (SFP module not included) 2. Connect the network (optical fibre and/or RJ45), I/O and power cables. For more information on different network connectivity options, see Install the network link on page 17. - Página 19 AXIS Q8752-E Bispectral PTZ Camera 4. Remove the protective cover. 5. Apply power to the product. Remove top cover CAUTION Risk of injury. Moving parts. Keep your body parts away from the product when in operation. Disconnect from power supply before installing or performing maintenance on the product.
- Página 20 AXIS Q8752-E Bispectral PTZ Camera To find out where to insert the SD card or reset to factory default, see Product overview on page 8. For more information, see the user manual at axis.com Adjust the weathershield 1. Loosen the two weathershield screws.
- Página 21 AXIS Q8752-E Bispectral PTZ Camera 2. Set the weathershield in the preferred position. 3. Tighten the two weathershield screws (torque 0.8 Nm).
- Página 22 AXIS Q8752-E Bispectral PTZ Camera Specifications To find the latest version of the product’s datasheet, go to the product page at axis.com and locate Support & Documentation. Cable thickness The cable diameter, when using cable gaskets provided with the product, should be in the range of 5 to 11 mm (0.2 to 0.4 in).
-
Página 23: Safety Information
Safety information • Use only applicable tools when installing the Axis product. Using excessive force with Hazard levels power tools could cause damage to the DANGER product. • Do not use chemicals, caustic agents, or Indicates a hazardous situation which, if not aerosol cleaners. -
Página 25: Contenu De L'emballage
AXIS Q8752-E Bispectral PTZ Camera Contenu de l’emballage... -
Página 26: Vue D'ensemble Du Produit
AXIS Q8752-E Bispectral PTZ Camera Vue d'ensemble du produit Protection étanche Couvercle supérieur Couvercle interne Unité de positionnement Vis de l'unité de base Unité de base Essuyage Avant avec feuille de protection Objectif visuel 10 Objectif thermique 11 Opercule... - Página 27 AXIS Q8752-E Bispectral PTZ Camera Connecteur du couvercle supérieur Connecteur RS485 Connecteur d’alimentation Bouton de commande Connecteur RJ45 LED de statut Connecteur d'entrée audio 3,5 mm Emplacement pour carte SD (microSD, carte non fournie) Connecteur d'alimentation d'entrée 10 Connecteur d'E/S...
- Página 28 AXIS Q8752-E Bispectral PTZ Camera Comment installer le produit DANGER Risque de choc électrique. Tous les câbles doivent être hors tension avant d'installer le produit. ATTENTION Les connexions électriques et les installations de conduites doivent être effectuées par un électricien certifié et conformément aux réglementations locales.
- Página 29 AXIS Q8752-E Bispectral PTZ Camera A A A VIS N'utilisez pas d'outils tranchants lorsque vous déposez le couvercle transparent de l'unité de base. 4. Déposez le couvercle transparent de l'unité de base. Clip du cache de conduit...
-
Página 30: Acheminement Des Câbles
AXIS Q8752-E Bispectral PTZ Camera Cache de conduit Trou de vis (x4) 5. Pour des installations de conduit uniquement : déposez les deux clips du cache de conduit suivis par le cache du conduit. 6. Fixez l'unité de base à la surface de montage avec les éléments de fixation appropriés dans les quatre trous de vis. - Página 31 AXIS Q8752-E Bispectral PTZ Camera passage du câble inférieur 1. Installez les adaptateurs de conduit en option (non fournis). 2. Reliez la tresse de terre à la vis de mise à la terre. 3. Insérez le câble d'alimentation, le câble d'E/S et le câble réseau à travers l'orifice de l'unité...
- Página 32 AXIS Q8752-E Bispectral PTZ Camera Câble d'alimentation (non inclus) Câble E/S (en option, non fourni) Câble réseau (non inclus) Joint de câble Couvercle transparent de l'unité de base 8. Placez les joints sur les câbles. Cf. Épaisseur du câble page 40.
- Página 33 AXIS Q8752-E Bispectral PTZ Camera d'informations sur les différentes options de connectivité réseau, consultez Installation de la liaison réseau page 35. 10. Placez le couvercle transparent de l'unité de base sur celle-ci et placez les joints dans les orifices. Connecteur d'E/S Connecteur d’alimentation...
- Página 34 AXIS Q8752-E Bispectral PTZ Camera A A A VIS Assurez-vous que les joints toriques sont correctement fixés autour du couvercle transparent de l'unité de base. 13. Placez l'unité de positionnement sur l'unité de base. Assurez-vous que les flèches des deux unités sont alignées.
- Página 35 AXIS Q8752-E Bispectral PTZ Camera Installation de la liaison réseau Vous pouvez choisir entre plusieurs options lorsque vous installez la liaison réseau : • A : via un câble à fibre optique ou un câble RJ45 raccordé au module SFP (avec connecteur correspondant) sur l'emplacement SFP.
- Página 36 AXIS Q8752-E Bispectral PTZ Camera Branchez les câbles 1. Desserrez les quatre vis du couvercle (T20) et retirez le couvercle. Connecteur d'alimentation d'entrée Connecteur E/S Connecteur RJ45 Emplacement SFP pour module SFP (module SFP non inclus) 2. Branchez le câble réseau (fibre optique et/ou RJ45), E/S et d'alimentation. Pour plus d'informations sur les différentes options de connectivité...
- Página 37 AXIS Q8752-E Bispectral PTZ Camera 4. Retirez le couvercle de protection. 5. Mettez le produit sous tension. Retirer le couvercle supérieur ATTENTION Risques de blessures. Pièces mobiles. Restez à l'écart du produit lorsqu'il est en cours de fonctionnement. Débranchez l'alimentation électrique avant d'installer le produit ou d'effectuer son entretien.
- Página 38 AXIS Q8752-E Bispectral PTZ Camera Pour savoir où insérer la carte SD ou réinitialiser aux valeurs par défaut, voir Vue d'ensemble du produit page 26. Pour plus d’informations, reportez-vous au manuel de l’utilisateur sur axis.com Ajuster la protection étanche 1. Desserrez les deux vis de la protection étanche.
- Página 39 AXIS Q8752-E Bispectral PTZ Camera 2. Placez la protection étanche dans la position de votre choix. 3. Serrez les deux vis de la protection étanche (couple de serrage 0,8 Nm).
- Página 40 AXIS Q8752-E Bispectral PTZ Camera Caractéristiques Pour obtenir la dernière version de la fiche technique du produit, rendez-vous sur la page du produit sur le site axis.com et trouvez l'option Support & Documentation (Assistance et documentation). Épaisseur du câble Le diamètre du câble, lors de l'utilisation de joints de câble fournis avec le produit, doit être comprise entre 5 et 11 mm (0,2 à...
- Página 41 Informations sur la sécurité • Conserver ce produit Axis dans un environnement sec et ventilé. Niveaux de risques • Ne pas exposer ce produit Axis aux chocs ou DANGER aux fortes pressions. • Ne pas installer ce produit sur des poteaux, Indique une situation dangereuse qui, si elle supports, surfaces ou murs instables.
-
Página 43: Lieferumfang
AXIS Q8752-E Bispectral PTZ Camera Lieferumfang... - Página 44 AXIS Q8752-E Bispectral PTZ Camera Produktübersicht Wetterschutz Obere Abdeckung Innere Abdeckung Positionierungseinheit Schrauben der Basiseinheit Basiseinheit Wischer Front mit Schutzfolie Lichtbildobjektiv 10 Wärmebildobjektiv 11 Deckel...
- Página 45 AXIS Q8752-E Bispectral PTZ Camera Anschluss obere Abdeckung RS485-Steckverbinder Stromanschluss Steuertaste RJ-45-Anschluss LED-Statusanzeige Audio-IN-3,5-mm-Stecker SD-Kartensteckplatz (microSD, Karte nicht im Lieferumfang enthalten) Stromversorgungsanschluss Eingang 10 E/A-Anschluss 11 RJ-45-Anschluss 12 SFP-Einschub für SFP-Modul (nicht enthalten)
-
Página 46: Installieren Des Produkts
AXIS Q8752-E Bispectral PTZ Camera Installieren des Produkts GEFAHR Stromschlaggefahr Vor der Installation oder Wartung des Produkts müssen alle Kabel von der Stromversorgung abgeklemmt werden. VORSICHT Die Installation der elektrischen Anschlüsse und Kabelkanäle darf nur von einem zugelassenen Elektriker in Übereinstimmung mit den geltenden Bestimmungen vorgenommen werden. - Página 47 AXIS Q8752-E Bispectral PTZ Camera HINWEIS HINWEIS HINWEIS Beim Entfernen der transparenten Abdeckung der Gerätebasis keine spitzen Werkzeuge verwenden. 4. Die transparente Abdeckung der Gerätebasis entfernen. Klammer der Kabelführung...
- Página 48 AXIS Q8752-E Bispectral PTZ Camera Abdeckung der Kabelführung Schraubenbohrung (4 x) 5. Nur bei Installationen über die Kabelführung: Zuerst die beiden Klammern der Kabelführung und anschließend die Abdeckung der Kabelführung entfernen. 6. Die Gerätebasis mit geeigneten Befestigungselementen für die vier Schraubenbohrungen an der Befestigungsfläche anbringen.
- Página 49 AXIS Q8752-E Bispectral PTZ Camera Kabelöffnung unten 1. Die optionalen Kabelführungsadapter installieren (nicht im Lieferumfang enthalten). 2. Das Erdungskabel mit der Erdungsschraube befestigen. 3. Die Kabel für Stromversorgung, Netzwerk und E/A einschließlich der Kabelverschraubungen wie in der Abbildung oben durch die Öffnung des Basisgeräts führen.
- Página 50 AXIS Q8752-E Bispectral PTZ Camera Stromversorgungskabel (nicht im Lieferumfang enthalten) E/A-Kabel (optional, nicht im Lieferumfang enthalten) Netzwerk-Kabel (nicht im Lieferumfang enthalten) Kabeldichtung Transparente Abdeckung der Gerätebasis 8. Die Kabeldichtungen auf die Kabel schieben. Siehe Kabelstärke auf Seite 58. 9. Die Kabel für Stromversorgung, Netzwerk und E/A einschließlich der Kabeldichtungen durch die Öffnungen der transparenten Abdeckung der Gerätebasis führen und die Kabel...
- Página 51 AXIS Q8752-E Bispectral PTZ Camera Weitere Informationen zu den verschiedenen Anschlussoptionen an das Netzwerk, siehe Einrichten der Netzwerkverbindung auf Seite 53. 10. Die transparente Abdeckung der Gerätebasis aufsetzen und die Kabeldichtungen in die Öffnungen schieben. E/A-Anschluss Stromanschluss O-Ring HINWEIS HINWEIS HINWEIS Um das Gerät nicht versehentlich von der Stromversorgung zu trennen, wenn das Kabel...
- Página 52 AXIS Q8752-E Bispectral PTZ Camera HINWEIS HINWEIS HINWEIS Sicherstellen, dass der O-Ring richtig um die transparente Abdeckung der Gerätebasis herum eingepasst ist. 13. Positionieren Sie die Positionierungseinheit auf der Basiseinheit. Stellen Sie sicher, dass die Pfeile an den beiden Geräten ausgerichtet sind.
- Página 53 AXIS Q8752-E Bispectral PTZ Camera Einrichten der Netzwerkverbindung Bei der Installation der Netzwerkverbindung stehen verschiedene Optionen zur Verfügung: • A: Mithilfe eines Glasfaserkabels oder eines Kabels des Typs RJ-45, das (mit einem entsprechenden Anschluss) an das SFP-Modul im SFP-Einschub angeschlossen wird.
-
Página 54: Anschließen Der Kabel
AXIS Q8752-E Bispectral PTZ Camera Anschließen der Kabel 1. Die vier Deckelschrauben (T20) lösen und den Deckel abnehmen. Stromversorgungsanschluss Eingang E/A-Anschluss RJ-45-Anschluss SFP-Einschub für SFP-Module (SFP-Modul nicht enthalten) 2. Das Netzwerk (Glasfaser und/oder RJ-45), E/A und die Stromversorgung anschließen Weitere Informationen zu den verschiedenen Anschlussoptionen an das Netzwerk, siehe Einrichten der Netzwerkverbindung auf Seite 53. - Página 55 AXIS Q8752-E Bispectral PTZ Camera 4. Entfernen Sie die Schutzabdeckung. 5. Das Produkt an die Stromversorgung anschließen. Obere Abdeckung entfernen VORSICHT Verletzungsgefahr Gefahr durch bewegliche Teile Körperteile während des Betriebs vom Produkt fernhalten. Vor der Installation oder Wartung des Produkts alle Kabel von der Stromversorgung abklemmen.
- Página 56 AXIS Q8752-E Bispectral PTZ Camera Weitere Informationen zum Einsetzen der SD-Karte oder zum Zurücksetzen auf die werksseitige Standardeinstellung finden Sie unter Produktübersicht auf Seite 44. Weitere Informationen hierzu finden Sie im Benutzerhandbuch unter axis.com. Den Wetterschild einstellen 1. Die beiden Schrauben des Wetterschilds lösen.
- Página 57 AXIS Q8752-E Bispectral PTZ Camera 2. Den Wetterschild in die gewünschte Position stellen. 3. Die beiden Schrauben des Wetterschilds anziehen (Drehmoment 0,8 Nm)
-
Página 58: Technische Daten
AXIS Q8752-E Bispectral PTZ Camera Technische Daten Die aktuelle Version des technischen Datenblatts für das Produkt finden Sie auf axis.com unter Support und Dokumentation. Kabelstärke Wenn die dem Produkt beiliegenden Kabeldichtungen verwendet werden, muss der Kabeldurchmesser zwischen 5 und 11 mm liegen. - Página 59 Sicherheitsinformationen • Lagern Sie das Axis Produkt in einer trockenen und belüfteten Umgebung. Gefährdungsstufen • Das Axis-Produkt weder Stößen noch GEFAHR starkem Druck aussetzen. • Das Produkt nicht an instabilen Masten, Weist auf eine gefährliche Situation hin, Halterungen, Oberflächen oder Wänden welche, falls nicht verhindert, zu Tod oder anbringen.
-
Página 61: Contenuto Della Confezione
AXIS Q8752-E Bispectral PTZ Camera Contenuto della confezione... -
Página 62: Panoramica Del Dispositivo
AXIS Q8752-E Bispectral PTZ Camera Panoramica del dispositivo Schermo di protezione dagli agenti atmosferici Copertura superiore Copertura interna Unità di posizionamento Viti dell'unità base Unità base Tergicristallo Parte anteriore con lamina protettiva Obiettivo visivo 10 Obiettivo termico 11 Coperchio... - Página 63 AXIS Q8752-E Bispectral PTZ Camera Connettore copertura superiore Connettore RS485 Connettore di alimentazione Pulsante di comando Connettore RJ45 LED di stato Connettore ingresso audio da 3,5 mm Slot per schede di memoria SD (microSD, scheda non inclusa) Connettore ingresso alimentazione...
-
Página 64: Come Installare Il Dispositivo
AXIS Q8752-E Bispectral PTZ Camera Come installare il dispositivo PERICOLO Rischio di scosse elettriche. Tutti i cavi non saranno sotto tensione prima di installare il dispositivo. ATTENZIONE Le connessioni elettriche e l'installazione dei tubi protettivi devono essere effettuate da un elettricista certificato e in conformità... - Página 65 AXIS Q8752-E Bispectral PTZ Camera A A A VVISO VVISO VVISO Non utilizzare strumenti appuntiti quando si rimuove il coperchio trasparente dell'unità base. 4. Rimuovere il coperchio trasparente dell'unità base. Clip del coperchio del tubo protettivo...
-
Página 66: Installazione Dei Cavi
AXIS Q8752-E Bispectral PTZ Camera Coperchio del tubo protettivo Foro per vite (x4) 5. Solo per le installazioni di tubi protettivi: rimuovere le due clip del coperchio del tubo protettivo e poi il coperchio del tubo protettivo stesso. 6. Fissare l'unità base alla superficie di montaggio con i fissaggi appropriati nei quattro fori delle viti. - Página 67 AXIS Q8752-E Bispectral PTZ Camera Foro per cavo inferiore 1. Installare gli adattatori dei tubi protettivi opzionali (non inclusi). 2. Collegare la treccia di messa a terra alla vite della messa a terra. 3. Inserire il cavo di alimentazione, il cavo di rete e il cavo I/O attraverso il foro nell'unità...
- Página 68 AXIS Q8752-E Bispectral PTZ Camera Cavo di alimentazione (non incluso) Cavo I/O (opzionale, non incluso) Cavo di rete (non incluso) Guarnizione per cavi Coperchio trasparente dell'unità base 8. Inserire le guarnizioni sui cavi. Vedere Spessore del cavo alla pagina 76.
- Página 69 AXIS Q8752-E Bispectral PTZ Camera tra i cavi e la guarnizione per evitare dispersioni. Per ulteriori informazioni sulle differenti opzioni di connettività di rete, vedere Installazione del collegamento di rete alla pagina 71. 10. Posizionare il coperchio trasparente sull'unità base e inserire le guarnizioni dei cavi nei fori.
- Página 70 AXIS Q8752-E Bispectral PTZ Camera A A A VVISO VVISO VVISO Assicurarsi che l'anello di tenuta sia correttamente fissato al coperchio trasparente dell'unità base. 13. Collocare l'unità di posizionamento sull'unità base. Assicurarsi che le frecce sulle due unità siano allineate.
- Página 71 AXIS Q8752-E Bispectral PTZ Camera Installazione del collegamento di rete È possibile scegliere tra diverse opzioni quando si installa il collegamento di rete: • A: tramite un cavo in fibra ottica o un cavo RJ45 collegato al modulo SFP (con un rispettivo connettore) nello slot SFP.
-
Página 72: Collegamento Dei Cavi
AXIS Q8752-E Bispectral PTZ Camera Collegamento dei cavi 1. Allentare le quattro viti (T20) del coperchio e rimuoverlo. Connettore ingresso alimentazione Connettore I/O Connettore RJ45 Slot SFP per modulo SFP (modulo SFP non incluso) 2. Collegare la rete (fibra ottica e/o RJ45), I/O e i cavi di alimentazione. Per ulteriori informazioni sulle differenti opzioni di connettività... - Página 73 AXIS Q8752-E Bispectral PTZ Camera 4. Rimuovere la copertura protettiva. 5. Applicare l'alimentazione al dispositivo. Rimuovere la copertura superiore ATTENZIONE Rischio di lesioni. Parti in movimento. Tenere il corpo a distanza dal dispositivo durante il funzionamento. Scollegare dall'alimentazione prima di installare o eseguire la manutenzione sul dispositivo.
- Página 74 AXIS Q8752-E Bispectral PTZ Camera Per sapere dove inserire la scheda di memoria o ripristinare i valori predefiniti di fabbrica, vedere Panoramica del dispositivo alla pagina 62. Per ulteriori informazioni, vedere il manuale utente su axis.com Regolare lo schermo di protezione dagli agenti atmosferici...
- Página 75 AXIS Q8752-E Bispectral PTZ Camera 1. Allentare le due viti dello schermo di protezione dagli agenti atmosferici. 2. Regolare lo schermo di protezione dagli agenti atmosferici nella posizione desiderata. 3. Serrare le due viti dello schermo di protezione dagli agenti atmosferici (serraggio 0,8 Nm).
-
Página 76: Spessore Del Cavo
AXIS Q8752-E Bispectral PTZ Camera Specifiche Per la versione più aggiornata della scheda tecnica del dispositivo, visitare il sito Web axis.com e trovare la sezione Support & Documentation (Supporto e documentazione). Spessore del cavo Quando si utilizzano le guarnizioni per cavo fornite con il dispositivo, il diametro del cavo deve essere compreso nell'intervallo tra 5 e 11 mm. - Página 77 Informazioni di sicurezza • Utilizzare solo strumenti applicabili quando si installa il dispositivo Axis. Se si utilizza Livelli di pericolo una forza eccessiva con strumenti non adatti PERICOLO è possibile causare danni al dispositivo. • Non utilizzare sostanze chimiche, agenti Indica una situazione pericolosa che, se non caustici o detergenti aerosol.
-
Página 79: Contenido Del Paquete
AXIS Q8752-E Bispectral PTZ Camera Contenido del paquete... -
Página 80: Información General Del Producto
AXIS Q8752-E Bispectral PTZ Camera Información general del producto Parasol Cubierta superior Cubierta interna Unidad de posicionamiento Tornillos de unidad base Unidad base Escobilla limpiadora Parte delantera con cubierta protectora Objetivo para cámara visual 10 Objetivo para cámara térmica 11 Tapa... - Página 81 AXIS Q8752-E Bispectral PTZ Camera Conector de cubierta superior Conector RS485 Conector de alimentación Botón de control Conector RJ45 LED de estado Conector de entrada de audio de 3,5 mm Ranura para tarjetas de memoria SD (microSD, tarjeta no incluida)
-
Página 82: Cómo Instalar El Producto
AXIS Q8752-E Bispectral PTZ Camera Cómo instalar el producto PELIGRO Riesgo de descarga eléctrica. Todos los cables deben estar sin energía antes de instalar el producto. ATENCIÓN Las conexiones eléctricas y las instalaciones de los conductos debe realizarlas un electricista cualificado, de conformidad con la normativa local. - Página 83 AXIS Q8752-E Bispectral PTZ Camera A A A VISO VISO VISO No utilice herramientas afiladas al retirar la cubierta transparente de la unidad base. 4. Extraiga la cubierta transparente de la unidad base. Clip de cubierta de conducto Cubierta de conducto...
-
Página 84: Guía De Los Cables
AXIS Q8752-E Bispectral PTZ Camera Orificio para tornillo (4) 5. Para instalaciones con conducto solo: retire los dos clips de cubierta de conducto y, a continuación, la cubierta de conducto. 6. Fije la unidad base a la superficie de montaje mediante los fijadores adecuados en los cuatro orificios para tornillos. - Página 85 AXIS Q8752-E Bispectral PTZ Camera 1. Instale los adaptadores de conducto opcionales (no incluidos). 2. Conecte el cable trenzado de tierra al tornillo de tierra. 3. Pase el cable de alimentación, el cable de E/S y el cable de red a través del orificio de la unidad base como se muestra en la ilustración anterior.
- Página 86 AXIS Q8752-E Bispectral PTZ Camera Cable de alimentación (no incluido) Cable de E/S (opcional, no incluido) Cable de red (no incluido) Junta de cable Cubierta transparente de la unidad base 8. Ponga juntas en los cables. Consulte Grosor del cable en la página 94.
- Página 87 AXIS Q8752-E Bispectral PTZ Camera 10. Coloque la cubierta transparente de la unidad base en la unidad y ponga las juntas de cable en los orificios. Conector de E/S Conector de alimentación Junta tórica A A A VISO VISO VISO A fin de evitar desconectar accidentalmente la unidad de la alimentación si se tira del...
- Página 88 AXIS Q8752-E Bispectral PTZ Camera 13. Coloque la unidad de posicionamiento en la unidad base. Asegúrese de que las flechas de las dos unidades estén alineadas. 14. Gire la unidad de posicionamiento en sentido horario hasta su posición original y apriete los cuatro tornillos de la base (par 3,0 Nm).
-
Página 89: Instalación Del Enlace De Red
AXIS Q8752-E Bispectral PTZ Camera Instalación del enlace de red Puede elegir entre diferentes opciones para instalar el enlace de red: • A: a través de un cable de fibra óptica o RJ45 conectado al módulo SFP (con el correspondiente conector) en la ranura SFP. -
Página 90: Conexión De Los Cables
AXIS Q8752-E Bispectral PTZ Camera Conexión de los cables 1. Afloje los cuatro tornillos (T20) de la tapa de la base y retírela. Conector de entrada de corriente Conector de E/S Conector RJ45 Ranura SFP para módulo SFP (módulo SFP no incluido) 2. - Página 91 AXIS Q8752-E Bispectral PTZ Camera 4. Extraiga la cubierta protectora. 5. Conecte la alimentación del producto. Retirar la cubierta superior ATENCIÓN Riesgo de lesiones. Piezas móviles. No acerque ninguna parte del cuerpo al producto mientras esté funcionando. Desconecte la fuente de alimentación antes de realizar trabajos de instalación o mantenimiento en el producto.
-
Página 92: Ajustar El Parasol
AXIS Q8752-E Bispectral PTZ Camera Para saber dónde puede insertar la tarjeta SD o restablecer la configuración predeterminada de fábrica, consulte Información general del producto en la página 80. Para obtener más información, consulte el manual de usuario en axis.com... - Página 93 AXIS Q8752-E Bispectral PTZ Camera 1. Afloje los dos tornillos del parasol. 2. Coloque el parasol en la posición que prefiera. 3. Apriete los dos tornillos del parasol (par 0,8 Nm).
-
Página 94: Especificaciones
AXIS Q8752-E Bispectral PTZ Camera Especificaciones Para acceder a la versión más reciente de la hoja de datos del producto, visite la página del producto en axis.com y localice Support & Documentation (Soporte técnico y documentación). Grosor del cable El diámetro del cable, si se usan las juntas para cables suministradas con este producto, debe ser de entre 5 y 11 mm. - Página 95 Información de seguridad • Evite la exposición del producto de Axis a choques o a una fuerte presión. Niveles de peligro • No instale el producto en postes, soportes, PELIGRO superficies o paredes inestables. • Utilice solo las herramientas Indica una situación peligrosa que, si no se correspondientes cuando instale el evita, provocará...
- Página 97 AXIS Q8752-E Bispectral PTZ Camera パ パ パ ッ ッ ッ ケ ケ ケ ー ー ー ジ ジ ジ の の の 内 内 内 容 容 容...
- Página 98 AXIS Q8752-E Bispectral PTZ Camera 製 製 製 品 品 品 の の の 概 概 概 要 要 要 ウェザーシールド トップカバー 内部カバー ポジショニングユニット ベースユニットのネジ ベースユニット ワイパー 保護フォイルを備えたフロント ビジュアルレンズ 10 サーマルレンズ...
- Página 99 AXIS Q8752-E Bispectral PTZ Camera 11 蓋 トップカバーコネクタ RS485コネクタ 電源コネクタ コントロールボタン RJ45コネクタ ステータスLED ⾳声⼊⼒3.5 mmコネクタ SDカードスロット (microSD、カードは付属していません) ⼊⼒電⼒コネクタ 10 I/Oコネクタ 11 RJ45コネクタ 12 SFPモジュール⽤SFPモジュール (⾮付属品)
- Página 100 AXIS Q8752-E Bispectral PTZ Camera 製 製 製 品 品 品 の の の 取 取 取 り り り 付 付 付 け け け ⽅ ⽅ ⽅ 法 法 法 危険 感電の危険があります。 製品を設置する前に、すべてのケーブルの通電 を切ってください。 注意 電気接続およびコンジットの取り付けは、必ず資格のある電気技師が地域 の規制に従って⾏ってください。 注意...
- Página 101 AXIS Q8752-E Bispectral PTZ Camera 注記 透明ベースユニットカバーの取り外しの際には、鋭利な⼯具を使⽤しな いでください。 4. 透明ベースユニットカバーを取り外します。 コンジットカバークリップ...
- Página 102 AXIS Q8752-E Bispectral PTZ Camera コンジットカバー ネジ⽳ (x4) 5. コンジットの取り付けの場合にのみ、2つのコンジットカバークリップを 取り外し、コンジットカバーを取り外します。 6. 4つのネジ⽳に適したファスナーで、ベースユニットを取付⾯に取り付 けます。 ケ ケ ケ ー ー ー ブ ブ ブ ル ル ル の の の 配 配 配 線 線 線 警告 感電の危険があります。 本製品は、電源ケーブルおよび接地編組の両⽅に保 護アース線を使⽤して接地するものとします。 保護アース線と接地編組のそ...
- Página 103 AXIS Q8752-E Bispectral PTZ Camera 1. オプションのコンジットアダプター (付属していません) を取り付けます。 2. 接地編組をアース端⼦ネジに接続します。 3. 上図に⽰すように、ベースユニットの⽳から電源ケーブル、I/Oケーブ ル、およびネットワークケーブルを挿⼊します。 あるいは、それらを 底部ケーブル孔から挿⼊します。 4. ストレインリリーフからケーブルの先端までの距離が530 mmになるよう に、ストレインリリーフを通じて電源ケーブルを挿⼊します。 I/Oケーブル (オプション、付属していません) ネットワークケーブル (付属していません) 5. ストレインリリーフからケーブルの先端までの距離が420 mmになるよう に、ストレインリリーフを通じてI/Oケーブル (オプション) を挿⼊します。 6. ストレインリリーフからコネクタの先端までの距離が580 mmになるよう に、ストレインリリーフを通じてネットワークケーブル (光ファイバー ケーブルやRJ45ケーブル) を挿⼊します。 さまざまなネットワーク接続オ 107ページの、ネットワークリンクのインス プションの詳細については、...
- Página 104 AXIS Q8752-E Bispectral PTZ Camera 電源ケーブル (付属していません) I/Oケーブル (オプション、付属していません) ネットワークケーブル (付属していません) ケーブルガスケット 透明ベースユニットカバー 112ページの、ケー 8. ケーブルに合ったケーブルガスケットを取り付けます。 ブルの太さ を参照してください。 9. 上図に⽰すように、ケーブルガスケットを含めて、電源ケーブル、I/Oケー ブル、ネットワークケーブルを透明ベースユニットのカバー孔から挿⼊ し、ケーブルの配置を調整します。 注記 光ファイバーとRJ45ケーブルの両⽅をネットワーク接続に使⽤している場 合、光ケーブルはI/Oケーブルと同じケーブルガスケットを通します。 漏電防...
- Página 105 AXIS Q8752-E Bispectral PTZ Camera ⽌のために、シーラントをケーブルとケーブルガスケットの間に貼り付けま 107ページ す。 さまざまなネットワーク接続オプションの詳細については、 の、ネットワークリンクのインストール を参照してください。 10. ベースユニットの上に透明ベースユニットカバーを置き、⽳の内側にケー ブルガスケットをはめ込みます。 I/Oコネクタ 電源コネクタ O-リング 注記 ケーブルが引っ張られた場合に誤って装置を電源から切断しないように、保 護接地線は他の2本の線 (電源ケーブル内) よりも約10 mm ⻑くしてください。 注意 設置をできるだけ簡単にするために、電源ケーブルジャケットの約90 mmと I/Oケーブルジャケットの70 mmを取り除くことをお勧めします。 11. 電源およびI/Oコネクタを取り付けます。 12. ネットワークケーブル、I/Oケーブル、および電源ケーブルのケーブルガ スケットからコネクタの端までの距離が、それぞれ240 mm、170 mm、 160 mmになるように調整します。...
- Página 106 AXIS Q8752-E Bispectral PTZ Camera 注記 O-リングが透明ベースユニットカバーに正しく取り付けられていること を確認します。 13. ポジショニングユニットをベースユニットに配置します。 2つのユニット上 の⽮印が⼀直線上になっていることを確認してください。 14. ポジショニングユニットを元の位置に戻るまで時計回りに回し、ベース ユニットのネジ4本を締めます (トルク3.0 Nm)。 注記 2つのユニットを組み⽴てるときにケーブルが締め付けられないように注意 してください。...
- Página 107 AXIS Q8752-E Bispectral PTZ Camera ネ ネ ネ ッ ッ ッ ト ト ト ワ ワ ワ ー ー ー ク ク ク リ リ リ ン ン ン ク ク ク の の の イ イ イ ン ン ン ス ス ス ト ト ト ー ー ー ル ル ル...
- Página 108 AXIS Q8752-E Bispectral PTZ Camera ケ ケ ケ ー ー ー ブ ブ ブ ル ル ル の の の 接 接 接 続 続 続 1. 4つの蓋⽌めネジ (T20) をゆるめ、蓋を取り外します。 ⼊⼒電⼒コネクタ I/Oコネクタ RJ45コネクタ SFPモジュール⽤SFPスロット (SFPモジュールは付属していません) 2. ネットワーク (光ファイバーまたはRJ45) に接続し、I/Oおよび電源ケーブル を接続します。 さまざまなネットワーク接続オプションの詳細については、...
- Página 109 AXIS Q8752-E Bispectral PTZ Camera 4. 保護カバーを取り外します。 5. 製品の電源を⼊れます。 ト ト ト ッ ッ ッ プ プ プ カ カ カ バ バ バ ー ー ー を を を 取 取 取 り り り 外 外 外 し し し ま ま ま す す す...
- Página 110 AXIS Q8752-E Bispectral PTZ Camera SDカードの挿⼊先、または⼯場出荷時の設定へのリセットについては、を参照し 98ページの、製品の概要 axis.com てください 。 詳細については、 でユーザーズマ ニュアルを参照してください。 ウ ウ ウ ェ ェ ェ ザ ザ ザ ー ー ー シ シ シ ー ー ー ル ル ル ド ド ド の の の 調 調 調 整 整 整...
- Página 111 AXIS Q8752-E Bispectral PTZ Camera 1. ウェザーシールドの2つのネジを緩めます。 2. 希望の位置にウェザーシールドを取り付けます。 3. ウェザーシールドの2つのネジを締めます (トルク0.8 Nm)。...
- Página 112 AXIS Q8752-E Bispectral PTZ Camera 仕 仕 仕 様 様 様 axis.com 最新バージョンの製品のデータシートについては、 で本製品のページを開い て「Support Support Support & & & Documentation Documentation ( ( ( サ サ サ ポ ポ ポ ー ー ー ト ト ト と と と ド ド ド キ キ キ ュ ュ ュ メ メ メ ン ン ン ト ト ト ) ) ) 」へお進みください。...
- Página 113 本製品を設置する際には、適切な⼯ 安 安 安 全 全 全 情 情 情 報 報 報 • 具のみを使⽤してください。 電動⼯ 危 危 危 険 険 険 レ レ レ ベ ベ ベ ル ル ル 具を使⽤して過剰な⼒をかけると、 危険 製品が損傷することがあります。 化学薬品、腐⾷剤、噴霧式クリーナー • 回避しない場合、死亡または重傷につ は使⽤しないでください。 ながる危険な状態を⽰します。 清掃には、きれいな⽔に浸した清潔 •...
- Página 115 AXIS Q8752-E Bispectral PTZ Camera 包 包 包 装 装 装 内 内 内 容 容 容...
- Página 116 AXIS Q8752-E Bispectral PTZ Camera 产 产 产 品 品 品 概 概 概 述 述 述 耐候保护罩 顶罩 内罩 定位单元 底座单元螺丝 底座单元 雨刮器 前部带有保护膜 视觉镜头 10 热透镜...
- Página 117 AXIS Q8752-E Bispectral PTZ Camera 11 盖 顶罩连接器 RS485 连接器 电源连接器 控制按钮 RJ45 连接器 LED 状态指示灯 音频输入 3.5 毫米连接器 SD 卡槽(microSD,不含卡) 输入电源连接器 10 I/O 连接器 11 RJ45 连接器 12 SFP 模块的 SFP 插槽(不含)...
- Página 118 AXIS Q8752-E Bispectral PTZ Camera 如 如 如 何 何 何 安 安 安 装 装 装 产 产 产 品 品 品 危险 电击风险。 安装产品之前,电缆都应断电。 小心 电气连接和导线管安装应由经过认证的电工执行,并遵守当地法规。 小心 伤害风险。 活动部件。 操作期间,请保持身体部位远离产品。 安装或 维护产品时,请断开电源。 小心 伤害风险。 灼热的表面。 请勿在操作期间触摸该产品。 执行产品维护时, 请断开电源并让表面冷却。...
- Página 119 AXIS Q8752-E Bispectral PTZ Camera 注意 移除透明底座单元盖板时,请勿使用尖锐工具。 4. 移除透明底座单元盖板。 导线管盖夹 导线管盖...
- Página 120 AXIS Q8752-E Bispectral PTZ Camera 螺丝孔(4 个) 5. 仅适用于导线管安装: 取下两个导线管盖夹,然后取下导线管盖。 6. 在四个螺丝孔中使用适当的紧固件将底座单元固定到安装表面。 布 布 布 线 线 线 警告 触点危险。 本产品应同时使用电源线中的保护接地线和接地编织层进行接地。 确保保护接地线和接地编织层的两端与其各自的接地表面接触。 重要 电缆厚度 在 仅使用符合指定电缆区域要求的电缆。 有关详细信息,请参见 第130页 。 电源线(不包括) 应力消除器 接地螺丝 接地编织层(不包括) 底部电缆孔 1. 安装可选的导线管适配器(不包括)。 2. 将接地编织层连接到接地螺丝。...
- Página 121 AXIS Q8752-E Bispectral PTZ Camera 3. 将电源线、I/O 电缆和网络电缆穿过底座单元上的孔(如上图所示)。 或 者,将其穿过底部电缆孔。 4. 将电源线穿过应力消除器,并保持应力消除器与电缆末端距离为 530 毫 米(21 英寸)。 I/O 电缆(可选,不包括) 网络电缆(不包括) 5. 将 I/O 电缆(可选)穿过应变消除件,并使应变消除件至电缆端的距离为 420 毫米(16.5 英寸)。 6. 将网络电缆(光纤电缆和/或 RJ45 电缆)穿过应力消除器,并保持应力消 除器与连接器末端的距离为 580 毫米(23 英寸)。 有关不同网络连接选项 安装网络链路 在第125页 的详细信息,请参见 。 7. 合上并拧紧这三个应力消除器。...
- Página 122 AXIS Q8752-E Bispectral PTZ Camera 电源线(不包括) I/O 电缆(可选,不包括) 网络电缆(不包括) 电缆垫片 透明底座单元盖板 电缆厚度 在第130页 8. 将电缆垫片安装到电缆上。 请参见 。 9. 将电源线、I/O 电缆和网络电缆(包括电缆垫片)穿过透明底座单元盖板上的 孔,然后按照上图所示进行布线。 注意 如果您同时使用光纤电缆和 RJ45 电缆进行网络连接,请将光纤电缆与 I/O 电缆 穿过同一电缆垫片。 在电缆和电缆垫片之间涂抹密封剂以防电缆滑出。 有关不 安装网络链路 在第125页 同网络连接选项的详细信息,请参见 。...
- Página 123 AXIS Q8752-E Bispectral PTZ Camera 10. 将透明底座单元盖板放在底座单元上,并将线缆垫圈安装在孔内。 I/O 连接器 电源连接器 O 形环 注意 为避免电缆被拉扯时单元电源意外断开,保护接地线应该比他两条电线(电源 线内)长约 10 毫米(0.4 英寸)。 备注 为了让安装尽可能简单,我们建议您将电源线护套剥去约 90 毫米(3.5 英 寸),并将 I/O 电缆护套剥去 70 毫米(2.8 英寸)。 11. 安装电源连接器和 I/O 连接器。 12. 调整网络、I/O 和电源线,以使电缆垫片与连接器末端的距离分别为 240 毫米 (10 英寸)、170 毫米(7 英寸)及 160 毫米(7 英寸)。...
- Página 124 AXIS Q8752-E Bispectral PTZ Camera 13. 将定位单元放在底座单元上。 确保两个单元上的箭头对齐。 14. 按顺时针方向将定位单元转回至其初始位置并拧紧 4 个底座单元螺丝(扭 矩 3.0 牛米)。 注意 在安装两个单元时,请确保电缆未被夹扁。...
- Página 125 AXIS Q8752-E Bispectral PTZ Camera 安 安 安 装 装 装 网 网 网 络 络 络 链 链 链 路 路 路 安装网络链路时,有几个选项可以选择: A: 通过光纤电缆或与 SFP 插槽中的 SFP 模块(带有相应的连接器)连接 • 的 RJ45 电缆。 B: 通过与固定式 RJ45 连接器连接的 RJ45 电缆。...
- Página 126 AXIS Q8752-E Bispectral PTZ Camera 连 连 连 接 接 接 电 电 电 缆 缆 缆 1. 松开四颗盖子螺丝 (T20),然后取下盖子。 输入电源连接器 I/O 连接器 RJ45 连接器 SFP 模块的 SFP 插槽(不包括 SFP 模块) 2. 连接网络(光纤和/或 RJ45)、I/O 和电源线。 有关不同网络连接选项的详细 安装网络链路 在第125页 信息,请参见 。...
- Página 127 AXIS Q8752-E Bispectral PTZ Camera 4. 移除保护盖。 5. 接通产品电源。 移 移 移 除 除 除 顶 顶 顶 罩 罩 罩 小心 受伤风险。 活动部件。 操作期间,请保持身体部位远离产品。 安装或 维护产品时,请断开电源。 小心 受伤风险。 灼热的表面。 请勿在操作期间触摸该产品。 执行产品维护时, 请断开电源并让表面冷却。 注意 移除顶罩时,将显露易受碰撞影响的视觉摄像机部件。 移除顶罩时,请确保 不要让顶罩碰撞无保护的摄像机。 要插入 SD 卡或重置为出厂默认设置,请移除顶罩:...
- Página 128 AXIS Q8752-E Bispectral PTZ Camera 产品概述 在第116页 要查明 SD 卡的插入位置或重置为出厂默认设置,请参见 。 更 axis.com 多信息请参见 上的用户手册 调 调 调 节 节 节 风 风 风 雨 雨 雨 罩 罩 罩 1. 拧松耐候保护罩的 2 个螺丝。...
- Página 129 AXIS Q8752-E Bispectral PTZ Camera 2. 将耐候保护罩设置在首选位置。 3. 拧紧耐候保护罩的 2 个螺丝(扭矩 0.8 牛米)。...
- Página 130 AXIS Q8752-E Bispectral PTZ Camera 规 规 规 格 格 格 axis.com 要查找最新版本的产品数据表,请转到 上的产品页并查找支 支 支 持 持 持 和 和 和 文 文 文 档 档 档 。 电 电 电 缆 缆 缆 厚 厚 厚 度 度 度...
- Página 131 安 安 安 全 全 全 信 信 信 息 息 息 请勿尝试自行维修产品。 有关服务事 • 项,请联系安讯士支持部门或安讯士 危 危 危 险 险 险 等 等 等 级 级 级 经销商。 危险 请勿将摄像机镜头对准太阳或其他高强 • 度辐射源,因为这可能会损坏摄像机。 表示如果不避免则会导致死亡或严重 运 运 运 输 输 输 伤害的危险情况。...
- Página 132 Installation Guide Ver. M1.2 AXIS Q8752-E Bispectral PTZ Camera Date: June 2020 © Axis Communications AB, 2020 Part No. 2110784...