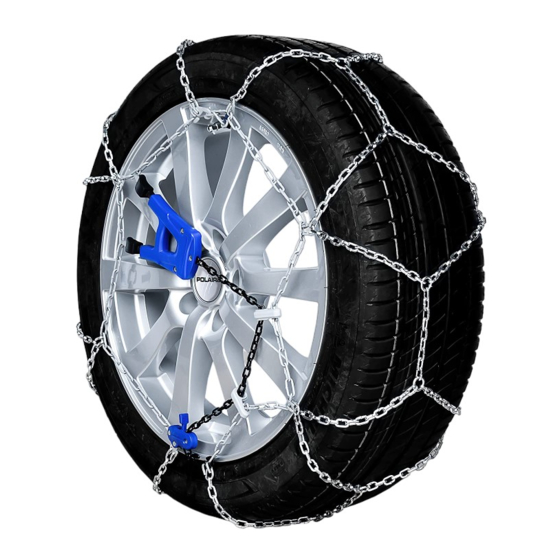
Resumen de contenidos para Polaire XK9
- Página 1 MOUNTING INSTRUCTIONS INSTRUCTIONS DE MONTAGE MONTAGEANLEITUNG ISTRUZIONI DI MONTAGGIO INSTRUCCIONES DE MONTAJE...
-
Página 2: Ważne Zalecenia
REGULATION RECOMMENDATION Any instructions given by the vehicle manufacturer shall be observed. *Valid for France only RECOMMANDATIONS REGLEMENTAIRES Les instructions du constructeur du véhicule doivent être suivies. *Valable en France seulement VORGESCHRIEBENE EMPFEHLUNG Die Anweisungen des Wagen-Herstellers sollen befolgt werden. * Nur für Frankreich gültig. - Página 3 RECOMMANDATIONS REGLEMENTAIRES : DOUZE RECOMMANDATIONS CONCERNANT LES CHAINES A NEIGE & DISPOSITIFS ANTI-DERAPANTS AMOVIBLES 1. L’utilisateur des présentes chaînes à neige se doit de respecter scrupuleusement l’ensemble des préco- nisations visées ci-après, engageant dans le cas contraire sa seule responsabilité à l’égard des dommages causés tant au produit qu’au véhicule ou bien encore aux personnes.
- Página 4 RACCOMANDAZIONE REGOLAMENTARE : DODICI RACCOMANDAZIONI RELATIVE ALLE CATENE DA NEVE & DISPOSITIVI ANTI-SLITTAMENTO AMOVIBILI. 1. L’utilizzatore delle presenti catene da neve deve rispettare scrupolosamente l’insieme delle indicazioni citate qui di seguito; in caso contrario la responsabilità di danni causati tanto al prodotto che al veicolo o anche alle persone è...
- Página 5 Ważne zalecenia: dWanaście zaleceń dotyczących eksploatacji łańcuchóW przeciWśnieżnych. 1. użytkownik niniejszego łańcucha musi bezwzględnie przestrzegać wszystkich poniższych zaleceń. nieprzestrzeganie tych zasad może spowodować szkody osobowe oraz rzeczowe, za których pełną odpowiedzialność ponosi użytkownik. 2. łańcuchy należy stosować wyłącznie na drogach pokrytych śniegiem lub lodem, które są przeznaczone dla ruchu kołowego. nie zapominaj że podczas jazdy z założonymi nakładkami tekstylnymi zachowanie pojazdu ulega zmianie.
- Página 6 UK-WARNING: Every chain is designed to be fitted on different size of tyres. Therefore, it could be difficult to obtain the correct fitting immediately : the chain’s fitting and tightening must be controled after 100 m driving. F-ATTENTION : Chaque chaine peut être montée sur différentes dimensions de pneumatique. Il est difficile d’obtenir immédiatement une adaptation parfaite : après montage de la chaîne, la mise en place et la tension de la chaîne doivent être contrôlées après avoir parcouru 100 m.
- Página 7 MOUNTING INSTRUCTIONS ISTRUZIONI DI MONTAGGIO INSTRUCTIONS DE MONTAGE INSTRUCCIONES DE MONTAJE MONTAGEANLEITUNG Lay the chain down on the ground and make sure that it is not entangled and that the double hooks are facing the ground. Pass the cable behind the wheel. Etendre bien la chaîne par terre en ayant soin qu’elle ne soit pas emmêlée et que les crochets doubles soient tournés vers le sol;...
- Página 8 MOUNTING - MONTAGE - MONTAGE - MONTAGGIO - MONTAJE Take the two ends of the cable (1 -2), lift them to the front side of the wheel and hook them. Prenez les extrémités du câble (1 et 2), passez-les sur la partie extérieure de la roue, et accrochez-les.
- Página 9 Hook the flat hook (3) to the link (4) of the side chain. Accrochez le crochet plat (3) à la maille (4) de la chaîne latérale. Den flachen Haken (3) in das Endglied (4) der Seitenkette einhaken. Agganciate il gancio piatto (3) alla maglia (4) della catena laterale. Enganche el gancho plano (3) en el eslabón (4) del lateral de la cadena.
- Página 10 MOUNTING - MONTAGE - MONTAGE - MONTAGGIO - MONTAJE Push the cable to the inner side of the wheel and make sure that it does not lay on the tread. Passez le câble à l’arrière de la roue en vous assurant qu’il ne reste pas sur la bande de roulement.
- Página 11 Take the small chain (5) which you will find at the lower side of the wheel and insert it into the hook (6). Prenez la chaînette (5) qui se trouve dans le bas du pneu et accrochez-la avec le crochet (6). Nehmen Sie die kleine Kette(5), die sich unter dem Reifen befindet, und hängen Sie sie mit dem Haken ein (6).
- Página 12 MOUNTING - MONTAGE - MONTAGE - MONTAGGIO - MONTAJE Hook the 2 grey hooks (8) to the close chain (7). Accrochez les 2 crochets gris (8) à la chaîne de tour (7). Hängen Sie die zwei grauen Haken (8) in die Kette (7) ein. Agganciate gli 2 ganci grigi (8) alla maglia de giro (7).
- Página 13 Pull the 2 rubber tensioners from the grey device and place them on the links of the chain (7). Pull to the maximum and control tensioning when you can see the yellow painted part on each of the 2 rubber tensioners. The grey device must be place with the black foam towards the rim, to protect it. Tirez les 2 tendeurs en caoutchouc de la pièce grise et accrochez-les aux maillons de la chaîne de tour (7).
-
Página 14: Dismounting Instructions - Instructions De Demontage
DISMOUNTING INSTRUCTIONS - INSTRUCTIONS DE DEMONTAGE - Stop the car so that the auto-locking device (6) in the position shown in the picture, then steer completely. Arrêtez le véhicule en faisant en sorte que le dispositif de blocage (6) se trouve dans la position illustrée sur l’image. - Página 15 DEMONTAGEANLEITUNG - ISTRUZIONI DI SMONTAGGIO - INSTRUCCIONES PARA Grasp the chain near the ends (3-4) and pull it to the bottom. Tirez la chaîne vers le bas en l’empoignant à côté des extrémités (3-4) Die Kette an deren Enden (3-4) an dem flachen Haken anfassen und nach unten ziehen, so dass Seil sich auf die obere Seite des Reifens schiebt.


