Publicidad
Idiomas disponibles
Idiomas disponibles
Enlaces rápidos
Publicidad

Manuales relacionados para Vortice DEUMIDO M20


Resumen de contenidos para Vortice DEUMIDO M20
- Página 1 Manual de instrucciones Instruction booklet DEUMIDO COD. 5.471.084.707 15/06/2017...
- Página 2 Descripción y operación... . Vortice no es responsable de los Seguridad ..... . .
- Página 3 ESPAÑOL Descripcion y operación este producto es un deshumidificador. Controla la humedad relativa pasando el aire SaLiDa De aiRe a través de la unidad, forzando el exceso de humedad condensarse sobre FiLTRO aLeTa elementos de enfriamiento. el contacto con De aiRe PaLaS la superficie fría hace que la humedad en el eNTRaDa...
- Página 4 ESPAÑOL Securidad Atención: este simbolo indica precauciones que sirven para evitar daños al usuario • asegúrese de que haya al menos 300 mm (1’) entre los lados del aparato y cualquier material inflamable o fuente de calor. • No es adecuado para uso en gabinetes, botes, tráileres o lugares similares. •...
- Página 5 ESPAÑOL Advertencia: este simbolo indica precauciones que sirven para evitar daños en el producto • Mantenga la unidad siempre en posición vertical y sobre una superficie firme todo el tiempo. • No la coloque sobre superficies suaves. • No cubra las parrillas de entrada o salida del aparato. •...
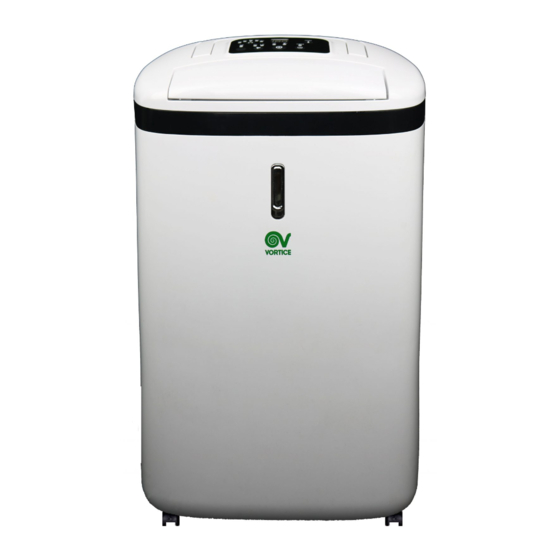
- Página 6 ESPAÑOL Componentes Frente (fig.3) Atrás (fig.4) Accesorios (fig.5) 1. Panel de control 1. aleta 1. Filtro carbón 2. Luz ambiental 2. Manija activo. 3. Panel frontal 3. Filtro aria (entrada) 4. Rueda giratoria 4. Pantalle de nivel de 5. Panel trasero agua 5.
- Página 7 ESPAÑOL Panel de control 1. Botón de ajuste de la humedad 9. indicador de ventilación alta 2. indicador de modo de trabajo 10. Botón de velocidad / ventilación (trabajo continuo, humedad 40%, 11. indicador de ventilación baja 50%, 60%, 70%) 12.
- Página 8 ESPAÑOL Operación 1. enchufe la unidad en el toma de la corriente principal. (Por favor, refiérase a la etiqueta de datos en la parte de atrás de la unidad para un voltaje / frequencia correctos.) 2. Presione ON/OFF para encender la unidad. el compresor empezará a trabajar.
- Página 9 ESPAÑOL Drenaje Mientras que el tanque de agua esté lleno, el compresor se detendrá para auto- protección y el ‘indicador tanque lleno’ (Water Full) se pondrá en rojo. Para mover el tanque de agua, hálelo completamente de la unidad. Después de vaciar el tanque de agua, colóquelo en el espacio.
- Página 10 ESPAÑOL Mantenimiento y limpieza NOTA: Desconecte siempre la unidad de la fuente de corriente eléctrica principal antes de llevar a cabo cualquier mantenimiento o limpieza de la unidad. Limpieza de aparato use una tela suave para limpiar la unidad. No use nunca químicos volátiles, gasolina, detergentes, tejidos tratados químicamente u otras soluciones de limpieza.
- Página 11 ESPAÑOL Resolución de problemas LA UNIDAD NO FUNCIONA: - ¿está enchufada? - ¿Hay energía en el recinto? - ¿está la temperatura ambiente por debajo de 5ºC, o sobre 32ºC? Si es así, entonces está fuera del rango de trabajo de la unidad. - asegúrese de que el switch ON/OFF esté...
- Página 12 ENGLISH Description and operation This product is a dehumidifier. it controls relative humidity by passing the air through the unit, forcing the excess moisture to condensate over the cooling elements. Contact with this cold surface causes the moisture in the air to condense.
- Página 13 ENGLISH Safety Attention: this symbol indicates that care must be taken to avoid injury to the user • ensure that there is at least 300mm (1’) between the sides of the appliance and any flammable, heating materials. • Not suitable for use in cabinet, boats, caravans or similar locations. •...
- Página 14 ENGLISH Caution this symbol indicates that care must be taken to avoid damaging the appliance • always keep the unit in vertical position and on a firm flat surface at all times. • Do not place on soft surfaces. • Do not cover the appliances intake or outlet grilles. •...
- Página 15 ENGLISH Components Front (fig.3) Rear (fig.4) Accessories (fig.5) 1. Control panel 1. Wind flap 1. active carbon filter 2. ambient light 2. Handle 3. Front plate 3. air filter (air inlet) 4. Caster wheel 4. Water level display 5. Rear plate 5.
- Página 16 ENGLISH Control panel 1. Humidity setting button 9. High ventilation indicator 2. Working mode indicator (continuous 10. Speed/Ventilation button working, humidity 40%, 50%, 60%, 11. Low ventilation indicator 70%) 12. Power indicator 3. Humidity/Temperature display 13. ON/OFF (power button 4. Timer operation indicator 14.
- Página 17 ENGLISH Operation 1. Plug the unit into a correct mains socket. (Please refer to the rating label at the rear of the unit for correct voltage/frequency.) 2. Press ON/OFF button to turn on the unit. The compressor will start to work. 3.
- Página 18 ENGLISH Drainage While the water tank is full, the compressor will stop for self-protection and the water full indicator will turn into red. To move the water tank, pull it out squarely from the unit. after empting the water tank, place the water tank into space. Make sure it is properly positioned, in order for the 'water full' sign to go out and your dehumidifier is operating.
- Página 19 ENGLISH Maintenance and cleaning always unplug the unit from the mains before carrying out any maintenance or cleaning of the unit. Cleaning the body use soft cloth to wipe the unit clean. Don't ever use volatile chemicals, gasoline, detergents, chemically treated clothes, or other cleansing solutions.
- Página 20 ENGLISH Troubleshooting THE UNIT DOES NOT OPERATE: - is the unit plugged in? - is the house electricity on? - is the room temperature below 5 C or above 32 C? if so, then it is out of the working range of the unit. - ensure the ON/OFF switch is turned on.
- Página 21 Vortice Elettrosociali S.p.A. reserves the right to make improvements to products at any time and without prior notice. La société Vortice Elettrosociali S.p.A. se réserve le droit d'apporter toutes les variations afin d'améliorer ses produits en cours de commercialisation. Die Firma Vortice Elettrosociali S.p.A. behält sich vor, alle eventuellen Verbesserungsänderungen an den Produkten des Verkaufsangebots vorzunehmen.
- Página 22 Mailing date __________________ Para ejercer la garantía , el Cliente debe completar y devolver a VORTiCe LaTaM , dentro de los 8 días posteriores a la compra , la "Parte 2 " de la garantía , la dirección y en la forma prevista en esta parte . La "Parte 1 " de la tarjeta de garantía debe ser conservada y presentada, junto con el documento fiscal (factura o recibo)
- Página 23 GARANTIA - GUARANTEE SELLO DEL DISTRIBUIDOR name and address of supplier PARA ENVIAR DENTRO DE LOS 8 DÍAS POSTERIORES A LA COMPRA to send (within 8 days from date of purchase) AÑO YEAR DATOS DEL USUARIO/CUSTOMER DATA nombre/name _____________________________________________________________ apellido/surname _______________________________________________________ calle/street ______________________________________________________________ código postal /post code __________________________________________________ ciudad/town ______________________________________________________________...
- Página 24 Vortice e l e t t r o s o c i a l i it through a third party for the S.p.a. y a los distribuidores de los despatch of advertising material.