Tabla de contenido
Publicidad
Idiomas disponibles
Idiomas disponibles
Enlaces rápidos
Publicidad
Tabla de contenido

Manuales relacionados para LUCCI BOREAS Serie


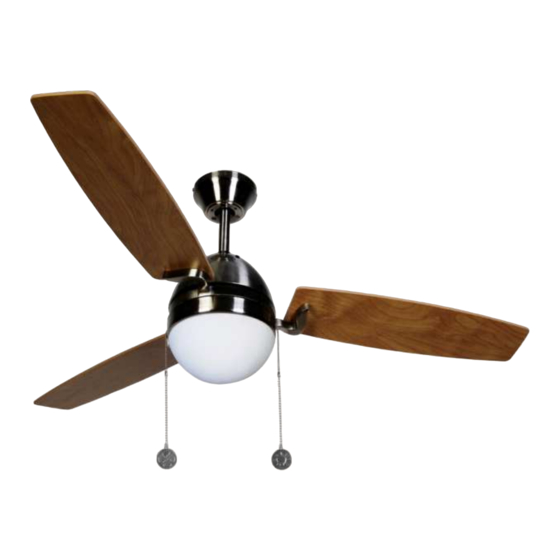
Resumen de contenidos para LUCCI BOREAS Serie
- Página 1 CEILING FAN MANUAL INSTALLATION OPERATION MAINTENANCE WARRANTY INFORMATION LUCCI BOREAS SERIES CEILING FANS CAUTION READ INSTRUCTIONS CAREFULLY FOR SAFE INSTALLATION AND FAN OPERATION. BOREAS - V1.0 - MUTIL...
- Página 2 CONTENTS Installation Instruction Manual ..................3 Installationsanleitung ......................11 Guide d’installation......................19 Manual de instrucciones de instalación................27 Manuale delle istruzioni di installazione................35 Installatiehandleiding......................43...
-
Página 3: Congratulations On Your Purchase
CONGRATULATIONS ON YOUR PURCHASE Congratulations on purchasing this quality Lucci product. To ensure correct function and safety, please read and save all instructions carefully before using the product. SAFETY PRECAUTIONS The information contained in the following pages has been prepared to ensure you of trouble-free operation of your Ceiling Fan . -
Página 4: Before Installation
BEFORE INSTALLATION Unpack the fan and carefully identify the parts. Please refer to Fig 1. Fig. 1 1. Hanger bracket x 1 9. Pendant for light x 1 2. Fan motor assembly x 1 10. Balance kit x 1 set 3. - Página 5 INSTALLING THE MOUNTING BRACKET The ceiling fan must be installed in a location so that the blades are 300mm spacing from the tip of the blade to the nearest objects or walls. Secure the hanging bracket to the ceiling joist or structure that is capable of carrying a load of at least 30KG, with two long screws provided.
-
Página 6: Hanging The Fan
HANGING THE FAN Installing the down rod The down rod has been pre-assembled. Lift assembly onto mounting bracket.Fig.4 Ensure the notch of the ball joint is positioned on the stopper of mounting bracket to prevent fan from rotating when in operation. -
Página 7: Electrical Wiring Diagram
Connect the quick connector (2, Fig.6), and then push them into the switch housing (1, Fig.6). Attached the light kit to light base and align the screw holes, then secure light kit with 3 light kit screws. Insert and secure the light bulbs into the E27 sockets. (Bulb not included) Carefully place the glass shade cover over the lamp and secure it by the three spring clips. -
Página 8: Finishing The Installation
Fig. 8 FINISHING THE INSTALLATION After completing the electrical connection at the mounting bracket terminal block, connect the ceiling fan wiring via the quick connector plug. Cover the mounting bracket with the canopy. Ensure all electrical wiring is tucked inside the canopy and that they are not damaged during this step. -
Página 9: After Installation
USING YOUR FAN WITH REMOTE IMPORTANT NOTE: The pull chain light switch must be set to the 'on' position and the pull chain fan switch must be set on high speed when you are using your ceiling fan with a remote. REVERSING SWITCH Your ceiling can operate either summer or winter mode. -
Página 10: Care And Cleaning
NOISE: When it is quiet (especially at night) you may hear occasional small noises. Slight power fluctuations and frequency signals superimposed in the electricity for off-peak hot water control, may cause a change in fan motor noise. This is normal. Please allow a 24-hour “breaking -in” period, most noises associated with a new fan disappear during the time. -
Página 11: Sicherheitshinweise
WIR GRATULIEREN ZUM KAUF DIESES GERÄTES Wir gratulieren zum Kauf dieses Qualitätsproduktes von Lucci. Bitte lesen Sie die Sicherheitshinweise vollständig und sorgfältig durch, um den ordnungsgemäßen und sicheren Einsatz des Gerätes zu gewährleisten. SICHERHEITSHINWEISE Die Hinweise auf den nachfolgenden Seiten erklären den sicheren und störungsfreien Betrieb Ihres Deckenventilators. -
Página 12: Vor Der Installation Zu Beachten
VOR DER INSTALLATION ZU BEACHTEN Bitte packen Sie das Gerät aus, und stellen Sie sicher, dass alle Teile im Versandkarton enthalten sind. Bitte beachten Sie Abb. 1. Abb. 1 1. Deckenhalterung x 1 9. Anhänger für Licht x 1 2. Ventilator-Motorgehäuse x 1 10. - Página 13 INSTALLATION DER DECKENHALTERUNG Der Deckenventilator muss an einem Ort so installiert werden, dass die Spitzen der Ventilatorflügel mindestens 300mm vom nächsten Gegenstand oder der Wand entfernt sind. Befestigen Sie die Deckenhalterung nur an Decken oder Deckenverschalungen und anderen Deckenstrukturen, die ein Gewicht von mindestens 30KG sicher halten können; verwenden Sie dazu die zwei langen Schrauben, die mit dem Ventilator ausgeliefert wurden.
- Página 14 AUFHÄNGEN DES VENTILATORS Installation der Halterungsstange Die Haltestange für den Ventilator wurde bereits vormontiert. Setzen Sie die vormontierte Haltestange an die Halterung an. Abb. 4 Stellen Sie sicher, dass die Nut am Kugelgelenk Verdrehsicherung eingeführt ist, um zu verhindern dass sich Abb.
- Página 15 Abb. 6) zurück. Bringen Sie den Lichtbausatz an der Lampenbasis an, und richten Sie die Schraubenlöcher aufeinander aus; sichern Sie den Lichtbausatz mit den für den dafür vorgesehenen, 3 Schrauben. Führen Sie die Glühbirnen in die Buchsen des Typs E27 ein und achten Sie auf festen Sitz. (Glühbirnen werden nicht mitgeliefert) Setzen Sie den Lampenschirm aus Glas über der Glühbirne auf, und sichern Sie diese mittels der Federklammern.
-
Página 16: Abschluss Der Installation
Abb. 8 ABSCHLUSS DER INSTALLATION Nach Abschluss der elektrischen Anschlüsse am Kabelblock der Halterung schließen Verkabelung Deckenventilator über Verbindungsstecker Netzstromversorgung an. Decken Sie die Halterung mit der Abdeckung ab. Die Verkabelung befindet sich nun unter der Abdeckung und Sie sollten darauf achten, dass diese in diesem Schritt nicht beschädigt wird. -
Página 17: Nach Der Installation
Ziehen Sie an der Lichtschalterkette, um das Licht „ein/aus“ zu schalten. DER EINSATZ DES VENTILATORS MIT FERNBEDIENUNG WICHTIGER HINWEIS: Der Lichtschalter muss mittels der Zugkette des Lichtschalters in die “Ein”-Stellung für die höchste Geschwindigkeitsstufe gebracht werden, damit Sie den Deckenventilator über die Fernbedienung ansteuern können. -
Página 18: Technische Daten
Geräusche des Ventilators zu vernehmen sind. Das Geräusch des Ventilatormotors kann sich durch geringe Stromschwankungen und Abweichungen in der Stromfrequenz ändern. Das ist völlig normal. Die meisten Geräusche eines neuen Ventilators verschwinden nach einer „Eingewöhnungszeit“ von etwa 24 Stunden. Die Garantie des Herstellers erstreckt sich auf tatsächliche Fehler, die u. U. auftreten können, und NICHT auf geringfügige Beschwerden wie zum Beispiel hörbare Motorgeräusche. - Página 19 MERCI POUR VOTRE ACQUISITION Merci d’avoir acheté ce produit de qualité de LUCCI. Pour garantiser la securité et le fonctionnement correct, lire et sauver soigneusement tous les instructions avant d’utiliser le produit. PRECAUTIONS à PRENDRE L’information que les pages suivantes contiennent a été préparée pour assurer l’operation rapide de votre ventilateur au plafond.
-
Página 20: Avant L'installation
AVANT L’INSTALLATION Déballer le ventilateur et identifier les pièces avec prudence. Veuillez référer à Fig 1. Fig. 1 1. Bielle de support x 1 9. Pendant de lumière x 1 2. Assemblage du moteur au ventilateur x 1 10. Kit de balancier x 1 set 3. -
Página 21: Installation De Support De Fixation
INSTALLATION DE SUPPORT DE FIXATION Le ventilateur doit être installé dans une position où les pales sont 300mm en espace de chaque point de pale même au mur le plus proche. Assurer le support de suspension à la solive de plafond ou structure qui est capable de transporter une charge de 30KG au moins avec l’utilisation de deux vis longues. -
Página 22: Installation De Pale
PENDAISON DU VENTILATEUR Installer la tige La tige a été préfabriquée Enlever l’assemblage de ventilateur au support de montage Fig.4 Assurer que l’entaille de la rotule soit positionnée au bouchon du support de montage pour empêcher l’oscillation de ventilateur en fonctionnement. Fig. - Página 23 Attacher le kit d’éclairage à la base de lumière et aligner les trous de vis en assurant le kit d’éclairage avec 3 vis de kit d’éclairage. Insérer et securer les lampes à filament dans les douilles E27. (la lampe à filament n’est pas incluse) Placer soigneusement l’abat-jour sur la lampe et securer-le avec trois pinces à...
- Página 24 Fig. 8 COMPLÈTEMENT DE L’INSTALLATION Après avoir complété la connexion électrique au bornier du support de montage, connecter le câblage de ventilateur au plafond en utilisant le connecteur libre. Couvrir le support de montage avec la voile. Assurer que tous les câblages électriques soient dans la voile et qui ne soient pas endommagés pendant cette procédure.
-
Página 25: Après L'installation
OUTILLAGE DE VOTRE TÉLÉCOMMANDE NOTE IMPORTANTE: la chaine de traction de lumière doit être allumée et la chaine de traction de ventilateur doit être posée à grande vitesse quand vous utilisez votre ventilateur à l’aide de la télécommande. FONCTIONNEMENT INVERSÉ Votre ventilateur peut être opéré... -
Página 26: Nettoyage Et Entretien
Lorsque tout est tranquille (tout spécialement la nuit) il se peut que vous entendiez des bruits occasionnels. De légères fluctuations de réseau et des signaux de fréquences superposées aux dispositifs de contrôle de l’alimentation en électricité peuvent occasionner un changement au niveau du bruit du moteur. -
Página 27: Felicitaciones Por Su Compra
FELICITACIONES POR SU COMPRA Felicitaciones por la compra de este producto de calidad de Lucci. Para garantizar el funcionamiento y seguridad, por favor antes de utilizar el producto, lea detalladamente todas las instrucciones y guárdelas para futura referencia. PRECAUCIONES DE SEGURIDAD La información contenida en las páginas siguientes ha sido preparada para asegurar el... -
Página 28: Antes De Instalar
ANTES DE INSTALAR Desempaque el ventilador e identifique las piezas cuidadosamente. Por favor, referirse a la figura 1. Fig. 1 1. Soporte de suspensión x 1 9. Colgante para luz x 1 2. Conjunto de motor del ventilador x 1 10. -
Página 29: Instalar El Soporte De Montaje
INSTALAR EL SOPORTE DE MONTAJE El ventilador deberá instalarse en una ubicación de forma que las aspas está alejadas a una distancia de 300mm desde el extreme del aspa al objeto mas cercano o paredes. Asegure el soporte de suspensión a la viga de techo o estructura capaz de soportar una carga de al menos 30Kg con los dos tornillos largos suministrados. -
Página 30: Colgar El Ventilador
COLGAR EL VENTILADOR Instalar la barra descendente La barra descendente ha sido preinstalada. Levante el modulo de ventilador sobre el soporte de montaje. Fig.4 Asegúrese de que la muesca sobre la justa esférica está colocada sobre el tope del soporte de montaje para evitar que el ventilador gire durante el funcionamiento. -
Página 31: Diagrama De Cableado Eléctrico
Conecte el juego de luces a la base de las luces y alinee los orificios de los tornillos, después asegure el juego de luces con los 3 tornillos del juego de luces. Inserte y asegure las bombillas en los soportes E27. Con cuidado coloque la pantalla de cristal sobre la bombilla y asegúrela con los tres pasadores de muelle. -
Página 32: Uso Del Ventilador De Techo
Fig. 8 FINISHING THE INSTALLATION Después de finalizar la conexión eléctrica en le bloque de terminales del soporte de montaje, conecte el cableado del ventilador de techo a través del enchufe de conexión rápida. Cubra el soporte de montaje con el dosel. Asegúrese de que todo el cableado eléctrico está... -
Página 33: Uso Del Control Remoto Del Ventilador
USO DEL CONTROL REMOTO DEL VENTILADOR NOTA IMPORTANTE: El selector de luces con cadena de tiro debe estar seleccionado en la posición de encendido y el selector de velocidades del ventilador con cadena de tiro debe estar en la posición de velocidad alta cuando se usa el ventilador de techo con el control remoto. Funcionamiento reversible Su ventilador puede girar en dirección de reloj o en la contraria. -
Página 34: Limpieza Y Cuidado
RUIDO Cuando esté silencioso (especialmente por la noche) es posible que escuche ocasionalmente algo de ruido. Las pequeñas fluctuaciones de energía de la red y las señales de frecuencia que se superponen en los dispositivos de control podrían ocasionar un cambio en el ruido del motor del ventilador. -
Página 35: Precauzioni Di Sicurezza
CONGRATULAZIONI PER L'ACQUISTO Congratulazioni per l'acquisto di questo prodotto di qualità Lucci. Per assicurare la corretta funzionalità e la sicurezza, si prega di leggere con attenzione e salvare tutte le istruzioni prima di utilizzare il prodotto. PRECAUZIONI DI SICUREZZA Le informazioni contenute nelle pagine seguenti sono state preparate per assicurare un funzionamento senza problemi del ventiolatore a soffitto. -
Página 36: Prima Dell'installazione
PRIMA DELL'INSTALLAZIONE Disimballare il ventilatore e identificare con attenzione le parti. Si prega di fare riferimento alla Fig. 1. Fig. 1 1. Sopporto di sospensione x 1 9. Pendente per la luce x 1 2. Assemblaggio del motore del ventilatore x 1 10. - Página 37 INSTALLAZIONE DELLA STAFFA DI MONTAGGIO Il ventilatore deve essere installato in una posizione tale da avere uno spazio libero di 300 mm tra la punta della pala e l'oggetto o parete più vicina. Fissare la staffa di sostegno al travetto o altra struttura del soffitto che sia in grado di sostenere un carico di almeno 30KG, con le due viti lunghe in dotazione.
- Página 38 APPENDERE IL VENTILATORE Installazione dell'asta discendente L'asta discendente è stata pre-assemblata. Sollevare il corpo del ventilatore alla staffa di montaggio. Fig.4 Assicurarsi che la tacca del giunto sia posizionata sullo stopper della staffa di montaggio per impedire al corpo del ventilatore ruotare durante...
- Página 39 Attaccare l’attrezzo di luce alla base di luce e allineare i bucchi delle vite assicurando l’attrezzo con le 3 vite del kit. Inserire e assicurare le lampade ad incandescenza nei portautensili E27. (la lampada ad incandescenza non è inclusa) Mettere meticolosamente il paralume sulla lampada e assicurarlo con i tre annelli di serraggio Fig.
-
Página 40: Completamento Dell'installazione
Fig. 9 COMPLETAMENTO DELL'INSTALLAZIONE Dopo aver completato il collegamento elettrico al blocco terminale della staffa di montaggio, collegare il cavo del ventilatore a soffitto tramite il connettore rapido. Coprire la staffa di montaggio con la calotta. Assicurarsi che tutti i cavi elettrici siano nascosti all'interno della calotta e che non siano stati danneggiati durante questa operazione. -
Página 41: Usanza Del Vostro Telecomando
USANZA DEL VOSTRO TELECOMANDO NOTA IMPORTANTE: la catena di trazione di luce deve essere accesa e la catena di trazione del ventilatore deve essere messa ad alta velocità nell’utilizzare il vostro ventilatore con il telecomando FUNZIONE DI RITORNO Il ventilatore può essere azionato in senso orario e antiorario. MODO ESTIVO: se l'interruttore della funzione di ritorno si trova su “down”... -
Página 42: Cura E Pulizia
provocare variazioni nel rumore prodotto dal motore del ventilatore. Questa condizione è normale. Concedere al ventilatore un periodo di rodaggio di 24, la maggioranza dei rumori scompare in quest’arco di tempo. La garanzia del produttore copre solamente i guasti effettivi che possono presentarsi, NON le lamentele sul rumore prodotto dal motore. -
Página 43: Veiligheidsvoorschriften
GEFELICITEERD MET UW AANKOOP Gefeliciteerd met de aankoop van dit kwaliteitsproduct van Lucci. Lees en bewaar alle instructies aandachtig voordat u het product gebruikt, om een juiste werking en veiligheid te garanderen. VEILIGHEIDSVOORSCHRIFTEN De informatie in de volgende pagina’s is voorbereid om u te verzekeren van een probleemloze bediening van uw plafondventilator. -
Página 44: Voor De Installatie
VOOR DE INSTALLATIE Pak de ventilator uit en identificeer de onderdelen nauwkeurig. Raadpleeg aub fig. 1. Fig. 1 1. Ophangkabel bevestigingsbeugel x 1 9. Ring voor licht x 1 2. Ventilator motormontage x 1 10. Evenwichtsdoos x 1 set 3. Bladhouders x 3 11. - Página 45 INSTALLATIE VAN DE MONTAGEBEUGEL De plafondventilator dient dusdanig geïnstalleerd te worden dat de bladen 300 mm verwijderd zijn vanaf de punt van het blad tot aan het dichtstbijzijnde object of de muur. Maak de hangbeugel stevig vast aan de steunbalk of het betreffende frame dat geschikt is om een lading van tenminste 30 kg te dragen met de twee lange, bijgesloten schroeven.
-
Página 46: De Ventilator Ophangen
DE VENTILATOR OPHANGEN Installatie van de neerhangende staaf neerhangende staaf vooraf geassembleerd. Til de ventilator op de montagebeugel. Fig. 4 Zorg ervoor dat de inkeping van het kogelgewricht op de stopper van de montagebeugel geplaatst voorkomen dat de ventilator ronddraait als Fig. - Página 47 Bevestig de lichtset op de basis en zorg ervoor dat de gaten voor de schroeven uitgelijnd zijn, daarna maakt u de lichtset vast met de 3 schroeven. Schroef de lampen in de E27 fittingen. (Lamp niet inbegrepen) Plaats de glazen kap voorzichtig over de lamp en maak deze vast met de drie klemringen.. Fig.
-
Página 48: De Installatie Afronden
Fig. 8 DE INSTALLATIE AFRONDEN Sluit plafondventilator-bedrading snelaansluitingsplug na voltooiing van de elektrische aansluiting bij het montagebeugel-aansluitblok. Bedek de montagebeugel met de overkapping. Zorg ervoor dat alle elektrische bedrading onder de overkapping gestopt is en dat ze niet beschadigd raken tijdens deze stap. Bevestig de overkapping aan de hangbeugel met de bijgesloten schroeven. - Página 49 VENTILATOR MET AFSTANDSBEDIENING GEBRUIKEN BELANGRIJK: De ketting moet in de ‘aan’ positive staan en de schakelaar van de ventilator moet op de hoge snelheid staan als u de ventilator met een afstandsbediening gebruikt. OMKEERFUNCTIE De ventilator kan zowel voorwaarts als ook achterwaarts worden toegepast. ZOMER-toepassing: Wanneer de schakelaar voor de omkeerfunctie op “down”...
-
Página 50: Reiniging En Verzorging
Dit is normaal. Voorzie een periode van 24 uur voor “inlopen”; de meeste geluiden van een nieuwe ventilator zullen tijdens die periode verdwijnen. De garantie van de fabrikant dekt echte storingen die zich kunnen voordoen, GEEN kleine klachten zoals het geluid van de motor – Alle elektrische motoren maken enig geluid.