Tabla de contenido
Publicidad
Idiomas disponibles
Idiomas disponibles
Enlaces rápidos
BBC
Safety and operating instructions
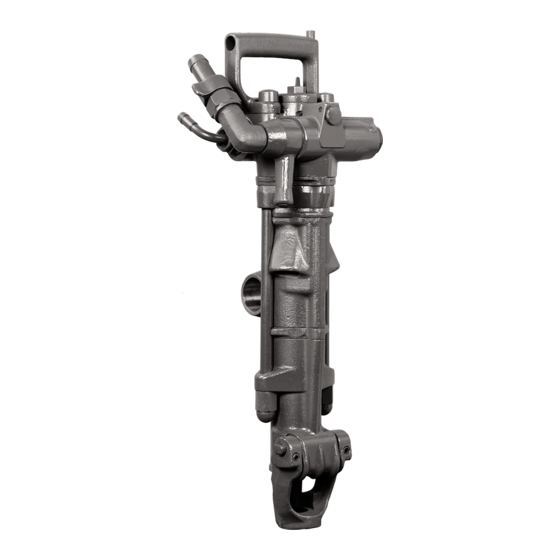
Pusher leg rockdrills
Prescriptions de sécurité et instructions pour
l'opérateur
Poussoirs de perforateur
Sicherheits- und Betriebsanleitung
Stützenbohrhämme
Instrucciones de seguridad y de funcionamiento
Perforadoras de empujador
Instruções de segurança e operação
Coluna telescópica para perfuradores de rocha
Istruzioni per la sicurezza e per l'uso
Perforatrici con servosostegno
Säkerhetsinstruktion och instruktionsbok
Bergborrmaskiner (anpassade för matarben)
© 2012 Atlas Copco Construction Tools AB | No. 9800 0627 71f | 2012-06-30
Original instructions
16W, 16WS, 34W, 34WS, 34WTH
Publicidad
Capítulos
Tabla de contenido
Solución de problemas

Manuales relacionados para Atlas Copco BBC 16W

Resumen de contenidos para Atlas Copco BBC 16W
- Página 1 Instruções de segurança e operação Coluna telescópica para perfuradores de rocha Istruzioni per la sicurezza e per l'uso Perforatrici con servosostegno Säkerhetsinstruktion och instruktionsbok Bergborrmaskiner (anpassade för matarben) © 2012 Atlas Copco Construction Tools AB | No. 9800 0627 71f | 2012-06-30 Original instructions...
- Página 3 SVENSKA............... . 168 © 2012 Atlas Copco Construction Tools AB | No. 9800 0627 71f | 2012-06-30...
-
Página 4: Tabla De Contenido
Operating..............20 © 2012 Atlas Copco Construction Tools AB | No. 9800 0627 71f | 2012-06-30... - Página 5 EC Declaration of Conformity (EC Directive 2006/42/EC)......28 © 2012 Atlas Copco Construction Tools AB | No. 9800 0627 71f | 2012-06-30...
-
Página 7: Introduction
Safety and operating instructions Introduction Thank you for choosing a product from Atlas Copco. Since 1873, we have been committed to finding new and better ways of fulfilling our customers' needs. Through the years, we have developed innovative and ergonomic product designs that have helped customers improve and rationalize their daily work. -
Página 8: Safety Instructions
Never point the inserted tool at yourself or anyone ► else. Appropriate work overall or similar clothing (not ● loose-fitting) that covers your arms and legs. © 2012 Atlas Copco Construction Tools AB | No. 9800 0627 71f | 2012-06-30 Original instructions... -
Página 9: Operation, Precautions
Keep your feet away from the inserted tool. Stand firmly and always hold on to the machine ► with both hands. Never drill in an old hole. ► © 2012 Atlas Copco Construction Tools AB | No. 9800 0627 71f | 2012-06-30 Original instructions... - Página 10 Make sure that no unauthorised persons trespass ► instructions into the working zone. Keep the workplace free from foreign objects. ► ► Ensure that the work piece is securely fixed. © 2012 Atlas Copco Construction Tools AB | No. 9800 0627 71f | 2012-06-30 Original instructions...
- Página 11 Before resuming the work, find and remove the cause of the increased vibrations. ► Never grab, hold or touch the inserted tool when using the machine. © 2012 Atlas Copco Construction Tools AB | No. 9800 0627 71f | 2012-06-30 Original instructions...
-
Página 12: Maintenance, Precautions
Keep the machine and tools in a safe place, out the machine from the power source. of the reach of children and locked up. © 2012 Atlas Copco Construction Tools AB | No. 9800 0627 71f | 2012-06-30 Original instructions... -
Página 13: Overview
The purpose is to prevent water from entering the percussion mechanism of the rock drill. © 2012 Atlas Copco Construction Tools AB | No. 9800 0627 71f | 2012-06-30 Original instructions... -
Página 14: Main Parts
Unpacking the rock drill Plastic guards Before the rock drill is first used remove all the plastic guards in the hose nipples, venting holes and rotation chuck. © 2012 Atlas Copco Construction Tools AB | No. 9800 0627 71f | 2012-06-30 Original instructions... -
Página 15: Lubricate
25 mm (1 in.) should be used. If the hose length is between 30 and 100 meters, a hose with a minimum internal diameter of 50 mm (2 in.) should be used. © 2012 Atlas Copco Construction Tools AB | No. 9800 0627 71f | 2012-06-30 Original instructions... -
Página 16: Pressure Adjustment
Before changing the insertion tool, stop the machine, switch off the compressed air supply and bleed the machine by activating the start and stop device. © 2012 Atlas Copco Construction Tools AB | No. 9800 0627 71f | 2012-06-30 Original instructions... -
Página 17: Removing The Drill Steel
Learn how the machine is switched off in the event ► of an emergency. Stop the machine immediately in all cases of ► power supply interruption. © 2012 Atlas Copco Construction Tools AB | No. 9800 0627 71f | 2012-06-30 Original instructions... -
Página 18: Preparations Before Starting
Throttle lever fully open (full throttle). Extra blowing. The pusher leg must be fixed to the rock drill by means of the bayonet coupling. © 2012 Atlas Copco Construction Tools AB | No. 9800 0627 71f | 2012-06-30 Original instructions... -
Página 19: Feed Control Lever
5. Move the throttle lever (A) forward a little, which will start the water flushing, the percussion and rotation. 6. Collar the hole with reduced feed force. © 2012 Atlas Copco Construction Tools AB | No. 9800 0627 71f | 2012-06-30 Original instructions... -
Página 20: Stopping The Rock Drill
This can be done during drilling. When the drill hole is clean, turn the throttle lever (A) forwards again to re-start the rock drill. © 2012 Atlas Copco Construction Tools AB | No. 9800 0627 71f | 2012-06-30 Original instructions... -
Página 21: When Taking A Break
In a few cases the part is marked either with the circle only or the part number only. © 2012 Atlas Copco Construction Tools AB | No. 9800 0627 71f | 2012-06-30 Original instructions... -
Página 22: Checking For Wear
This will protect the machine from corrosion. © 2012 Atlas Copco Construction Tools AB | No. 9800 0627 71f | 2012-06-30 Original instructions... -
Página 23: Disposal
© 2012 Atlas Copco Construction Tools AB | No. 9800 0627 71f | 2012-06-30 Original instructions... -
Página 24: Technical Data
Water pipe breakage Misalignment of the shank Change drill steel or chuck bushing or both Damaged flushing hole in the shank Change drill steel © 2012 Atlas Copco Construction Tools AB | No. 9800 0627 71f | 2012-06-30 Original instructions... -
Página 25: Machine Data
Tighten the bolts correctly Gauge for chuck bushing 22 mm ( ⁄ ”) hexagon shank Atlas Copco no. 3091 0038 00. Use Atlas Copco no. 9090 0550 80 pressure gauge to test the water and air pressure. Machine data Piston bore Stroke length... -
Página 26: Noise And Vibration Data
We, Atlas Copco Construction Tools AB, cannot be held liable for the consequences of using the declared values, instead of values reflecting the actual exposure, in an individual risk assessment in a work place situation over which we have no control. -
Página 27: Pusher Legs
BBC 34WTH Double telescope ALF 67/80 8321 0201 85 BBC 16W/WS 1855 1495 3350 67/80 BBC 34W/WS (73) (58.9) (131.9) (37) (2.6/3.1) BBC 34WTH © 2012 Atlas Copco Construction Tools AB | No. 9800 0627 71f | 2012-06-30 Original instructions... -
Página 28: Ec Declaration Of Conformity
EC Declaration of Conformity EC Declaration of Conformity (EC Directive 2006/42/EC) We, Atlas Copco Construction Tools AB, hereby declare that the machines listed below conform to the provisions of EC Directive 2006/42/EC (Machinery Directive), and the harmonised standards mentioned below. - Página 30 Utilisation..............48 © 2012 Atlas Copco Construction Tools AB | No. 9800 0627 71f | 2012-06-30...
- Página 31 Déclaration CE de conformité (Directive 2006/42/CE)......56 © 2012 Atlas Copco Construction Tools AB | No. 9800 0627 71f | 2012-06-30...
-
Página 33: Introduction
également des conseils et vous indiquent comment effectuer la maintenance de routine du marteau perforateur. Vous devez lire ces instructions attentivement et les comprendre avant d'utiliser le marteau perforateur pour la première fois. © 2012 Atlas Copco Construction Tools AB | No. 9800 0627 71f | 2012-06-30 Instructions d’origine... -
Página 34: Consignes De Sécurité
► Vérifiez que les raccords d'air comprimé sont correctement fixés. Ne jamais porter une machine pneumatique par ► le flexible d'air. © 2012 Atlas Copco Construction Tools AB | No. 9800 0627 71f | 2012-06-30 Instructions d’origine... -
Página 35: Fonctionnement, Précautions
Ne maltraitez jamais l'équipement. ► Examinez régulièrement l'usure de l'outil ► d'insertion et contrôlez la présence éventuelle de signes de détérioration ou de fissures visibles. © 2012 Atlas Copco Construction Tools AB | No. 9800 0627 71f | 2012-06-30 Instructions d’origine... - Página 36 être compatible avec le type de substance en cause (et le cas échéant, approuvé par l'autorité gouvernementale pertinente). Travailler dans une zone bien ventilée. ► © 2012 Atlas Copco Construction Tools AB | No. 9800 0627 71f | 2012-06-30 Instructions d’origine...
- Página 37 Les résidus de substances dangereuses sur la machine peuvent constituer un risque. Avant d'entreprendre toute opération de maintenance sur la machine, la nettoyer soigneusement. © 2012 Atlas Copco Construction Tools AB | No. 9800 0627 71f | 2012-06-30 Instructions d’origine...
- Página 38 (et celle de l'exposition aux vibrations) et peuvent induire ou contribuer à des niveaux plus élevés d'exposition aux vibrations. © 2012 Atlas Copco Construction Tools AB | No. 9800 0627 71f | 2012-06-30 Instructions d’origine...
- Página 39 Si vous pensez avoir touché un objet caché avec l'outil, arrêtez immédiatement la machine. ► Vérifiez que tout danger est écarté avant de continuer. © 2012 Atlas Copco Construction Tools AB | No. 9800 0627 71f | 2012-06-30 Instructions d’origine...
-
Página 40: Maintenance, Précautions
Stockage, précautions ♦ Conservez la machine et les outils bien verrouillés, dans un endroit sûr, hors de la portée des enfants. © 2012 Atlas Copco Construction Tools AB | No. 9800 0627 71f | 2012-06-30 Instructions d’origine... -
Página 41: Vue D'ensemble
Pour choisir l'outil d'insertion correct, veuillez contacter votre représentant local Atlas Copco. Principe de fonctionnement d'un marteau perforateur Force Fréquence Rotation Rinçage d'avance © 2012 Atlas Copco Construction Tools AB | No. 9800 0627 71f | 2012-06-30 Instructions d’origine... -
Página 42: Rinçage
Lire et comprendre les consignes de sécurité fournies Embout de prise d'air séparément avant d’utiliser l’outil ou d’effectuer son entretien, afin d'éviter tout risque de blessures. © 2012 Atlas Copco Construction Tools AB | No. 9800 0627 71f | 2012-06-30 Instructions d’origine... -
Página 43: Installation
°F), le tuyau doit être suffisamment court pour éviter le graisseur et la machine. à l'eau de geler avant d'atteindre le séparateur d'eau. Flexible d'air, machine Tuyau d'eau © 2012 Atlas Copco Construction Tools AB | No. 9800 0627 71f | 2012-06-30 Instructions d’origine... -
Página 44: Lubrification
AVIS Ne jamais refroidir un outil d’insertion chaud dans l’eau. Ceci peut fragiliser l’outil et entraîner sa rupture prématurée. © 2012 Atlas Copco Construction Tools AB | No. 9800 0627 71f | 2012-06-30 Instructions d’origine... -
Página 45: Fixation Du Fleuret
Apprenez à éteindre la machine en cas d'urgence. ► Arrêtez immédiatement la machine en cas de ► coupure d'énergie quelconque. © 2012 Atlas Copco Construction Tools AB | No. 9800 0627 71f | 2012-06-30 Instructions d’origine... -
Página 46: Opérations À Effectuer Avant La Mise En Service
Remplissez le lubrificateur d'huile ♦ Vérifiez que le porte-fleuret et le fleuret soient toujours couverts d'un film d'huile. BBC 16W/WS, BBC 34W/WS © 2012 Atlas Copco Construction Tools AB | No. 9800 0627 71f | 2012-06-30 Instructions d’origine... -
Página 47: Levier De Commande D'avance
à tendance à bloquer. Lorsque l'axe du clapet est enfoncé, le réglage du contrôle d'avance est à nouveau activé. BBC 16W/WS, BBC 34W/WS © 2012 Atlas Copco Construction Tools AB | No. 9800 0627 71f | 2012-06-30 Instructions d’origine... -
Página 48: Marche/Arrêt
8. Réglez la force d'avance à l'aide du levier de commande d'avance (C) de façon à obtenir un taux de pénétration maximum. © 2012 Atlas Copco Construction Tools AB | No. 9800 0627 71f | 2012-06-30 Instructions d’origine... -
Página 49: Re-Positionnement Du Poussoir
Une fois que le trou foré est propre, poussez de nouveau le levier de commande (A) à fond vers l'avant, pour redémarrer la machine. © 2012 Atlas Copco Construction Tools AB | No. 9800 0627 71f | 2012-06-30 Instructions d’origine... -
Página 50: Chaque Jour
Remplacez immédiatement les pièces endommagées. 3. Vérifiez le serrage du levier d'accélérateur. Serrez l'écrou à 60 Nm. ♦ Remplacez les éléments ou pièces usés sans attendre. © 2012 Atlas Copco Construction Tools AB | No. 9800 0627 71f | 2012-06-30 Instructions d’origine... -
Página 51: Maintenance Périodique
Rayures Dégâts secondaires L'intérieur du perforateur est sale Mauvais alignement intérieur provoqué par une tension inégale des boulons latéraux © 2012 Atlas Copco Construction Tools AB | No. 9800 0627 71f | 2012-06-30 Instructions d’origine... -
Página 52: Caractéristiques Techniques
, insérée entre les deux surfaces planes opposées, touche le fond. Contrôlez la pression d'eau - elle doit être inférieure à celle de l'air © 2012 Atlas Copco Construction Tools AB | No. 9800 0627 71f | 2012-06-30 Instructions d’origine... -
Página 53: Caractéristiques De La Machine
Calibre pour emmanchement hexagonal de la douille de rotation de 22 mm ( ⁄ ") Atlas Copco N° 3091 0038 00. Utilisez la jauge de pression Atlas Copco N° 9090 0550 80 pour vérifier la pression d'eau et d'air. Caractéristiques de la machine Dimension de Alésage du... -
Página 54: Énoncé Déclaratif Sur Les Vibrations Et Le Bruit
Atlas Copco Construction Tools AB, ne peut être tenu pour responsable des conséquences d'une utilisation des valeurs déclarées à la place des valeurs correspondant à l'exposition réelle, dans le cadre d'une évaluation des risques sur un lieu de travail dont nous ne maîtrisons aucun élément. -
Página 55: Accessoires
BBC 34WTH Lunette double ALF 67/80 8321 0201 85 BBC 16W/WS 1855 1495 3350 67/80 BBC 34W/WS (73) (58.9) (131.9) (37) (2.6/3.1) BBC 34WTH © 2012 Atlas Copco Construction Tools AB | No. 9800 0627 71f | 2012-06-30 Instructions d’origine... -
Página 56: Déclaration Ce De Conformité
Déclaration CE de conformité Déclaration CE de conformité (Directive 2006/42/CE) Nous, Atlas Copco Construction Tools AB, déclarons par la présente que les machines énumérées ci-dessous sont conformes aux dispositions de la directive européenne 2006/42/CE (directive « Machines »), et des normes harmonisées mentionnées ci-dessous. - Página 58 Betrieb............... . . 76 © 2012 Atlas Copco Construction Tools AB | No. 9800 0627 71f | 2012-06-30...
- Página 59 EG-Konformitätserklärung (EG-Richtlinie 2006/42/EG)......85 © 2012 Atlas Copco Construction Tools AB | No. 9800 0627 71f | 2012-06-30...
-
Página 61: Einleitung
BBC 16W, 16WS, 34W, 34WS, 34WTH Sicherheits- und Betriebsanleitung Einleitung Wir danken Ihnen für die Wahl eines Produkts von Atlas Copco! Seit 1873 sind wir bestrebt, die Wünsche und den Bedarf unserer Kunden optimal zu decken. Unsere innovativen und ergonomischen Produktlösungen dienen der Kostensenkung und somit der besseren Rentabilität der Unternehmenstätigkeit... -
Página 62: Sicherheitshinweise
Verlassen Sie sich immer auf Ihren gesunden ► Stellen Sie sicher, dass sämtliche Menschenverstand. Druckluftanschlüsse korrekt befestigt sind. Tragen Sie eine Druckluftmaschine niemals am ► Druckluftschlauch. © 2012 Atlas Copco Construction Tools AB | No. 9800 0627 71f | 2012-06-30 Originalbetriebsanleitung... -
Página 63: Betrieb, Vorsichtsmaßnahmen
Verwenden Sie niemals Werkzeuge ohne Bund. Prüfen Sie das Werkzeug regelmäßig auf ► Abnutzung, Beschädigungen oder sichtbare Risse. ► Achten Sie während des Betriebs auf ungewöhnliche Vorgänge. © 2012 Atlas Copco Construction Tools AB | No. 9800 0627 71f | 2012-06-30 Originalbetriebsanleitung... - Página 64 Arbeiten Sie in einem gut belüfteten Bereich. Verfügt die Maschine über ein Abgasrohr, richten ► Sie dieses so aus, dass die Staubaufwirbelungen in staubigen Umgebungen möglichst gering sind. © 2012 Atlas Copco Construction Tools AB | No. 9800 0627 71f | 2012-06-30 Originalbetriebsanleitung...
- Página 65 Lassen Sie sich von Experten beraten. Rückstände von gefährlichen Substanzen auf der ► Maschine bergen Risiken. Säubern Sie die Maschine vor jeder Wartung gründlich. © 2012 Atlas Copco Construction Tools AB | No. 9800 0627 71f | 2012-06-30 Originalbetriebsanleitung...
- Página 66 Anlehnen irgendeines Körperteils an die Maschine, um die Vorschubkraft zu erhöhen. Wichtig ist auch, beim Zurückziehen des Werkzeugs aus der aufgebrochenen Bearbeitungsfläche den Start- und Stoppschalter nicht gedrückt zu halten. © 2012 Atlas Copco Construction Tools AB | No. 9800 0627 71f | 2012-06-30 Originalbetriebsanleitung...
- Página 67 Sie sicher, dass dieser angebracht und in einwandfreiem Zustand ist. ► Tragen Sie stets einen Gehörschutz. Verwenden Sie dämpfende Materialien, um das ► „Klingeln“ von Werkstücken zu vermeiden. © 2012 Atlas Copco Construction Tools AB | No. 9800 0627 71f | 2012-06-30 Originalbetriebsanleitung...
-
Página 68: Wartung, Vorsichtsmaßnahmen
Werkzeug bei noch angeschlossener Energieversorgung. Lagerung, Vorsichtsmaßnahmen ♦ Lagern Sie die Maschine und die Werkzeuge in einer sicheren, abgeschlossenen Umgebung und für Kinder unzugänglich. © 2012 Atlas Copco Construction Tools AB | No. 9800 0627 71f | 2012-06-30 Originalbetriebsanleitung... -
Página 69: Übersicht
Die Spülung wird durch zwei konzentrische Röhren geleitet, die äußere für Luft und die innere für Wasser. Damit steht Spülluft zur Verfügung, sobald die Druckluft eingeschaltet wird. Damit soll verhindert © 2012 Atlas Copco Construction Tools AB | No. 9800 0627 71f | 2012-06-30 Originalbetriebsanleitung... -
Página 70: Hauptkomponenten
Bohrstahlaufnahme Lesen Sie vor Benutzung und Wartung des Werkzeugs die separat mitgelieferten Lufteinlassnippel Sicherheitshinweise sorgfältig durch, um Wassereinlassnippel Verletzungen zu vermeiden. Maschinenzusatz Schalldämpfer Ventilstift Vorschubhebel © 2012 Atlas Copco Construction Tools AB | No. 9800 0627 71f | 2012-06-30 Originalbetriebsanleitung... -
Página 71: Installation
Wenn die Umgebungstemperatur unter 0 °C (32 °F) liegt, muss der Schlauch kurz genug sein, damit das Druckluftschlauch, Maschine Wasser im Schlauch nicht gefriert, bevor es den Wasserschlauch Wasserabscheider erreicht. © 2012 Atlas Copco Construction Tools AB | No. 9800 0627 71f | 2012-06-30 Originalbetriebsanleitung... -
Página 72: Schmierung
Werkzeug abgekühlt hat. HINWEIS Kühlen Sie ein heißes Werkzeug niemals in Wasser ab. Dies könnte zur Versprödung des Werkzeugs und zu dessen vorzeitigem Ausfall führen. © 2012 Atlas Copco Construction Tools AB | No. 9800 0627 71f | 2012-06-30 Originalbetriebsanleitung... -
Página 73: Einsetzen Des Bohrstahls
Maschine bereit sind. Machen Sie sich damit vertraut, wie die Maschine ► im Notfall ausgeschaltet wird. Stoppen Sie die Maschine bei jeglicher ► Unterbrechung der Energieversorgung. © 2012 Atlas Copco Construction Tools AB | No. 9800 0627 71f | 2012-06-30 Originalbetriebsanleitung... -
Página 74: Vorbereitungen Vor Der Inbetriebnahme
Feuchtigkeit befreit zu werden. Schmiervorrichtung mit Öl füllen ♦ Stellen Sie sicher, dass das Spannfutter und der Bohrstahlschaft immer mit einem Ölfilm bedeckt sind. BBC 16W/WS, BBC 34W/WS © 2012 Atlas Copco Construction Tools AB | No. 9800 0627 71f | 2012-06-30 Originalbetriebsanleitung... -
Página 75: Vorschubhebel
Diese Funktion dient z. B. dazu, die Lage des Bohrhammers beim Ansetzen oder bei Klemmneigung zu korrigieren. Wird der Ventilstift losgelassen, ist der Vorschubhebel wieder aktiviert. BBC 16W/WS, BBC 34W/WS © 2012 Atlas Copco Construction Tools AB | No. 9800 0627 71f | 2012-06-30 Originalbetriebsanleitung... -
Página 76: Start Und Stopp
Bohrstahl ausreichend Führung bearbeitenden Objekts. im Gestein erlangt hat. 8. Stellen Sie die Vorschubkraft mithilfe des Vorschubhebels (C) so ein, dass eine maximale Vorschubgeschwindigkeit erreicht wird. © 2012 Atlas Copco Construction Tools AB | No. 9800 0627 71f | 2012-06-30 Originalbetriebsanleitung... -
Página 77: Neupositionieren Der Vorschubstütze
Bohrvorgang hält an. Dies ist während des werden. Bohrvorgangs möglich. Stellen Sie den Hebel nach dem Ausblasen wieder nach vorn – und der Bohrvorgang startet wieder. © 2012 Atlas Copco Construction Tools AB | No. 9800 0627 71f | 2012-06-30 Originalbetriebsanleitung... -
Página 78: Täglich
Prüfen Sie die Funktion der Aufnahme. Stellen Sie sicher, dass der Bohrstahl in der Aufnahme arretiert ist. ♦ Wechseln Sie beschädigte Bauteile sofort aus. ♦ Ersetzen Sie verschlissene Komponenten rechtzeitig. © 2012 Atlas Copco Construction Tools AB | No. 9800 0627 71f | 2012-06-30 Originalbetriebsanleitung... -
Página 79: Prüfen Auf Abnutzung
Ziehen Sie ihn mit einem Anziehdrehmoment von 60 Nm an. Stellen Sie sicher, dass keine Fremdkörper in die ● Maschine gelangen. 4. Prüfen Sie die Verbindung von Bohrhammer und Vorschubstütze. © 2012 Atlas Copco Construction Tools AB | No. 9800 0627 71f | 2012-06-30 Originalbetriebsanleitung... -
Página 80: Entsorgung
Material wie möglich wiederverwendet werden kann und die Umwelt in Übereinstimmung mit den örtlichen Regelungen so wenig wie möglich belastet wird. © 2012 Atlas Copco Construction Tools AB | No. 9800 0627 71f | 2012-06-30 Originalbetriebsanleitung... -
Página 81: Technische Daten
Ölfilm bedeckt sein. Stellen Sie sicher, dass die Schmiervorrichtung in der richtigen Richtung angeschlossen ist. Einfrieren Feuchtigkeit in der Druckluft Verwenden Sie Wasserabscheider © 2012 Atlas Copco Construction Tools AB | No. 9800 0627 71f | 2012-06-30 Originalbetriebsanleitung... -
Página 82: Maschinendaten
Ziehen Sie die Schrauben richtig an gebrochen Schrauben Lehre für Bohrfutterbuchse 22 mm ( ⁄ ") Sechskantschaft, Atlas Copco-Nr. 3091 0038 00. Verwenden Sie zum Messen des Luft- und Wasserdrucks das Manometer Atlas Copco-Nr. 9090 0550 80. Maschinendaten Kolben bohrung Kolbenhub Gesamtlänge Gewicht Schaftgröße... -
Página 83: Angaben Zu Geräuschemission Und Vibration
Arbeitsweise des Anwenders, vom bearbeiteten Material, von der Belastungsdauer, von der physischen Kondition des Anwenders und vom Zustand der Maschine ab. Atlas Copco Construction Tools AB haftet nicht für Folgen, falls die genannten Werte anstelle der Werte verwenden werden, die der tatsächlichen Belastung entsprechen, hervorgehend aus einer individuellen Risikoanalyse in einer Arbeitsplatzsituation, die wir nicht beeinflussen können. -
Página 84: Vorschubstützen
(29) (2.8) BBC 34WTH Doppelteleskop ALF 67/80 8321 0201 85 BBC 16W/WS 1855 1495 3350 67/80 BBC 34W/WS (73) (58.9) (131.9) (37) (2.6/3.1) BBC 34WTH © 2012 Atlas Copco Construction Tools AB | No. 9800 0627 71f | 2012-06-30 Originalbetriebsanleitung... -
Página 85: Eg-Konformitätserklärung
BBC 16W, 16WS, 34W, 34WS, 34WTH Sicherheits- und Betriebsanleitung EG-Konformitätserklärung EG-Konformitätserklärung (EG-Richtlinie 2006/42/EG) Wir, die Atlas Copco Construction Tools AB, erklären hiermit, dass die nachfolgend aufgelisteten Maschinen die Bestimmungen der EG-Richtlinien 2006/42/EG (Maschinenrichtlinie) sowie die nachfolgend genannten harmonisierten Normen erfüllen. Stützenbohrhämme... - Página 86 En funcionamiento............104 © 2012 Atlas Copco Construction Tools AB | No. 9800 0627 71f | 2012-06-30...
- Página 87 Declaración CE de conformidad (Directiva 2006/42/CE)......113 © 2012 Atlas Copco Construction Tools AB | No. 9800 0627 71f | 2012-06-30...
-
Página 89: Introducción
Atlas Copco cuenta con una sólida red de ventas y servicios a escala mundial formada por centros de atención al cliente y distribuidores repartidos por todo el mundo. -
Página 90: Instrucciones De Seguridad
● ● Protección ocular resistente a los impactos con protección lateral Protección respiratoria, cuando sea necesario ● Guantes protectores ● ● Botas protectoras adecuadas © 2012 Atlas Copco Construction Tools AB | No. 9800 0627 71f | 2012-06-30 Instrucciones originales... -
Página 91: Funcionamiento, Precauciones
► inflamables, humos o polvo. Asegúrese de que no haya fuentes de gas ni ► explosivos no detectados. ► Nunca perfore un barreno antiguo. © 2012 Atlas Copco Construction Tools AB | No. 9800 0627 71f | 2012-06-30 Instrucciones originales... - Página 92 ► ► Si la máquina tiene tubo de escape, diríjalo convenientemente de forma que se mueva el menor polvo posible donde éste sea abundante. © 2012 Atlas Copco Construction Tools AB | No. 9800 0627 71f | 2012-06-30 Instrucciones originales...
- Página 93 Los residuos de sustancias peligrosas de la ► máquina pueden constituir un riesgo. Antes de hacer el mantenimiento de la máquina, límpiela a fondo. © 2012 Atlas Copco Construction Tools AB | No. 9800 0627 71f | 2012-06-30 Instrucciones originales...
- Página 94 (y de exposición a las vibraciones) y pueden contribuir a la exposición a niveles más altos de vibración. © 2012 Atlas Copco Construction Tools AB | No. 9800 0627 71f | 2012-06-30 Instrucciones originales...
- Página 95 Si la herramienta insertada parece haber topado con un objeto oculto, apague la máquina de inmediato. ► Compruebe que no haya ningún peligro antes de continuar. © 2012 Atlas Copco Construction Tools AB | No. 9800 0627 71f | 2012-06-30 Instrucciones originales...
-
Página 96: Mantenimiento, Precauciones
Almacenaje, precauciones ♦ Guarde la máquina y las herramientas en un lugar seguro, fuera del alcance de los niños y bajo llave. © 2012 Atlas Copco Construction Tools AB | No. 9800 0627 71f | 2012-06-30 Instrucciones originales... -
Página 97: Visión General
Esto significa que el aire de barrido se suministra justo cuando se activa el aire comprimido. El objetivo de este mecanismo es impedir que entre © 2012 Atlas Copco Construction Tools AB | No. 9800 0627 71f | 2012-06-30 Instrucciones originales... -
Página 98: Piezas Principales
Boquilla de admisión de agua seguridad proporcionadas por separado. Acoplamiento de la máquina Silenciador Pasador de válvula Palanca de control de avance © 2012 Atlas Copco Construction Tools AB | No. 9800 0627 71f | 2012-06-30 Instrucciones originales... -
Página 99: Instalación
(32 °F) el tubo flexible debe ser lo suficientemente corto para impedir que se congele el agua antes de Manguera de agua llegar al separador de agua. © 2012 Atlas Copco Construction Tools AB | No. 9800 0627 71f | 2012-06-30 Instrucciones originales... -
Página 100: Lubricación
Nunca toque una herramienta de inserción caliente ► o afilada. ► Espere a que la herramienta de inserción se haya enfriado antes de realizar los trabajos de mantenimiento. © 2012 Atlas Copco Construction Tools AB | No. 9800 0627 71f | 2012-06-30 Instrucciones originales... -
Página 101: Inserción De La Barrena De Perforación
Sepa cómo apagar la máquina en caso de ► producirse una emergencia. Detenga inmediatamente la máquina en caso de ► interrupción de la alimentación. © 2012 Atlas Copco Construction Tools AB | No. 9800 0627 71f | 2012-06-30 Instrucciones originales... -
Página 102: Preparaciones Antes De La Puesta En Marcha
Llenado de aceite del lubricador ♦ Compruebe que el mandril y el vástago de la barrena estén siempre cubiertos de una película BBC 16W/WS, BBC 34W/WS de aceite. © 2012 Atlas Copco Construction Tools AB | No. 9800 0627 71f | 2012-06-30 Instrucciones originales... -
Página 103: Palanca De Control De Avance
Cuando se presiona el pasador de válvula, se vuelve a activar la palanca BBC 16W/WS, BBC 34W/WS de control de avance. © 2012 Atlas Copco Construction Tools AB | No. 9800 0627 71f | 2012-06-30 Instrucciones originales... -
Página 104: Puesta En Marcha Y Parada
8. Ajuste la fuerza de avance girando la palanca de control de avance (C) para lograr el máximo índice de penetración. © 2012 Atlas Copco Construction Tools AB | No. 9800 0627 71f | 2012-06-30 Instrucciones originales... -
Página 105: Recolocación Del Empujador
Si es necesaria la limpieza por barrido del barreno: Si no lo es, póngase en contacto con el taller autorizado más cercano. © 2012 Atlas Copco Construction Tools AB | No. 9800 0627 71f | 2012-06-30 Instrucciones originales... -
Página 106: Diferencias Entre Las Piezas Originales Y Otras Piezas
♦ Compruebe el funcionamiento de la palanca de control. Compruebe que se desplaza libremente arriba y abajo. © 2012 Atlas Copco Construction Tools AB | No. 9800 0627 71f | 2012-06-30 Instrucciones originales... -
Página 107: Comprobación Del Desgaste
Asegúrese de que no entren elementos extraños ● empujador. en la máquina. 5. Compruebe las mangueras, los acoplamientos y los controles por si presentan fugas o están dañados. © 2012 Atlas Copco Construction Tools AB | No. 9800 0627 71f | 2012-06-30 Instrucciones originales... -
Página 108: Desechar
© 2012 Atlas Copco Construction Tools AB | No. 9800 0627 71f | 2012-06-30 Instrucciones originales... -
Página 109: Especificaciones Técnicas
Compruebe que el lubricador esté conectado en la dirección correcta. Congelación Humedad en el aire comprimido Utilice separadores de humedad © 2012 Atlas Copco Construction Tools AB | No. 9800 0627 71f | 2012-06-30 Instrucciones originales... -
Página 110: Datos De La Máquina
Calibrador para vástago hexagonal de 22 mm ( ⁄ ") de casquillo de mandril de Atlas Copco número 3091 0038 00. Utilice el manómetro de Atlas Copco número 9090 0550 80 para comprobar la presión del agua y del aire. Datos de la máquina Diámetro... -
Página 111: Declaración De Ruido Y Vibraciones
Nuestra empresa, Atlas Copco Construction Tools AB, no se hace responsable de las consecuencias de utilizar los valores declarados en lugar de valores que reflejen la exposición real, en una evaluación de riesgos individual en una situación del lugar de trabajo sobre la que no tenemos control. -
Página 112: Empujadores
BBC 34WTH Telescópico doble ALF 67/80 8321 0201 85 BBC 16W/WS 1855 1495 3350 67/80 BBC 34W/WS (73) (58.9) (131.9) (37) (2.6/3.1) BBC 34WTH © 2012 Atlas Copco Construction Tools AB | No. 9800 0627 71f | 2012-06-30 Instrucciones originales... -
Página 113: Declaración Ce De Conformidad
Declaración CE de conformidad Declaración CE de conformidad (Directiva 2006/42/CE) Atlas Copco Construction Tools AB declara por la presente que las máquinas detalladas a continuación se ajustan a las disposiciones de las Directivas 2006/42/CE (Directiva sobre máquinas), y a las normas armonizadas mencionadas más abajo. - Página 114 Funcionamento............. . . 132 © 2012 Atlas Copco Construction Tools AB | No. 9800 0627 71f | 2012-06-30...
- Página 115 Declaração de Conformidade da CE (Directiva da CE 2006/42/CE)....141 © 2012 Atlas Copco Construction Tools AB | No. 9800 0627 71f | 2012-06-30...
-
Página 117: Introdução
A Atlas Copco tem uma forte rede global de vendas e assistência, que consiste em centros de apoio ao cliente e aos distribuidores espalhados por todo o mundo. -
Página 118: Instruções De Segurança
Protecção auricular ● mangueira à máquina, ou de mangueira a mangueira. Protecção para os olhos, resistente ao impacto e ● com protecção lateral © 2012 Atlas Copco Construction Tools AB | No. 9800 0627 71f | 2012-06-30 Instruções originais... -
Página 119: Operação, Precauções
Certifique-se de que não existem fontes de gás ► ou explosivos ocultos. ► Nunca faça perfurações num buraco antigo. © 2012 Atlas Copco Construction Tools AB | No. 9800 0627 71f | 2012-06-30 Instruções originais... - Página 120 (e, se aplicável, tem que ser aprovada pela entidade governamental adequada). Trabalhe numa área bem ventilada. ► © 2012 Atlas Copco Construction Tools AB | No. 9800 0627 71f | 2012-06-30 Instruções originais...
- Página 121 Aconselhe-se com especialistas. ► Os resíduos de substâncias perigosas na máquina podem ser um risco. Antes de iniciar um trabalho de manutenção na máquina, limpe-a cuidadosamente. © 2012 Atlas Copco Construction Tools AB | No. 9800 0627 71f | 2012-06-30 Instruções originais...
- Página 122 É também importante que não tenha o dispositivo de arranque e paragem ativado enquanto tirar a ferramenta da superfície de trabalho partida. © 2012 Atlas Copco Construction Tools AB | No. 9800 0627 71f | 2012-06-30 Instruções originais...
- Página 123 ► Use sempre protecção para a audição. Use material de amortecimento para evitar que ► as peças de trabalho “toquem” como uma campainha. © 2012 Atlas Copco Construction Tools AB | No. 9800 0627 71f | 2012-06-30 Instruções originais...
-
Página 124: Manutenção, Precauções
à máquina. Armazenamento, precauções ♦ Guarde a máquina e as ferramentas num local seguro, fora do alcance de crianças e trancado. © 2012 Atlas Copco Construction Tools AB | No. 9800 0627 71f | 2012-06-30 Instruções originais... -
Página 125: Visão Geral
Atlas Copco. Princípio de funcionamento de um perfurador de rocha Limpeza por Força de Impacto Rotação injecção de avanço ar/água © 2012 Atlas Copco Construction Tools AB | No. 9800 0627 71f | 2012-06-30 Instruções originais... -
Página 126: Limpeza Por Injecção De Ar/Água
Para evitar ferimentos, antes de operar ou fazer Bocal de entrada de ar manutenção na ferramenta, leia e compreenda as instruções de segurança, fornecidas em separado. © 2012 Atlas Copco Construction Tools AB | No. 9800 0627 71f | 2012-06-30 Instruções originais... -
Página 127: Instalação
água congele antes de atingir o de 3 metros. separador de água. Água Mangueira de ar, máquina Mangueira de água © 2012 Atlas Copco Construction Tools AB | No. 9800 0627 71f | 2012-06-30 Instruções originais... -
Página 128: Lubrificação
Quando mudar a broca de aço certifique-se de que a nova tem a dimensão correcta para continuar a sua perfuração anterior. © 2012 Atlas Copco Construction Tools AB | No. 9800 0627 71f | 2012-06-30 Instruções originais... -
Página 129: Colocar A Broca De Aço
2. Insira a broca de aço no casquilho. 3. Quando a broca bater no fundo, empurre o retentor para trás de modo a trancá-lo. © 2012 Atlas Copco Construction Tools AB | No. 9800 0627 71f | 2012-06-30 Instruções originais... -
Página 130: Operação
Diariamente, antes de utilizar o martelo perfurador, faça uma descarga de ar pela mangueira de ar, para a limpar de qualquer sujidade e humidade acumuladas. © 2012 Atlas Copco Construction Tools AB | No. 9800 0627 71f | 2012-06-30 Instruções originais... -
Página 131: Alavanca De Controlo De Avanço
Quando o pino da válvula é puxado para fora, a alavanca de controlo de avanço é activada novamente. © 2012 Atlas Copco Construction Tools AB | No. 9800 0627 71f | 2012-06-30 Instruções originais... -
Página 132: Arranque E Paragem
8. Ajuste a força de avanço rodando a alavanca de controlo de avanço (C), para obter assim a taxa de penetração máxima. © 2012 Atlas Copco Construction Tools AB | No. 9800 0627 71f | 2012-06-30 Instruções originais... -
Página 133: Reposicionar A Coluna Telescópica
Depois de cada assistência, certifique-se de que o nível de vibração da máquina é normal. Se não for, contacte a sua oficina autorizada mais próxima. © 2012 Atlas Copco Construction Tools AB | No. 9800 0627 71f | 2012-06-30 Instruções originais... -
Página 134: Diferenças Entre Peças De Origem E Peças Standard
Faça uma inspecção geral, procurando fugas e danos. ♦ Verifique se o bocal de entrada de ar está bem apertado, e se o acoplamento de gancho não está danificado. © 2012 Atlas Copco Construction Tools AB | No. 9800 0627 71f | 2012-06-30 Instruções originais... -
Página 135: Inspecção De Desgaste
Certifique-se de que nenhuns corpos estranhos entram no equipamento. 5. Verifique as mangueiras, os acoplamentos e os controlos para ver se existem fugas ou danos. © 2012 Atlas Copco Construction Tools AB | No. 9800 0627 71f | 2012-06-30 Instruções originais... -
Página 136: Abate
© 2012 Atlas Copco Construction Tools AB | No. 9800 0627 71f | 2012-06-30 Instruções originais... -
Página 137: Dados Técnicos
, introduzido entre duas superfícies planas opostas, tocar no fundo. Verifique a pressão da água - tem obrigatoriamente que ser inferior à pressão do ar © 2012 Atlas Copco Construction Tools AB | No. 9800 0627 71f | 2012-06-30 Instruções originais... -
Página 138: Dados Da Máquina
Medidor para casquilho de 22 mm ( ⁄ ") encabadouro hexagonal Atlas Copco nº 3091 0038 00. Use o manómetro de pressão Atlas Copco nº 9090 0550 80 para testar a pressão da água e do ar. Dados da máquina Diâmetro... -
Página 139: Declaração De Ruído E Vibração
Nós, na Atlas Copco Construction Tools AB, não podemos ser considerados responsáveis pelas consequências de usar os valores declarados em vez de valores que reflictam a exposição real na avaliação de riscos pessoais numa situação de trabalho sobre a qual não temos qualquer controlo. -
Página 140: Acessórios
BBC 34WTH Telescópio duplo ALF 67/80 8321 0201 85 BBC 16W/WS 1855 1495 3350 67/80 BBC 34W/WS (73) (58.9) (131.9) (37) (2.6/3.1) BBC 34WTH © 2012 Atlas Copco Construction Tools AB | No. 9800 0627 71f | 2012-06-30 Instruções originais... -
Página 141: Declaração De Conformidade Da Ce
Declaração de Conformidade da CE Declaração de Conformidade da CE (Directiva da CE 2006/42/CE) Nós, Atlas Copco Construction Tools AB, declaramos pela presente que as máquinas listadas abaixo se encontram em conformidade com as provisões da Directiva 2006/42/CE da CE (Directiva de Maquinaria), e com as normas harmonizadas mencionadas abaixo. - Página 142 Condizioni di esercizio............159 © 2012 Atlas Copco Construction Tools AB | No. 9800 0627 71f | 2012-06-30...
- Página 143 Dichiarazione di conformità CE (Direttiva CE 2006/42/CE)......167 © 2012 Atlas Copco Construction Tools AB | No. 9800 0627 71f | 2012-06-30...
-
Página 145: Introduzione
In tutti gli angoli del mondo, Atlas Copco è in grado di offrire assistenza per i prodotti e la competenza idonea a garantire che i suoi clienti possano lavorare con la massima efficienza in qualunque momento. -
Página 146: Norme Di Sicurezza
Elmetto protettivo ● ● Protezione acustica occhiali di sicurezza resistenti agli urti con ● protezioni laterali ● protezione delle vie respiratorie, se necessario © 2012 Atlas Copco Construction Tools AB | No. 9800 0627 71f | 2012-06-30 Istruzioni originali... -
Página 147: Funzionamento, Precauzioni
Accertarsi che non siano presenti fonti di gas o ► esplosivi non rilevati. ► Non perforare mai in un foro esistente. © 2012 Atlas Copco Construction Tools AB | No. 9800 0627 71f | 2012-06-30 Istruzioni originali... - Página 148 Lavorare in un'area ben ventilata. Se la macchina ha uno scarico, dirigerlo in modo ► tale da ridurre il disturbo delle polveri in un ambiente polveroso. © 2012 Atlas Copco Construction Tools AB | No. 9800 0627 71f | 2012-06-30 Istruzioni originali...
- Página 149 Il cambio di postura durante lavori prolungati può aiutare a ridurre il fastidio e la fatica. In caso di sintomi persistenti o ricorrenti, ► consultare un medico professionista qualificato. © 2012 Atlas Copco Construction Tools AB | No. 9800 0627 71f | 2012-06-30 Istruzioni originali...
- Página 150 (quindi con un periodo maggiore di continuare. esposizione alle vibrazioni) e possono causare o contribuire a più alti livelli di esposizione alle vibrazioni. © 2012 Atlas Copco Construction Tools AB | No. 9800 0627 71f | 2012-06-30 Istruzioni originali...
-
Página 151: Manutenzione, Precauzioni
Utilizzare sempre ricambi, utensili d'inserimento ► ed accessori originali approvati dalla Atlas Copco. ► Sostituire immediatamente i pezzi danneggiati. Sostituire tempestivamente i componenti usurati. ► © 2012 Atlas Copco Construction Tools AB | No. 9800 0627 71f | 2012-06-30 Istruzioni originali... -
Página 152: Avvertenze
Ciò significa che l'erogazione dell'aria di spurgo ha inizio non appena si attiva l'aria compressa. Lo scopo è quello di impedire che l'acqua © 2012 Atlas Copco Construction Tools AB | No. 9800 0627 71f | 2012-06-30 Istruzioni originali... -
Página 153: Parti Principali
Nipplo ingresso aria le istruzioni di sicurezza fornite separatamente. Accessorio della macchina Silenziatore Pulsante azionamento servosostegno Leva di comando alimentazione © 2012 Atlas Copco Construction Tools AB | No. 9800 0627 71f | 2012-06-30 Istruzioni originali... -
Página 154: Installazione
Acqua il rischio di formazione di ghiaccio prima che l'acqua raggiunga il separatore di condensa. Flessibile dell'aria, macchina Flessibile dell'acqua © 2012 Atlas Copco Construction Tools AB | No. 9800 0627 71f | 2012-06-30 Istruzioni originali... -
Página 155: Lubrificazione
AVVISO Non raffreddare mai un utensile di inserimento caldo in acqua, potrebbe derivarne fragilità e rottura precoce. © 2012 Atlas Copco Construction Tools AB | No. 9800 0627 71f | 2012-06-30 Istruzioni originali... -
Página 156: Montaggio Della Punta Di Perforazione
è pronto ad avviare la macchina. Imparare come fermare la macchina in caso di ► emergenza. Arrestare immediatamente la macchina in caso di ► interruzione di corrente. © 2012 Atlas Copco Construction Tools AB | No. 9800 0627 71f | 2012-06-30 Istruzioni originali... -
Página 157: Preparativi Prima Dell'accensione
Riempire di olio l’oliatore ♦ Accertarsi che il mandrino e la bussola del fioretto siano sempre ricoperti da una pellicola d'olio. BBC 16W/WS, BBC 34W/WS © 2012 Atlas Copco Construction Tools AB | No. 9800 0627 71f | 2012-06-30 Istruzioni originali... -
Página 158: Leva Di Comando Alimentazione
Quando il pulsante della valvola è premuto, la leva di controllo alimentazione viene nuovamente attivata. © 2012 Atlas Copco Construction Tools AB | No. 9800 0627 71f | 2012-06-30 Istruzioni originali... -
Página 159: Avviamento E Arresto
8. Regolare la forza di alimentazione per mezzo della leva di controllo alimentazione (C) in modo da ottenere la velocità di penetrazione minima. © 2012 Atlas Copco Construction Tools AB | No. 9800 0627 71f | 2012-06-30 Istruzioni originali... -
Página 160: Riposizionamento Del Servosostegno
Questa operazione può essere compiuta durante la perforazione. Quando il foro è pulito, riportare la leva (A) in avanti e la perforatrice si riavvierà. © 2012 Atlas Copco Construction Tools AB | No. 9800 0627 71f | 2012-06-30 Istruzioni originali... -
Página 161: Giornaliera
60 Nm. ♦ Controllare i bulloni passanti della macchina. Accertarsi che siano serrati. 4. Verificare il collegamento della perforatrice al servosostegno. © 2012 Atlas Copco Construction Tools AB | No. 9800 0627 71f | 2012-06-30 Istruzioni originali... -
Página 162: Manutenzione Periodica
Oliare bene la perforatrice prima di riporla. ● Riporre sempre la macchina in un luogo pulito e ● asciutto. ● Accertarsi che nella macchina non possa entrare materiale estraneo. © 2012 Atlas Copco Construction Tools AB | No. 9800 0627 71f | 2012-06-30 Istruzioni originali... -
Página 163: Dati Tecnici
è sufficiente. Deve esserci anche uno strato di olio sulla bussola del fioretto. Controllare che il lubrificatore sia collegato in direzione corretta. Congelamento Umidità nell'aria compressa Usare separatori d'acqua © 2012 Atlas Copco Construction Tools AB | No. 9800 0627 71f | 2012-06-30 Istruzioni originali... -
Página 164: Dati Della Macchina
Calibro per la boccola del mandrino esagonale 22 mm ( ⁄ ") Atlas Copco no. 3091 0038 00. Usare l'indicatore di pressione Atlas Copco no. 9090 0550 80 per misurare la pressione dell'acqua e dell'aria. Dati della macchina Alesaggio Lunghezza... -
Página 165: Dichiarazione In Materia Di Rumore E Vibrazioni
- invece dei valori che riflettono l'esposizione effettiva - nella singola valutazione dei rischi di uno specifico posto di lavoro, sul quale Atlas Copco Construction Tools AB non ha controllo. Questo utensile può causare una sindrome da vibrazioni mano-braccio se non utilizzato nella maniera idonea. -
Página 166: Servosostegni
BBC 34WTH Telescopio doppio ALF 67/80 8321 0201 85 BBC 16W/WS 1855 1495 3350 67/80 BBC 34W/WS (73) (58.9) (131.9) (37) (2.6/3.1) BBC 34WTH © 2012 Atlas Copco Construction Tools AB | No. 9800 0627 71f | 2012-06-30 Istruzioni originali... -
Página 167: Dichiarazione Di Conformità Ce
Dichiarazione di conformità CE Dichiarazione di conformità CE (Direttiva CE 2006/42/CE) Atlas Copco Construction Tools AB, con il presente documento dichiara che i macchinari elencati di seguito sono conformi ai requisiti specificati dalle Direttive CE 2006/42/CE (Direttiva macchine), nonché agli standard armonizzati specificati di seguito. - Página 168 Drift................185 © 2012 Atlas Copco Construction Tools AB | No. 9800 0627 71f | 2012-06-30...
- Página 169 EG-deklaration om överensstämmelse..........193 EG-deklaration om överensstämmelse (EG-direktiv 2006/42/EG)....193 © 2012 Atlas Copco Construction Tools AB | No. 9800 0627 71f | 2012-06-30 Originalinstruktioner...
-
Página 171: Inledning
Säkerhetsinstruktion och instruktionsbok Inledning Tack för att ni valt en produkt från Atlas Copco. Sedan 1873 har vi arbetat med att hitta nya och bättre sätt att tillgodose våra kunders behov. Vi har under årens lopp utvecklat nyskapande och ergonomiska produktlösningar som har hjälpt kunderna att förbättra och rationalisera det dagliga arbetet. -
Página 172: Säkerhetsinstruktioner
Hörselskydd eller tillbehör sker. Slagtåliga skyddsglasögon med sidoskydd ● Rikta inte insatsverktyget mot dig själv eller någon ► annan. ● Andningsskydd, vid behov Skyddshandskar ● © 2012 Atlas Copco Construction Tools AB | No. 9800 0627 71f | 2012-06-30 Originalinstruktioner... -
Página 173: Drift, Säkerhetsåtgärder
Stå stadigt och håll alltid i maskinen med bägge ► händerna. Borra aldrig i ett gammalt hål. ► ► Starta inte maskinen när den ligger på marken. © 2012 Atlas Copco Construction Tools AB | No. 9800 0627 71f | 2012-06-30 Originalinstruktioner... - Página 174 Om maskinen är försedd med utblås bör detta ► riktas så att störningarna från damm i dammfyllda miljöer reduceras. Använd och underhåll maskinen i enlighet med ► rekommendationerna i säkerhetsinstruktioner och bruksanvisning. © 2012 Atlas Copco Construction Tools AB | No. 9800 0627 71f | 2012-06-30 Originalinstruktioner...
- Página 175 ► Avbryt arbetet omedelbart om maskinen plötsligt börjar vibrera våldsamt. Ta reda på orsaken till de ökade vibrationerna och åtgärda felet innan du återupptar arbetet. © 2012 Atlas Copco Construction Tools AB | No. 9800 0627 71f | 2012-06-30 Originalinstruktioner...
-
Página 176: Underhåll, Säkerhetsåtgärder
► Tänk på att aldrig inspektera, rengöra, montera eller demontera insatsverktyget när strömkällan är ansluten. © 2012 Atlas Copco Construction Tools AB | No. 9800 0627 71f | 2012-06-30 Originalinstruktioner... -
Página 177: Förvaring, Säkerhetsåtgärder
BBC 16W, 16WS, 34W, 34WS, 34WTH Säkerhetsinstruktion och instruktionsbok Förvaring, säkerhetsåtgärder ♦ Förvara maskiner och verktyg på en säker, låst plats utom räckhåll för barn. © 2012 Atlas Copco Construction Tools AB | No. 9800 0627 71f | 2012-06-30 Originalinstruktioner... -
Página 178: Översikt
Detta innebär att spolluft matas fram så snart som tryckluften sätts på. Syftet är att förhindra vatten från att komma in i bergborrmaskinens slagmekanism. © 2012 Atlas Copco Construction Tools AB | No. 9800 0627 71f | 2012-06-30 Originalinstruktioner... -
Página 179: Maskinens Huvuddelar
Borrstålshållare Luftnippel För att undvika skador bör du läsa och förstå separat Vattennippel bifogade säkerhetsinstruktioner innan du använder eller underhåller verktyg. Maskinfäste Ljuddämpare Ventilpinne Matningsreglage © 2012 Atlas Copco Construction Tools AB | No. 9800 0627 71f | 2012-06-30 Originalinstruktioner... -
Página 180: Installation
Olja doseras i tryckluften med hjälp av smörjapparaten Atlas Copco BLG 30 eller CLG 30 som ansluts till luftledningen. © 2012 Atlas Copco Construction Tools AB | No. 9800 0627 71f | 2012-06-30 Originalinstruktioner... -
Página 181: Tryckjustering
Om exempelvis lufttrycket är 6 bar (87 psi) måste vattentrycket vara under 5 bar (72.5 psi) för att förhindra att vatten tränger in i slagmekanismen. © 2012 Atlas Copco Construction Tools AB | No. 9800 0627 71f | 2012-06-30 Originalinstruktioner... -
Página 182: Ta Bort Borrstålet
Lär dig hur man stänger av maskinen i händelse ► av nödfall. Stanna maskinen omedelbart i händelse av ► störningar i strömförsörjningen. © 2012 Atlas Copco Construction Tools AB | No. 9800 0627 71f | 2012-06-30 Originalinstruktioner... -
Página 183: Åtgärder Före Start
Pådragsventilen stängd (stoppläge). Endast blåsrengöring. Luft till matarbenet. Spolvatten. Luft till slagsmekanismen. Effektreglaget helt öppet (full gas). Extra tryckluft (”blåsning”). Matarbenet måste fästas på bergborren med bajonettkopplingen. © 2012 Atlas Copco Construction Tools AB | No. 9800 0627 71f | 2012-06-30 Originalinstruktioner... -
Página 184: Matningsreglage
4. Rikta in bergborrmaskinen så att borrstålet vidrör den önskade ansättningspunkten. 5. För effektreglaget (A) framåt lite grann för att starta vattenspolning, anslag och rotation. 6. Påbörja hålet med reducerad matningskraft. © 2012 Atlas Copco Construction Tools AB | No. 9800 0627 71f | 2012-06-30 Originalinstruktioner... -
Página 185: Stoppa Bergborrmaskinen
”Kontroller”). Detta får bergborrmaskinen att stanna. Detta kan utföras under borrning. När borrhålet är rent, för effektreglaget (A) framåt igen för att starta om bergborrmaskinen. © 2012 Atlas Copco Construction Tools AB | No. 9800 0627 71f | 2012-06-30 Originalinstruktioner... -
Página 186: När Du Tar Rast
Atlas Copcos symbol, en cirkel med en bergborr. I vissa fall är delen märkt med enbart cirkeln eller enbart artikelnumret. Delar i gummi och plast är normalt inte märkta. © 2012 Atlas Copco Construction Tools AB | No. 9800 0627 71f | 2012-06-30 Originalinstruktioner... -
Página 187: Slitagekontroll
● Vid långtidsförvaring ska du hälla lite olja direkt i bergborrens luftintag och sedan sätta på luften en liten stund. Detta skyddar maskinen mot korrosion. © 2012 Atlas Copco Construction Tools AB | No. 9800 0627 71f | 2012-06-30 Originalinstruktioner... -
Página 188: Kassering
återvinnas. All form av negativ inverkan på miljön skall i möjligaste mån undvikas och lokala begränsningar respekteras. © 2012 Atlas Copco Construction Tools AB | No. 9800 0627 71f | 2012-06-30 Originalinstruktioner... -
Página 189: Tekniska Specifikationer
Skadat spolhål i nacken Byt borrstål Flisor har gått ur Felaktig inriktning av nacken Byt borrstål och/eller borrbussning kolvtoppen Stort slitage på kolvtoppen Byt kolv © 2012 Atlas Copco Construction Tools AB | No. 9800 0627 71f | 2012-06-30 Originalinstruktioner... -
Página 190: Maskindata
Dessa deklarerade värden är inte lämpliga att använda vid riskbedömningar. Värden som uppmäts på enskilda arbetsplatser kan vara högre. De faktiska exponeringsvärdena och de skaderisker som © 2012 Atlas Copco Construction Tools AB | No. 9800 0627 71f | 2012-06-30 Originalinstruktioner... -
Página 191: Buller- Och Vibrationsdata
är unika och beror på personens arbetssätt, i vilket material maskinen används, användarens exponeringstid och fysiska kondition samt maskinens skick. Atlas Copco Construction Tools AB kan inte hållas ansvarigt för konsekvenserna av att de deklarerade värdena används, istället för värden som återspeglar den faktiska exponeringen vid en enskild riskbedömning i en arbetsplatssituation över vilken Atlas Copco Construction Tools AB inte har någon kontroll. -
Página 192: Matarben
(2.8) BBC 34WTH Dubbelt teleskop ALF 67/80 8321 0201 85 BBC 16W/WS 1855 1495 3350 67/80 BBC 34W/WS (73) (58.9) (131.9) (37) (2.6/3.1) BBC 34WTH © 2012 Atlas Copco Construction Tools AB | No. 9800 0627 71f | 2012-06-30 Originalinstruktioner... -
Página 193: Eg-Deklaration Om Överensstämmelse
Dragonvägen 2 Kalmar Vice vd Design and Development: Erik Sigfridsson Tillverkare: Atlas Copco Construction Tools AB 105 23 Stockholm Sweden Ort och datum: Kalmar, 2012-06-30 © 2012 Atlas Copco Construction Tools AB | No. 9800 0627 71f | 2012-06-30 Originalinstruktioner... - Página 196 Any unauthorized use or copying of the contents or any part thereof is prohibited. This applies in particular to trademarks, model denominations, part numbers, and drawings. www.atlascopco.com...