
Manuales relacionados para Blumfeldt Ayana


Resumen de contenidos para Blumfeldt Ayana
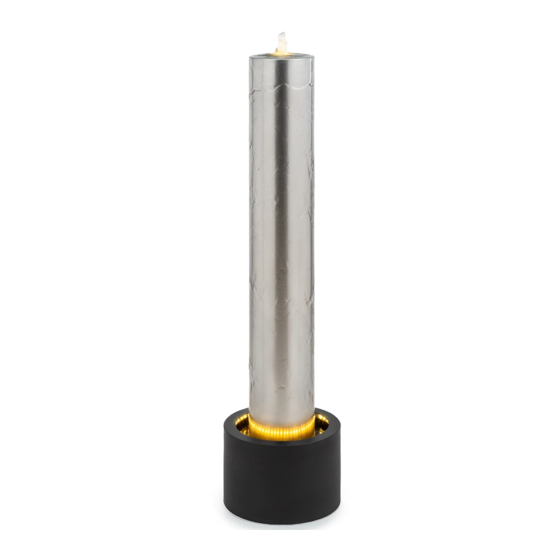
- Página 1 Ayana Gartenbrunnen Garden Fountain Fuente de jardín Fontaine de jardin Fontana da giardino 10035914 10035915...
-
Página 3: Tabla De Contenido
Hinweise zur Bedienung 9 Italiano 35 Fehlerbehebung 10 Hinweise zur Entsorgung 10 TECHNISCHE DATEN Artikelnummer 10035914 10035915 Name Ayana (schwarz) Ayana (weiß) Stromversorgung 220-240 V / 12 V ~ 50 Hz 220-240 V / 12 V ~ 50 Hz Stromverbrauch 12 W 12 W Durchflussmenge 800 l/h... -
Página 4: Sicherheitshinweise
SICHERHEITSHINWEISE • Um die Gefahr von Stromschlägen zu reduzieren, entfernen Sie keine der Abdeckungen. Das Gerät enthält Teile, die dem Benutzer nicht zugänglich sind. • Lassen Sie keine Gegenstände aus Metall auf dieses Gerät fallen. • Stellen Sie keine schweren Gegenstände auf dieses Gerät. •... -
Página 5: Einzelteile Und Zusammenbau
EINZELTEILE UND ZUSAMMENBAU 1: Einzelteile Brunnenaufsatz (1x) Brunnenbecken (1x) Pumpe (1x) Adapter (1x) Dichtungen (3x) Schrauben (3x) (Benötigtes Werkzeug: Inbusschlüssel) 2: Verbinden Sie die Pumpe mit dem Schlauch. - Página 6 3: Verbinden Sie das Lichtkabel des Brunnenaufsatzes mit dem Pumpenkabel. 4: Verbinden sie das Lichtkabel des Brunnenbeckens mit dem Pumpenkabel.
- Página 7 5: Führen Sie das Kabel durch den Kabelausgang des Brunnenbeckens nach außen. 6: Setzen Sie den Brunnenaufsatz auf das Brunnenbecken.
- Página 8 7: Verbinden Sie das Kabel mit dem Adapter. 8: Befestigen Sie den Brunnenaufsatz mit Schrauben und Dichtungen auf dem Brunnenbecken.
-
Página 9: Hinweise Zur Bedienung
9: Der Brunnen ist nun fertig zusammengebaut und einsatzbereit. HINWEISE ZUR BEDIENUNG • Füllen Sie vor der Benutzung des Brunnens genug saubereres Wasser ein. • Wenn Sie den Brunnen nicht mehr benutzen, schalten Sie die Pumpe aus und entfernen Sie das Wasser. •... -
Página 10: Fehlerbehebung
FEHLERBEHEBUNG Problem Mögliche Ursache Lösungsansatz Der Brunnen läuft Der Brunnen ist nicht Stecken Sie den Stecker nicht. an die Stromversorgung in die Steckdose. angeschlossen. Die Flusskontrolle Drehen Sie die der Pumpe ist nicht Flusskontrolle aufgedreht. der Pumpe im Uhrzeigersinn, um den Durchfluss zu erhöhen. - Página 11 Notes on Operation 17 Troubleshooting 18 Hints on Disposal 18 TECHNICAL DATA Item number 10035914 10035915 Name Ayana (black) Ayana (white) Power supply 220-240 V / 12 V ~ 50 Hz 220-240 V / 12 V ~ 50 Hz Power consumption 12 W 12 W Flow rate...
- Página 12 SAFETY INSTRUCTIONS • To reduce the risk of electric shock, do not remove any of the covers. The unit contains parts that are not accessible to the user. • Do not drop metal objects on this unit. • Do not place heavy objects on top of this unit. •...
- Página 13 PARTS AND ASSEMBLY 1: Parts Fountain attachment (1x) Fountain basin (1x) Pump (1x) Adapter (1x) Gaskets (3x) Screws (3x) (Tools required: Allen key) 2: Connect the pump to the hose.
- Página 14 3: Connect the light cable of the fountain attachment to the pump cable. 4: Connect the light cable of the fountain basin to the pump cable.
- Página 15 5: Lead the cable through the cable outlet of the fountain basin to the outside. 6: Place the fountain attachment on the fountain basin.
- Página 16 7: Connect the cable to the adapter. 8: Fix the fountain attachment to the fountain basin with screws and gaskets.
- Página 17 9: The fountain is now completely assembled and ready for use. NOTES ON OPERATION • Fill in enough cleaner water before using the fountain. • If you no longer use the fountain, turn off the pump and remove the water. •...
- Página 18 TROUBLESHOOTING Problem Possible cause Solution The fountain is not The fountain is not Insert the plug into the running. connected to the power socket. supply. The flow control of the Turn the flow control of pump is not turned on. the pump clockwise to increase the flow.
- Página 19 Scannez le QR-Code pour obtenir la dernière version du mode d‘emploi ainsi que d‘autres informations concernant le produit : SOMMAIRE FICHE TECHNIQUE Numéro d'article 10035914 10035915 Ayana (noir) Ayana (blanc) Alimentation 220-240 V / 12 V ~ 50 Hz 220-240 V / 12 V ~ 50 Hz Consommation 12 W 12 W Débit...
- Página 20 CONSIGNES DE SÉCURITÉ • Pour réduire le risque de choc électrique, ne retirez aucun des caches. L‘appareil contient des pièces qui ne sont pas accessibles à l‘utilisateur. • Ne faites pas tomber d‘objets métalliques sur cet appareil. • Ne placez pas d‘objets lourds sur cet appareil. •...
- Página 21 PIÈCES DÉTACHÉES ET ASSEMBLAGE 1 : Pièces détachées Fontaine (1x) Bassin (1x) Pompe (1x) Adaptateur (3x) Joints (3x) Vis (3x) (Outil nécessaire : une clé Allen) 2 : Connectez la pompe et le tuyau.
- Página 22 3 : Connectez le câble d‘éclairage de la fontaine au câble de la pompe. 4 : Connectez le câble d‘éclairage du bassin de la fontaine avec le câble de pompe.
- Página 23 5 : Faites passer le câble à travers la sortie de câble du bassin de la fontaine vers l‘extérieur. 6 : Placez la fontaine sur son bassin.
- Página 24 7 : Connectez le câble à l‘adaptateur. 8 : Fixez la fontaine sur son bassin avec des vis et des joints.
- Página 25 9 : La fontaine est maintenant entièrement assemblée et prête à l‘emploi. CONSEILS D‘UTILISATION • Remplissez suffisamment d‘eau propre avant d‘utiliser la fontaine. • Lorsque vous avez fini d‘utiliser la fontaine, éteignez la pompe et videz l‘eau. • Si la fontaine est sale, nettoyez-la avec un chiffon doux.
- Página 26 RÉSOLUTION DES PROBLÈMES Problème Cause possible Solution La fontaine ne La fontaine n'est Branchez la fiche dans fonctionne pas. pas connectée à la prise. l'alimentation. Le contrôle du débit Tournez la commande de la pompe n'est pas de débit de la pompe ouvert.
- Página 27 Notas sobre el funcionamiento 33 Solución de problemas 34 Retirada del aparato 34 DATOS TÉCNICOS Número de artículo 10035914 10035915 Nombre Ayana (negra) Ayana (blanco) Fuente de 220-240 V / 12 V ~ 50 Hz 220-240 V / 12 V ~ 50 Hz alimentación Potencia 12 W 12 W Batería...
- Página 28 INSTRUCCIONES DE SEGURIDAD • Para reducir el riesgo de una descarga eléctrica, no quite ninguna de las cubiertas. La unidad contiene partes que no son accesibles para el usuario. • No coloque objetos llenos de líquidos como jarrones o regaderas cerca del dispositivo.
- Página 29 PIEZAS Y MONTAJE 1: Piezas Tapa de la fuente (1x) Cubeta de la fuente (1x) Bomba (1x) Adaptador (1x) Juntas (3x) Tornillos (3x) (Herramienta necesaria: llave Allen) 2: Conecte la bomba a la manguera.
- Página 30 3: Conecte el cable de luz del accesorio del surtidor al cable de la bomba. 4: Conecte el cable de la luz del depósito de la fuente al cable de la bomba.
- Página 31 5: Pase el cable a través de la salida del cable de la cuenca del pozo hacia el exterior. 6: Coloque la parte superior de la fuente en la pila de la fuente.
- Página 32 7: Conecte el cable al adaptador. 8: Fije la tapa del pozo a la pila del pozo con tornillos y juntas.
- Página 33 9: La fuente está ahora completamente montada y lista para su uso. NOTAS SOBRE EL FUNCIONAMIENTO • Llene la fuente con suficiente agua limpia antes de utilizarla. • Cuando termine de utilizar la fuente, apague la bomba y elimine el agua. •...
- Página 34 SOLUCIÓN DE PROBLEMAS Problema Posible causa Solución La fuente no funciona. La fuente no está Inserte el enchufe en la conectada a la red toma de corriente. eléctrica. El control de flujo Gire el control de de la bomba no está flujo de la bomba en el activado.
- Página 35 Singoli componenti e assemblaggio 37 Note sull’utilizzo 41 Correzione degli errori 42 Smaltimento 42 DATI TECNICI Numero articolo 10035914 10035915 Nome Ayana (nero) Ayana (bianco) Alimentazione 220-240 V / 12 V ~ 50 Hz 220-240 V / 12 V ~ 50 Hz Consumo 12 W 12 W energetico...
- Página 36 AVVERTENZE DI SICUREZZA • Per evitare il pericolo di scosse elettriche, non rimuovere alcuna copertura. Il dispositivo contiene componenti che non sono accessibili all’utente. • Non lasciar cadere nel dispositivo oggetti metallici. • Non poggiare oggetti pesanti sul dispositivo. • Utilizzare solo accessori e componenti approvati dal produttore.
- Página 37 SINGOLI COMPONENTI E ASSEMBLAGGIO 1: singoli componenti Elemento superiore della fontana (1x) Vasca della fontana (1x) Pompa (1x) Adattatore (1x) Guarnizioni (3x) Viti (3x) (Attrezzi necessari: chiave a brugola) 2: collegare la pompa al tubo flessibile.
- Página 38 3: collegare il cavo della luce dell’elemento superiore della fontana al cavo della pompa. 4: collegare il cavo della luce della vasca della fontana al cavo della pompa.
- Página 39 5: far passare il cavo verso l’esterno, dall’apposita uscita della vasca della fontana 6: posizionare l’elemento superiore della fontana sulla vasca.
- Página 40 7: collegare il cavo all’adattatore 8: fissare l’elemento superiore della fontana alla vasca con viti e guarnizioni.
- Página 41 9: la fontana è ora completamente assemblata e pronta all’uso NOTE SULL’UTILIZZO • Riempire la fontana con sufficiente acqua pulita prima dell’utilizzo. • Se non si usa più la fontana, spegnere la pompa e rimuovere l’acqua. • Se la pompa è sporca, pulirla con un panno morbido.
- Página 42 CORREZIONE DEGLI ERRORI Problema Possibile causa Soluzione La fontana non La fontana non Collegare la spina alla funziona. è collegata presa elettrica. correttamente all’alimentazione. Il controllo di flusso Girare il controllo di della pompa non è flusso della pompa aperto. in senso orario per aumentare il flusso.