Tabla de contenido
Publicidad
Idiomas disponibles
Idiomas disponibles
Enlaces rápidos
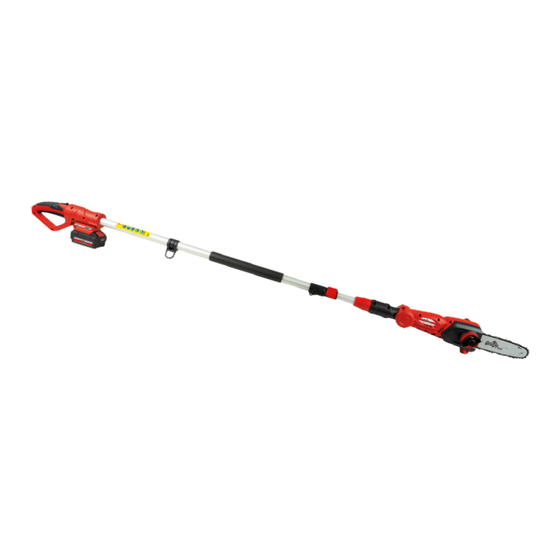
Draadloze telescopische hoge snoeischaar
Teleskopowa podkrzesywarka akumulatorowa
Akumulátorový teleskopický odvetvovac pro
Akumuliatorine teleskopine aukštapjove
Akumulátorový teleskopický odvetvovac
Traduction de la notice d'utilisation originale
Vertaling van de originele gebruiksaanwijzing
Translation of the original instructions for use
Traduzione delle istruzioni per l'uso in originale
Tłumaczenie oryginalnej instrukcji obsługi
Vertimas iš originalių eksploatavimo instrukcijoje
Traducción del manual de instrucciones original
Preklad originálneho návodu na obsluhu
Akku-Teleskop-Hochentaster
Sécateur télescopique sans fil
Cordless telescopic pruner
Potatore telescopico a batteria
Podadora telescópica a batería
AKS 2040-21 T Lion Set
Originalbetriebsanleitung
Překlad originálního návodu k obsluze
práci ve výškách
DE
FR
NL
GB
IT
PL
CZ
LT
ES
SK
Publicidad
Capítulos
Tabla de contenido

Resumen de contenidos para Grizzly Tools AKS 2040-21 T Lion Set
- Página 1 Akumulátorový teleskopický odvetvovac pro práci ve výškách Akumuliatorine teleskopine aukštapjove Podadora telescópica a batería Akumulátorový teleskopický odvetvovac AKS 2040-21 T Lion Set Originalbetriebsanleitung Traduction de la notice d’utilisation originale Vertaling van de originele gebruiksaanwijzing Translation of the original instructions for use Traduzione delle istruzioni per l’uso in originale...
- Página 4 2 mm max.
- Página 5 Originalbetriebsanleitung ..........6 Traduction de la notice d’utilisation originale .... 24 Vertaling van de originele gebruiksaanwijzing ..42 Translation of the original instructions for use ..60 Tłumaczenie oryginalnej instrukcji obsługi ....76 Překlad originálního návodu k obsluze ....... 94 Originalios eksploatavimo instrukcijos vertimas ..111 Traduzione delle istruzioni per l’uso in originale ..
-
Página 6: Tabla De Contenido
Inhalt Verwendungszweck......6 Ein- und Ausschalten ....... 17 Allgemeine Beschreibung ....7 Öl-Automatik prüfen ......17 Lieferumfang ........7 Arbeiten mit dem Gerät ....18 Transport ..........18 Funktionsbeschreibung ...... 7 Übersicht ..........7 Sägetechniken ........18 Technische Daten ......... 8 Absägen eines kleinen Astes ... -
Página 7: Allgemeine Beschreibung
Das Gerät ist zum Gebrauch durch Er- Das Gerät verfügt über einen Lithium- wachsene bestimmt. Jugendliche über Ionen Wechselakku und ein Ladegerät. 16 Jahre dürfen das Gerät nur unter Auf- Die Funktion der Bedienteile entnehmen Sie sicht benutzen. bitte den nachfolgenden Beschreibungen. Der Bediener oder Nutzer ist für Unfälle Übersicht oder Schäden an anderen Menschen oder... -
Página 8: Technische Daten
Technische Daten Warnung: Der Schwingungs- emissionswert kann sich während Akku-Teleskop- der tatsächlichen Benutzung des Hochentaster... AKS 2040-21 T Lion Set Elektrowerkzeugs von dem Anga- Motorspannung......20 V bewert unterscheiden, abhängig Schutzklasse ......... III von der Art und Weise, in der das Schutzart ...........IPX0... -
Página 9: Bildzeichen Und Symbole
Bildzeichen und Symbole Die Tankfüllung reicht für ca. Bildzeichen auf dem Gerät 15 Minuten Dauerbetrieb aus. Symbole in der Anleitung Gefahrenzeichen mit Angaben zur Verhütung von Personen- oder Sachschäden. Gebotszeichen (anstelle des Aus- Achtung! rufungszeichens ist das Gebot er- Betriebsanleitung lesen! läutert) mit Angaben zur Verhütung Setzen Sie die Maschine nicht dem von Schäden. -
Página 10: Allgemeine Sicherheitshinweise Für Elektrowerkzeuge
Allgemeine Sicherheitshinweise wenden Sie keine Adapterstecker für Elektrowerkzeuge gemeinsam mit schutzgeerdeten Elektrowerkzeugen. Unveränderte WARNUNG! Lesen Sie alle Stecker und passende Steckdosen Sicherheitshinweise und verringern das Risiko eines elektri- Anweisungen. Versäumnisse schen Schlages. bei der Einhaltung der • Vermeiden Sie Körperkontakt mit Sicherheitshinweise und geerdeten Oberflächen wie von Rohren, Heizungen, Herden und... - Página 11 Sicherheit von Personen: • Tragen Sie geeignete Kleidung. Tragen Sie keine weite Kleidung Seien Sie aufmerksam, achten Sie oder Schmuck. Halten Sie Haare, • darauf, was Sie tun, und gehen Kleidung und Handschuhe fern von Sie mit Vernunft an die Arbeit mit sich bewegenden Teilen.
- Página 12 sind, dass die Funktion des Elek- Spezielle Sicherheitshinweise für trowerkzeuges beeinträchtigt ist. Akkugeräte: Lassen Sie beschädigte Teile vor dem Einsatz des Gerätes reparie- • Stellen Sie sicher, dass das Gerät ren. Viele Unfälle haben ihre Ursache ausgeschaltet ist, bevor Sie den Akku einsetzen.
-
Página 13: Vorsichtsmaßnahmen Gegen Rückschlag
Vorsichtsmaßnahmen gegen Ein Rückschlag ist die Folge eines fal- Rückschlag schen oder fehlerhaften Gebrauchs des Elektrowerkzeugs. Er kann durch geeig- Achtung Rückschlag! Achten Sie nete Vorsichtsmaßnahmen, wie nachfol- beim Arbeiten auf Rückschlag des gend beschrieben, verhindert werden: Halten Sie die Säge mit beiden Hän- Gerätes. -
Página 14: Weiterführende Sicherheitshinweise
Weiterführende beiten im Gefälle sehr vorsichtig. Sie Sicherheitshinweise könnten das Gleichgewicht verlieren. • Achten Sie beim Standortwechsel • Halten Sie das Gerät, die Schneidgar- darauf, dass das Gerät ausgeschaltet nitur und die Schwertschutzhülle in ist und der Finger nicht den Ein-/Aus- einem guten Gebrauchszustand, um schalter berührt. -
Página 15: Montageanleitung
c) Gesundheitsschäden, die aus Hand- 1. Lösen Sie die Befestigungs- Arm-Schwingungen resultieren, schraube (5) und nehmen Sie falls das Gerät über einen längeren die Kettenradabdeckung (6) ab Zeitraum verwendet wird oder nicht (siehe kleines Bild). ordnungsgemäß geführt und gewartet 2. Breiten Sie die Sägekette (1) in wird. -
Página 16: Kettenschmierung
Gerätes. Eine richtig gespannte Sägekette Die Tankfüllung reicht für ca. 15 Mi- (1) erhöht die Lebensdauer Ihres Gerätes. nuten Dauerbetrieb aus. Kontrollie- ren Sie rechtzeitig den Ölstand. Prüfen Sie vor jeder Nutzung des Gerätes die Kettenspannung. Das Gerät ist mit einer Öl-Automatik aus- gestattet. -
Página 17: Akku Einsetzen/Entnehmen
dürfen nicht arretiert werden. 2. Klappen Sie den Hebel (11) wieder Sie müssen nach Loslassen des zurück und fixieren Sie damit die ge- Schalters den Motor ausschalten. wünschte Arbeitslänge des Teleskops- Sollte ein Schalter beschädigt tieles (10). sein, darf mit dem Gerät nicht Sägekopf abwinkeln mehr gearbeitet werden. -
Página 18: Arbeiten Mit Dem Gerät
Transport 3. Wenn sich keine Ölspur zeigt, reini- gen Sie den Ölausflusskanal ( oder lassen Sie das Gerät von unse- • Benutzen Sie beim Transport die rem Kundendienst reparieren. Schwertschutzhülle ( 23). 4. Zum Reinigen wischen Sie Rückstän- • Achten Sie darauf, das Gerät beim de aus dem Ölausflusskanal ( Tragen nicht einzuschalten. -
Página 19: Absägen In Teilstücken
Reinigung Dieser wird von unten ausgeführt. Sägen Sie im unteren Drittel des Astes einen Ein- schnitt ein. Verwenden Sie keine Reinigungs- Der eigentliche Ablängungsschnitt bzw. Lösungsmittel. Sie könnten (s. Schnitt b) erfolgt wieder von oben das Gerät damit irreparabel be- in möglichst einer Linie mit dem ersten schädigen. -
Página 20: Tabelle Wartungsintervalle
Tabelle Wartungsintervalle Vor jedem Nach 10 Maschinenteil Aktion Gebrauch Betriebsstunden Zustand prüfen, beschädigte Komplette Maschine Teile bei Bedarf ersetzen Zugängliche Schrau- nachziehen ben und Muttern Kettenrad prüfen, bei Bedarf ersetzen prüfen, ölen, bei Bedarf nach- Sägekette schleifen oder ersetzen Schwert prüfen, umdrehen, reinigen, ölen ... -
Página 21: Lagerung
Garantie Bei optimalem Zustand der Öl- durchlässe sprüht die Sägekette wenige Sekunden nach Anlassen Für dieses Gerät gewähren wir 24 Monate der Säge automatisch etwas Öl ab. Garantie. Bei gewerblichem Einsatz er- lischt die Garantie. Lagerung Schäden, die auf natürliche Abnutzung, Überlastung oder unsachgemäße Bedie- •... -
Página 22: Reparatur-Service
Reparatur-Service Achtung: Bitte liefern Sie Ihr Gerät im Sie können Reparaturen, die nicht der Garantie unterliegen, gegen Berechnung Reklamations- oder Servicefall gereinigt von unserem Service-Center durchführen und mit einem Hinweis auf den Defekt an lassen. Unser Service-Center erstellt Ih- unsere Service-Adresse. nen gerne einen Kostenvoranschlag. -
Página 23: Fehlersuche
Fehlersuche Problem Mögliche Ursache Fehlerbehebung Akku aufladen (separate Be- dienungsanleitung für Akku Akku ( 15) entladen und Ladegerät beachten) Akku einsetzen (separate Bedienungsanleitung für Akku Akku ( 15) nicht eingesetzt Gerät startet nicht und Ladegerät beachten) Einschalten (siehe „Inbetrieb- Sicherheitsschalter ( 17) nicht nahme“) richtig betätigt... -
Página 24: Domaine D'utilisation
Content Domaine d’utilisation ......24 Vérifier le réservoir d’approvisionnement Description générale ......25 automatique d’huile ......36 Volume de la livraison ...... 25 Travailler avec l’appareil ....36 Transport ..........36 Description du fonctionnement ..25 Vue synoptique ........ 25 Techniques de sciage ...... -
Página 25: Description Générale
l’appareil et présenter un réel danger pour Reportez-vous aux pages suivantes en ce l’utilisateur. qui concerne la fonction des pièces. L’appareil est destiné à une utilisation par Vue synoptique des adultes. Les jeunes gens âgés de plus de 16 ans sont autorisés à utiliser l’appareil sous surveillance d’un adulte. -
Página 26: Données Techniques
Avertissement : L’émission de vibration au cours Sécateur télescopique de l’utilisation réelle de l’outil élec- sans fil ..... AKS 2040-21 T Lion Set trique peut différer de la valeur to- Tension .........20 V tale déclarée, selon les méthodes Classe de protection ......III d’utilisation de l’outil. -
Página 27: Symboles Et Pictogrammes
Symboles et pictogrammes Niveau de performance sonore garanti Symboles apposés sur l’appareil Le plein du réservoir permet un fonctionnement continu d’environ 15 minutes. Symboles utilisés dans le mode d’emploi Signes de danger avec conseils de prévention des accidents sur Attention! les personnes ou des dégâts Avant d’utiliser l’appareil, lisez attenti- matériels. -
Página 28: Consignes De Sécurité Générales Pour Outils Électriques
En cas d’accident ou d’une panne • Maintenir les enfants et les per- survenant pendant l’utilisation, sonnes présentes à l’écart pendant l’utilisation de l’outil. Les distrac- il faut immédiatement arrêter l’appareil et retirer la fiche secteur. tions peuvent vous faire perdre le Appliquez les premiers soins et contrôle de l’outil. - Página 29 courant différentiel résiduel (RCD). • S’habiller de manière adaptée. Ne L’usage d’un RCD réduit le risque de pas porter de vêtements amples ou de bijoux. Garder les cheveux, les choc électrique. vêtements et les gants à distance Sécurité des personnes des parties en mouvement.
-
Página 30: Mesures De Précaution Contre Le Rebond
• Observer la maintenance de l’outil. Utilisation des outils fonctionnant sur Vérifier qu’il n’y a pas de mauvais batteries et précautions d*emploi. alignement ou de blocage des par- ties mobiles, des pièces cassées • Charger les accumulateurs unique- ou toute autre condition pouvant ment avec les chargeurs qui sont affecter le fonctionnement de recommandés par le fabricant. -
Página 31: Autres Consignes De Sécurité
résister aux forces de rebond. Les forces de rebond peuvent être maî- trisées par l’opérateur, si des précau- tions appro-priées sont prises. Ne pas laisser partir la scie à chaîne. Ne pas tendre le bras trop loin et • ne pas couper au-dessus de la Bild 1 hauteur de l’épaule. -
Página 32: Autres Risques
• Ne travaillez pas avec un appareil en- • Soyez très prudent lorsque vous sciez dommagé, incomplet ou modifié sans de petits buissons et des branches. le consentement du fabricant. N’utilisez Les branches minces peuvent s’enfer- jamais l’appareil avec un équipement rer dans la scie et rebondir dans votre de protection défectueux. -
Página 33: Instructions De Montage
Instructions de montage chaîne soient orientés dans le sens des aiguilles d’une montre. Éteignez l’appareil, et retirez, 3. Posez la chaîne (1) dans la rai- avant tous travaux, la batterie de nure de guidage. l’appareil. 4. Tournez la bague de tension de la chaîne (3) sur le cache du pi- Si les tubes de l’appareil ne sont gnon de chaîne (6) dans le sens... -
Página 34: Graissage De La Chaîne
lame, sans fléchir, avec la main (por- Lorsque le moteur est en marche, l’huile ter des gants de protection). de graissage bio est acheminée vers la • Lorsque l’on tire sur la chaîne de la lame ( scie (1) avec une force de 9 N (environ Avant de démarrer le travail, vérifiez le ré- 1 kg), la scie et la lame (2) ne de- servoir d’approvisionnement automatique... -
Página 35: Retirer/Utiliser L'accumulator
de marche/arrêt et l’interrupteur 1. Rabattez le levier (11) correspondant de sécurité soient bloqués. Ils vers l’avant et modifiez la longueur du doivent arrêter le moteur dès manche en poussant et tirant. qu’ils ont été lâchés. Si un inter- 2. Rabattez le levier (11) de nouveau rupteur est endommagé, il ne faut vers l’arrière et fixez le manche téles- plus travailler avec l’appareil. -
Página 36: Vérifier Le Réservoir D'approvisionnement Automatique D'huile
Vérifier le réservoir d’appro- • Changez régulièrement de position visionnement automatique de travail. Une utilisation prolongée d’huile de l’appareil peut, en raison des vibrations, provoquer des troubles de Avant de démarrer le travail, vérifiez le la circulation dans les mains. Toute- niveau d’huile dans réservoir d’approvi- fois, vous pouvez allonger la durée sionnement automatique d’huile. -
Página 37: Scier Des Grandes Branches
Scier des grandes branches Éteignez l’appareil, et retirez, avant tous travaux, la batterie de l’appareil. Portez des gants résistant à la coupe si vous maniez la chaîne de la scie. Il existe un risque de bles- sure! Nettoyage Pour les grandes branches (Ø 8-20 cm), choisissez tout d’abord une découpe d’allègement (voir ill. -
Página 38: Tableau Des Intervalles D'entretien
Tableau des intervalles d’entretien Après 10 Avant chaque Pièce Action heures usage d‘utilisation Machine com- Contrôler l’état, en cas de besoin, plète changer les pièces endommagées Vis et écrous Resserrer accessibles Contrôler, remplacer le cas Roue de chaîne ... -
Página 39: Stockage
Garantie 5. Montez la lame, la chaîne et la protection de chaîne et tendez la chaîne (cf. chapitre Nous accordons 24 mois de garantie sur «Instructions de montage»). cet appareil. Cette garantie est seulement valable pour le premier acheteur et n‘est Si l’état des orifices et le réglage pas transmissible. -
Página 40: Service De Réparation
Service de réparation Vous pouvez faire exécuter par notre sont à la charge de l‘expéditeur. En cas service après-vente, contre paiement, de réclamation ou de demande de ser- des réparations qui ne sont pas prises en vice, veuillez remettre votre appareil net- compte par la garantie. -
Página 41: Dépannage
Dépannage Problème Cause possible Elimination de l‘erreur Charger l’accumulator (respec- ter la notice d‘utilisation de la Accumulator ( 15) déchargé batterie et du chargeur) Mettre en place l’accumulator (respecter la notice d‘utilisation Accumulator ( 15) non inséré L‘appareil ne dé- de la batterie et du chargeur) marre pas Le commutateur de sécurité... -
Página 42: Toepassingsgebied
Inhoud Toepassingsgebied ......42 Aan- en uitschakelen ....... 53 Algemene beschrijving ...... 43 Automatisch oliemechanisme Omvang van de levering ....43 controlere ......... 53 Funktiebeschrijving ......43 Veilige werkwijze ......53 Overzicht .......... 43 Transport ..........54 Technische gegevens ......44 Zaagtechnieken ........ -
Página 43: Algemene Beschrijving
mercieel gebruik. Bij commercieel gebruik Om de gebruiker te beschermen, kan het vervalt de garantie. apparaat alleen worden ingeschakeld als Het apparaat is bedoeld voor gebruik door de veiligheidsschakelaar wordt ingedrukt. volwassenen. Jongeren boven 16 jaar De handbescherming beschermt ook mogen het apparaat enkel onder toezicht tegen takken en twijgen.Het apparaat gebruiken. -
Página 44: Technische Gegevens
Technische gegevens van het elektrische gereedschap van de aangegeven waarde verschillen. Draadloze telescopische hoge Probeer de belasting door trillin- snoeischaar..AKS 2040-21 T Lion Set gen zo gering mogelijk te houden. Motorspanning ......20 V Voorbeeldmaatregelen voor de Beschermingsniveau ......III reductie van trillingsbelasting zijn Beschermingsklasse......IPX0... -
Página 45: Symbolen
Symbolen Machines horen niet bij huishoude- lijk afval thuis. Symbolen op het apparaat Angabe des Schallleistungspegels in dB. De tankvulling volstaat voor een con- tinue werking van ca. 15 minuten. Symbolen in de gebruiksaanwijzing Let op! Gevaarsymbool met informatie Gebruiksaanwijzing raadplegen over de preventie van personen- of zaakschade. -
Página 46: Algemene Veiligheidsinstructies Voor Elektrisch Gereedschap
verwondingen oordeelkundig of Elektrische veiligheid: raadpleeg een arts. Lees om sto- • De aansluitstekker van het elektri- ringen te verhelpen het hoofdstuk “Foutopsporing” of contacteer ons sche gereedschap moet in het stop- servicecenter. contact passen. De stekker mag op geen enkele manier veranderd wor- Algemene den. - Página 47 Veiligheid van personen: derdelen. Loszittende kledij, sieraden of lang haar kunnen door bewegende • Wees aandacht, let erop wat u doet onderdelen vastgegrepen worden. en ga met verstand aan het werk met het elektrische gereedschap. Gebruik Gebruik en behandeling het elektrische gereedschap niet van het elektrische gereedschap: wanneer u moe bent of onder invloed van drugs, alcohol of medicijnen...
-
Página 48: Voorzorgsmaatregelen Voor Terugslag Bij Werkzaamheden Met De Kettingzaag
• Houd snoeigereedschap scherp en den kunnen veroorzaken. Een kort- netjes. Zorgvuldig onderhouden snoei- sluiting tussen de accucontacten kan tot gereedschap met scherpe snoeikanten brandwonden of brand leiden. gaat minder klemmen en is gemakkelij- • Bij verkeerd gebruik kan vloeistof uit ker te bedienen. -
Página 49: Verdergaande Veiligheidsinstructies
• Een aanraking met het uiteinde van de • Gebruik steeds door de fabrikant rail kan in sommige gevallen tot een voorgeschreven reserverails en zaagkettingen. Verkeerde reserverails onverwachte, achterwaarts gerichte reactie leiden, waarbij de geleiderail en zaagkettingen kunnen tot een scheur opwaarts en in de richting van de met van de ketting en/of tot een terugslag de bediening belaste persoon geslagen... -
Página 50: Restrisico's
• Vergewis u dat het apparaat bij het • Tracht niet, wanneer het zaaggereed- starten en tijdens het werk niet met de schap schuin komt te staan of in takken grond, met stenen, met draad of met gekneld raakt, het apparaat met geweld andere vreemde voorwerpen in aanra- te bevrijden. -
Página 51: Zaagketting En Zwaard Monteren
Apparaat monteren kettingwiel (29). Het is normaal 1. Voeg het uiteinde van de alu- dat de zaagketting (1) door- minium zeskantpijp van de hangt. telescopische steel (10) en het 7. Zet de kettingwielafdekking (6) uiteinde van de steel onder de op. -
Página 52: Kettingsmering
Draai de bevestigingsschroef (5) vast • Als u niet beschikt over bio-kettingolie, aan. kunt u het beste een kettingolie zon- der hechtende additieven gebruiken. Bij nieuwe zaagkettingen (1) moet u de kettingspanning nogmaals na 1. Draai de dop van de olietank (21) en een korte werkingstijd bijregelen. -
Página 53: Schouderriem Bevestigen
Schouderriem bevestigen Let voor u het apparaat inschakelt op dat het niet in aanraking komt 1. Bevestig de karabijnhaak van de met andere voorwerpen. schouderriem (25) aan de draafhou- der (14) aan de telescopische steel 1. Druk de veiligheidsschakelaar van het apparaat. 17) in en schakel het toestel met 2. -
Página 54: Transport
• Gebruik de apparaat niet op een lad- als hiernaast afgebeeld. der staande of op een onveilige stand- Let op het voortijdige doorbreken van de plaats. tak indien u zich op de grootte en het ge- • Laat u niet tot een onbezonnen snede wicht verkeken hebt. -
Página 55: Onderhoud En Reiniging
Onderhoud en reiniging beetje oefening. In geval van twijfel dient aan een uitwisseling van de zaagketting Laat onderhoudswerkzaamheden de voorkeur gegeven te worden. die niet in deze handleiding wor- Zaagketting wisselen den beschreven uitvoeren door ons servicecenter. Gebruik enkel originele onderdelen. Bevestig een nieuwe zaagketting nooit op een versleten tanding of Schakel het apparaat uit en verwij-... -
Página 56: Onderhoudsintervallen
Onderhoudsintervallen 5. Monteer zwaard, ketting en ket- tingwielbescherming en span de ketting aan (zie ook gedeelte Voer de in onderstaande tabel opgesom- „Montagehandleiding”). de onderhoudswerkzaamheden regelma- tig uit. Door regelmatig onderhoud van uw Bi optimale oliedoorvoer en juist zaag wordt haar levensduur verlengd. ingestelde olietoevoerknop sproeit de ketting enkele seconden auto- •... -
Página 57: Verwerking En Milieubescherming
Verwerking en Garantie milieubescherming • Wij geven 24 maanden garantie op dit Neem de accu uit het toestel en breng product. Bij commercieel gebruik ver- het toestel, de accu, de accessoires en valt de garantie. de verpakking naar een milieuvriendelijke •... -
Página 58: Reparatieservice
Reparatieservice • Herstellingen, die niet onder de garan- • De afvalverwijdering van uw defecte tie ressorteren, kunt u tegen facturatie ingezonden apparaten voeren wij door ons servicecenter laten doorvoe- gratis door. ren. Ons servicecenter maakt graag voor u een bestek op. Wij kunnen apparaten slechts behan- delen indien ze voldoende verpakt en gefrankeerd toegezonden werden. -
Página 59: Foutmeldingen
Foutmeldingen Probleem Mogelijke oorzaak Oplossing van de fout Accu (9) laden (aparte gebruiks- aanwijzing voor accu en lader raad- Accu ( 15) ontladen plegen) Accu (9) aanbrengen (aparte ge- Accu ( 15) niet aange- bruiksaanwijzing voor accu en lader bracht raadplegen) Apparaat start niet Veiligheidsschakelaar... -
Página 60: Intended Purpose
Contents Intended purpose ....... 60 Checking the oil automation ... 70 General description ......61 Working Safelyt ......70 Extent of the delivery ...... 61 Transport ..........71 Sawing techniques ......71 Functional description ....61 Overview ........61 Sawing Off Small Branches .... 71 Technical Data ........ -
Página 61: General Description
Overview The operator or user is responsible for accidents or damage to other persons or their property. 1 Saw chain The manufacturer is not liable for damage 2 Chain bar which is caused through inappropriate use 3 Chain adjustment ring or incorrect operation. -
Página 62: Technical Data
Warning: During actual use of the power Cordless telescopic tool, the vibration emission value pruner ....AKS 2040-21 T Lion Set may differ from the value specified, Motor voltage ........20 V depending on the manner of use of Protection class ........III the power tool. -
Página 63: General Notes On Safety
General notes on safety Caution! Read and take note of the operating manual belonging to the machine! Before you do any work with the Do not expose the machine to the cordless pruner, make yourself rain. Do not allow the equipment to familiar with all operating parts. - Página 64 presence of flammable Iiquids, gases Personal safety: or dust. Power tools create sparks • Stay alert, watch what you are do- which may ignite the dust or fumes. • Keep children and bystanders away ing and use common sense when while operating a power tool.
- Página 65 Power tool use and care: • Carefully inspect the area to be cut and remove all wires or other foreign bodies. • Do not force the power tool. Use the • Hold the power tool only on the in- correct power tool for your applica- sulated handle surfaces, as the saw tion.
-
Página 66: Causes And Operator Prevention Of Kickback
Causes and operator and position your body and arm to prevention of kickback allow you to resist kickback forces. Kickback forces can be controlled by the Beware of kickback! Be careful of operator, if proper precautions are taken. kickback of the machine during Do not let go of the chain saw. -
Página 67: Residual Risks
for transporting the cordless pruner. If • In the event that the cutting attach- dropped, check the equipment for sig- ment becomes jammed or stuck in the nificant damage or defects. branches, do not attempt to free the • Never start the cordless pruner before equipment with the use of force. -
Página 68: Fitting The Saw Chain And Blade
Tensioning the saw chain interlocking the two, ensure that the nose (10a) of the hexagonal aluminium pipe fits into the nut Turn off the appliance and, before (7a) at the end of the arm (see doing any servicing, remove the small image). -
Página 69: Operation
Operation Blade ( 2) and saw chain 1) must always be oiled. Non- When working with the device observance of this will result in increased wear on the blade and wear suitable clothing, work saw chain. gloves, protective headgear and hearing protection and firm A full tank will last for approx. -
Página 70: Adjusting The Telescopic Arm
Adjusting the Telescopic Checking the oil automation Before starting work, check the oil level in The telescopic arm (10) can be infinitely the oil automation system adjusted using quick release (11). 1. Switch the device on and hold it above clear ground. The device 1. -
Página 71: Transport
Transport ble in line with the first cut so that the two cuts meet. • Put on blade cover ( 23). Sawing Off Parts • Ensure that you do not switch on the equipment when carrying it. Sawing techniques Be thoroughly aware of the danger of re- bounding branches. -
Página 72: Maintenance Intervals
Maintenance intervals handles of the appliance. Use a damp cloth or a brush. • Only dry wipe the saw chain. After Carry out the maintenance work listed cleaning, lightly oil the saw chain with in the table below at regular intervals. chain oil. -
Página 73: Maintaining The Blade
Disposal and Maintaining the blade environmental protection The blade must be turned over every 8 - 10 working hours in order to guarantee Be environmentally friendly. Return the even wear (for this, see the “Operation” tool, accessories and packaging to a recy- chapter). -
Página 74: Repair Service
services is that the maintenance intervals, Caution: Please, in no case, send defec- indicated in the operating instruction, have tive devices with filled oil tank. Completely been adhered to and the instructions on empty the tank. Possible material dam- the cleaning, care and maintenance have ages (oil runs out if device is placed on its been followed. -
Página 75: Trouble Shooting
Trouble shooting Problem Possilble cause Fault correction Recharge battery (observe the separate operating ins- Battery ( 15) discharged tructions for the battery and charger) Insert battery (observe the separate operating inst- Appliance won‘t Battery ( 15) not inserted ructions for the battery and start charger) Safety lock (... -
Página 76: Przeznaczenie
Spis treści Przeznaczenie ........76 Sprawdzanie układu Opis ogólny ......... 77 automatycznego oleju ...... 87 Zakres dostawy ........ 77 Bezpieczna praca ......87 Transport ..........88 Opis działania ........77 Przegląd ........... 77 Techniki piłowania ......88 Dane techniczne ......... 78 Odcinanie małej gałęzi ..... -
Página 77: Opis Ogólny
mercyjnego. W przypadku użytkowania towo-jonowy i szybką ładowarkę. Funkcje komercyjnego wygasają prawa z tytułu elementów obsługowych podano w poniż- gwarancji. szych opisach. Urządzenie przeznaczone jest do użytku Przegląd przez osoby dorosłe. Młodzież do 16 roku życia może korzystać z urządzenia wy- łącznie pod nadzorem dorosłych. -
Página 78: Dane Techniczne
Dane techniczne Ostrzeżenie: Wartość emisji drgań może się Teleskopowa podkrzesywarka podczas pracy różnić od podanej, akumulatorowa ..AKS 2040-21 T Lion Set zależnie od sposobu używania Napięcie silnika......20 V elektronarzędzia. Klasa zabezpieczenia ......III Proszę spróbować maksymalnie Typ zabezpieczenia ......IPX0 ograniczyć narażenie na wibracje. -
Página 79: Symbole I Piktogramy
Symbole i piktogramy Jedna pojemność zbiornikawy starcza na ok. 15 minut ciągłej pra- Symbole na urządzeniu cy. Sprawdzaj regularnie poziom oleju. Symbole w instrukcji obsługi Symbol niebezpieczeństwa z informacjami na temat ochrony osób i zapobiegania szkodom materialnym. Uwaga! Znak nakazu (w miejscu wykrzyk- Przeczytaj instrukcję... - Página 80 Zachowaj wszystkie zasady bezpie- nie się wody do wnętrza narzędzia elek- czeństwa i instrukcje na przyszłość. trycznego zwiększa ryzyko porażenia Użyte w zasadach bezpieczeństwa po- prądem. jęcie „narzędzie elektryczne“ dotyczy • Nie używaj kabla do przenoszenia narzędzi elektrycznych zasilanych prądem narzędzia elektrycznego, do jego za- wieszania ani do wyciągania wtyczki sieciowym (za kablem sieciowym) oraz...
- Página 81 rzędzia elektrycznego do źródła za- gnij wtyczkę z gniazdka. Ten środek silania i/lub baterii, przed jej podnie- ostrożności uniemożliwi przypadkowe sieniem i przeniesieniem upewnij się, uruchomienie narzędzia elektrycznego. że jest ona wyłączona. Jeżeli podczas • Przechowuj nieużywane narzędzie przenoszenia narzędzia elektrycznego elektryczne w niedostępnym dla dzieci miejscu.
-
Página 82: Środki Ostrożności Przeciwko Odrzutom
Środki ostrożności przeciwko pięciem może spowodować przepływ odrzutom prądu także do metalowych części urządzenia i spowodować porażenie elektryczne. Uwaga odrzut! Uwaga - podczas pracy uważaj na odrzuty maszy- Uważne obchodzenie się z urządzenia- ny. Niebezpieczeństwo zranienia. mi napędzanymi akumulatorami i ich Odrzutów możesz unikać... -
Página 83: Dalsze Zasady Bezpieczeństwa
Dalsze zasady bezpieczeństwa trycznego. Odrzutom można zapobiegać stosując odpowiednie, opisane niżej środ- ki ostrożności: • Urządzenie, zestaw tnący i osłonę mie- cza utrzymywać w dobrym stanie, aby • Trzymaj pilarkę obiema dłońmi, przy uniknąć obrażeń. czym kciuk i palce muszą obejmo- •... -
Página 84: Zagrożenia Ogólne
Instrukcja montażu • Podczas zmiany stanowiska pracy zwracać uwagę na to, by urządzenie było wyłączone, a palce nie dotykały Przed wykonaniem wszelkich prac włącznika. Urządzenie nosić z łańcu- przy urządzeniu wyłączyć urządze- chem i mieczem skierowanym do tyłu. nie i wyjąć akumulator. Do transportu urządzenia zakładać... -
Página 85: Napinanie Łańcucha Tnącego
3. Włożyć łańcuch tnący (1) w ro- Przed każdym włączeniem okrze- wek miecza. sywarki sprawdź napięcie łańcu- 4. Obrócić pierścień napinający cha tnącego. łańcuch (3) na osłonie koła łańcuchowego (6) w kierunku • Łańcuch tnący (1) jest napięty pra- przeciwnym do kierunku wska- widłowo, gdy nie zwisa z miecza, ale zówek zegara, do momentu w daje się... -
Página 86: Obsługa
Jedna pojemność zbiornikawy Włącznik/wyłącznik oraz wyłącz- starcza na ok. 15 minut ciągłej pra- nik bezpieczeństwa nie mogą być zablokowane. Po zwolnieniu cy. Sprawdzaj regularnie poziom oleju. włącznika należy wyłączyć sil- nik. W przypadku uszkodzenia jednego z przełączników nie Okrzesywarka jest wyposażona w automa- tyczny układ oliwienia. -
Página 87: Ustawienie Głowicy Tnącej Pod Kątem
jego wsuwanie i wyciąganie. 2. Jeśli pojawi się smuga oleju, oznacza 2. Przechyl dźwignię (11) z powrotem, to, że urządzenie pracuje prawidłowo. blokując w ten sposób żądaną pozycję 3. Jeśli nie pojawi się smuga oleju, nale- teleskopu. ży wyczyścić kanał wypływu oleju 28) lub oddać... -
Página 88: Transport
Transport leży wykonać od góry, możliwie w jednej linii z nacięciem wstępnym, tak, aby oba • W czasie transportu używaj osłony cięcia się połączyły. miecza ( 23). Odcinanie w kawałkach • Uważaj, żeby nie włączyć urządzenia przy przenoszeniu. Techniki piłowania Zawsze pamiętaj o możliwości odrzucenia gałęzi. -
Página 89: Czyszczenie
Czyszczenie 3. Zdjąć stary łańcuch ( Nie używaj środków czyszczących Montaż i napinanie nowego łańcucha opi- ani rozpuszczalników. Mógłbyś sano w rozdziale „Montaż“. w ten sposób nieodwracalnie Konserwacja miecza uszkodzić urządzenie. Substan- cje chemiczne mogą zaatakować elementy urządzenia wykonane z Miecz należy obracać... -
Página 90: Częstotliwość Konserwacji
Częstotliwość konserwacji Wymienione w tabeli czynności konser- • Sprawdź pokrywy i urządzenia wacyjne należy wykonywać regularnie. ochronne pod względem uszkodzeń, Regularna konserwacja przedłuża trwałość właściwego zamocowania. W razie urządzenia. Ponadto dzięki niej uzyskuje się potrzeby dokonaj ich wymiany. optymalną wydajność i unika wypadków. Tabela przerw między konserwacjami Przed każ- Po 10 godz. -
Página 91: Gwarancja
Serwis naprawczy • Utylizację przesłanych nam uszko- dzonych urządzeń przeprowadzamy bezpłatnie Naprawy nie objęte gwarancją można zlecać odpłatnie naszemu centrum ser- Gwarancja wisowemu. Centrum serwisowe chętnie sporządzi odpowiedni kosztorys. Przyj- Na niniejsze urządzenie udzielamy mujemy tylko urządzenia nadesłane w 24-miesiącznej gwarancji. W przypadku odpowiednim opakowaniu z opłaceniem użytkowania zarobkowego i urządzeń... -
Página 92: Części Zamienne/Akcesoria
Części zamienne/Akcesoria Części zamienne i akcesoria można zakupić na www.grizzlytools-service.eu W razie kolejnych pytań należy zwracać się do „Service-Center” (patrz „Service-Center”). Pos. Pos. Oznaczenie Nr. katalogowe Instrukcja Rysunek samo- obsługi rozwijający Nr. 47 Osłona koła łańcucha (zestaw) 9110 5776 Nr. 91/92/93 Zbiornika oleju (zestaw) 9110 5772 Nr. -
Página 93: Odszukiwanie Błędów
Odszukiwanie błędów Problem Możliwa przyczyna Sposób usunięcia Naładuj akumulator (przestrze- Rozładowany akumulator gaj oddzielnej instrukcji obsługi akumulatora i ładowarki) Włóż akumulator (przestrzegaj W urządzeniu nie ma akumula- oddzielnej instrukcji obsługi Urządzenie nie daje tora ( akumulatora i ładowarki) się uruchomić Wyłącznik bezpieczeństwa 17) nie jest prawidłowo wci- Włącz (patrz „Uruchamianie“) -
Página 94: Účel Použití
Obsah Účel použití ......... 94 Zapnutí a vypnutí ......105 Všeobecný popis ........ 95 Kontrola olejové automatiky ... 105 Objem dodávky ........ 95 Práce s přístrojem ......105 Techniky řezání ......... 105 Popis funkcí ........95 Přehled ..........95 Odříznutí malé větve ...... 105 Technické... -
Página 95: Všeobecný Popis
Přehled Tento přístroj není určený pro komerční vyu- žití. Při komerčním použití záruka zanikne. Přístroj je určen pro dospělé osoby. Oso- 1 řetěz pily by mladší 16 let smí přístroj používat jen 2 meč (vodicí kolejnice) pod dohledem. 3 Napínací prstenec řetězu Obsluhující... -
Página 96: Technické Údaje
Akumulátorový teleskopický elektrického nářadí lišit od uvedené odvětvovač pro práci hodnoty, v závislosti na způsobu, ve výškách ..AKS 2040-21 T Lion Set kterým se elektrické nářadí používá. Napětí ...........20 V Existuje nutnost stanovit bezpeč- Třída ochrany ........III nostní... -
Página 97: Všeobecné Bezpečnostní Pokyny
Pozor! Informační značka s informacemi Před použitím přístroje si pozorně pře- pro lepší manipulaci s přístrojem. čtěte návod k obsluze. Všeobecné bezpečnostní Nůžky na plot nepoužívejte v dešti, pokyny anebo na mokrých živých plotech. Nebezpečí úrazu v důsledku odmrš- těných dílů a padajících předmětů. Před prací... - Página 98 zamotané kabely zvyšují riziko elek- Bezpečnost pracoviště: trického úderu. Když pracujete s elektrickým ná- • Udržujte svůj pracovní úsek čistý a • strojem pod širým nebem, pak po- dobře osvětlený. Nepořádek anebo užívejte pouze prodlužovací kabely, neosvětlené pracovní oblasti mohou které...
- Página 99 • Odstraňte nastavovací nářadí nejsou obeznámené anebo tyto po- anebo šroubováky předtím, než kyny nečetly. Elektrické nástroje jsou elektrický nástroj zapnete. Nářadí nebezpečné, když je používají nezku- anebo klíč, který se nachází v šené osoby. otáčející se části nástroje, může vést •...
-
Página 100: Bezpečnostní Opatření Proti Zpětnému Nárazu
Bezpečnostní opatření proti PEČLIVÉ ZACHÁZENÍ S AKUMULÁTO- zpětnému nárazu ROVÝMI NÁSTROJI A JEJICH POUŽÍVÁNÍ • Nabíjejte akumulátory pouze v Pozor na zpětný náraz! Při práci nabíjecích přístrojích, které jsou může dojít ke zpětnému nárazu výrobcem doporučené. U nabíjecího stroje. Existuje nebezpečí zranění. přístroje, který... -
Página 101: Další Bezpečnostní Pokyny
Nespoléhejte se výlučně na bezpečnostná • Noste ochranné brýle a ochranu slu- zařízení zabudovaná do řetězové pily. chu. Doporučuje se další ochranná Jakožto uživatel řetězové pily byste měl výstroj pro hlavu, ruce, nohy a cho- učinit rozličná opatření, abyste mohl pra- didla. -
Página 102: Zbývající Rizika
Návod k montáži skrytými elektrickými vedeními anebo síťovým kabelem přístroje. Kontakt řetězu s vedením pod napětím může Před jakoukoliv prací na přístroji uvést kovové části přístroje pod napětí vypněte přístroj a vytáhněte aku- a způsobit úraz elektrickým proudem. mulátor z přístroje •... -
Página 103: Napnutí Pilového Řetězu
4 Otáčejte upínacím kroužkem 1 Povolte upevňovací šroub ( řetězu (3) na krytu řetězového 2 Držte vodicí lištu pevně za špičku. kola (6) proti směru hodinových K upnutí pily otočte upínací kroužek ručiček tak dlouho, dokud obě řetězu (3) ve směru hodinových značky neukazují... -
Página 104: Obsluha
• Používejte biologický řetězový olej s 2. Pro vyjmutí akumulátoru (15) z pří- obsahem přísad ke snižování tření a stroje stiskněte tlačítko pro odbloková- opotřebení. Olej lze objednat v našem ní (16) na akumulátoru a akumulátor servisním centru. vytáhněte. • Nemáte-li k dispozici biologický... -
Página 105: Zapnutí A Vypnutí
Zapnutí a vypnutí • Nepoužívejte přístroj při práci na žeb- říku nebo na nestabilním místě. Dbejte na bezpečný postoj a držte • Nenechte se zlákat k provedení ne- přístroj pevně oběma rukama a s uváženého řezu. Mohli byste ohrozit odstupem od Vašeho těla. Před za- sami sebe nebo ostatní... -
Página 106: Odřezání Větších Větví
Údržba a čištění hadnete její velikost a hmotnost. Vždy věnujte pozornost odpadávajícímu odřezanému větvoví. Údržba a čištění Opravářské a údržbářské práce, které v tomto návodu nejsou po- Odřezání větších větví psány, přenechejte některému námi autorizovanému servisnímu středisku. Používejte jen originální díly. -
Página 107: Intervaly Údržby
Intervaly údržby Provádějte pravidelně údržbářské práce • Zkontrolujte celistvost a správné osa- uvedené v následující tabulce. Pravidel- zení všech krytů a ochranných zaříze- nou údržbou Vaší řetězové pily se prodlou- ní. V případě potřeby je vyměňte. ží její životnost. Navíc docílíte optimálních řezných výkonů... -
Página 108: Uložení
Záruka 4. K zajištění bezporuchového, au- tomatického olejování pilového řetězu během provozu vyčistěte Na tento přístroj poskytujeme 24 měsíční propust oleje (28). záruku. Pro užívání k podnikatelským účelům a pro vyměňovací zařízení platí 5. Namontujte meč, pilový řetěz a kryt podle zákonných ustanovení... -
Página 109: Opravy Služby
Opravy Služby Opravy, na které se nevztahuje záruka, olej, je-li přístroj polo-žen na boku anebo můžete nechat provést po kalkulaci pro- svisle!) anebo škody následkem požáru vedené v našem Service-Center. Rádi během dopravy jdou k tíži odesílatele. vám zde připravíme předběžný rozpočet V případě... -
Página 110: Detekce Poruch
Detekce poruch Problém Možná příčina Odstranění chyby Nabíjení baterie (dodržujte sa- mostatný návod k obsluze pro Akumulátor ( 15) je prázdný akumulátor a nabíječku) Vložte baterii (dodržujte sa- mostatný návod k obsluze pro Akumulátor ( 15) není vložen akumulátor a nabíječku) Přístroj nestartuje Zapněte přístroj (viz Bezpečnostní... -
Página 111: Naudojimas Pagal Paskirtį
Turinys Naudojimas pagal paskirtį ....111 Įjungimas ir išjungimas ....121 Bendrasis aprašymas .......112 Automatinės tepimo sistemos Pristatomas komplektas ....112 patikrinimas ........121 Veikimo aprašymas ......112 Darbas su prietaisu ......121 Apžvalga .........112 Gabenimas ........122 Techniniai duomenys ......113 Pjovimo metodai ....... 122 Saugos nurodymai ......113 Smulkių... -
Página 112: Bendrasis Aprašymas
Apžvalga Prietaisą gali naudoti tik suaugusieji. 16 metų neturintys jaunuoliai prietaisą gali naudoti tik prižiūrimi suaugusiųjų. Gamin- 1 Pjūklo grandinė tojas neatsako už žalą, atsiradusią dėl 2 Geležtė (kreiptuvas) naudojimo ne pagal paskirtį arba netinka- 3 Grandinės įtempimo žiedas mo valdymo. 4 Atraminiai nagai 5 Grandinės krumpliaračio Bendrasis aprašymas... -
Página 113: Techniniai Duomenys
Techniniai duomenys Įspėjimas: naudojant elektrinį įrankį tikroji Akumuliatorinė teleskopinė vibracijos emisijos vertė gali skirtis aukštapjovė ..AKS 2040-21 T Lion Set nuo nurodytosios, nes ji priklauso įtampa, ..........20 V nuo elektrinio įrankio naudojimo Apsaugos klasė ........III būdo. Apsaugos laipsnis......IPX0 Stenkitės kuo labiau sumažinti... -
Página 114: Paveikslėliai / Simboliai
Paveikslėliai / simboliai Instrukcijoje naudojami simboliai Paveikslėliai ant prietaiso Pavojaus ženklas su duomenimis, kaip išvengti žalos žmonėms ir ma- terialiniam turtui Privalomasis ženklas (vietoje žen- klo su šauktuku pateiktas reikalavi- mas) su duomenimis, kaip išvengti žalos materialiniam turtui Informacinis ženklas, kuriame pa- Dėmesio! teikiama informacijos, kaip geriau Perskaityti naudojimo instrukciją! -
Página 115: Bendrieji Saugos Nurodymai Dėl Darbo Su Elektriniais Įrankiais
Bendrieji saugos nurodymai • Venkite kūno sąlyčio su įžemintais dėl darbo su elektriniais paviršiais, pvz., vamzdžiais, šildy- įrankiais tuvais, viryklėmis ir šaldytuvais. Jei jūsų kūnas įžemintas, didėja elektros ĮSPĖJIMAS! Perskaitykite visus smūgio rizika. saugos nurodymus ir instrukci- • Saugokite elektrinius įrankius nuo jas. - Página 116 ginys išjungtas, galite elektrinį įrankį žinę arba neperskaitė šių instrukcijų. jungti prie elektros tinklo, jį kelti ar Elektriniai įrankiai yra pavojingi, kai juos nešti. Jei nešdami elektrinį įrankį pirštą naudoja nepatyrę asmenys. laikote ant jungiklio arba jei prijungiamas • Kruopščiai prižiūrėkite elektrinius prie elektros šaltinio įrenginys yra įjung- įrankius.
-
Página 117: Apsaugos Nuo Atatrankos Priemonės
• Elektrinius įrankius naudokite tik su • Kreiptuvo viršūnei prisilietus prie kokio jiems skirtais akumuliatoriais. Naudojant nors objekto, kreiptuvas gali netikėtai kitokius akumuliatorius, iškyla sužaloji- atšokti ir imti judėti aukštyn naudotojo mo ir gaisro pavojus. link (žr. a pav.). • Nelaikykite arti nenaudojamo akumulia- •... -
Página 118: Papildoma Saugos Informacija
• Nepjaukite geležtės galu (žr. b pav.). • Kiekvieno pjūvio metu tvirtai įremkite at- Gresia atatrankos pavojus. raminius nagus ir tada pradėkite pjauti. • Įsitikinkite, kad ant žemės neguli • Būkite ypač atsargūs, kai pjaunate ne- jokių daiktų, ant kurių jūs galite su- didelius krūmus ir šakas. -
Página 119: Pjūklo Grandinės Ir Geležtės Surinkimas
Įrenginio montavimas 7. Uždėkite žvaigždutės gaubtą 1. Sujunkite teleskopinio koto (10) (6). Tam pirmiausia gaubto šešiakampio aliuminio vamz- išsikišimą įkiškite į tam skirtą džio galą su koto galu žemiau įrankio įrantą. Tvirtinimo varžtą pjovimo galvutės (7), kad užsi- (5) tik šiek tiek priveržkite, nes fiksuotų. -
Página 120: Grandinės Sutepimas
Grandinės sutepimas 2. Jei reikia, nuvalykite išlaistytą bio- loginę grandinės alyvą ir uždarykite Prieš įpildami grandinės aly- alyvos bakelio dangtelį (21). vą visada išjunkite prietaisą ir leiskite varikliui atvėsti. Dėl per Atkreipkite dėmesį, kad iš pjūklo kraštus išsiliejusios grandinės gali išsiskirti alyva. alyvos gresia gaisro pavojus. -
Página 121: Pečių Diržo Tvirtinimas / Nustatymas
Pečių diržo tvirtinimas / atstumu nuo savo kūno. Prieš nustatymas įjungdami įrenginį, įsitikinkite, kad jis prie nieko nesiliečia. 1. Pritvirtinkite per petį dėvimo diržo (25) karabino kablį už nešimo kilpos (14) 1. Paspauskite apsauginį jungiklį ( ant įrenginio koto. ir įjunkite prietaisą įjungimo / išjungimo 2. -
Página 122: Gabenimas
Stambių šakų pjovimas • Reguliariai keiskite savo darbinę padėtį. Ilgai naudojant prietaisą dėl vibracijos gali sutrikti rankų kraujotaka. Vis dėlto darbo trukmę galite pailginti naudodami tinkamas apsaugines pirštines arba da- rydami reguliarias pertraukas. Atkreipkite dėmesį, kad asmeninis blogos kraujota- kos paveldimumas, žemos lauko tem- peratūros arba didelės griebimo jėgos darbo metu sutrumpina darbo trukmę. -
Página 123: Valymas
priežiūros ar valymo darbus pa- 1. Išjunkite prietaisą ir prieš visus darbus laukite, kol mašina atvės. Gresia išimkite akumuliatorių iš prietaiso. pavojus nusideginti! 2. Atlaisvinkite ir nuimkite geležtės tvirti- nimo varžtą ( 5) ir grandinės krum- Išjunkite prietaisą ir prieš visus pliaračio dangtelį... -
Página 124: Techninės Priežiūros Intervalai
Techninės priežiūros intervalai Reguliariai atlikite lentelėje nurodytus • Patikrinkite uždangalus ir apsauginius techninės priežiūros darbus. Reguliariai įtaisus, ar jie nepažeisti ir tinkamai pri- atlikdami techninę priežiūrą galite pailginti tvirtinti. Prireikus juos pakeiskite. prietaiso naudojimo trukmę. Be to, pa- sieksite optimalų pajėgumą ir išvengsite nelaimingų... -
Página 125: Garantija
Remonto tarnyba Apie tai teiraukitės mūsų techninės priežiūros centre. • Jei mums atsiųsite savo sugedusį • Remonto darbus, kuriems nesuteikia- prietaisą, mes jį utilizuosime nemoka- ma garantija, už tam tikrą atlygį galite mai. pavesti atlikti mūsų techninės priežiūros • Nupjautas šakas nuvežkite į kompos- centro darbuotojams. -
Página 126: Atsarginės Dalys/Priedai
Atsarginės dalys/Priedai Atsargines dalis ir priedus galite įsigyti interneto svetainėje www.grizzlytools-service.eu Dėl tolesnių klausimų kreipkitės į „Service-Center„ (žr. „Service-Center„). Poz. Eksploatavimo Poz. Trimatis Aprašymas Straipsnio instrukcija vaizdas numerį Nr. 47 Grandinės krumpliaračio dangtelis (Rinkinys) 9110 5776 Nr. 91/92/93 Bakelis (Rinkinys) 9110 5772 Nr. -
Página 127: Klaidų Paieška
Klaidų paieška Problema Galima priežastis Klaidos šalinimas Įkraukite akumuliatorių Išsikrovęs akumuliatorius (laikykitės atskirų akumulia- toriaus ir įkroviklio naudojimo instrukcijų) Įstatykite akumuliatorių Neįstatytas akumuliatorius (laikykitės atskirų akumulia- Įrenginys neužsi- toriaus ir įkroviklio naudojimo veda instrukcijų) Netinkamai nuspaustas apsau- Įjunkite (žr. „Eksploatacijos ginis jungiklis ( pradžia“) Sugedęs įjungimo / išjungimo... -
Página 128: Scopo Di Impiego
Contenuto Scopo di impiego ......128 Accensione/Spegnimento ....139 Descrizione generale......129 Controllo dell’automatismo dell’olio ... 139 Contenuto della confezione ... 129 Uso dell‘apparecchio ...... 139 Trasporto ........... 140 Descrizione delle funzionalità ..129 Illustrazione ........129 Tecniche di segatura ......140 Dati tecnici ........ -
Página 129: Descrizione Generale
L’apparecchio è destinato all’uso da parte Le funzioni dei vari elementi si possono di persone adulte. I giovani al di sopra dei apprendere dalle descrizioni seguenti. 16 anni potranno utilizzare l’apparecchio Illustrazione solo sotto sorveglianza di un adulto. L’utente che mette in funzione ed in uso l’apparecchio è... -
Página 130: Dati Tecnici
Avvertenza: Durante l’uso effettivo dell’appa- Potatore telescopico recchio elettrico, il livello di emis- a batteria..AKS 2040-21 T Lion Set sione di vibrazioni può differire da Tensione del motore ..... 20 V quello indicato a seconda della Classe di protezione ......III tipologia e della modalità... -
Página 131: Simboli E Pittogrammi
Simboli e pittogrammi Il riempimento del serbatoio è suf- ficiente per ca. 15 minuti di eserci- Simboli grafici sull’apparecchio zio permanente. Simboli riportati nelle istruzioni Simboli di pericolo con indica- zioni relative alla prevenzione di danni a cose e persone. Simboli di divieto (al posto del 1 Attenzione! punto esclamativo il divieto viene... -
Página 132: Indicazioni Di Sicurezza Generali Per Utensili Elettrici
Indicazioni di sicurezza re un adattatore insieme a utensili generali per utensili elettrici collegati a massa. Spine non elettrici modificate riducono il rischio di scosse elettriche. ATTENZIONE! Leggere tutte • Evitare il contatto del corpo con le indicazioni di sicurezza e le superfici collegate a massa, come istruzioni. - Página 133 • Indossare un‘attrezzatura di sicurez- USO E TRATTAMENTO za personale e sempre occhiali pro- DELL‘UTENSILE ELETTRICO tettivi. Indossando un‘attrezzatura di sicurezza personale, come maschera • Non sovraccaricare l‘apparecchio. antipolvere, scarpe di sicurezza anti- Usare l‘utensile elettrico destinato al tipo di lavoro da svolgere. Con scivolo, casco o protezione dell‘udito a seconda dell‘impiego dell‘utensile elet- l‘utensile elettrico adatto si lavora in...
-
Página 134: Utilizzare E Maneggiare Gli Utensili A Batteria Con Cautela
• Usare l‘utensile elettrico, gli acces- tra negli occhi consultare un medico. sori e i ricambi ecc. conformemente Il liquido fuoriuscito dalla batteria può alle istruzioni. A tale proposito tene- causare irritazioni cutanee o ustioni. re in considerazione le condizioni di lavoro e l‘attività... -
Página 135: Ulteriori Informazioni Di Sicurezza
• Ciascuna di queste reazioni può com- • Non segare con la punta della lama portare la perdita del controllo della (vedere imm. b) oppure al di sopra delle proprie spalle. Pertanto non sega e causare lesioni gravi. Non fare affidamento esclusivamente ai dispositi- sporgersi troppo in avanti durante l’ope- vi di sicurezza montati nella motosega. -
Página 136: Rischi Residui
chio. Il contatto della catena della sega alla tipologia costruttiva e al tipo di esecu- con una conduttura conduttiva può zione di questo elettrodomestico: mettere in tensione le parti metalliche a) Lesioni da taglio dell’apparecchio e provocare scosse b) Danni all‘udito, qualora non venga in- elettriche. -
Página 137: Montaggio Della Catena Della Sega E Della Lama
Montaggio della catena della Tensione della catena sega e della lama trinciante Disattivare l‘apparecchio e, prima Disattivare l‘apparecchio e, prima di iniziare qualsiasi lavoro, rimuo- di iniziare qualsiasi lavoro, rimuo- vere la batteria dall‘apparecchio vere la batteria dall‘apparecchio stesso. stesso. 1. -
Página 138: Lubrificazione Della Catena
Lubrificazione della catena 1. Svitare il coperchio del oblò livello dell’olio (21) e versare l’olio biologico Spegnere l’apparecchio e lascia- per catene nel serbatoio. re raffreddare il motore prima di 2. Rimuovere l’eventuale olio che è fuo- rabboccare l’olio per catene. Un riuscito con una pezza e richiudere il eventuale trabocco può... -
Página 139: Fissaggio E Regolazione Della Tracolla
Fissaggio e regolazione mantenendolo a distanza dal corpo. della tracolla Prima di accenderlo, assicurarsi che l‘apparecchio non sia a contat- 1. Fissare i ganci a moschettone della to con altri oggetti. tracolla (25) agli occhielli (14) del ma- nico telescopico dell’apparecchio. 1. -
Página 140: Trasporto
• Non eseguire mai tagli in modo avven- Fare attenzione all‘eventuale rottura anti- tato. Potreste mettere a rischio l’incolu- cipata del ramo, nel caso in cui avete cal- mità vostra e di altre persone. colato male la dimensione e il peso. •... -
Página 141: Manutenzione E Pulizia
post-affilatura di una catena richiede un Manutenzione e pulizia certo esercizio. In caso di dubbio sostitui- re la catena. Per i lavori di riparazione e manu- tenzione non descritti nelle presen- Sostituzione della catena ti istruzioni chiedere l’intervento del nostro Centro Assistenza. Usare solo componenti originali. -
Página 142: Intervalli Di Manutenzione
Intervalli di manutenzione 5. Montare la lama, la catena e la schermatura rocchetto e rimettere in tensione la catena Effettuare il lavori di manutenzione ripor- (vedere il capitolo “Istruzioni di tati nella seguente tabella ad intervalli montaggio”). regolari. Con una manutenzione ad inter- valli regolari della vostra sega a catena In caso di stato ottimale dei pas- si prolunga la durata della sega. -
Página 143: Garanzia
Servizio di riparazione Le apparecchiature non si devono smaltire insieme ai rifiuti domestici. • Le riparazioni che non siano coperte • Consegnare l‘apparecchio e il cari- da garanzia potranno essere esegui- cabatterie a un centro di riciclaggio. te a pagamento dal nostro Centro di I componenti in plastica e metallo Assistenza tecnico. -
Página 144: Pezzi Di Ricambio / Accessori
Pezzi di ricambio / Accessori È possibile ordinare pezzi di ricambio e accessori all’indirizzo www.grizzlytools-service.eu Per ulteriori domande rivolgersi al “Service-Center” (vedere “Service-Center”). Position Position Denominazione Numeri Istruzioni Disegno d’ordine per l’uso esploso Nr. 47 Schermatura rocchetto (kit) 9110 5776 Nr. -
Página 145: Ricerca Di Guasti
Ricerca di guasti Problema Possibile causa Rimedio Ricaricare la batteria (attenersi alle istruzioni per l’uso separate Batteria ( 15) scarica per batteria e caricabatterie) Inserire la batteria (attenersi alle istruzioni per l’uso separate per Batteria ( 15) non inserita L’apparecchio non batteria e caricabatterie) (vede- parte re „Comando“) -
Página 146: Používanie Na Určený Účel
Obsah Používanie na určený účel....146 Zapnutie a vypnutie ......156 Všeobecný opis ........ 147 Kontrola automatiky oleja ....157 Rozsah dodávky ......147 Práca s prístrojom ......157 Preprava ..........157 Opis funkcie ........147 Prehľad .......... 147 Techniky pílenia ........ 157 Technické... -
Página 147: Všeobecný Opis
Prehľad nad 16 rokov môžu zariadenie používať len pod dohľadom. Obsluhujúci alebo používateľ je zod- 1 Pílová reťaz povedný za zranenia iných ľudí alebo 2 Lišta (vodiaca koľajnička) poškodenia ich majetku. 3 Upínací krúžok reťaze Výrobca neručí za škody, ktoré vzniknú 4 Doraz zubov iným používaním než... -
Página 148: Technické Údaje
Zaťaženie spôsobené vibráciami sa pokúste udržať tak malé, ako Akumulátorový teleskopický je to možné. Príkladné opatrenia odvetvovač ..AKS 2040-21 T Lion Set na zníženie zaťaženia vibráciami Napätie motora ......20 V je nosenie rukavíc pri používaní Trieda ochrany ........III nástroja a obmedzenie pracovné-... -
Página 149: Všeobecné Bezpečnostné Pokyny
Pozor! Upozorňovacia značka s informáci- Prečítajte si návod na obsluhu! ami pre lepšiu manipuláciu s príst- Stroj nevystavujte dažďu. Prístroj rojom. nesmie byť ani vlhký, ani sa nesmie Všeobecné Bezpečnostné prevádzkovať vo vlhkom prostredí. pokyny Nebezpečenstvo poranenia v dôsled- ku vymrštených dielov a spadnutých predmetov. - Página 150 • Nepoužívajte kábel na iný účel vzťahuje na elektrické náradie pripojené ako nosenie elektrického náradia, na elektrickú sieť (so sieťovým káblom) a zavesenie alebo vytiahnutie elektrické náradie pripojené na akumulá- zástrčky zo zásuvky. Kábel držte tor (bez sieťového kábla). mimo dosahu tepla, oleja, ostrých Bezpečnosť...
- Página 151 Ak pri prenášaní elektrického náradia • Nepoužívané elektrické náradie máte prst na vypínači alebo je prístroj uschovajte mimo dosahu detí. Nen- echajte používať prístroj osoby, pripojený na zdroj prúdu, môže to spôsobiť úraz. ktoré s týmto nie sú oboznámené • Skôr ako zapnete elektrické...
-
Página 152: Preventívne Bezpečnostné Opatrenia Proti Spätnému Rázu
Preventívne bezpečnostné Servis: opatrenia proti spätnému rázu Elektrické náradie nechajte opraviť • len kvalifikovaným odborným Pozor, spätný ráz! Pri práci dávaj- personálom a len s originálny- te pozor na spätný ráz prístroja. mi náhradnými dielmi. Tým sa Existuje nebezpečenstvo pora- zabezpečí, že bezpečnosť... -
Página 153: Ďalšie Bezpečnostné Pokyny
Ďalšie bezpečnostné pokyny Spätný ráz je dôsledkom nesprávneho alebo chybného používania elektrického náradia. Môže sa mu zabrániť vhodným • Prístroj, rezaciu súpravu a ochranný preventívnym opatrením, ako je nižšie obal na lištu udržiavajte v dobrom opísané: technickom stave, aby ste predišli zra- •... -
Página 154: Zostatkové Riziká
Montáž nedotýkal vypínača zap/vyp. Prístroj noste s pílovou reťazou a lištou nas- merovanými dozadu. Na prepravu Vypnite prístroj a pred všetkými upevnite ochranný kryt lišty. prácami vyberte akumulátor z • Pri každom reze nasaďte pevne doraz prístroja. zubov a až potom začnite s pílením. •... -
Página 155: Napnutie Pílovej Reťaze
4. Otočte upínací krúžok reťaze Uvoľnite upevňovaciu skrutku ( (3) na kryte reťazového kolesa Lištu držte pevne za hrot. Na napnutie (6) proti smeru hodinových píly otočte upínací krúžok reťaze (3) ručičiek, až budú obidve značky v smere hodinových ručičiek. Na ukazovať... -
Página 156: Obsluha
Upevnenie/nastavenie • Používajte bioolej, prísady na zníže- nosného popruhu nie trenia a opotrebenia. Môžete ho objednať cez naše servisné centrum. • Keď bioolej nie je k dispozícii, použitie 1. Upevnite karabínku nosného popruhu olej na mazanie reťaze s malým po- (25) na nosnom oku (14) na telesko- dielom adhéznych prísad. -
Página 157: Kontrola Automatiky Oleja
1. Stlačte bezpečnostný vypínač ( • Deti majú byť pod dohľadom, aby sa a prístroj zapnite vypínačom zap/vyp ( zabezpečilo, že sa nehrajú s prístro- 18) ein. Eine arretierbare Dauer- jom. betriebsstellung ist aus Sicherheits- • Pravidelne meňte svoju pracovnú gründen nicht möglich. -
Página 158: Odpílenie Veľkých Konárov
Údržba a čistenie Odpílenie veľkých konárov Údržbárske a opravárenské práce, ktoré nie sú uvedené v tomto návode na prevádzku, nechajte vykonať nášmu servisnému centru. Používajte len originálne náhradné diely. Vypnite prístroj a pred všetkými prácami vyberte akumulátor z Pri väčších konároch (Ø 8 – 20 cm) prístroja. -
Página 159: Intervaly Údržby
Intervaly údržby Uvedené údržbárske práce vykonávajte • Skontrolujte kryty a ochranné zariade- pravidelne podľa nasledujúcej tabuľky. Pra- nia vzhľadom na poškodenia a správ- videlnou údržbou vášho prístroja sa predĺži ne osadenie. Prípadne tieto vymeňte. jeho životnosť. Navyše dosiahnete optimál- ne rezné výkony a zabránite úrazom. Tabuľka intervalov údržby Pred Po 10 prevádz-... -
Página 160: Skladovanie
Likvidácia/ochrana 1. Vypnite prístroj a pred všetkými prá- životného prostredia cami vyberte akumulátor z prístroja. 2. Odoberte kryt reťazového kolesa (6), pílovú reťaz (1) a lištu (2) (pozri obrá- Z prístroja vyberte akumulátor a prístroj, starý olej, akumulátor, príslušenstvo a 3. -
Página 161: Opravný Servis
v nedemontovanom stave a s dokladom o V prípade oprávnenej reklamácie sa, zakúpení a záruke. prosím, kontaktujte telefonicky s naším V prípade oprávnenej reklamácie sa, servisným centrom. Tu obdržíte informá- prosím, kontaktujte telefonicky s naším cie o vybavení reklamácie. servisným centrom. Tu obdržíte informá- Pozor: Váš... -
Página 162: Vyhľadávanie Chýb
Vyhľadávanie chýb Problém Možná príčina Odstránenie chyby Nabite akumulátor (zohľadnite samostatný návod na obsluhu Vybitá batéria ( pre akumulátor a nabíjačku) Vložte akumulátor (zohľadnite samostatný návod na obsluhu Batéria ( 15) nie je vložená Prístroj sa nespustí pre akumulátor a nabíjačku) Zapnutie (pozri „Zapnutie a Bezpečnostný... -
Página 163: Uso Previsto
Contenido Uso previsto ........163 Revisar la función automática Descripción general ......164 del aceite ........174 Volumen de suministro ....164 Funcionamiento del aparato ..175 Transporte ......... 175 Descripción del funcionamiento ..164 Vista general ........164 Técnicas de poda ......175 Datos técnicos ........ -
Página 164: Descripción General
extingue la garantía. mando se explica a continuación en las El aparato está destinado para el uso por siguientes descripciones. personas mayores de edad. Jóvenes mayo- Vista general res de 16 años están exclusivamente autori- zados para usar el aparato bajo vigilancia. El operador o usuario será... -
Página 165: Datos Técnicos
Aviso: El índice de emisión de vib- raciones indicado puede diferir del Podadora telescópica valor reseñado cuando se usa efec- a batería ... AKS 2040-21 T Lion Set tivamente esa herramienta eléctrica Tensión .......... 20 V y según cómo se utilice. -
Página 166: Símbolos Y Pictogramas
Símbolos y pictogramas El depósito tiene capacidad para funcionamiento continuo de unos Símbolos en el aparato 15 minutos. Símbolos en las instrucciones Símbolos de riesgo con indica- ciones para prevención de da- ños personales y materiales. Señal prescriptiva (a diferencia de la ¡Atención! señal de exclamación, la prescripción Lea atentamente las instrucciones de... -
Página 167: Instrucciones Generales De Seguridad Para Herramientas Eléctricas
Instrucciones generales de dores junto a aparatos eléctricos con seguridad para herramientas toma de tierra. Los enchufes genuinos y eléctricas las cajas de empalme adecuadas dismi- nuyen el riesgo de descarga eléctrica. ADVERTENCIA: Lea todas las • Evite el contacto físico con superficies instrucciones de seguridad y de puestas a tierra como tuberías, cale- procedimiento. - Página 168 • Lleve un equipo protector personal • No utilice herramientas eléctricas que y siempre unas gafas protectoras. tengan el interruptor defectuoso. Las Al llevar un equipo protector personal, herramientas eléctricas que ya no se como zapatos de seguridad antides- pueden conectar o desconectar son peli- lizantes, casco protector o protección grosas y deben ser reparadas.
- Página 169 • Sujete la herramienta electrónica Asistencia: solo de las zonas de empuñadura aisladas ya que la cadena de la sierra Haga reparar la herramienta eléctrica puede entrar en contacto con cables solamente por personal técnico cuali- de corriente ocultos. El contacto de la ficado y sólo con piezas de recambio originales.
-
Página 170: Medidas Preventivas Contra El Retroceso
• No intente utilizar nunca baterías no El retroceso es consecuencia del mal o recargables. equivocado uso de una herramienta eléctri- ca. Puede evitarse mediante medidas pre- Medidas preventivas contra el ventivas adecuadas como las siguientes: retroceso • Sujetar la sierra con ambas manos, encerrando las asas con el pulgar Existe peligro de retroceso: Al y los dedos. -
Página 171: Riesgos Residuales
especialmente del sable y la sierra. Si el en cuenta el posible retroceso al des- aparato se ha caído, examínelo con res- cender repentinamente la presión de la pecto a daños o defectos. madera. Existe peligro de lesiones. • No arranque el aparato antes de montar •... -
Página 172: Montar La Cadena De Sierra Y La Lanza
Montar el cortasetos 6. Coloque la lanza (2) para el 1. Introduzca el extremo del tubo montaje en un ángulo de aprox. de aluminio hexagonal del palo 45 grados inclinada hacia arriba del telescopio (10) y el extremo y coloque la cadena de sierra del palo por debajo de la boqui- (1) alrededor de la rueda de lla de roscar (7) hasta el tope. -
Página 173: Lubricación De La Cadena
1 Afloje el tornillo de fijación ( Rellenar con bioaceite para 2 Sostenga firmemente la lanza desde cadena: la punta. Para tensar la sierra, gire el anillo tensor (3) en sentido horario. • Revise regularmente los indicadores Para destensarla, gire el anillo tensor de nivel de aceite (22) y añada aceite en sentido contrario a las agujas cuando se alcance la señal mínima de... -
Página 174: Inserción E Extracción De La Batería Recargable
que la tensión de red coincide con 2. Vuelva a colocar la palanca (11) en su los datos indicados en la placa de posición y fije el mango telescópico tipo del aparato. (10) a la longitud de trabajo que desea. Acodar la cabeza de Observe la regulación para la pro- sierra... -
Página 175: Funcionamiento Del Aparato
Transporte 2. Si se puede ver un rastro de aceite, el aparato funciona correctamente. 3. Si no queda rastro de aceite, limpie el • Durante el transporte utilice la funda canal de salida del aceite ( 28) o protectora de lanza ( 23). -
Página 176: Serrado En Trozos
Limpieza El recorte real (véase corte b) se volverá a ha- cer desde arriba formando, si es posible, una línea con el primer corte, para que coincidan. No utilizar detergentes ni disolventes para limpiarlo. Con ello podría dañar Serrado en trozos el aparato de forma irremediable. -
Página 177: Tabla De Intervalos De Mantenimiento
Tabla de intervalos de mantenimiento Antes de Después Parte Acción cada uso de cada uso Comprobar estado, cambiar Máquina completa las piezas dañadas en su caso Tornillos y tuercas accesibles Reapretar Revisar, reemplazar cuando Piñón sea necesario Revisar, reafilar o reemplazar cuando sea necesario Cadena dentada... -
Página 178: Almacenaje
Cuando las bocas de lubricación los polos con una tira adhesiva para pro- están en perfecto estado, la cadena teger la pila de un cortocircuito. No abra de la sierra rocía automáticamente nunca ninguna pila recargable. un poco de aceite unos segundos •... -
Página 179: Servicio De Reparación
Servicio de reparación sido desmontado, y que se devuelva a nuestro Service Center, junto con el res- • Las reparaciones que no estén cubier- guardo de la compra y la garantía. tas por la garantía, pueden ser efectua- No serán aceptados los aparatos en- das por nuestro Service-Center contra viados sin franqueo como mercancía facturación. -
Página 180: Búsqueda De Fallos
Búsqueda de fallos Problema Posible causa Reparación del fallo Cargar la batería (ver “Proce- Batería recargable ( 15) de- so de carga”) scargada Insertar una batería recarga- Batería recargable ( 15) no ble (ver “Manejo”) insertada Aparato no se enci- El interruptor de seguridad ende 17) no se acciona correc-... -
Página 182: Original Eg- Konformitätserklärung
Original EG- Konformitätserklärung Hiermit bestätigen wir, dass die Akku-Teleskop-Hochentaster Baureihe AKS 2040-21 T Lion Set Lot-Nummer B-51399 folgenden einschlägigen EU-Richtlinien in ihrer jeweils gültigen Fassung entspricht: 2006/42/EG • 2014/30/EU • 2000/14/EG • 2005/88/EG • 2011/65/EU* Um die Übereinstimmung zu gewährleisten, wurden folgende harmonisierte Normen sowie nationale Normen und Bestimmungen angewendet: EN ISO 11680-1:2011 •... -
Página 183: Traduction De La Déclaration De Conformité Ce Originale
Traduction de la déclaration de conformité CE originale Nous certifions que le modèle Sécateur télescopique sans fil série AKS 2040-21 T Lion Set numéro de lot B-51399 est conforme aux directives UE actuellement en vigueur: 2006/42/EC • 2014/30/EU • 2000/14/EC • 2005/88/EC • 2011/65/EU* En vue de garantir la conformité... -
Página 184: Vertaling Van De Originele Ce-Conformiteitsverklaring
Vertaling van de originele CE-conformiteitsverklaring Hiermede bevestigen wij dat de Draadloze telescopische hoge snoeischaar bouwserie AKS 2040-21 T Lion Set Lot-nummer B-51399 atitinka toliau nurodytų numatytųjų ES direktyvų galiojantį leidimą: 2006/42/EC • 2014/30/EU • 2000/14/EC • 2005/88/EC • 2011/65/EU* Om de overeenstemming te waarborgen, werden de hierna volgende, in overeenstem- ming gebrachte normen en nationale normen en bepalingen toegepast: EN ISO 11680-1:2011 •... -
Página 185: Translation Of The Original Ec Declaration Of Conformity
Translation of the original EC declaration of conformity We declare that the unit Cordless telescopic pruner model AKS 2040-21 T Lion Set Batch number B-51399 conforms with the following applicable relevant version of the EU guidelines: 2006/42/EC • 2014/30/EU • 2000/14/EC • 2005/88/EC • 2011/65/EU*... -
Página 186: Tłumaczenie Oryginalnej Deklaracji Zgodności We
Tłumaczenie oryginalnej deklaracji zgodności WE Niniejszym oświadczamy, że konstrukcja Teleskopowa podkrzesywarka akumulatorowa typu AKS 2040-21 T Lion Set Numer partii B-51399 spełnia wymogi odpowiednich Dyrektyw UE w ich aktualnie obowiązującym brzmieniu: 2006/42/EC • 2014/30/EU • 2000/14/EC • 2005/88/EC • 2011/65/EU* W celu zapewnienia zgodności z powyższymi dyrektywami zastosowano następujące... -
Página 187: Překlad Originálního Prohlášení O Shodě Ce
Překlad originálního prohlášení o shodě CE Tímto potvrzujeme, že Akumulátorový teleskopický odvetvovac pro práci ve výškách konstrukční řady AKS 2040-21 T Lion Set Číslo šarže B-51399 odpovídá následujícím příslušným směrnicím EU v jejich toho času platném vydání 2006/42/EC • 2014/30/EU • 2000/14/EC • 2005/88/EC • 2011/65/EU* Aby byl zaručen shodnost, bylo použito následujících harmonizovaných- norem jakož... -
Página 188: Vertimas Iš Originalių Eb Atitikties Deklaracija
Vertimas iš originalių EB atitikties deklaracija Šiuo dokumentu mes patvirtiname, kad Akumuliatorine teleskopine aukštapjove Serija AKS 2040-21 T Lion Set Partijos Numeris B-51399 atitinka toliau nurodytų numatytųjų ES direktyvų galiojantį leidimą: 2006/42/EC • 2014/30/EU • 2000/14/EC • 2005/88/EC • 2011/65/EU* Kad būtų... -
Página 189: Traduzione Della Dichiarazione Di Conformità Ce Originale
Traduzione della dichiarazione di conformità CE originale Con la presente dichiariamo che Potatore telescopico a batteria serie di costruzione AKS 2040-21 T Lion Set numero lotto B-51399 corrisponde alle seguenti direttive UE in materia nella rispettiva versione valida: 2006/42/EC • 2014/30/EU • 2000/14/EC • 2005/88/EC • 2011/65/EU* Per garantire la conformità... -
Página 190: Preklad Originálneho Prehlásenia O Zhode Ce
Preklad originálneho prehlásenia o zhode CE Týmto potvrdzujeme, že Akumulátorový teleskopický odvetvovac konštrukčnej rady AKS 2040-21 T Lion Set Poradové číslo B-51399 zodpovedá nasledujúcim príslušným smerniciam EÚ v ich práve platnom znení: 2006/42/EC • 2014/30/EU • 2000/14/EC • 2005/88/EC • 2011/65/EU* Aby bola zaručená... -
Página 191: Traducción De La Declaración De Conformidad Ce Original
Traducción de la Declaración de conformidad CE original Mediante la presente declaramos que Podadora telescópica a batería de la serie AKS 2040-21 T Lion Set Número de serie B-51399 corresponde a las siguientes Directivas de la UE corrientes en su respectiva versión vigente: 2006/42/EC •... -
Página 193: Explosionszeichnung
Explosionszeichnung • Exploded Drawing • Explosietekening Vue éclatée • Vista esplosa • Rysunek samorozwijający Výkres sestavení • Trimatis vaizdas • Plano de explosión Výkres náhradných dielov AKS 2040-21 T Lion Set... -
Página 195: Service-Center
Service-Center Grizzly Tools GmbH & Co. KG Garden Italia SPA Via Zaccarini, 8 Kunden-Service 29010 San Nicolò a Trebbia (PC) Stockstädter Straße 20 Tel.: 0523 764811 D-63762 Großostheim Fax: 0523 768689 Tel.: 06026-9914-441 e-mail: info@gardenitalia.it Fax: 06026-9914-499 e-mail: service-baumarkt@grizzly.biz www.grizzlybaltic.com Homepage: www.grizzlytools.de...