
Resumen de contenidos para Blumfeldt Garden Hero
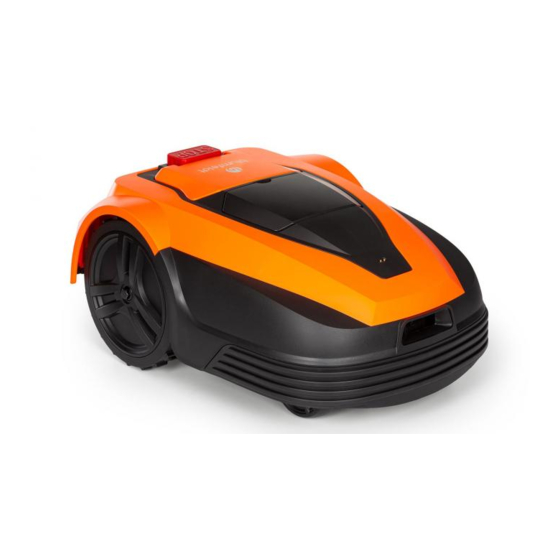
- Página 1 Garden Hero Mähroboter Robot Mower Robot tondeuse Robot tagliaerba Robot cortacésped 10034749...
-
Página 3: Tabla De Contenido
Sehr geehrter Kunde, wir gratulieren Ihnen zum Erwerb Ihres Gerätes. Lesen Sie die folgenden Hinweise sorgfältig durch und befolgen Sie diese, um möglichen Schäden vorzubeugen. Für Schäden, die durch Missachtung der Hinweise und unsachgemäßen Gebrauch entstehen, übernehmen wir keine Haftung. Scannen Sie den folgenden QR-Code, um Zugriff auf die aktuellste Bedienungsanleitung und weitere Informationen rund um das Produkt zu erhalten. -
Página 4: Technische Daten
TECHNISCHE DATEN Artikelnummer 10034749 Adapter-Stromversorgung 25,5 V / 2,0 A, 100-240 V Batterie-Stromversorgung 22,2 V / 5200 mAh Batterietyp Lithium-Ionen-Akku Geschwindigkeit des Klingenmotors 3200-3500 rpm Gewicht 16 kg Betriebsleistung 1400 m² +/- 20 % Fahrgeschwindigkeit 22 m/min... -
Página 5: Erklärung Der Warnsymbole
ERKLÄRUNG DER WARNSYMBOLE Symbole auf dem Mähroboter WARNUNG / VORSICHT Achten Sie darauf, dass keine Zehen oder Hände abgetrennt werden. Halten Sie Hände oder Füße nicht in die Nähe eines rotierenden Messers. Gefährliche Stromspannung! Das Gerät muss während der Verwendung permanent den Boden berühren. Ein Kippen oder Anheben des Geräts kann dazu führen, dass Steine ausgeworfen werden. -
Página 6: Sicherheitshinweise
SICHERHEITSHINWEISE WARNUNG Brand-, Stromschlag- und Verletzungsgefahr! Bei der Verwendung elektrischer Geräte sollten immer grundlegende Sicherheitsvorkehrungen beachtet werden, um die Gefahr von Bränden, Stromschlägen oder schweren Verletzungen zu verringern. • Machen Sie sich vor der Verwendung mit der gesamten Bedienungsanleitung vertraut. Bewahren Sie die Bedienungsanleitung für die zukünftige Verwendung auf. - Página 7 • Überprüfen Sie vor dem Einsatz des Geräts den Bereich, in welchem das Gerät verwendet werden soll. Entfernen Sie jegliche Fremdkörper, die das Gerät blockieren oder davon ausgeworfen werden könnten, wie beispielsweise Steine und Stöcke. • Vermeiden Sie den Einsatz des Geräts auf nassem Gras. •...
- Página 8 • Verwenden Sie das Gerät nicht, wenn die Taste STOP defekt ist. • Schalten Sie das Gerät immer aus, wenn dieses nicht in Verwendung ist. Das Gerät kann nur dann gestartet werden, wenn der korrekte Pin eingegeben wurde. • Das Gerät darf niemals zur gleichen Zeit wie der Rasensprenger verwendet werden.
- Página 9 Batteriesicherheit • Dieses Gerät enthält Lithium-Ionen-Batterien. Entzünden Sie die Batterien nicht und setzen Sie diese keinen hohen Temperaturen aus, da dadurch Explosionsgefahr besteht. • Nach langem Gebrauch oder bei der Verwendung bei heißer Außentemperatur können die Batterien warm werden. Lassen Sie das Gerät mindestens 30 Minuten lang abkühlen, bevor Sie dieses laden.
-
Página 10: Gerät Und Zubehör
GERÄT UND ZUBEHÖR Begrenzungsdraht (x100 m) Begrenzungsdraht Heringe (x100) Erdungsschrauben Ladestation (x4) Klingen (x9) Klingenschrauben (x9) Drahtverbindungsstück (x4) Netzteil Schraubendreher Ladestange (x2) Ladestation Mähroboter... -
Página 11: Installation
INSTALLATION 1. Den Rasen für den Mähroboter vorbereiten Min. 30 cm Ladestation gegen den Uhrzeigersinn Min. 2 m Min. 30 cm Min. 1,2 m Min. 1,2 m Der aktive Mähroboter benötigt eine vollständige Begrenzungsschleife, um zu funktionieren. Die Schleife überträgt ein schwaches elektrisches Signal, durch welches der Mähroboter weiß, an welcher Stelle des Max. - Página 12 Es kann in Ihrem Garten Bereiche geben, die für den Mähroboter eine Herausforderung darstellen oder für ihn nicht zugänglich sind. Der Mähroboter mäht nicht über den von Ihnen im Garten verlegten Begrenzungsdraht hinaus. Zudem wechselt der Mähroboter die Richtung, wenn er in Kontakt mit Gegenständen kommt, wie beispielsweise: •...
- Página 13 2. Problembereiche beseitigen oder meiden Hindernisse wie Baumwurzeln auf dem Rasen Wenn eine Eine Lösung ist, den Alternativ kann Baumwurzel sich in Begrenzungsdraht die Baumwurzel Ihrem Mähbereich um die Wurzel mit einer Säge befindet, stellt dies herum zu abgesägt werden und für den Mähroboter verlegen und den verbleibende unebene...
- Página 14 Besonders langes Gras Wenn der Mähroboter auf besonders langes Gras trifft, kann es vorkommen, dass dieses durch den Hindernissensor des Mähroboters als Hindernis erkannt wird. Das Gras muss sich auf einer angemessenen Höhe befinden, damit der Mähroboter korrekt funktionieren kann. 3.
- Página 15 Sichere Stromquelle Der Standort der Ladestation darf sich maximal 5 Meter von einem sicheren Standort entfernt befi nden – entweder von einer wasserdichten Außensteckdose oder einer Steckdose im Innenraum, wie beispielsweise in der Garage. • Der Standort der Ladestation sollte fl ach und sicher sein, ohne Gefahr der Bewegung.
- Página 16 Der Begrenzungsdraht Drücken Sie den Es tritt dann an tritt an der Begrenzungsdraht der Rückseite der Vorderseite (1) der in das Rohr an der Ladestation (2) wieder Ladestation ein Vorderseite (1) der aus. und kommt an der Ladestation. Rückseite (2) heraus. Sie müssen den Kunststoffmantel Die Ladestation hat an der vom Ende des Drahtes abziehen,...
- Página 17 Drücken Sie die Haube der Die gefederte Klemme muss Ladestation nach vorne, um angehoben werden, um das Loch die Verdrahtungsanschlüsse freizulegen. Stellen Sie sicher, dass freizulegen. der Draht vollständig eingeführt ist, bevor Sie die rote Klemme loslassen. Wenn der Begrenzungsdraht Führen Sie das Netzkabel an der vollständig verlegt wurde, anderen Seite der Ladestation nach...
- Página 18 Achten Sie auf die Drücken Sie das Kabel hinein. Kabelanschlüsse, da diese mit einer Keilnut versehen sind, um einen korrekten Anschluss zu gewährleisten. Schrauben Sie den äußeren Ring Sobald die Ladestation vollständig darauf, um das Kabel zu sichern verkabelt wurde, kann diese mit und zu verhindern, dass Wasser den 4 Schrauben (im Lieferumfang eintreten kann.
- Página 19 LED-Statusanzeige Drücken Sie die Haube zurück Stellen Sie sicher, dass der in die Originalposition, um Netzschalter ausgeschaltet die Drähte und Anschlüsse ist. Schrauben Sie die beiden vor eindringendem Wasser zu Ladestangen in die Löcher schützen. unterhalb der Haube der Ladestation. (Hinweis: Hier befindet sich die LED-Statusanzeige.) 4.
- Página 20 Der Begrenzungsdraht muss Wenn der Begrenzungsdraht über straff gespannt sein. eine kleine Senke im Rasen verläuft, Sollte er lose sein, kann es sind mehr Heringe erforderlich, vorkommen, dass er vom um den Begrenzungsdraht Mährroboter durchtrennt wird, direkt am Boden zu fixieren. wenn dieser darüber fährt.
- Página 21 5. Den Mähroboter installieren Platzieren Sie den Mähroboter Drücken Sie die STOP-Taste. auf der Ladestation. Achten Sie darauf, dass sich die Räder auf den Halterungen befinden und dass die beiden Ladestangen in der Vorderseite des Mähroboters stecken. Hinweis: Der Mähroboter muss auf mindestens 70 % seiner Kapazität aufgeladen werden, bevor er die...
-
Página 22: Bedienfeld
BEDIENFELD Zeit, Datum, Batterie Status POWER-Taste: Ein/Aus ZURÜCK-Taste START-Taste: Mähen starten OK/MENU-Taste HOME-Taste: Kehrt zur AUF, AB, LINKS, RECHTS- Ladestation zurück Tasten, A, B, C, D für PIN-Code STOP-Taste: Not-Aus-Taste und Öffnen der Bedienfeld- Abdeckung... -
Página 23: Inbetriebnahme Und Bedienung
INBETRIEBNAHME UND BEDIENUNG Anpassung der Schnitthöhe 1. Öffnen Sie die Drehknopf- Abdeckung. 2. Durch Drehen des Drehknopfes kann eine Schnitthöhe zwischen 2,5 cm und 5,5 cm eingestellt werden. Schnitthöhe einstellen Für den ersten Schnitt der Saison oder langes, dickes, nasses Gras ist die höchste Einstellung (5,5 cm) erforderlich. - Página 24 Erste Verwendung Auf dem Bedienfeld muss der PIN-Code eingegeben werden. Der werkseitig eingestellte PIN-Code ist „AAAA“. Wenn Sie die START-Taste drücken und die Abdeckung schließen, beginnt der Mähroboter den von Ihnen begrenzten Bereich zu mähen. Die ersten Mähdurchläufe Die ersten paar Mähdurchläufe werden zufällig und unfertig erscheinen. Dies ist normal.
- Página 25 Mährroboter ein- und ausschalten Einschalten Ausschalten 1. Drücken Sie die POWER- 1. Drücken Sie die POWER- Taste 3 Sekunden lang. Taste 3 Sekunden lang. 2. Geben Sie den vierstelligen PIN-Code ein. Werkseitig voreingestellt ist der PIN- Code „AAAA“. 3. Der Mähroboter befindet sich nun im Standbymodus und weitere Eingaben sind erforderlich.
- Página 26 Den Mähvorgang starten 1. Drücken Sie die START-Taste. Im Standardmähmodus fährt der 2. Schließen Sie zum Starten die Mähroboter in einer zufälligen Abdeckung. Reihenfolge in Ihren Garten herum und ändert jedes Mal die Richtung, wenn er den Hinweis: Wenn die Batterie Begrenzungsdraht erreicht.
- Página 27 1. Drücken Sie die OK-Taste, um in das Untermenü 1 zu gelangen. 2. Wählen Sie „setting“ aus, um in das Untermenü 2 zu gelangen. 3. Wählen Sie „work time“ aus. 4. Stellen Sie die Betriebszeit mit den Tasten AUF und AB ein (werkseitig voreingestellt sind 8 Stunden).
- Página 28 Laden 1. Platzieren Sie den Mähroboter in der Ladestation (oder drücken Sie 3 Sekunden lang die HOME-Taste). 2. Der Mähroboter lädt auf 100 % auf und wechselt anschließend in den Standbymodus. 3. Der Mähroboter wird erneut geladen, wenn der Batteriestatus unter 75 % fällt.
- Página 29 Zone 1. Drücken Sie die OK-Taste, Sie können bis zu 5 Zonen in Ihrem Garten einrichten. um in das Untermenü 1 zu So können Sie entscheiden, welche Bereiche Ihres gelangen. Gartens mehr oder weniger Aufmerksamkeit 2. Wählen Sie „Zone“ aus. benötigen.
- Página 30 Spiralförmiges Mähen (spot mode) Mähroboter hier platziert 1. Platzieren Sie den Der Mähroboter kann innerhalb der Begrenzung Mähroboter im Garten. platziert werden, und während dieses Modus mäht 2. Drücken Sie die OK-Taste, der Mähroboter 5 Minuten lang in einem relativ um in das Untermenü...
- Página 31 Regenmodus Durch den Regenmodus wird festgelegt, ob der Mähroboter den Rasen bei Regen mähen soll oder nicht. Wenn diese Funktion deaktiviert wird, setzt der Mähroboter auch bei Regen den Betrieb fort. Hinweis: Vermeiden Sie es, den Mähroboter bei starkem Regen oder Sturm zu verwenden.
- Página 32 Sprache Datum und Zeit 1. Drücken Sie die OK-Taste, 1. Drücken Sie die OK-Taste, um in das Untermenü 1 zu um in das Untermenü 1 zu gelangen. gelangen. 2. Wählen Sie „setting“ aus, 2. Wählen Sie „setting“ aus, um in das Untermenü 2 zu um in das Untermenü...
- Página 33 PIN-Code PIN-Code ändern 1. Der PIN-Code muss nach dem 1. Drücken Sie die OK-Taste, Einschalten, dem Drücken der um in das Untermenü 1 zu STOP-Taste, vor dem Löschen gelangen. eines Fehlerzustands und vor 2. Wählen Sie „setting“ aus, dem Ändern des PIN-Codes um in das Untermenü...
- Página 34 Auf Werkseinstellung Fehlerprotokoll zurücksetzen 1. Drücken Sie die OK-Taste, 1. Drücken Sie die OK-Taste, um in das Untermenü 1 zu um in das Untermenü 1 zu gelangen. gelangen. 2. Wählen Sie „setting“ aus, 2. Wählen Sie „setting“ aus, um in das Untermenü 2 zu um in das Untermenü...
- Página 35 Betriebsprotokoll Energie sparen Die Hintergrundbeleuchtung schaltet sich nach 2 Minuten aus und der Mähroboter schaltet sich nach 8 Minuten ohne Eingabe aus. LED-Anzeige Die Hintergrundbeleuchtung 1. Drücken Sie die OK-Taste, schaltet sich nach 2 Minuten aus um in das Untermenü 1 zu und der Mähroboter schaltet gelangen.
- Página 36 Untermenü 1 Untermenü 2 Untermenü 3 Spot mode (Spiralförmiges Mähen) English (Englisch) Language German (Sprache) (Deutsch) French (Französisch) Date & Time (Datum & Uhrzeit) Rain mode (Regenmodus) Work time Setting (Betriebszeit) (Einstellungen) Change PIN (PIN-Code ändern) Factory reset (Auf Werkseinstellung zurücksetzen) About (über)
-
Página 37: Reparatur, Reinigung Und Wartung
REPARATUR, REINIGUNG UND WARTUNG WARNUNG Verletzungsgefahr! Entfernen Sie den Sicherheitsschlüssel, wenn der Mähroboter nicht in Betrieb ist und bevor er transportiert, gereinigt oder gelagert wird. Begrenzungsdraht reparieren Wenn der Begrenzungsdraht Der Clip hat zwei Rillen in sich. durchtrennt wird oder aus Schieben Sie ein Ende in die eine sonstigen Gründen bricht Rinne und das andere Ende in die... - Página 38 Nehmen Sie eine Zange und pressen Sie die Metalllasche auf die eingelegten Drähte. Dadurch wird eine Verbindung zwischen den Drähten hergestellt. Sobald der Begrenzungsdraht repariert wurde, leuchtet das Licht an der Ladestation permanent blau auf. Wenn das Licht immer noch rot leuchtet, bedeutet dies, dass der Begrenzungsdraht noch an weiteren Stellen defekt ist und repariert werden muss.
- Página 39 Klingen austauschen WARNUNG Verletzungsgefahr! Tragen Sie Schutzhandschuhe, wenn Sie Klingen einsetzen, reinigen oder austauschen. 1. Schalten Sie den Mähroboter 5. Verwenden Sie einen zweiten aus. Schraubenzieher, um die 2. Tragen Sie Klingenplatte zu fi xieren, Schutzhandschuhe. während Sie die Klinge 3.
- Página 40 Richten Sie die Klingen neu aus Tragen Sie den Mähroboter (drehen Sie diese um oder auf am Griff zwischen den beiden den Kopf), da jede Kante sich Hinterrädern, mit den Klingen nach separat abnutzt, bis jede Seite der außen zeigend. Klinge einmal verwendet wurde.
- Página 41 Reinigung und Wartung 1. Überprüfen und reinigen Sie den Mähroboter regelmäßig einmal pro Woche. 2. Wenn Sie den Mähroboter zum ersten Mal in Betrieb nehmen, sollten die Klingenplatte, die Schutzplatten und Klingen einmal monatlich überprüft werden. 3. Es ist wichtig, dass die Klingen und die Klingenplatten ohne Probleme rotieren können.
-
Página 42: Fehlersuche Und Fehlerbehebung
FEHLERSUCHE UND FEHLERBEHEBUNG Fehlermeldung Ursache Lösung Mower outside Der Mähroboter Stellen Sie den befindet sich außerhalb Mähroboter innerhalb der Begrenzung. der Begrenzung auf. Mower lifted Der Mähroboter ist Bewegen Sie den vom Boden abgehoben. Mähroboter zu einem flachen Bereich des Rasens. - Página 43 Durchdrehende Räder, durch welche der Mähroboter an einer einzigen Stelle mit sich drehenden Rädern stehen bleibt, werden durch eine Kombination aus unebenem und/oder nassem Boden verursacht. Die Lösung besteht darin, Erde hinzuzufügen, um den Boden zu ebnen. Sorgen Sie vor dem Mähen für eine gute Entwässerung des Rasens und mähen Sie nicht bei starkem Regen und Staunässe.
-
Página 44: Spezielle Entsorgungshinweise Für Verbraucher In Deutschland
SPEZIELLE ENTSORGUNGSHINWEISE FÜR VERBRAUCHER IN DEUTSCHLAND Entsorgen Sie Ihre Altgeräte fachgerecht. Dadurch wird gewährleistet, dass die Altgeräte umweltgerecht verwertet und negative Auswirkungen auf die Umwelt und menschliche Gesundheit vermieden werden. Bei der Entsorgung sind folgende Regeln zu beachten: • Jeder Verbraucher ist gesetzlich verpflichtet, Elektro- und Elektronikaltgeräte (Altgeräte) sowie Batterien und Akkus getrennt vom Hausmüll zu entsorgen. - Página 45 • Bei einem Vertrieb unter Verwendung von Fernkommunikationsmitteln ist die unentgeltliche Abholung am Ort der Abgabe auf Elektro- und Elektronikgeräte der Kategorien 1, 2 und 4 gemäß § 2 Abs. 1 ElektroG, nämlich „Wärmeüberträger“, „Bildschirmgeräte“ (Oberfläche von mehr als 100 cm²) oder „Großgeräte“ (letztere mit mindestens einer äußeren Abmessung über 50 Zentimeter) beschränkt.
-
Página 46: Hinweise Zur Entsorgung
Importeur für Großbritannien: Berlin Brands Group UK Ltd PO Box 1145 Oxford, OX1 9UW United Kingdom Hiermit erklärt Chal-Tec GmbH, dass der Funkanlagentyp Garden Hero der Richtlinie 2014/53/EU entspricht. Der vollständige Text der EU-Konformitätserklärung ist unter der folgenden Internetadresse verfügbar: use.berlin/10034749... - Página 47 Dear Customer, Congratulations on purchasing this device. Please read the following instructions carefully and follow them to prevent possible damages. We assume no liability for damage caused by disregard of the instructions and improper use. Scan the QR code to get access to the latest user manual and more product information.
-
Página 48: Technical Data
TECHNICAL DATA Item number 10034749 Adapter power supply 25,5 V / 2,0 A, 100-240 V Battery power supply 22,2 V / 5200 mAh Battery type Lithium-ion battery Blade motor speed 3200-3500 rpm Weight 16 kg Working capacity 1400 m² +/- 20 % Moving speed 22 m/min... -
Página 49: Explanation Of The Warning Symbols
EXPLANATION OF THE WARNING SYMBOLS Symbols on the robot mower WARNING / CAUTION Beware of severing toes or hands. Do not put hands or feet near a rotating blade. Dangerous voltage! Always keep the robot mover on the ground when mowing. Tilting or lifting the robot mover may cause stones to be thrown out. -
Página 50: Safety Instructions
SAFETY INSTRUCTIONS WARNING Risk of fi re, electric shock and injury! Basic safety precautions should always be observed when using an electrical appliance to reduce the risk of fi re, electrical shock or serious injury. • Read all instructions before use. Retain instructions for future reference. •... - Página 51 WARNING Risk of injury! The blade will continue to move after the motor is switched off. • Ensure that the blade has fully stopped before: – clearing a blockage, – adjusting the cutting height, – lifting or carrying the robot mower, –...
- Página 52 Electrical safety • Do not operate the robot mower in explosive atmospheres, such as in the presence of flammable liquids, gases or dust. Mowers can sometimes create sparks, which may ignite the dust and fumes. • Avoid body contact with earthed or grounded surfaces, such as pipes. There is an increased risk of electric shock if your body is earthed or grounded.
- Página 53 Description Robot mowers work by making regular small cuts of the grass to maintain a set height. To do this they must be able to mow the grass multiple times per day every day. This will keep the grass level constantly in check. As it is cutting small amounts regularly the clipping will fall to the ground and are not collected.
-
Página 54: Appliance And Accessories
APPLIANCE AND ACCESSORIES Boundary wire (x100 m) Boundary wire pegs (x100) Charge station ground screw (x4) Blades (x9) Blade screws (x9) Wire splicer (x4) Power supply Allen tool Charging rods (x2) Charging station Robot mower... -
Página 55: Installation
INSTALLATION 1. Preparing the lawn for the robot mower Min. 30 cm Charge Station Anti-clockwise Min. 2 m Min. 30 cm Min. 1.2 m Min. 1.2 m The robot mower needs a full and complete perimeter loop in order to operate. The loop carries a weak electrical signal that the robot mower uses to know where it is in Max. - Página 56 There may be parts of your garden which will be challenging or even impossible for your robot mower. Your robot mower will not stray beyond the boundary wire you must lay around your garden. It will change direction on making contact with things like: •...
- Página 57 2. Rectifying or avoiding problem areas Obstacles such as tree roots on lawn If a tree root is One solution is to Alternatively, cut protruding into the take the perimeter the tree root back perimeter of your around the tree with a saw and fill cutting area it would root, leaving area...
- Página 58 Extra long grass If your robot mower encounters particularly long grass it may treat it as an obstacle as it could bump the robot mower’s obstacle sensor. The grass needs to be at a reasonable level before the robot mower can function correctly. 3.
- Página 59 Safe power source The location must be within 5 m of a safe power source – either a weatherproof outdoor electrical socket or an indoor power point in a garage, for example. • The location of the charging station should be fl at and secure, without risk of movement, if placed next to a border edge that is unstable it can slump and cause the station to be uneven, this will cause problems for the robot mower when returning to charge.
- Página 60 The boundary wire Push the boundary It will emerge at the goes into the front (1) wire into the tube at rear of the unit (2). of the charging station the front (1) of the and comes out at the charging station.
- Página 61 Push the charging station hood The sprung terminal will need forward to uncover the wiring lifting to expose the hole, ensure terminals. the wire is full inserted before releasing the red terminal clip. When you have completed your Feed the power lead up through boundary wire it must return to the other side of the base station the charging station and be fed...
- Página 62 Pay attention to the cable fittings Push the power cable into place. as there is a keyway orientation detail to ensure correct connection. Then screw on the outer ring Once the base station has been to secure the cable in place and fully wired, it can be secured prevent water ingress.
- Página 63 LED status indicator Push the cover back to its original Making sure the power is switched position to cover the wires and off at the socket, screw the two connections from water ingress. charging rods into the holes just below the cover of the base station.
- Página 64 The perimeter wire must be kept If the wire passes over a moderate tight. If it is loose it may well end dip in the lawn, more pegs will be up being cut by the robot mower required to keep the wire firmly as it passes over it.
- Página 65 5. Installing the robot mower Place the robot mower on the Press the STOP button. base station with the wheels on the grips and the two pins engaged into the front of the robot mower. Note: The robot mower will require to be charged to at least 70 % capacity before it will leave its station.
-
Página 66: Control Panel
CONTROL PANEL Time, date, battery Status POWER button: RETURN button Power on/off START button: Start mowing OK/MENU button HOME button: Back to UP, DOWN, LEFT, RIGHT station. button, A, B, C, D for PIN code STOP button: Emergency stop and open the control panel hatch... -
Página 67: Start-Up And Operation
START-UP AND OPERATION Cutting height adjustment 1. Open the knob lid. 2. Cutting height can be adjusted from 2.5 cm to 5.5 cm by rotating the adjustment knob. Set the cutting height The first cut of the season or long thick wet grass will need the highest setting (5.5 cm). - Página 68 First use The control panel will ask for a pass code. The default PIN is “AAAA”. Pressing the start button and closing the flap will cause the robot mower to start a perimeter circuit after which it will begin randomly mowing the lawn. The first mowing runs The first few mows will appear random and unfinished, this is normal.
- Página 69 Switching the mowing robot on and off Power on Power off 1. Press the POWER button for 1. Press the POWER button for 3 seconds. 3 seconds. 2. Enter the 4-letter PIN code. The default PIN code is “AAAA”. 3. The robot mower will now await further instruction in standby mode.
- Página 70 Start mowing 1. Press START button. In standard mowing mode the 2. Close the cover to start. robot mower will proceed in a random fashion around your garden, changing direction each Note: If the battery is below time it reaches the boundary wire. 70 % charge, the robot mower enters “charge to work”...
- Página 71 1. Press OK button to enter sub-menu 1. 2. Select “setting” to enter sub-menu 2. 3. Select “work time”. 4. Set work time by UP and DOWN buttons (default is 8 hours). 5. Press OK button to confirm setting. You may want to stop the robot mower during its cutting cycle.
- Página 72 Charging 1. Place the robot mower in the station (or press the HOME button for 3 seconds) 2. The robot mower will charge up to 100 % and then go into standby. 3. The robot mower will get charged again if battery is lower than 75 %. The robot mower charges on its station through the two charging rods.
- Página 73 Zone 1. Press the OK button to enter You can set up to 5 zones in your garden. This enables sub-menu 1. you to decide areas of your garden that need more 2. Select “zone”. or less attention. A zone is set by how far along the 3.
- Página 74 Spot mow (spot mode) Robot mover placed here 1. Place the robot mower in the The robot mower can be placed within the perimeter garden. boundary and that the spot mow function will mow in 2. Press the OK button to enter relatively uniform spiral pattern for 5 minutes.
- Página 75 Rain mode Rain mode sets if the robot mower will go out in rain or not. Disabling this will allow the robot mower to continue to work in the rain. Note: Avoid activation during heavy rain and storms. Wet grass will cause additional load for the robot mower and mowing time may be reduced.
- Página 76 Language Date and time 1. Press the OK button to enter 1. Press the OK button to enter sub-menu 1. sub-menu 1. 2. Select “setting” to enter sub- 2. Select “setting” to enter sub- menu 2. menu 2. 3. Select “Language”. 3.
- Página 77 PIN code Change PIN code 1. The PIN code should be 1. Press the OK button to enter entered after powering on, sub-menu 1. pressing the STOP button, 2. Select “setting” to enter sub- and before clearing error menu 2. status and changing the PIN 3.
- Página 78 Factory reset Error log 1. Press the OK button to enter 1. Press the OK button to enter sub-menu 1. sub-menu 1. 2. Select “setting” to enter sub- 2. Select “setting” to enter sub- menu 2. menu 2. 3. Select “factory reset”. 3.
- Página 79 Work log Save power The backlight will switch off after 2 minutes in the robot mower will power off after 8 minutes, respectively, without user interference. LED indicator The backlight will switch off 1. Press the OK button to enter after 2 minutes and the robot sub-menu 1.
- Página 80 Sub-menu 1 Sub-menu 2 Sub-menu 3 Spot mode English Language German French Date & Time Rain mode Setting Work time Change PIN Factory reset About Information Error log Work log Schedule Zone...
-
Página 81: Repair, Cleaning And Maintenance
REPAIR, CLEANING AND MAINTENANCE WARNING Risk of injury! Remove the safety key when the robot mower is not in use and before it is transported, cleaned or stored. Repairing the boundary wire If the boundary wire gets cut or The clip has two channels in it. Push breaks for any reason (indicated one end into one channel and the by solid red light on charging... - Página 82 Taking a pair of pliers, crimp the metal tab onto the inserted wires. This will form a connection between the wires. When the boundary wire is repaired the charging station will display a solid blue light. If the light is still red there are more breaks in the loop, which will need locating and repairing.
- Página 83 Replacing the blades WARNING Risk of injury! Wear protective gloves when handling, cleaning or replacing the blade. 1. Switch the robot mower off. 5. Use a second screwdriver to 2. Wear protective gloves. anchor the blade plate while 3. Turn the robot mower you attach the blade.
- Página 84 Re-orientate the blade (turn it Carry the robot mower by the around or turn it upside down) handle between the two rear as each corner wears out until all wheels with the blades pointing four quarters of the blade have outwards.
- Página 85 Cleaning and maintenance 1. Check and clean the robot mower regularly once a week. 2. When you first start using the robot mower, the blade plate, protections plate and blades should be checked once a month. 3. It is important that the blades and blade plate rotate easily. 4.
-
Página 86: Troubleshooting
TROUBLESHOOTING Error message Cause Solution Mower outside The robot mover is Place the robot mover outside the perimeter. inside the perimeter. Mower lifted The robot mover is Move the robot mover lifted away from the to a flat part of the ground. - Página 87 Wheel spinning faults where the robot mower will stop in a single spot and wheel(s) spin is a combination of uneven and/or wet ground. The solution is to add soil to level the ground. Ensure good drainage of the lawn before mowing, and not to mow during heavy rain and water logging.
-
Página 88: Disposal Considerations
Oxford, OX1 9UW United Kingdom Hereby, Chal-Tec GmbH declares that the radio equipment type Garden Hero is in compliance with Directive 2014/53/ EU. The full text of the EU declaration of conformity is available at the following internet address: use. - Página 89 Cher client, chère cliente, Toutes nos félicitations pour l’acquisition de ce nouvel appareil. Veuillez lire attentivement et respecter les instructions de ce mode d’emploi afin d’éviter d’éventuels dommages. Nous ne saurions être tenus pour responsables des dommages dus au non-respect des consignes et à...
-
Página 90: Fiche Technique
FICHE TECHNIQUE Numéro d'article 10034749 Alimentation de l'adaptateur 25,5 V / 2,0 A, 100-240 V Alimentation de la batterie 22,2 V / 5200 mAh Type de batterie Batterie lithium ion Vitesse du moteur de coupe 3200-3500 t/mn Poids 16 kg Performances opérationnelles 1400 m²... -
Página 91: Explication Des Symboles De Mise En Garde
EXPLICATION DES SYMBOLES DE MISE EN GARDE Symboles sur le robot tondeuse MISE EN GARDE / ATTENTION Faites attention de ne pas vous couper les orteils ou les mains. Tenez vos mains et vos pieds à distance de la lame en rotation. Tension dangereuse ! L'appareil en marche doit toujours rester en contact avec le sol. -
Página 92: Consignes De Sécurité
CONSIGNES DE SÉCURITÉ MISE EN GARDE Risques d'incendie, d'électrocution et de blessure ! Respectez toujours les précautions de sécurité de base lorsque vous utilisez un appareil électrique afi n de réduire le risque d'incendie, d'électrocution ou de blessures graves. • Familiarisez-vous avec le mode d'emploi complet avant d'utiliser l'appareil. - Página 93 • Retirez les crottes de chien de la pelouse avant de passer la tondeuse. • Vérifi ez les lames et leurs supports pour détecter d'éventuels dommages visibles avant chaque utilisation. • Pour éviter tout déséquilibre, les pièces endommagées ou usées doivent être remplacées immédiatement.
- Página 94 • Les objets métalliques dans le sol (câbles électriques enterrés par ex) peuvent provoquer l'arrêt de l'appareil. Les objets métalliques peuvent interférer avec le signal de délimitation de zone, ce qui arrêtera le robot de tonte. • Il peut arriver que le câble périphérique soit déterré ou cassé par des animaux domestiques.
- Página 95 Entretien • Vérifiez toutes les vis et écrous de verrouillage visibles, en particulier sur les lames de coupe, pour vous assurer qu'ils sont correctement serrés. • Le robot de tonte et sa station de charge doivent être vérifiés et nettoyés régulièrement et maintenus exempts de saletés et de blocages.
-
Página 96: Appareil Et Accessoires
APPAREIL ET ACCESSOIRES Câble de délimitation (x 100m) Piquets de fixation du câble de délimitation (x 100) Vis de fixation au sol de la station de charge (x 4) Lames (x9) Vis des lames (x9) Raccord pour les câbles de délimitation (x4) Adaptateur secteur Tournevis Barre de chargement (x2) -
Página 97: Installation
INSTALLATION 1. Préparation de la pelouse pour la tondeuse Min. 30 cm Station de charge en sens antihoraire Min. 2 m Min. 30 cm Min. 1,2 m Min. 1,2 m Le robot de tonte active a besoin d’une boucle de délimitation complète pour fonctionner. La boucle transmet un faible signal électrique qui permet au robot de tonte de savoir où... - Página 98 Il se peut que certaines zones de votre jardin soient difficiles d'accès ou inaccessibles au robot de tonte. Le robot de tonte ne tond pas au-delà du câble périphérique que vous avez posé dans le jardin. Le robot de tonte change également de direction lorsqu'il entre en contact avec des objets tels que : •...
- Página 99 2. Pour résoudre ou éviter les zones problématiques Obstacles tels que les racines d'arbres sur la pelouse S'il y a une racine Une solution Vous pouvez aussi d'arbre dans votre consiste à faire scier la racine de zone de tonte, cela passer le câble l'arbre et remplir pose un problème...
- Página 100 Herbe très haute Si le robot de tonte rencontre de l'herbe particulièrement haute, il peut arriver que cela soit reconnu comme un obstacle par le capteur d'obstacle du robot de tonte. L'herbe doit être à une hauteur appropriée pour que le robot de tonte fonctionne correctement.
- Página 101 Source d'alimentation sûre L'emplacement de la station de charge peut être à un maximum de 5 mètres d'un endroit sûr - soit d'une prise externe étanche, soit d'une prise à l'intérieur, dans le garage par exemple. • L'emplacement de la station de charge doit être plat et sécurisé sans risque de mouvement.
- Página 102 Le câble périphérique Poussez le câble Il sort à l'arrière de la entre par l'avant (1) de périphérique dans le station de charge (2). la station de charge et tube à l'avant (1) de la sort par l'arrière (2). station de base. Vous devrez décoller la gaine La station de charge a un capot en plastique de l'extrémité...
- Página 103 Poussez le capot de la station de La pince à ressort doit être soulevée charge vers l'avant pour accéder pour accéder au trou. Assurez-vous aux connexions de câblage. que le fil est complètement inséré avant de relâcher la pince rouge. Lorsque le câble périphérique Faites passer le cordon est complètement posé, il doit...
- Página 104 Les prises des câbles ont une Enfoncez le câble. rainure de clavette comme détrompeur pour assurer une connexion correcte. Vissez la bague extérieure dessus Dès que la station de charge est pour fixer le câble et empêcher entièrement câblée, vous pouvez l'eau de pénétrer.
- Página 105 LED d'état Repoussez le capot dans sa Assurez-vous que l'interrupteur position d'origine pour protéger d'alimentation est éteint. Vissez les les câbles et les connecteurs deux pôles de charge dans les trous contre les infiltrations d'eau. sous le couvercle de la station de charge.
- Página 106 Le câble de délimitation doit être Si le câble périphérique passe sur bien tendu un petit creux dans la pelouse, il S'il ne l'est pas, le robot tondeuse vous faudra plus de piquets pour pourrait le couper en passant fixer le câble périphérique bien dessus.
- Página 107 5. Installation du robot tondeuse Placez le robot tondeuse sur Appuyez sur la touche STOP. la station de charge. Veillez à ce que les roues soient sur les supports et que les deux barres de chargement soient à l'avant du robot de tonte.
-
Página 108: Panneau De Commande
PANNEAU DE COMMANDE Heure, date, batterie État Touche POWER : marche / Touche retour arrêt Touche START : pour Touche OK/MENU démarrer la tondeuse Touche HOME : retour à la Touches HAUT, BAS, station de charge GAUCHE, DROITE A, B, C, D pour le code PIN Touche STOP : arrêt d'urgence et ouverture du cache du panneau de... -
Página 109: Mise En Marche Et Utilisation
MISE EN MARCHE ET UTILISATION Réglage de la hauteur de coupe 1. Ouvrez le couvercle du bouton rotatif. 2. Tournez le bouton rotatif pour régler la hauteur de coupe entre 2,5 cm et 5,5 cm. Réglage de la hauteur de coupe Pour la première coupe de la saison ou de l'herbe haute, épaisse et mouillée, utilisez le réglage le plus élevé... - Página 110 Première utilisation Vous devez saisir le code PIN sur le panneau de commande. Le code PIN par défaut est "AAAA". Lorsque vous appuyez sur la touche START et fermez le capot, le robot de tonte commence à tondre la zone que vous avez définie. Les premiers passages de tonte Les premiers passages de tonte pourront sembler aléatoires et inachevés.
- Página 111 Pour allumer et éteindre le robot tondeuse Allumer Éteindre 1. Appuyez sur la touche 1. Appuyez sur la touche POWER pendant 3 secondes. POWER pendant 3 secondes. 2. Entrez le code PIN à quatre chiffres. Le code PIN par défaut est "AAAA". 3.
- Página 112 Démarrer la tonte. 1. Appuyez sur la touche START. En mode de tonte standard, le 2. Pour démarrer, fermez le robot de tonte tourne autour capot. de votre jardin dans un ordre aléatoire, changeant de direction chaque fois qu'il atteint le câble Remarque : Si la batterie périphérique.
- Página 113 1. Appuyez sur la touche OK pour accéder au sous-menu 1. 2. Choisissez "paramètres" pour accéder au sous-menu 2. 3. Choisissez "durée de fonctionnement". 4. Réglez la durée de fonctionnement avec les touches HAUT et bas (le réglage par défaut est de 8 heures). 5.
- Página 114 Chargement 1. Mettez le robot tondeuse sur la station de charge (ou appuyez sur la touche HOME pendant 3 secondes). 2. Le robot de tonte se charge à 100 %, puis passe en mode veille. 3. Le robot de tonte se recharge lorsque le niveau de la batterie tombe en dessous de 75 %.
- Página 115 Zone 1. Appuyez sur la touche OK Vous pouvez confi gurer jusqu'à 5 zones dans votre pour accéder au sous-menu 1. jardin. Ainsi, vous pouvez décider quelles zones de 2. Choisissez "zone" votre jardin nécessitent plus ou moins d'attention. 3. Appuyez sur OK pour Une zone est défi nie par la distance entre le câble confi rmer la zone choisie.
- Página 116 Tonte en spirale (mode spot) Robot tondeuse placé ici 1. Placez le robot tondeuse dans Le robot de tonte peut être placé dans le périmètre. le jardin. Pendant ce mode, le robot de tonte tond en spirale 2. Appuyez sur la touche OK relativement uniforme pendant 5 minutes.
- Página 117 Mode pluie Le mode pluie détermine si le robot de tonte doit tondre la pelouse lorsqu'il pleut ou non. Si cette fonction est désactivée, le robot de tonte continuera à fonctionner même lorsqu'il pleut. Remarque : évitez d'utiliser la tondeuse par forte pluie et en cas d'orage. L'herbe mouillée est une charge supplémentaire pour le robot de tonte et la durée de tonte peut s'en trouver réduite.
- Página 118 Langue Date et heure 1. Appuyez sur la touche OK 1. Appuyez sur la touche OK pour accéder au sous-menu 1. pour accéder au sous-menu 1. 2. Choisissez "paramètres" pour 2. Choisissez "paramètres" pour accéder au sous-menu 2. accéder au sous-menu 2. 3.
- Página 119 Code PIN Modifier le code PIN 1. Le code PIN doit être entré 1. Appuyez sur la touche OK après la mise en marche, pour accéder au sous-menu 1. en appuyant sur le bouton 2. Choisissez "paramètres" pour STOP, avant d'effacer un état accéder au sous-menu 2.
- Página 120 Réinitialisation aux paramètres Journal des erreurs d'usine 1. Appuyez sur la touche OK 1. Appuyez sur la touche OK pour accéder au sous-menu 1. pour accéder au sous-menu 1. 2. Choisissez "paramètres" pour 2. Choisissez "paramètres" pour accéder au sous-menu 2. accéder au sous-menu 2.
- Página 121 Journal opérationnel Économie d'énergie Le rétroéclairage s'éteint au bout de 2 minutes et le robot de tonte s'éteint au bout de 8 minutes sans aucune intervention. Voyant LED Le rétroéclairage s'éteint au bout de 2 minutes et le robot de tonte 1.
- Página 122 Sous-menu 1 Sous-menu 2 Sous-menu 3 Mode spot (Tonte en spirale) English (Englisch) Language German (Langue) (Allemand) French (Français) Date & Time (Date et heure) Rain mode (Mode pluie) Work Time Setting (Période de (Paramètres) fonctionnement) Change PIN (Modifier le code PIN) Factory reset (Réinitialiser aux paramètres d'usine)
-
Página 123: Réparation, Nettoyage Et Entretien
RÉPARATION, NETTOYAGE ET ENTRETIEN MISE EN GARDE Risque de blessure ! Retirez la clé de sécurité lorsque le robot de tonte n'est pas utilisé et avant de le transporter, de le nettoyer ou de le ranger. Réparer le câble de délimitation Si le câble de délimitation est Le clip comporte deux rainures. - Página 124 Prenez une paire de pinces et appuyez sur la languette métallique sur les câbles insérés. Cela crée une connexion entre les câbles. Une fois le câble périphérique réparé, le voyant de la station de charge devient bleu fixe. Si le voyant est toujours rouge, cela signifie que le câble périphérique est toujours cassé...
- Página 125 Remplacement des lames MISE EN GARDE Risque de blessure ! Portez des gants de protection lors de l'insertion, du nettoyage ou du remplacement des lames. 1. Éteignez le robot tondeuse. 5. Utilisez un deuxième tournevis 2. Portez des gants de pour maintenir la plaque de la protection.
- Página 126 Réalignez les lames (retournez- Transportez le robot de tonte par les ou mettez-les à l'envers) car la poignée entre les deux roues chaque bord s'usera séparément arrière, les lames pointées vers jusqu'à ce que chaque côté de l'extérieur. la lame ait été utilisé une fois. Remplacez les lames lorsque les deux côtés ont été...
- Página 127 Nettoyage et entretien 1. Vérifiez et nettoyez le robot de tonte régulièrement une fois par semaine. 2. Lors des premières utilisations du robot de tonte, la plaque de lame, les plaques de protection et les lames doivent être vérifiées une fois par mois. 3.
-
Página 128: Identification Et Résolution Des Problèmes
IDENTIFICATION ET RÉSOLUTION DES PROBLÈMES Message d'erreur Cause Solution Tondeuse à l'extérieur Le robot tondeuse se Placez le robot trouve en dehors de tondeuse à l'intérieur l'espace délimité. de l'espace délimité. Tondeuse soulevée Le robot tondeuse est Déplacez le robot soulevé... - Página 129 Les roues qui tournent, qui provoquent l'arrêt du robot de tonte en un seul endroit avec les roues qui patinent, sont causées par une combinaison de sol irrégulier et / ou humide. La solution consiste à ajouter de la terre pour niveler le sol.
-
Página 130: Conseils Pour Le Recyclage
Oxford, OX1 9UW United Kingdom Le soussigné, Chal-Tec GmbH, déclare que l’équipement radioélectrique du type Garden Hero est conforme à la directive 2014/53/UE. Le texte complet de la déclaration UE de conformité est disponible à l’adresse internet suivante : use.berlin/10034749... - Página 131 Estimado cliente: Le felicitamos por la adquisición de este producto. Lea atentamente las siguientes instrucciones y sígalas para evitar posibles daños. No asumimos ninguna responsabilidad por los daños causados por el incumplimiento de las instrucciones y el uso inadecuado. Escanee el siguiente código QR para obtener acceso a la última guía del usuario y más información sobre el producto.
-
Página 132: Datos Técnicos
DATOS TÉCNICOS Número de artículo 10034749 Suministro eléctrico del adaptador 25,5 V / 2,0 A, 100-240 V Suministro eléctrico de la batería 22,2 V / 5200 mAh Tipo de batería Batería de litio ion Velocidad del motor de la cuchilla 3200-3500 rpm Peso 16 kg... -
Página 133: Explicación De Los Símbolos De Advertencia
EXPLICACIÓN DE LOS SÍMBOLOS DE ADVERTENCIA Símbolos presentes en el robot cortacésped ADVERTENCIA / ATENCIÓN Asegúrese de no pillarse los dedos ni las manos. Mantenga las manos y los pies alejados de la cuchilla en movimiento. ¡Tensión eléctrica peligrosa! El aparato debe tocar el suelo permanentemente durante el funcionamiento. Un vuelco o levantamiento del aparato puede provocar que las piedras salgan disparadas. -
Página 134: Indicaciones De Seguridad
INDICACIONES DE SEGURIDAD ADVERTENCIA ¡Riesgo de incendio, descarga eléctrica y lesiones! Para utilizar aparatos eléctricos deben seguirse en todo momento las indicaciones de seguridad para reducir el riesgo de incendios, descargas eléctricas y lesiones graves. • Familiarícese con el manual de instrucciones completo antes de utilizar el aparato. - Página 135 • Para evitar desequilibrios, es necesario sustituir inmediatamente las piezas desgastadas. • No utilice el aparato si está incompleto o si ha sufrido modifi caciones no autorizadas. • Mantenga todas las partes de su cuerpo, especialmente las manos y los pies, alejadas de las cuchillas.
- Página 136 • Puede ocurrir que el cable perimetral sea desenterrado o cortado por mascotas. Compruébelo con frecuencia. • El fabricante no asume ninguna garantía por la compatibilidad entre el aparato y otros sistemas inalámbricos, como controles remoto, emisores de ondas, bucles de inducción, vallas de ganado eléctricas subterráneas, etc.
-
Página 137: Mantenimiento
Mantenimiento • Compruebe todos los tornillos y tuercas de fijación visibles, especialmente en las cuchillas de corte, para garantizar su posición correcta. • El robot cortacésped y su estación de carga deben comprobarse y limpiarse frecuentemente y mantenerse limpios y sin obstrucciones. Algunos habitantes de su jardín, como arañas, insectos, caracoles y babosas, podrían anidar en las ranuras del aparato o hibernar en él. -
Página 138: Aparato Y Accesorios
APARATO Y ACCESORIOS Cable perimetral (x 100 m) Piquetas para cable perimetral (x 100) Tornillos de fijación de la estación de carga (x 4) Cuchillas (x 9) Tornillos de las cuchillas (x 9) Pieza de unión para el cable (x 4) Fuente de alimentación Destornillador Poste de carga (x 2) -
Página 139: Instalación
INSTALACIÓN 1. Preparar el césped para el robot Min. 30 cm Estación de carga en sentido antihorario Min. 2 m Min. 30 cm Min. 1,2 m Min. 1,2 m El robot cortacésped activo necesita un bucle perimetral completo para funcionar. El bucle transmite una señal eléctrica débil a través de la cual el cortacésped sabe el punto del jardín en el que se encuentra. - Página 140 En su jardín pueden existir zonas que supongan un desafío para su robot cortacésped o que no sean accesibles. El robot cortacésped no puede cruzar el cable perimetral colocado. Además, el robot cortacésped cambia de orientación cuando entra en contacto objetos, como: •...
- Página 141 2. Resolver o evitar áreas problemáticas Obstáculos como raíces de árboles en el césped Si existe una raíz Una solución es Como alternativa, de un árbol en la disponer el cable se puede cortar la zona para recortar, perimetral alrededor raíz del árbol con supondrá...
- Página 142 Césped muy alto Si el robot cortacésped pasa por césped demasiado alto, puede ocurrir que el sensor de obstáculos del robot lo detecte como tal. El césped debe tener una altura adecuada para que el robot pueda funcionar correctamente. 3. Instalación de la estación de carga Cumpla una distancia mínima de 2 m hacia la parte delantera de la estación de carga y 30 cm hacia la trasera.
- Página 143 Fuente de electricidad segura La ubicación de la estación de carga puede situarse como máximo a 5 metros de un lugar seguro, ya sea de una toma de corriente estanca para exteriores o de una toma de corriente interior, como la del garaje. •...
- Página 144 El cable perimetral Presione el cable Luego saldrá por la entra por la parte perimetral por el tubo parte trasera de la delantera (1) de la de la parte delantera estación de carga (2). estación de carga (1) de la estación de y sale por la parte carga.
- Página 145 Presione la tapa de la estación Los bornes con resorte deben de carga hacia adelante para levantarse para descubrir el orificio. descubrir la conexión del Asegúrese de que el cable se haya cableado. introducido completamente antes de soltar el borne rojo. Cuando haya colocado todo el Lleve el cable de alimentación hacia cable perimetral, debe volver a...
- Página 146 Para conectar el cable, asegúrese Presione el cable hacia el interior. de que tenga un terminal para garantizar una conexión adecuada. Desenrosque la anilla exterior En cuanto la estación de carga para asegurar el cable y evitar que esté cableada, podrá fijarse con el agua pueda entrar.
- Página 147 Indicador de estado LED Coloque la tapa en su posición Asegúrese de que el interruptor original para proteger los cables de red esté desactivado. Atornille y conexiones de filtraciones de ambos postes de carga en los agua. orificios situados por debajo de la tapa de la estación de carga.
- Página 148 El cable perimetral debe estar Si el cable perimetral pasa por tenso. una irregularidad en el césped, Si está suelto, puede ocurrir que necesitará utilizar más piquetas el robot lo corte cuando pase para fijarlo directamente al suelo. junto a él. De lo contrario, existe el riesgo que el cable perimetral sea cortado por el robot cortacésped.
- Página 149 5. Instalar el robot cortacésped Coloque el robot cortacésped en Pulse el botón STOP. la estación de carga. Asegúrese de que las ruedas se sitúen en los soportes y de que los postes de carga de la parte superior del robot estén encajados.
-
Página 150: Panel De Control
PANEL DE CONTROL Hora, fecha, batería Estado Botón POWER: encendido/ Botón ATRÁS apagado Botón START: empezar a Botón OK/MENÚ cortar Botón HOME: regresa a la Botones ARRIBA, ABAJO, estación de carga IZQUIERDA, DERECHA, A, B, C, D para código PIN Botón STOP: botón de parada de emergencia y para abrir la cubierta del panel de control... -
Página 151: Puesta En Funcionamiento
PUESTA EN FUNCIONAMIENTO Ajuste de la altura de corte 1. Abra la cubierta del regulador. 2. Girando el regulador puede elegir entre una altura de corte de 2,5 y 5,5 cm. Ajustar altura de corte Para el primer corte de la temporada o en caso de hierba alta, gruesa y húmeda, se necesitará... - Página 152 Primer uso En el panel de control debe introducirse el código PIN. El código PIN por defecto es "AAAA". Si presiona el botón START y cierra la cubierta, el robot comienza a cortar la zona que ha delimitado. Los primeros periodos de corte Los primeros periodos de corte parecerán aleatorios y sin terminar.
- Página 153 Apagar y encender el robot Encender Apagar 1. Mantenga pulsado el botón 1. Mantenga pulsado el botón POWER durante 3 segundos. POWER durante 3 segundos. 2. Introduzca el código PIN de 4 dígitos. El código PIN por defecto es "AAAA". 3.
- Página 154 Iniciar el proceso de corte 1. Pulse el botón START. En el modo estándar, el robot 2. Cierre la cubierta para iniciar. realiza un recorrido aleatorio en su jardín y cada vez modifica su dirección cuando se encuentra Nota: si la batería tiene una con un cable perimetral.
- Página 155 1. Pulse el botón OK para acceder al submenú 1. 2. Seleccione "setting" para acceder al submenú 2. 3. Seleccione "work time". 4. Ajuste el tiempo de funcionamiento con los botones ARRIBA y ABAJO (por defecto aparecen 8 horas). 5.
- Página 156 Carga 1. Coloque el robot cortacésped en su estación de carga (o presione 3 segundos el botón HOME). 2. El robot cortacésped se carga al 100 % y luego pasa al modo standby. 3. El robot cortacésped se carga de nuevo cuando el estado de la batería es inferior al 75 %.
- Página 157 Zona 1. Pulse el botón OK para Puede confi gurar hasta 5 zonas en su jardín. Así puede acceder al submenú 1. decidir qué zonas de su jardín necesitan más o menos 2. Seleccione "zone". atención. Una zona se determina por la distancia del 3.
- Página 158 Corte en espiral (spot mode) Colocar aquí el robot cortacésped. 1. Coloque el robot cortacésped El robot cortacésped puede colocarse dentro del en el jardín. perímetro y durante este modo realizará un recorrido 2. Pulse el botón OK para con forma de espiral bastante homogénea durante acceder al submenú...
- Página 159 Modo lluvia Con el modo de lluvia se determina si el robot debe cortar el césped con lluvia o no. Si esta función está desactivada, el robot también continuará con su trabajo los días lluviosos. Nota: evite utilizar el robot con lluvias fuertes o tormentas. La hierba mojada supone una carga adicional para el robot cortacésped y puede reducir el tiempo de actividad.
- Página 160 Idioma Fecha y hora 1. Pulse el botón OK para 1. Pulse el botón OK para acceder al submenú 1. acceder al submenú 1. 2. Seleccione "setting" para 2. Seleccione "setting" para acceder al submenú 2. acceder al submenú 2. 3.
- Página 161 Código PIN Modificar código PIN 1. El código PIN debe 1. Pulse el botón OK para introducirse después de acceder al submenú 1. encender el aparato, de pulsar 2. Seleccione "setting" para el botón STOP, antes de acceder al submenú 2. eliminar un estado de error y 3.
- Página 162 Restablecer los valores de fábrica Registro de errores 1. Pulse el botón OK para 1. Pulse el botón OK para acceder al submenú 1. acceder al submenú 1. 2. Seleccione "setting" para 2. Seleccione "setting" para acceder al submenú 2. acceder al submenú...
- Página 163 Registro de funcionamiento Ahorrar energía La retroiluminación se apaga a los 2 minutos y el robot cortacésped se apaga tras 8 minutos sin realizar ninguna acción. Indicador LED La retroiluminación se apaga 1. Pulse el botón OK para a los 2 minutos y el robot acceder al submenú...
- Página 164 Submenú 1 Submenú 2 Submenú 3 Spot mode (Corte en espiral) English (Inglés) Language German (Idioma) (Alemán) French (Francés) Date & Time (Fecha y hora) Rain mode (modo lluvia) Work time (Hora de Setting funcionamiento) (Ajustes) Change PIN (Modificar código PIN) Factory reset (Restablecer los valores de fábrica)
-
Página 165: Reparación, Limpieza Y Mantenimiento
REPARACIÓN, LIMPIEZA Y MANTENIMIENTO ADVERTENCIA ¡Riesgo de lesiones! Retire la llave de seguridad cuando el robot no esté en funcionamiento y antes de transportarlo, limpiarlo o guardarlo. Reparar cable perimetral Si el cable perimetral se separa La pinza tiene dos ranuras. o se rompe por otros motivos Desplace un extremo por una (señalizado por una luz roja en... - Página 166 Coja unos alicates y presione la patilla metálica del cable introducido. Así se establecerá la conexión entre ambos cables. En cuanto se repare el cable perimetral, la luz de la estación de carga debería iluminarse en azul permanentemente. Si la luz continúa en color rojo, significa que el cable perimetral presenta defectos en otro punto y debe ser reparado.
- Página 167 Sustituir las cuchillas ADVERTENCIA ¡Riesgo de lesiones! Utilice guantes de protección para colocar, limpiar o sustituir las cuchillas 1. Apague el robot cortacésped. 5. Utilice un destornillador para 2. Póngase los guantes de fi jar la placa de las cuchillas protección.
- Página 168 Reoriente las cuchillas (gírelas o Coja el robot entre el asa y las dos deles la vuelta), pues las esquinas ruedas traseras con las cuchillas se desgastan desigualmente, mirando hacia afuera. hasta que todas las esquinas de la cuchilla se hayan utilizado una vez.
- Página 169 Limpieza y mantenimiento 1. Compruebe y limpie el robot frecuentemente una vez por semana. 2. Si utiliza el robot por primera vez, la placa de las cuchillas y las cuchillas deben comprobarse una vez al mes. 3. Es importante que las cuchillas y la placa puedan girar sin problemas. 4.
-
Página 170: Detección Y Reparación De Anomalías
DETECCIÓN Y REPARACIÓN DE ANOMALÍAS Avisos de error Causa Solución Mower outside El robot está fuera de Vuelva a colocar el su perímetro. robot dentro del perímetro. Mower lifted El robot se ha Mueva el robot hacia levantado del suelo. una superficie lisa de césped. - Página 171 Si las ruedas giran sin que el robot avance de su posición, se debe a una combinación de un suelo irregular y/o mojado. La solución consiste en añadir tierra para igualar el suelo. Antes de cortar el césped, riéguelo bien y no corte con lluvias fuertes o zonas encharcadas.
-
Página 172: Retirada Del Aparato
Oxford, OX1 9UW United Kingdom Por la presente, Chal-Tec GmbH declara que el tipo de equipo radioeléctrico Garden Hero es conforme con la Directiva 2014/53/UE. El texto completo de la declaración UE de conformidad está disponible en la dirección Internet siguiente: use.berlin/10034749... - Página 173 Gentile Cliente, La ringraziamo per aver acquistato il dispositivo. La preghiamo di leggere attentamente le seguenti istruzioni per l’uso e di seguirle per evitare possibili danni tecnici. Non ci assumiamo alcuna responsabilità per danni scaturiti da una mancata osservazione delle avvertenze di sicurezza e da un uso improprio del dispositivo.
-
Página 174: Dati Tecnici
DATI TECNICI Numero articolo 10034749 Alimentazione dell'adattatore 25,5 V/2,0 A, 100-240 V Alimentazione a batteria 22,2 V/5200 mAh Tipo di batteria Batteria agli ioni di litio Velocità del motore delle lame 3200-3500 rpm Peso 16 kg Potenza operativa 1400 m² +/- 20 % Velocità... -
Página 175: Spiegazione Dei Simboli Di Avvertimento
SPIEGAZIONE DEI SIMBOLI DI AVVERTIMENTO Simboli sul robot tagliaerba AVVERTENZA/ATTENZIONE Prestare estrema attenzione, in modo da non tagliarsi mani o dita dei piedi. Non tenere mani e piedi nelle vicinanze di una lama rotante. Tensione pericolosa! Il dispositivo deve essere sempre a contatto con il suolo durante l'utilizzo. L'inclinazione e il sollevamento del dispositivo possono causare la violenta espulsione di pietre. -
Página 176: Avvertenze Di Sicurezza
AVVERTENZE DI SICUREZZA AVVERTENZA Pericolo d'incendio, scosse elettriche e lesioni! Quando si utilizzano dispositivi elettrici, è necessario rispettare sempre le procedure di sicurezza basilari per ridurre il rischio di incendi, scosse elettriche o gravi lesioni. • Prendere confi denza con l'intero manuale d'uso prima di procedere all'utilizzo. - Página 177 • Prima di tagliere il prato, rimuovere eventuali escrementi di cane. • Prima di ogni utilizzo, controllare se le lame e il loro supporto presentano danni visibili. • Per evitare squilibri, sostituire immediatamente componenti danneggiati o usurati. • Non utilizzare il dispositivo se non è completo o se sono state realizzate modifi che non autorizzate.
- Página 178 • Oggetti metallici che si trovano nel suolo (come cavi elettrici sotterranei) possono causare l'arresto del dispositivo. Gli oggetti metallici possono disturbare il segnale del circuito ad anello, causando l'arresto del robot tagliaerba. • Può capitare che il cavo di delimitazione venga dissotterrato o interrotto da animali domestici.
- Página 179 Sicurezza delle batterie • Il dispositivo contiene batterie agli ioni di litio. Non dare fuoco alle batterie e non esporle a temperature elevate, altrimenti si corre il rischio di esplosioni. • Dopo lunghi utilizzi o in caso di uso con temperature esterne elevate, le batterie potrebbero diventare calde.
-
Página 180: Dispositivo E Accessori
DISPOSITIVO E ACCESSORI Cavo di delimitazione (x100 m) Picchetti per cavo di delimitazione (x100) Viti di messa a terra per stazione di carica (x100) Lame (x9) Viti delle lame (x9) Connettori cavo (x4) Alimentatore Cacciavite Aste di carica (x2) Stazione di carica Robot tagliaerba... -
Página 181: Installazione
INSTALLAZIONE 1. Preparare il prato per il robot tagliaerba Min. 30 cm Stazione di carica in senso antiorario Min. 2 m Min. 30 cm Min. 1,2 m Min. 1,2 m Il robot tagliaerba attivo necessita di un cavo di delimitazione completo per funzionare. Il cavo trasmette un segnale elettrico debole, tramite cui il robot tagliaerba è... - Página 182 Nel vostro giardino possono esserci zone che rappresentano un ostacolo per il robot taglierba o che non sono accessibili. Il robot tagliaerba non tosa oltre al cavo di delimitazione posato in giardino. Inoltre, il robot tagliaerba cambia direzione se entra in contatto con oggetti, come ad esempio: •...
- Página 183 2. Evitare o eliminare aree problematiche Ostacoli, come radici degli alberi sul prato Se nell'area da tosare Una soluzione In alternativa, è è presente la radice di può essere quella possibile tagliare la un albero, potrebbe di posare il cavo radice con una sega rappresentare un introno alla radice,...
- Página 184 Erba particolarmente lunga Se il robot tagliaerba si imbatte in erba particolarmente lunga, potrebbe essere interpretata dal sensore del robot come un ostacolo. L'erba deve essere a un'altezza adeguata per permette il corretto funzionamento del robot tagliaerba. 3. Installazione della stazione di carica Rispettare una distanza minima lineare di 2 m sul lato anteriore della stazione di carica e di 30 cm su quello...
- Página 185 Fonte di corrente sicura Il luogo di posizionamento della stazione di carica può trovarsi a un massimo di 5 m di distanza da un luogo sicuro, da una presa elettrica impermeabile per esterni o da una presa elettrica in locali interni, ad esempio nel garage.
- Página 186 Il cavo di delimitazione Spingere il cavo di Questo esce poi dal entra dal lato delimitazione nel tubo lato posteriore della anteriore (1) della sul lato anteriore (1) stazione di carica (2). stazione di carica della stazione di carica. ed esce da quello posteriore (2).
- Página 187 Spingere in avanti lo sportello Il morsetto a molla deve essere della stazione di carica per sollevato per esporre il foro. esporre i collegamenti del Assicurarsi che il cavo sia inserito cablaggio. completamente prima di lasciare andare il morsetto rosso. Una volta posato completamente Condurre il cavo di alimentazione il cavo di delimitazione, deve...
- Página 188 Prestare attenzione ai Premere il cavo all'interno. collegamenti del cavo, dato che sono dotati di una sede per chiavetta, in modo da garantire un collegamento corretto. Avvitarci sopra l'anello esterno, in Non appena il cablaggio della modo da fissare il cavo ed evitare stazione di carica è...
- Página 189 Indicazione di stato LED Premere lo sportello in posizione Assicurarsi che l'interruttore sia di partenza, in modo da spento. Avvitare entrambe le aste proteggere cavi e collegamenti di carica nei fori sotto allo sportello dall'acqua. della stazione di carica. (Nota: qui si trova l'indicazione di stato LED).
- Página 190 Il cavo di delimitazione deve Se il cavo di delimitazione passa essere ben teso. sopra a un piccolo avvallamento Se è allentato, può capitare sul prato, sono necessari diversi che venga interrotto dal robot picchetti, in modo da fissare il cavo tagliaerba quando ci passa sopra.
- Página 191 5. Installare il robot tagliaerba Posizionare il robot tagliaerba Premere STOP. sulla stazione di carica. Assicurarsi che le ruote si trovino sui supporti e che entrambe le aste di carica siano inserite nel lato anteriore del robot tagliaerba. Nota: il robot tagliaerba deve essere caricato almeno al 70 % della sua capacità...
-
Página 192: Pannello Di Controllo
PANNELLO DI CONTROLLO Ora, data, batteria Stato Tasto POWER: on/off Tasto INDIETRO Tasto START: iniziare a Tasto OK/MENU tagliare l'erba Tasto HOME: ritorno alla Tasti IN ALTO, IN BASSO, stazione di carica SINISTRA, DESTRA A, B, C, D per codice PIN Tasto STOP: tasto di spegnimento di emergenza e apertura della copertura del... -
Página 193: Messa In Funzione E Utilizzo
MESSA IN FUNZIONE E UTILIZZO Regolare l'altezza di taglio 1. Aprire la copertura della manopola. 2. Girando la manopola è possibile impostare un'altezza di taglio tra 2,5 cm e 5,5 cm. Impostare l'altezza di taglio Per il primo taglio della stagione o per erba lunga, spessa e bagnata, è necessaria l'impostazione massima (5,5 cm). - Página 194 Primo utilizzo Inserire il codice PIN sul pannello di controllo. Il codice PIN predefinito è "AAAA". Se si preme START e si chiude la copertura, il robot tagliaerba inizia a tosare l'area che avete delimitato. Le prime sessioni di taglio Le prime sessioni di taglio risulteranno casuali e incomplete.
- Página 195 Accendere e spegnere il robot tagliaerba. Accendere Spegnere 1. Premere POWER per 1. Premere POWER per 3 secondi. 3 secondi. 2. Inserire il codice PIN a quattro caratteri. Il codice PIN predefinito è "AAAA". 3. Il robot tagliaerba si trova in standby ed è necessario premere altri tasti.
- Página 196 Avviare la sessione di taglio 1. Premere START. In modalità di taglio standard, il 2. Chiudere la copertura per robot tagliaerba si muove intorno avviare il dispositivo. al giardino in sequenza casuale e cambia direzione ogni volta che raggiunge il cavo di delimitazione. Nota: se la batteria presenta meno del 70 % di carica, il dispositivo passa allo stato...
- Página 197 1. Premere OK per raggiungere il sottomenu 1. 2. Selezionare "setting" per raggiungere il sottomenu 2. 3. Selezionare "work time". 4. Impostare il tempo di funzionamento con i tasti IN ALTO e IN BASSO (l'impostazione predefinita è di 8 ore). 5.
- Página 198 Carica 1. Posizionare il robot tagliaerba nella stazione di carica (o premere HOME per 3 secondi). 2. Il robot tagliaerba carica fino al 100% e passa poi in standby. 3. Il robot viene ricaricato quando lo stato della batteria torna sotto al 75 %. Il robot tagliaerba viene caricato nella stazione dalle due apposite aste.
- Página 199 Zone 1. Premere OK per raggiungere Possono essere defi nite fi no a 5 zone in giardino. È il sottomenu 1. possibile scegliere quali zone del giardino necessitano 2. Selezionare "Zone". maggiore o minore attenzione. Una zona viene 3. Premere OK per confermare defi nita in base alla distanza del cavo di delimitazione la zona selezionata.
- Página 200 Taglio a spirale (spot mode) Robot tagliaerba posizionato qui 1. Posizionare il robot tagliaerba Il robot tagliaerba può essere posizionato entro la in giardino. delimitazione e durante questa modalità il robot 2. Premere OK per raggiungere taglia per 5 minuti seguendo un modello a spirale il sottomenu 1.
- Página 201 Modalità pioggia Con la modalità pioggia si definisce se il robot deve tagliare il prato in caso di pioggia. Se questa funzione è disattivata, il robot tagliaerba prosegue il funzionamento anche in caso di pioggia. Nota: evitare di utilizzare il robot tagliaerba in caso di pioggia intensa o temporali.
- Página 202 Lingua Data e ora 1. Premere OK per raggiungere 1. Premere OK per raggiungere il sottomenu 1. il sottomenu 1. 2. Selezionare "setting" per 2. Selezionare "setting" per raggiungere il sottomenu 2. raggiungere il sottomenu 2. 3. Selezionare "Language". 3. Selezionare "date & time". 4.
- Página 203 Codice PIN Modificare il codice PIN 1. Il codice PIN deve essere 1. Premere OK per raggiungere inserito dopo l'accensione, il sottomenu 1. dopo aver premuto STOP, 2. Selezionare "setting" per prima di cancellare uno stato raggiungere il sottomenu 2. di errore e prima di modificare 3.
- Página 204 Resettare alle impostazioni di Protocollo di errore fabbrica 1. Premere OK per raggiungere 1. Premere OK per raggiungere il sottomenu 1. il sottomenu 1. 2. Selezionare "setting" per 2. Selezionare "setting" per raggiungere il sottomenu 2. raggiungere il sottomenu 2. 3.
- Página 205 Protocolo di funzionamento Risparmio energetico La retroilluminazione si spegne dopo 2 minuti e il robot tagliaerba si spegne dopo 8 minuti senza alcuna immissione. Indicazione LED La retroilluminazione si spegne dopo 2 minuti e il robot 1. Premere OK per raggiungere tagliaerba si spegne dopo 8 il sottomenu 1.
- Página 206 Sottomenu 1 Sottomenu 2 Sottomenu 3 Spot mode (taglio a spirale) English (inglese) Language German (lingua) (tedesco) French (francese) Date & Time (data e ora) Rain mode (modalità pioggia) Work time (durata di funzionamento) Setting Change PIN (impostazioni) (modificare il codice PIN) Factory reset (resettare alle...
-
Página 207: Riparazione, Pulizia E Manutenzione
RIPARAZIONE, PULIZIA E MANUTENZIONE AVVERTENZA Pericolo di lesione! Togliere la chiave di sicurezza quando il robot tagliaerba non è in funzione e prima di trasportarlo, pulirlo o metterlo via. Riparare il cavo di delimitazione Se il cavo di delimitazione viene La clip presenta due fessure. - Página 208 Prendere una pinza e premere la linguetta metallica sui cavi inseriti. In questo modo si realizza un collegamento tra i cavi. Non appena il cavo di delimitazione è stato riparato, la luce sulla stazione di carica rimane illuminata costantemente di blu. Se la luce è ancora rossa, significa che il cavo di delimitazione è...
- Página 209 Sostituire le lame AVVERTENZA Pericolo di lesione! Indossare guanti protettivi quando si inseriscono, puliscono o sostituiscono le lame. 1. Spegnere il robot tagliaerba. 5. Utilizzare un secondo 2. Indossare guanti protettivi. cacciavite per fi ssare il pannello 3. Rovesciare il robot tagliaerba. delle lame mentre si monta la 4.
- Página 210 Riposizionare le lame (girarle o Trasportare il robot tagliaerba rovesciarle), dato che ogni lato dall'impugnatura tra le due ruote si usura separatamente, fino a posteriori, con la lama rivolta verso quando sono stati utilizzati tutti i l'esterno. lati della lama. Sostituire la lama quando sono stati utilizzati tutti i lati.
- Página 211 Pulizia e manutenzione 1. Controllare e pulire il robot tagliaerba regolarmente una volta alla settimana. 2. Quando si mette in funzione il robot taglierba per la prima volta, il pannello delle lame, i pannelli protettivi e le lame devono essere controllate una volta al mese.
-
Página 212: Ricerca E Correzione Degli Errori
RICERCA E CORREZIONE DEGLI ERRORI Avviso di errore Causa Soluzione Mower outside Il robot tagliaerba Posizionare il robot si trova fuori dalla tagliaerba all'interno delimitazione. della delimitazione. Mower lifted Il robot tagliaerba è Spostare il robot sollevato dal terreno. tagliaerba su una zona piana del prato. - Página 213 Le ruote che girano a vuoto e causano l'impossibilità di movimento del robot taglierba sono dovute a una combinazione di fondo irregolare e/o bagnato. La soluzione consiste nell'aggiungere terra per pareggiare il terreno. Garantire un buon prosciugamento del prato prima del taglio e non tosare il prato in caso di pioggia o acqua stagnante.
-
Página 214: Smaltimento
PO Box 1145 Oxford, OX1 9UW United Kingdom Il fabbricante, Chal-Tec GmbH, dichiara che il tipo di apparecchiatura radio Garden Hero è conforme alla direttiva 2014/53/UE. Il testo completo della dichiarazione di conformità UE è disponibile al seguente indirizzo Internet: use.berlin/10034749...