Tabla de contenido
Publicidad
Enlaces rápidos
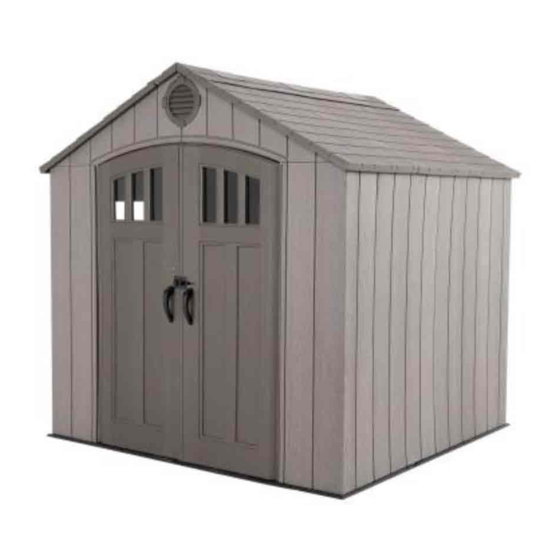
OUTDOOR
SHED
MODEL 60370
BEFORE ASSEMBLY:
• Assemble on a level surface
• At least 3 people recommended for setup
• Ensure all hardware and parts are included and
free of damage.
WATCH
3D ANIMATION
OF THE FULL ASSEMBLY
SCAN THE
OR SEARCH
CODE
1217253
YouTube
FOR DOMESTIC USE ONLY!
IMPORTANT, RETAIN FOR FUTURE REFERENCE: READ CAREFULLY.
TOOLS REQUIRED
QUESTIONS?
Call: 1-800-225-3865
7:00 am-5:00 pm (Monday-Friday) MST
and 9:00 am-1:00 pm Saturday MST
OR WATCH THE HOW-TO ON YOUTUBE
Scan the code, or visit go.lifetime.com/60370-assemblyvideo
®
and the YouTube logo are trademarks of Google, LLC.
®
CONTACT LIFETIME
Live Chat: www.lifetime.com/customerservice
(click on "LIVE CHAT" tab)
For Customer Service in the United Kingdom and mainland Europe:
E-mail: cs@lifetimeproducts.eu
ASSEMBLY INSTRUCTIONS
Pour le français, voir la page 2. Para el español, ver la página 3.
5/16" (≈8 mm) Wood Drill Bit
5/16" (≈8 mm) Masonry Drill Bit
CUSTOMER SERVICE:
Remove Watermar
TABLE OF CONTENTS
Icon Legend..................................................4
Warnings & Notices.....................................5
Platform Construction..................................6
Truss Assembly...........................................11
Gable Assembly..........................................16
Door Assembly............................................21
Floor Assembly............................................35
Wall Assembly.............................................38
Parts Identifi er............................................39
Shelving Installation..................................48
Door & Gable Installation............................51
Roof Assembly............................................55
Wall Hook Installation................................65
Window Pane Installation..........................67
Door Alignment...........................................70
Shed Anchoring..........................................72
Cleaning & Care.........................................75
Registration..............................................76
Warranty....................................................77
MODEL# AND PRODUCT ID
(both are needed when contacting us)
Model Number: 60370
Product ID:
Wondershare
PDFelement
Publicidad
Tabla de contenido

Manuales relacionados para Lifetime 60370


Resumen de contenidos para Lifetime 60370
-
Página 1: Tabla De Contenido
OR WATCH THE HOW-TO ON YOUTUBE SCAN THE OR SEARCH CODE 1217253 Scan the code, or visit go.lifetime.com/60370-assemblyvideo ® YouTube and the YouTube logo are trademarks of Google, LLC. FOR DOMESTIC USE ONLY! IMPORTANT, RETAIN FOR FUTURE REFERENCE: READ CAREFULLY. -
Página 2: Instructions D'assemblage
OU REGARDER LA VIDÉO SUR YOUTUBE SCANNER LE OU CHERCHER CODE 1217253 Scanner le code, ou visiter go.lifetime.com/60370-assemblyvideo ® YouTube et le logotype YouTube sont des marques déposées de Google, LLC. POUR L’USAGE DOMESTIQUE SEULEMENT! IMPORTANT, CONSERVER POUR RÉFÉRENCE : LIRE AVEC PRUDENCE! -
Página 3: Instrucciones De Ensamblaje
Registro................76 Garantía.................79 5/16 in (≈8 mm) Broca de albañilería ¿PREGUNTAS? ® PONERSE EN CONTACTO CON LOS SERVICIOS DE CLIENTES LIFETIME MODEL E ID DEL PRODUCTO Chat en vivo: www.lifetime.com/customerservice Marcar : 1-800-225-3865 (se necesitan los dos al contactarnos) (cliquear en la lengüeta «LIVE CHAT») Número de modelo: 60370... -
Página 4: Icon Legend
Wondershare Remove Watermar PDFelement ICON LEGEND / LÉGENDE DES ICÔNES / SIGNIFICADO DE LOS ÍCONOS • Indicates special heed should be taken when reading. • Indique qu’une attention spéciale doit être portée à la lecture. • Indica que uno debe prestar atención al leer. •... -
Página 5: Warnings & Notices
Wondershare Remove Watermar PDFelement WARNINGS & NOTICES / AVERTISSEMENTS ET AVIS / ADVERTENCIAS Y AVISOS English: • Failure to follow these warnings may result in serious injury or property damage and will void warranty. • To ensure safety, do not attempt to assemble this product without following the instructions carefully. •... -
Página 6: Platform Construction
Wondershare Remove Watermar PDFelement PLATFORM CONSTRUCTION / CONSTRUCTION DE LA PLATE-FORME / CONSTRUCCIÓN DE LA PLATAFORMA • You must provide a platform on which to assemble your shed. Proper building permit documentation may be required in your neighborhood. Consult all local building codes prior to assembling the shed. Before beginning assembly, you must pour or construct a platform. - Página 7 Wondershare Remove Watermar PDFelement SECTION 1 (CONTINUED) / SECTION 1 (SUITE) SECCIÓN 1 (CONTINUACIÓN) CONCRETE REQUIRED / BÉTON REQUIS CONCRETO REQUERIDO 1 yd (0,77 m CONCRETE PLATFORM / PLATE-FORME EN BÉTON PLATAFORMA DE CONCRETO • The concrete should be approximately 4" (10,2 cm) thick. The actual dimensions of the shed, at its widest and longest points, are 95 3/8"...
- Página 8 Wondershare Remove Watermar PDFelement SECTION 1 (CONTINUED) / SECTION 1 (SUITE) SECCIÓN 1 (CONTINUACIÓN) WOOD REQUIRED / BOIS REQUIS MADERA REQUERIDA RIDA WOOD PLATFORM / PLATE-FORME EN BOIS PLATAFORMA DE MADERA • All lumber must be rated for outdoor use! The actual dimensions of the shed, at its widest and longest points, are 95 3/8” x 89 1/2” (2,42 m x 2,27 m).
- Página 9 Wondershare Remove Watermar PDFelement SECTION 1 (CONTINUED) / SECTION 1 (SUITE) SECCIÓN 1 (CONTINUACIÓN) TOOLS, PARTS, AND HARDWARE REQUIRED / OUTILS, PIÈCES, ET QUINCAILLERIE REQUIS INSTRUMENTAL, PIEZAS, Y HERRAJE REQUERIDOS 2 in/po x 4 in/po x 88 3/16 in/po (5,1 cm x 10,2 cm x 2,24 m) (x2) 2 in/po x 4 in/po x 90 3/4 in/po (5,1 cm x 10,2 cm x 2,31 m) (x7) 16d 3 in/po (16d x 7,62 cm) (x28) 1.2.1...
- Página 10 Wondershare Remove Watermar PDFelement SECTION 1 (CONTINUED) / SECTION 1 (SUITE) SECCIÓN 1 (CONTINUACIÓN) TOOLS, PARTS, AND HARDWARE REQUIRED / OUTILS, PIÈCES, ET QUINCAILLERIE REQUIS INSTRUMENTAL, PIEZAS, Y HERRAJE REQUERIDOS 40 3/16 in/po x 93 3/4 in/po x 3/4 in/po 48 in/po x 93 3/4 in/po x 3/4 in/po (1,02 m x 2,38 m x 19,1 mm) (x1) (1,22 m x 2,38 m x 19,1 mm) (x1)
-
Página 11: Truss Assembly
Wondershare Remove Watermar PDFelement TRUSS ASSEMBLY / ASSEMBLAGE DES FERMES / ENSAMBLAJE DE LAS CERCHAS HARDWARE REQUIRED / QUINCAILLERIE REQUISE / HERRAJE REQUERIDO Hardware Bag / Sac de quincaillerie Bolsa de herraje DTK (x8) ADY (x8) ADJ (x4) ADK (x16) 11 9/16 in/po (≈29,4 cm) ADH (x2) AIP (x2) - Página 12 • Si tiene problemas con esta sección, escanee el código abajo para ver un video del ensamble del tobogán y los columpios http://go.Lifetime.com/outdoorstorageshed-section2 • Slide a Connector (AIP) onto the ends of two Truss Gutter Channels (DSR) as shown. • Faire glisser un connecteur (AIP) dans les extrémités de deux canaux de ferme pour gouttières (DSR) tel que démontré.
- Página 13 Wondershare Remove Watermar PDFelement SECTION 2 (CONTINUED) / SECTION 2 (SUITE) SECCIÓN 2 (CONTINUACIÓN) TOOLS AND HARDWARE REQUIRED / OUTILS ET QUINCAILLERIE REQUIS INSTRUMENTAL Y HERRAJE REQUERIDOS 3/8 in/po (≈10 mm) ADY (x8) ADK (x8) • Attatch the Large Truss Brace using the hardware included. Do not overtighten the Cap Nuts. •...
- Página 14 Wondershare Remove Watermar PDFelement SECTION 2 (CONTINUED) / SECTION 2 (SUITE) SECCIÓN 2 (CONTINUACIÓN) TOOLS AND HARDWARE REQUIRED / OUTILS ET QUINCAILLERIE REQUIS INSTRUMENTAL Y HERRAJE REQUERIDOS 11 9/16 in/po (≈29,4 cm) ADH (x2) • Slide a Truss Rod (ADH) through the holes in the Large Truss Brace and Connector. •...
- Página 15 Wondershare Remove Watermar PDFelement SECTION 2 (CONTINUED) / SECTION 2 (SUITE) SECCIÓN 2 (CONTINUACIÓN) TOOLS AND HARDWARE REQUIRED / OUTILS ET QUINCAILLERIE REQUIS INSTRUMENTAL Y HERRAJE REQUERIDOS 7/16 in/po (x2) (≈11 mm) (x2) ADJ (x4) • Secure it with two Cap Nuts (ADJ). Do not overtighten the Nuts. Repeat this section. •...
-
Página 16: Gable Assembly
Wondershare Remove Watermar PDFelement GABLE ASSEMBLY / ASSEMBLAGE DES PIGNONS / ENSAMBLAJE DE LAS FACHADAS HARDWARE REQUIRED / QUINCAILLERIE REQUISE / HERRAJE REQUERIDO Hardware Bag / Sac de quincaillerie Bolsa de herraje ADW (x10) ADV (x12) ADZ (x6) AHS (x4) CXK (x2) ADK (x2) EYR (x2) - Página 17 • Si tiene problemas con esta sección, escanee el código abajo para ver un video del ensamble del tobogán y los columpios http://go.Lifetime.com/outdoorstorageshed-section3 • Align the holes in the left (AGH) and right (AGI) rear gable halves. • Aligner les trous dans les demis pignons gauche (AGH) et droit (AGI).
- Página 18 Wondershare Remove Watermar PDFelement SECTION 3 (CONTINUED) / SECTION 3 (SUITE) SECCIÓN 3 (CONTINUACIÓN) TOOLS AND HARDWARE REQUIRED / OUTILS ET QUINCAILLERIE REQUIS INSTRUMENTAL Y HERRAJE REQUERIDOS ADV (x6) ADW (x5) AEE (x5) AHS (x2) • Insert an end cap (AHS) into each end of the square •...
- Página 19 Wondershare Remove Watermar PDFelement SECTION 3 (CONTINUED) / SECTION 3 (SUITE) SECCIÓN 3 (CONTINUACIÓN) TOOLS AND HARDWARE REQUIRED / OUTILS ET QUINCAILLERIE REQUIS INSTRUMENTAL Y HERRAJE REQUERIDOS 3/8 in/po (≈10 mm) ADW (x5) ADZ (x2) AEE (x7) AHS (x2) CXK (x2) EYQ (x2) •...
- Página 20 Wondershare Remove Watermar PDFelement SECTION 3 (CONTINUED) / SECTION 3 (SUITE) SECCIÓN 3 (CONTINUACIÓN) TOOLS AND HARDWARE REQUIRED / OUTILS ET QUINCAILLERIE REQUIS INSTRUMENTAL Y HERRAJE REQUERIDOS ADK (x2) ADV (x6) EYR (x2) AEE (x2) 3.12 • Align the holes in the header with those in the gable. •...
-
Página 21: Door Assembly
Wondershare Remove Watermar PDFelement LEFT DOOR ASSEMBLY / ASSEMBLAGE DE LA PORTE GAUCHE / ENSAMBLAJE DE LA PUERTA IZQUIERDA HARDWARE REQUIRED / QUINCAILLERIE REQUIS / HERRAJE REQUERIDO Hardware Bag / Sac de quincaillerie Bolsa de herraje BYZ (x2) AEE (x3) AAB (x2) ADW (x1) ACH (x2) - Página 22 • Si tiene problemas con esta sección, escanee el código abajo para ver un video del ensamble del tobogán y los columpios http://go.Lifetime.com/outdoorstorageshed-section4 • Slide a Long Tube (EDW) into the hole in the Left Door (BDJ) until a few inches remain out of the Door. The end with the hole goes at the top.
- Página 23 Wondershare Remove Watermar PDFelement SECTION 4 (CONTINUED) / SECTION 4 (SUITE) SECCIÓN 4 (CONTINUACIÓN) TOOLS AND HARDWARE REQUIRED / OUTILS ET QUINCAILLERIE REQUIS INSTRUMENTAL Y HERRAJE REQUERIDOS ACH (x2) AAB (x2) 1/8 in/po (3 mm) ARA (x1) EOY (x1) AEB (x2) •...
- Página 24 Wondershare Remove Watermar PDFelement SECTION 4 (CONTINUED) / SECTION 4 (SUITE) SECCIÓN 4 (CONTINUACIÓN) TOOLS AND HARDWARE REQUIRED / OUTILS ET QUINCAILLERIE REQUIS INSTRUMENTAL Y HERRAJE REQUERIDOS BYR (x1) ENP (x2) DGR (x1) Lower / Inférieur Inferior DGS (x1) ENO (x4) BYS (x1) Upper / Supérieur...
- Página 25 Wondershare Remove Watermar PDFelement SECTION 4 (CONTINUED) / SECTION 4 (SUITE) SECCIÓN 4 (CONTINUACIÓN) TOOLS AND HARDWARE REQUIRED / OUTILS ET QUINCAILLERIE REQUIS INSTRUMENTAL Y HERRAJE REQUERIDOS AEE (x3) ADW (x1) BYZ (x2) • Attach the Handle to the Door using the hardware included. •...
- Página 26 Wondershare Remove Watermar PDFelement SECTION 4 (CONTINUED) / SECTION 4 (SUITE) SECCIÓN 4 (CONTINUACIÓN) TOOLS AND HARDWARE REQUIRED / OUTILS ET QUINCAILLERIE REQUIS INSTRUMENTAL Y HERRAJE REQUERIDOS EPH (x1) • There is a narrow groove (illustrated in black) running along the outside of the window on the back of each Door. Starting at the top, left corner of the groove in the Left Door, lay the 1/8"...
- Página 27 Wondershare Remove Watermar PDFelement SECTION 4 (CONTINUED) / SECTION 4 (SUITE) SECCIÓN 4 (CONTINUACIÓN) TOOLS AND HARDWARE REQUIRED / OUTILS ET QUINCAILLERIE REQUIS INSTRUMENTAL Y HERRAJE REQUERIDOS ADZ (x14) 4.10 • Align the holes in the Pane with those in the Door, and gently set a Window Pane (DHN) down onto the Door. •...
- Página 28 Wondershare Remove Watermar PDFelement RIGHT DOOR ASSEMBLY / ASSEMBLAGE DE LA PORTE DROITE / ENSAMBLE DE LA PUERTA DERECHA HARDWARE REQUIRED / QUINCAILLERIE REQUISE / HERRAJE REQUERIDO Hardware Bags / Sacs de quincaillerie Bolsas de herraje ADW (x1) EPC (x2) BYZ (x2) ACH (x2) CHK (x1)
- Página 29 • Si tiene problemas con esta sección, escanee el código abajo para ver un video del ensamble del tobogán y los columpios http://go.Lifetime.com/outdoorstorageshed-section5 • Slide a Long Tube (EDW) into the hole in the Right Door (BDK) until a few inches remain out of the Door. The end with the hole goes at the top.
- Página 30 Wondershare Remove Watermar PDFelement SECTION 5 (CONTINUED) / SECTION 5 (SUITE) SECCIÓN 5 (CONTINUACIÓN) TOOLS AND HARDWARE REQUIRED / OUTILS ET QUINCAILLERIE REQUIS INSTRUMENTAL Y HERRAJE REQUERIDOS 7/16 in/po (11 mm) 3/8 in/po BYS (x1) AEE (x2) (10 mm) BYR (x1) EPA (x1) EOZ (x1) EPC (x2)
- Página 31 Wondershare Remove Watermar PDFelement SECTION 5 (CONTINUED) / SECTION 5 (SUITE) SECCIÓN 5 (CONTINUACIÓN) TOOLS AND HARDWARE REQUIRED / OUTILS ET QUINCAILLERIE REQUIS INSTRUMENTAL Y HERRAJE REQUERIDOS AEE (x1) ADW (x1) BYZ (x2) BBI (x1) • Attach the Handle as shown. Tighten securely. •...
- Página 32 Wondershare Remove Watermar PDFelement SECTION 5 (CONTINUED) / SECTION 5 (SUITE) SECCIÓN 5 (CONTINUACIÓN) TOOLS AND HARDWARE REQUIRED / OUTILS ET QUINCAILLERIE REQUIS INSTRUMENTAL Y HERRAJE REQUERIDOS • Slide a Hinge Tube (CRD) into the hole in the Door until a few inches remain out of the bottom. •...
- Página 33 Wondershare Remove Watermar PDFelement SECTION 5 (CONTINUED) / SECTION 5 (SUITE) SECCIÓN 5 (CONTINUACIÓN) TOOLS AND HARDWARE REQUIRED / OUTILS ET QUINCAILLERIE REQUIS INSTRUMENTAL Y HERRAJE REQUERIDOS EPH (x1) • There is a narrow groove (illustrated in black) running along the outside of the window on the back of each Door. Starting at the top, right corner of the groove in the Right Door, lay the 1/8"...
- Página 34 Wondershare Remove Watermar PDFelement SECTION 5 (CONTINUED) / SECTION 5 (SUITE) SECCIÓN 5 (CONTINUACIÓN) TOOLS AND HARDWARE REQUIRED / OUTILS ET QUINCAILLERIE REQUIS INSTRUMENTAL Y HERRAJE REQUERIDOS ADZ (x14) • Align the holes in the Pane with those in the Door, and gently set a Window Pane (DHN) down onto the Door. •...
-
Página 35: Floor Assembly
Wondershare Remove Watermar PDFelement FLOOR ASSEMBLY / ASSEMBLAGE DU PLANCHER / ENSAMBLAJE DEL PISO HARDWARE REQUIRED / QUINCAILLERIE REQUISE / HERRAJE REQUERIDO Hardware Bag / Sac de quincaillerie Bolsa de herraje ADC (x1) AHO (x2) BQC (x20) Note: These are not anchoring screws. Their purpose is to fasten together the Floor Panels. Remarque : Ce ne sont pas des vis d’ancrage. - Página 36 • Si tiene problemas con esta sección, escanee el código abajo para ver un video del ensamble del tobogán y los columpios http://go.Lifetime.com/outdoorstorageshed-section6 • Hold an Inner Floor Panel (CUD) at an angle, and slide the tabs along the edge underneath an Outer Floor Panel (CUW). The tabs interlock.
- Página 37 Wondershare Remove Watermar PDFelement SECTION 6 (CONTINUED) / SECTION 6 (SUITE) SECCIÓN 6 (CONTINUACIÓN) TOOLS AND HARDWARE REQUIRED / OUTILS ET QUINCAILLERIE REQUIS INSTRUMENTAL Y HERRAJE REQUERIDOS AHO (x2) BQC (x12) Note: These are not anchoring screws. Their purpose is to fasten together the Floor Panels. Remarque : Ce ne sont pas des vis d’ancrage.
-
Página 38: Wall Assembly
Wondershare Remove Watermar PDFelement WALL ASSEMBLY / ASSEMBLAGE DES MURS / ENSAMBLAJE DE LOS MUROS HARDWARE REQUIRED / QUINCAILLERIE REQUISE / HERRAJE REQUERIDO Hardware Bag / Sac de quincaillerie Bolsa de herraje ADZ (x91) ADV (x4) PARTS REQUIRED / PIÈCES REQUISES / PIEZAS REQUERIDAS Metal Parts / Pièces en métal / Piezas de metal... -
Página 39: Parts Identifi Er
Wondershare Remove Watermar PDFelement PARTS IDENTIFIER / IDENTIFICATEUR DE PIÈCES / IDENTIFICADOR DE PIEZAS CONTENTS OF BOX 1 / CONTENU DE LA BOÎTE 1 CONTENIDO DE LA CAJA 1 BDJ (x1) BDK (x1) EVZ (x1) EWA (x1) AGQ (x6) AGH (x1) AGI (x1) CUW (x2) AFV (x1) - Página 40 Wondershare Remove Watermar PDFelement PARTS IDENTIFIER / IDENTIFICATEUR DE PIÈCES / IDENTIFICADOR DE PIEZAS CONTENTS METAL KIT / CONTENU DU KIT DE PIÈCES EN MÉTAL CONTENIDO DEL KIT DE PIEZAS DE METAL 50 9/16 in/po (≈1,28 m) DSR (x4) 59 1/2 in/po (≈1,51 m) 59 1/2 in/po (1,51 m) EYS (x1) 48 in/po (≈1,22 m)
- Página 41 Wondershare Remove Watermar PDFelement PARTS IDENTIFIER / IDENTIFICATEUR DE PIÈCES / IDENTIFICADOR DE PIEZAS CONTENTS OF BOX 2 / CONTENU DE LA BOÎTE 2 CONTENIDO DE LA CAJA 2 AFY (117) (x2) AGY (x1) AGW (x1) AGL (x1) AGN (x1) AHD (x5) AHH (x1) CONTENTS OF SMALL PARTS KIT /...
- Página 42 Wondershare Remove Watermar PDFelement PARTS IDENTIFIER / IDENTIFICATEUR DE PIÈCES / IDENTIFICADOR DE PIEZAS HARDWARE BAGS / SACS DE QUINCAILLERIE BOLSAS DE HERRAJE...
- Página 43 • Si tiene problemas con esta sección, escanee el código abajo para ver un video del ensamble del tobogán y los columpios http://go.Lifetime.com/outdoorstorageshed-section7 • Secure a Wall Support Channel (AFM) to the fi ve (5) Wall Panels (AHD) just to the left of the notch at the top of the Wall Panels using four (4) Screws (ADZ) for each.
- Página 44 Wondershare Remove Watermar PDFelement SECTION 7 (CONTINUED) / SECTION 7 (SUITE) SECCIÓN 7 (CONTINUACIÓN) TOOLS AND HARDWARE REQUIRED / OUTILS ET QUINCAILLERIE REQUIS INSTRUMENTAL Y HERRAJE REQUERIDOS ADV (x4) • Secure the Channel to the Panel using four (4) Screws (ADV). Note the angle of the Screws. •...
- Página 45 Wondershare Remove Watermar PDFelement SECTION 7 (CONTINUED) / SECTION 7 (SUITE) SECCIÓN 7 (CONTINUACIÓN) TOOLS AND HARDWARE REQUIRED / OUTILS ET QUINCAILLERIE REQUIS INSTRUMENTAL Y HERRAJE REQUERIDOS AIW (x1) ADZ (x8) • Secure a Wall Support Channel (AFM) to the Corner •...
- Página 46 Wondershare Remove Watermar PDFelement SECTION 7 (CONTINUED) / SECTION 7 (SUITE) SECCIÓN 7 (CONTINUACIÓN) TOOLS AND HARDWARE REQUIRED / OUTILS ET QUINCAILLERIE REQUIS INSTRUMENTAL Y HERRAJE REQUERIDOS AIW (x1) ADZ (x15) • Insert the tabs of two Wall Panels (AHD or AHH) and •...
- Página 47 Wondershare Remove Watermar PDFelement SECTION 7 (CONTINUED) / SECTION 7 (SUITE) SECCIÓN 7 (CONTINUACIÓN) TOOLS AND HARDWARE REQUIRED / OUTILS ET QUINCAILLERIE REQUIS INSTRUMENTAL Y HERRAJE REQUERIDOS AIW (x1) ADZ (x30) 7.12 7.13 • Insert this Corner Panel (AGL) like the fi rst Corner Wall •...
-
Página 48: Shelving Installation
Wondershare Remove Watermar PDFelement SHELVING INSTALLATION / INSTALLATION DU RAYONNAGE / INSTALACIÓN DE LA ESTANTERÍA HARDWARE REQUIRED / QUINCAILLERIE REQUISE / HERRAJE REQUERIDO Hardware Bag / Sac de quincaillerie Bolsa de herraje AIY (x2) ADZ (x14) PARTS REQUIRED / PIÈCES REQUISES / PIEZAS REQUERIDAS Plastic Parts / Pièces en plastique Piezas de plástico... - Página 49 • Si tiene problemas con esta sección, escanee el código abajo para ver un video del ensamble del tobogán y los columpios http://go.Lifetime.com/outdoorstorageshed-section8 • Insert the shelf brackets (AIY) into the slots in the wall support channels. The brackets must be at the same height and on the rear Wall.
- Página 50 Wondershare Remove Watermar PDFelement SECTION 8 (CONTINUED) / SECTION 8 (SUITE) SECCIÓN 8 (CONTINUACIÓN) TOOLS AND HARDWARE REQUIRED / OUTILS ET QUINCAILLERIE REQUIS INSTRUMENTAL Y HERRAJE REQUERIDOS ADZ (x6) • Fold the fl aps on the ends of the shelf (AFV) up, and set the shelf onto the brackets.
-
Página 51: Door & Gable Installation
Wondershare Remove Watermar PDFelement DOOR & ENTRY GABLE INSTALLATION / INSTALLATION DU PIGNON D’ENTRÉE ET DES PORTES / INSTALACIÓN DE LA FACHADA DE ENTRADA Y LAS PUERTAS HARDWARE REQUIRED / QUINCAILLERIE REQUISE / HERRAJE REQUERIDO Hardware Bag / Sac de quincaillerie Bolsa de herraje ADX (x4) AHP (x2) - Página 52 • Si tiene problemas con esta sección, escanee el código abajo para ver un video del ensamble del tobogán y los columpios http://go.Lifetime.com/outdoorstorageshed-section9 • Pull the Hinge Tube down out of the Door about six inches. Align the hole at the bottom of the Hinge Tube with the slit in the Bushing, and insert the Tube.
- Página 53 Wondershare Remove Watermar PDFelement SECTION 9 (CONTINUED) / SECTION 9 (SUITE) SECCIÓN 9 (CONTINUACIÓN) TOOLS AND HARDWARE REQUIRED / OUTILS ET QUINCAILLERIE REQUIS INSTRUMENTAL Y HERRAJE REQUERIDOS ADZ (x6) • Slide the holes in the Entry Gable down over the two Hinge Tubes. •...
- Página 54 Wondershare Remove Watermar PDFelement SECTION 9 (CONTINUED) / SECTION 9 (SUITE) SECCIÓN 9 (CONTINUACIÓN) TOOLS AND HARDWARE REQUIRED / OUTILS ET QUINCAILLERIE REQUIS INSTRUMENTAL Y HERRAJE REQUERIDOS ADX (x4) AIC (x1) AIM (x1) • Attach the Left (AIC) and Right (AIM) Gap Flaps to the corners of the Doors using the hardware included. These Flaps simply serve to block out light.
-
Página 55: Roof Assembly
Wondershare Remove Watermar PDFelement ROOF ASSEMBLY / MONTAGE DU TOIT / ENSAMBLAJE DEL TEJADO HARDWARE REQUIRED / QUINCAILLERIE REQUISE / HERRAJE REQUERIDO Hardware Bag / Sac de quincaillerie Bolsa de herraje ADX (x18) ADZ (x100) AED (x18) PARTS REQUIRED / PIÈCES REQUISES / PIEZAS REQUERIDAS Metal Parts / Pièces en métal Piezas de metal... - Página 56 • Si tiene problemas con esta sección, escanee el código abajo para ver un video del ensamble del tobogán y los columpios 10.1 http://go.Lifetime.com/outdoorstorageshed-section10 • Set a Truss Assembly into the notches on the fi rst two opposite Wall Panels. Set a Roof Panel (AGQ) onto the Gable, Wall Panel, and Truss Assembly.
- Página 57 Wondershare Remove Watermar PDFelement SECTION 10 (CONTINUED) / SECTION 10 (SUITE) SECCIÓN 10 (CONTINUACIÓN) TOOLS AND HARDWARE REQUIRED / OUTILS ET QUINCAILLERIE REQUIS INSTRUMENTAL Y HERRAJE REQUERIDOS ADZ (x4) 10.3 • Align the four holes in the Wall Panel with those at the bottom of the Roof Panel, and insert four (4) Screws (ADZ) to secure the Panel in place.
- Página 58 Wondershare Remove Watermar PDFelement SECTION 10 (CONTINUED) / SECTION 10 (SUITE) SECCIÓN 10 (CONTINUACIÓN) TOOLS AND HARDWARE REQUIRED / OUTILS ET QUINCAILLERIE REQUIS INSTRUMENTAL Y HERRAJE REQUERIDOS ADZ (x2) 10.4 • Insert the fi rst two Screws (ADZ) through the Gable and into the Roof Panel at the locations shown. Insert the Roof Support (AFL) into the notches in the Gable and between the Truss and the Roof Panel.
- Página 59 Wondershare Remove Watermar PDFelement SECTION 10 (CONTINUED) / SECTION 10 (SUITE) SECCIÓN 10 (CONTINUACIÓN) TOOLS AND HARDWARE REQUIRED / OUTILS ET QUINCAILLERIE REQUIS INSTRUMENTAL Y HERRAJE REQUERIDOS ADZ (x16) 10.5 • Insert fi ve (5) more Screws (ADZ) to secure the Panel in place. •...
- Página 60 Wondershare Remove Watermar PDFelement SECTION 10 (CONTINUED) / SECTION 10 (SUITE) SECCIÓN 10 (CONTINUACIÓN) TOOLS AND HARDWARE REQUIRED / OUTILS ET QUINCAILLERIE REQUIS INSTRUMENTAL Y HERRAJE REQUERIDOS ADZ (x20) 10.7 • Repeat the previous steps for the center Roof Panels but using ten (10) Screws (ADZ) per Panel. •...
- Página 61 Wondershare Remove Watermar PDFelement SECTION 10 (CONTINUED) / SECTION 10 (SUITE) SECCIÓN 10 (CONTINUACIÓN) TOOLS AND HARDWARE REQUIRED / OUTILS ET QUINCAILLERIE REQUIS INSTRUMENTAL Y HERRAJE REQUERIDOS ADZ (x14) 10.8 • Attach the Rear Gable to the Shed using fourteen (14) Screws (ADZ). •...
- Página 62 Wondershare Remove Watermar PDFelement SECTION 10 (CONTINUED) / SECTION 10 (SUITE) SECCIÓN 10 (CONTINUACIÓN) TOOLS AND HARDWARE REQUIRED / OUTILS ET QUINCAILLERIE REQUIS INSTRUMENTAL Y HERRAJE REQUERIDOS ADZ (x22) 10.9 • Attach the last two Roof Panels to the shed in the same way you did the fi rst two. •...
- Página 63 Wondershare Remove Watermar PDFelement SECTION 10 (CONTINUED) / SECTION 10 (SUITE) SECCIÓN 10 (CONTINUACIÓN) TOOLS AND HARDWARE REQUIRED / OUTILS ET QUINCAILLERIE REQUIS INSTRUMENTAL Y HERRAJE REQUERIDOS ADZ (x18) 10.10 • Starting at the front, attach the Roof Caps to the shed using the hardware included. •...
- Página 64 Wondershare Remove Watermar PDFelement SECTION 10 (CONTINUED) / SECTION 10 (SUITE) SECCIÓN 10 (CONTINUACIÓN) TOOLS AND HARDWARE REQUIRED / OUTILS ET QUINCAILLERIE REQUIS INSTRUMENTAL Y HERRAJE REQUERIDOS ADX (x18) AED (x18) 10.11 • Fold the Skylights (AHC), and attach them to the Roof using six (6) Screws (ADX) and Washers (AED) for each Skylight. •...
-
Página 65: Wall Hook Installation
Wondershare Remove Watermar PDFelement WALL HOOK INSTALLATION / INSTALLATION DES CROCHETS MURAUX / INSTALACIÓN DE LOS GANCHOS MURALES ACCESSORIES REQUIRED / ACCESSOIRES REQUIS / ACCESORIOS REQUERIDOS Accessory Bag / Sac d’accessoires Bolsa de accesorios EDL (x6) PARTS REQUIRED / PIÈCES REQUISES / PIEZAS REQUERIDAS TOOLS REQUIRED / OUTILS REQUIS / INSTRUMENTAL REQUERIDO... - Página 66 • Si tiene problemas con esta sección, escanee el código abajo para ver un video del ensamble del tobogán y los columpios http://go.Lifetime.com/outdoorstorageshed-section11 11.1 • Insert the six (6) Wall Hooks (EDL) into any of the notches in the Wall Panels (either side of the shed). Then push downward to lock them in place.
-
Página 67: Window Pane Installation
Wondershare Remove Watermar PDFelement WINDOW PANE INSTALLATION / INSTALLATION DU CARREAU / INSTALACIÓN DE LA HOJA DE VENTANA HARDWARE REQUIRED / QUINCAILLERIE REQUISE / HERRAJE REQUERIDO Hardware Bag / Sac de quincaillerie Bolsa de herraje AIS (x2) ADZ (x4) ADY (x1) PARTS REQUIRED / PIÈCES REQUISES / PIEZAS REQUERIDAS Plastic Parts / Pièces en plastique... - Página 68 • Si tiene problemas con esta sección, escanee el código abajo para ver un video del ensamble del tobogán y los columpios http://go.Lifetime.com/outdoorstorageshed-section12 12.1 • Peel off the protective backing from both sides of the Window Pane (AHE).
- Página 69 Wondershare Remove Watermar PDFelement SECTION 12 (CONTINUED) / SECTION 12 (SUITE) SECCIÓN 12 (CONTINUACIÓN) TOOLS AND HARDWARE REQUIRED / OUTILS ET QUINCAILLERIE REQUIS INSTRUMENTAL Y HERRAJE REQUERIDOS ADZ (x4) AIS (x2) 12.4 • Attach the two (2) Window Latches (ADY) at the top corners of the Panel opening. •...
-
Página 70: Door Alignment
Wondershare Remove Watermar PDFelement DOOR ALIGNMENT / ALIGNEMENT DES PORTES / ALINEACIÓN DE LAS PUERTAS HARDWARE REQUIRED / QUINCAILLERIE REQUISE / HERRAJE REQUERIDO PARTS REQUIRED / PIÈCES REQUISES / PIEZAS REQUERIDAS Plastic Parts / Pièces en plastique Piezas de plástico AIX (x4) TOOLS REQUIRED / OUTILS REQUIS / INSTRUMENTAL REQUERIDO... - Página 71 Wondershare Remove Watermar PDFelement SECTION 13 (CONTINUED) / SECTION 13 (SUITE) SECCIÓN 13 (CONTINUACIÓN) TOOLS AND HARDWARE REQUIRED / OUTILS ET QUINCAILLERIE REQUIS INSTRUMENTAL Y HERRAJE REQUERIDOS AIX (x4) 13.1 • If the Doors are not level, follow the steps on this page to even them out. •...
-
Página 72: Shed Anchoring
Wondershare Remove Watermar PDFelement SHED ANCHORING / ANCRAGE DE L’ABRI / ANCLAJE DE LA CASETA HARDWARE REQUIRED / QUINCAILLERIE REQUISE / HERRAJE REQUERIDO PARTS REQUIRED / PIÈCES REQUISES / PIEZAS REQUERIDAS TOOLS REQUIRED / OUTILS REQUIS / INSTRUMENTAL REQUERIDO 5/16" (≈8 mm) Wood Drill Bit Foret à... - Página 73 Wondershare Remove Watermar PDFelement SECTION 14 (CONTINUED) / SECTION 14 (SUITE) SECCIÓN 14 (CONTINUACIÓN) FOR A CONCRETE PLATFORM / POUR UNE PLATE-FORME EN BÉTON PARA UNA PLATAFORMA DE CONCRETO 5/16 in/po (≈8 mm) 14.1 • If you plan on anchoring your shed to a concrete platform, you must purchase the correct anchoring hardware. We recommend using a hammer drill, 5/16"...
- Página 74 Wondershare Remove Watermar PDFelement SECTION 14 (CONTINUED) / SECTION 14 (SUITE) SECCIÓN 14 (CONTINUACIÓN) FOR A WOOD PLATFORM / POUR UNE PLATE-FORME EN BOIS PARA UNA PLATAFORMA DE MADERA 5/16 in/po (≈8 mm) 7/16 in/po (≈11 mm) 14.1 • If you plan on anchoring your shed to a wood platform, you must purchase the correct anchoring hardware. We recommend using a drill, 5/16"...
-
Página 75: Cleaning & Care
Congratulations on your Lifetime ® product purchase. By following the instructions below, your new Lifetime product should provide you with years of service and enjoyment. The polyethylene panels are stain and solvent resistant. Most stains can be removed using a mild soap and a soft-bristled brush. -
Página 76: Registration
à des tiers, et ne leur permettra pas d’utiliser vos données personnelles à leurs propres fi ns. Nous vous invitons à lire notre politique de confi dentialité à www.lifetime.com (en anglais seulement) ENREGISTRER CE PRODUIT aujourd’hui! REGISTRAR EL PRODUCTO EN LÍNEA EN WWW.LIFETIME.COM... -
Página 77: Warranty
This warranty is expressly in lieu of all other warranties, expressed or implied, including warranties of merchantability or fi tness for use to extent permitted by Federal and state law. Neither Lifetime Products, Inc., nor any representative assumes any other liability in connection with this product. This warranty gives you specifi c legal rights, and you may also have other rights which vary from state to state. -
Página 78: Garantie De Fabrication Limitée De 10 Ans
à cette condition et aucun représentant de la société ne peut renoncer à l’application de cette politique ou la modifi er. Ce produit n’est pas destiné à des fi ns institutionnelles ou commerciales; Lifetime Products, Inc. n’assume aucune responsabilité à cet égard. Toute utilisation institutionnelle ou commerciale annule la garantie. -
Página 79: Garantía
NO ESTÁN DISPONIBLES O SON OBSOLETAS. El comprador original recibe una garantía de que los productos de césped y jardín de Lifetime están libres de defectos de material o mano de obra durante un período de 10 años a partir de la fecha de compra original al por menor. - Página 80 ® MEJORAR LA COMPRA DE LIFETIME AGREGANDO ACCESORIOS U OTROS MARAVILLOSOS PRODUCTOS Para comprar accesorios u otros productos de Lifetime®, visitarnos en: www.lifetime.com O marcar al 1-800-424-3865 De lunes hasta viernes 7:00 h–17:00 h Horario Éstandar de la Montaña (MST) y sábados 9:00 h–13:00 h (MST)