Tabla de contenido
Publicidad
Idiomas disponibles
Idiomas disponibles
Enlaces rápidos
H-9022
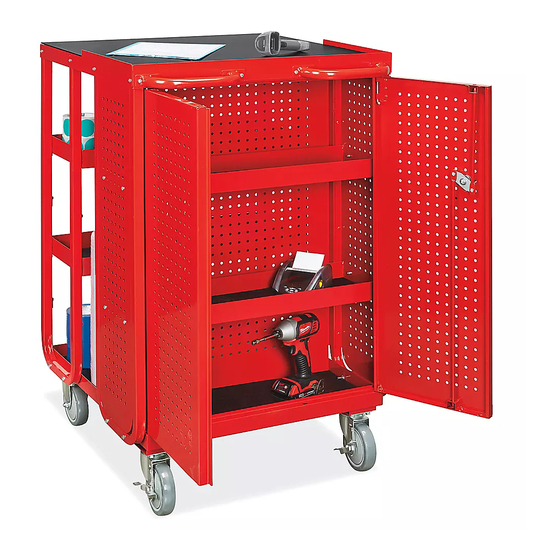
RECEIVING CART
TOOLS NEEDED
Phillips
Allen Wrench
Screwdriver
(included)
Base x 1
Inner Cabinet
Exterior Cabinet
Shelf x 2
Shelf x 2
Rigid
Swivel Caster
Caster x 2
with Brake x 2
NOTE: Do not fully tighten nuts and bolts until
cart is completely assembled.
1. Attach casters to base using 16 hex head bolts.
(See Figure 1)
NOTE: Swivel with brake casters can be installed
on either end of cart. It is recommended that
swivel with brake casters be installed at the
rear of cart by the lip for cabinet doors.
PAGE 1 OF 12
1-800-295-5510
uline.com
8 mm Wrench
10 mm Wrench
13 mm Wrench
Left Cabinet
Right Cabinet
Door x 1
Door x 1
Shelf Mat x 6
Short Allen
Short Phillips
Head Bolt x 24
Head Bolt x 19
PARTS
Cabinet
Support x 2
Top Shelf x 1
Long Phillips
Head Bolt x 8
ASSEMBLY
Figure 1
Para Español, vea páginas 5-8.
Pour le français, consulter les pages 9-12.
Outer
Cabinet Back x 1
Support x 2
Short Shelf Lip x 4
Handle x 2
Long Shelf Lip x 2
Hex Head
5 mm
Bolt x 16
Locknut x 11
6 mm
Locknut x 8
1220 IH-9022
Publicidad
Tabla de contenido

Resumen de contenidos para Uline H-9022
- Página 1 Para Español, vea páginas 5-8. Pour le français, consulter les pages 9-12. H-9022 1-800-295-5510 uline.com RECEIVING CART TOOLS NEEDED 8 mm Wrench Phillips Allen Wrench Screwdriver (included) 10 mm Wrench 13 mm Wrench PARTS Base x 1 Left Cabinet Right Cabinet...
- Página 2 ASSEMBLY CONTINUED 2. Turn the base over onto its casters and attach 4. Attach bottom lip of cabinet back to base using cabinet supports to outside of base using two long three short Phillips head bolts and three 5 mm Phillips head bolts and two 6 mm locknuts per locknuts.
- Página 3 ASSEMBLY CONTINUED 6. Install exterior shelves to desired height on outer 9. Attach handles to desired side of cart by inserting supports by placing shelves onto outer support eight short Allen head bolts through handle, long louvers. (See Figure 6) shelf lip and top shelf.
- Página 4 13. Place shelf mats in shelves and tighten all nuts of hinge in base lip. Pull top spring hinge down to and bolts. align door with top and release hinge to attach door to top. (See Figure 11) Figure 11 1-800-295-5510 uline.com PAGE 4 OF 12 1220 IH-9022...
-
Página 5: Carrito Para Área De Recepción De Materiales
H-9022 800-295-5510 uline.mx CARRITO PARA ÁREA DE RECEPCIÓN DE MATERIALES HERRAMIENTAS NECESARIAS Llave de 8 mm Desarmador Llave Allen de Cruz (incluida) Llave de 10 mm Llave de 13 mm PARTES 1 Base 1 Puerta Izquierda 1 Puerta Derecha 2 Soportes para... -
Página 6: Continuación Del Ensamble
CONTINUACIÓN DEL ENSAMBLE 2. Voltee la base sobre las ruedas y fije los soportes 4. Fije el reborde inferior de la parte posterior del para gabinete al exterior de la base usando dos gabinete a la base usando tres pernos cortos de cruz pernos largos de cruz y dos contratuercas de 6 mm y tres contratuercas de 5 mm. - Página 7 CONTINUACIÓN DEL ENSAMBLE 6. Instale las repisas exteriores a la altura deseada 9. Fije las asas en el lado deseado del carrito en los soportes externos colocando repisas en las insertando ocho pernos con cabeza Allen a través rejillas del soporte externos. (Vea Diagrama 6) del asa, borde largo de repisa y repisa superior.
- Página 8 Jale el resorte de bisagra superior hacia abajo para alinear la puerta con la cubierta y suelte la bisagra para fijar la puerta a la cubierta. (Vea Diagrama 11) Diagrama 11 800-295-5510 uline.mx PAGE 8 OF 12 1220 IH-9022...
-
Página 9: Outils Requis
H-9022 1-800-295-5510 uline.ca CHARIOT DE MANUTENTION OUTILS REQUIS Tournevis Clé Allen Clé de 8 mm cruciforme (inclus) Clé de 10 mm Clé de 13 mm PIÈCES Base x 1 Porte d'armoire Porte d'armoire Support Support Panneau arrière gauche x 1... - Página 10 MONTAGE SUITE 2. Tournez la base sur ses roulettes et fixez les supports 4. Fixez le rebord inférieur du panneau arrière d'armoire à la partie extérieure de la base avec d'armoire avec trois boulons courts cruciformes et deux boulons longs cruciformes et deux écrous trois écrous freinés de 5 mm.
- Página 11 MONTAGE SUITE 6. Installez les tablettes extérieures à la hauteur voulue 9. Fixez les poignées sur le côté désiré du chariot avec sur les supports externes en les plaçant sur les huit boulons courts Allen en les insérant à travers la lamelles.
- Página 12 Tirez la charnière supérieure à ressort vers le bas pour aligner la porte sur la tablette supérieure, puis relâchez-la pour fixer la porte à la tablette supérieure. (Voir Figure 11) Figure 11 1-800-295-5510 uline.ca PAGE 12 OF 12 1220 IH-9022...


