Tabla de contenido
Publicidad
Idiomas disponibles
Idiomas disponibles
Enlaces rápidos
welcoming • sophisticated • inspiring
®
allen + roth
is a registered trademark
ITEM #4143022
of LF, LLC. All Rights Reserved.
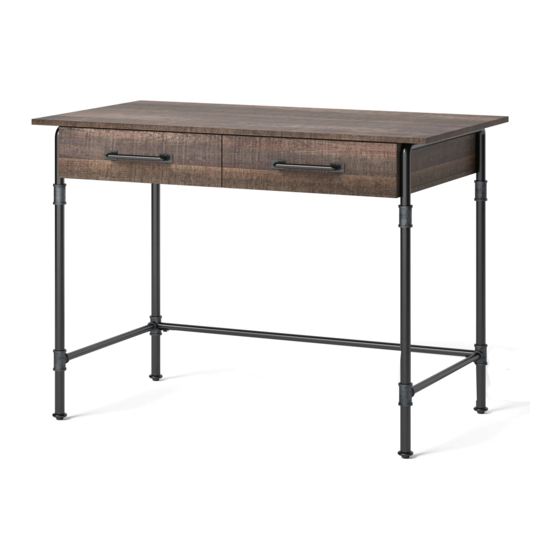
DESK
MODEL #LWS44PSD
Français p. 14
Español p. 27
ATTACH YOUR RECEIPT HERE
Serial Number
Purchase Date
Questions, problems, missing parts? Before returning to your retailer, call our customer service
department at 1-866-439-9800, 8 a.m. - 8 p.m., EST, Monday - Sunday. You could also contact us at
partsplus@lowes.com.
A S 2 1 7 3 1
1
Publicidad
Tabla de contenido

Manuales relacionados para allen+roth LWS44PSD


Resumen de contenidos para allen+roth LWS44PSD
- Página 1 ® allen + roth is a registered trademark ITEM #4143022 of LF, LLC. All Rights Reserved. DESK MODEL #LWS44PSD Français p. 14 Español p. 27 ATTACH YOUR RECEIPT HERE Serial Number Purchase Date Questions, problems, missing parts? Before returning to your retailer, call our customer service department at 1-866-439-9800, 8 a.m.
-
Página 2: Tabla De Contenido
TABLE OF CONTENTS Cam lock System Operation....................2 Package Contents....................... 3 Hardware Contents.......................4 Safety Information....................... 5 Preparation ......................... 5 Assembly Instructions......................6 Care and Maintenance ....................... 11 Limited Lifetime Warranty....................11 Replacement Parts List ....................12 CAM LOCK SYSTEM OPERATION DETAIL A DETAIL B CAM LOCK... -
Página 3: Package Contents
PACKAGE CONTENTS PART DESCRIPTION QUANTITY PART DESCRIPTION QUANTITY Top Panel Bottom Side Rail Left Side Frame Bottom Center Rail Right Side Frame Back Stretcher Metal Support Tube Drawer Left Back Panel Drawer Right Left Side Panel Drawer Back Drawer Bottom Right Side Panel Drawer Stretcher Partition Panel... -
Página 4: Hardware Contents
HARDWARE CONTENTS (shown not actual size) Large Cam Lock Cam Bolt M3 x 38mm Screw Wood Dowel Qty. 18 Qty. 30 Qty. 26 Qty. 31 1/4”x 32mm Bolt 1/4” Lock Washer 1/4”x 15mm Bolt 1/4” Flat Washer Qty. 8 Qty. 8 Qty. -
Página 5: Safety Information
SAFETY INFORMATION Please read and understand this entire manual before attemting to assemble or install the product. 1. Please read the Assembly Instructions prior to assembling the unit. 2. To avoid damage, assemble the unit on a sturdy, level and non-abrasive surface. 3. -
Página 6: Assembly Instructions
ASSEMBLY INSTRUCTIONS 1. Insert cam bolts (BB) into top panel (A). Hardware Used Cam Bolt 2. Insert cam bolts (BB) into back panel (E), left side panel (F), right side panel (G). Hardware Used Cam Bolt 3. Attach left side panel (F), right side panel (G), partition panel (H) to back panel (E), using large cam lock (AA) and wood dowel (DD). - Página 7 ASSEMBLY INSTRUCTIONS 4. Attach fixed left side panel (F), right side panel (G), partition panel (H), back panel (E) to top panel (A), using large cam lock (AA) and wood dowel (DD). Hardware Used Large Cam Lock x 12 Wood Dowel 5.
- Página 8 ASSEMBLY INSTRUCTIONS 7. Attach bottom back rail (I), bottom front rail (J), bottom side rail (K), bottom center rail (L) to fixed left side panel (F), right side panel (G), partition panel (H), back panel (E), using wood dowel (DD) and M3 x 38 mm screws (CC). Hardware Used M3 x 38mm Screw Wood Dowel...
- Página 9 ASSEMBLY INSTRUCTIONS 10. Attach drawer left (N) and drawer right (O) to drawer back (P), tighten with M3 x 38 mm screws (CC). Hardware Used M3 x 38mm Screw 11. Insert drawer bottom (Q) into drawer left (N), drawer right (O) and drawer back (P). 12.
- Página 10 ASSEMBLY INSTRUCTIONS 13. Attach handle (MM) to drawer front (S) using 5/32” x 15 mm bolts (II). Using small cam lock (NN) to tighten the drawer front (S), dawer left (N) and drawer right (O). Hardware Used 5/32” x 15 mm Bolt Handle Small Cam Lock 14.
-
Página 11: Care And Maintenance
CARE AND MAINTENANCE • Use a soft, clean cloth that will not scratch the surface when dusting. • Use of furniture polishes is not necessary. Should you choose to use polishes, test first in an inconspicuous area. • Using solvents of any kind on your furniture may damage the finish. •... -
Página 12: Replacement Parts List
REPLACEMENT PARTS LIST For replacement parts, call our customer service department at 1-866-439-9800, 8 a.m. - 8 p.m., EST, Monday - Sunday. You could also contact us at partsplus@lowes.com. PART DESCRIPTION PART # Top Panel 00LWS44PSD-01 Left Side Frame 00LWS44PSD-02 Right Side Frame 00LWS44PSD-03 Metal Support Tube... - Página 13 REPLACEMENT PARTS LIST Date: 2021-11-15 Rev. 0001-A Printed in Vietnam...
- Página 14 • sophisticated • inspiring ARTICLE N 4143022 BUREAU MODÈLE N LWS44PSD Français p. 14 Español p. 27 ATTACH YOUR RECEIPT HERE Numéro de série Date d’achat Des questions, des problèmes, des pièces manquantes? Avant de retourner l’article au détaillant, appelez notre service à...
-
Página 15: Fonctionnement Du Système Camloc
TABLE DES MATIÈRES Fonctionnement du système Camloc ................15 Contenu de l’emballage..................... 16 Contenu de la quincaillerie....................17 Consignes de sécurité....................... 18 Préparation ........................18 Instructions de montage....................19 Soin et entretien ........................ 24 Garantie limitée à vie......................24 Liste des pièces de remplacement..................25 FONCTIONNEMENT DU SYSTÈME CAMLOC DÉTAIL A DÉTAIL B... -
Página 16: Contenu De L'emballage
CONTENU DE L’EMBALLAGE PIÈCE DESCRIPTION QUANTITÉ PIÈCE DESCRIPTION QUANTITÉ Panneau supérieur Rail latéral inférieur Cadre latéral gauche Rail central inférieur Cadre latéral droit Traverse arrière Tube de support Tiroir gauche métallique Tiroir droit Panneau arrière Tiroir arrière Panneau latéral gauche Tiroir Bas Panneau latéral droit Tiroir tendeur... -
Página 17: Contenu De La Quincaillerie
CONTENU DE LA QUINCAILLERIE (non illustrée à la grandeur réelle) Grande Vis Camloc Goujon de bois attache Camloc M3 x 38 mm Qty. 18 Qty. 30 Qty. 26 Qty. 31 Boulon 1/4” Rondelle de Boulon 1/4” Rondelle plate blocage 1/4”x 32 mm 1/4”x 15 mm Qty. -
Página 18: Consignes De Sécurité
CONSIGNES DE SÉCURITÉ Lire et comprendre le présent guide avant de monter ou d’installer le produit. 1. Lire les Instructions de montage avant d’assembler l’unité. 2. Pour éviter les dommages, assembler l’unité sur une surface solide, de niveau et non abrasive. -
Página 19: Instructions De Montage
INSTRUCTIONS DE MONTAGE 1. Insérer les vis camloc (BB) dans le panneau supérieur (A). Quincaillerie utilisée Vis Camloc 2. Insérer les vis camloc (BB) dans le panneau arrière (E), le panneau latéral gauche (F), le panneau latéral droit (G). Quincaillerie utilisée Vis Camloc 3. - Página 20 INSTRUCTIONS DE MONTAGE 4. Fixez le panneau latéral gauche (F), le panneau latéral droit (G), le panneau de séparation (H), le panneau arrière (E) au panneau supérieur (A), à l’aide d’un grande attache camloc (AA) et d’une goujon de bois (DD). Quincaillerie utilisée Grande attache Camloc x 12...
- Página 21 INSTRUCTIONS DE MONTAGE 7. Fixer le rail arrière inférieur (I), le rail frontal inférieur (J), le rail latéral inférieur (K), le rail central inférieur (L) au panneau latéral gauche (F), au panneau latéral droit (G), au panneau de séparation (H), au panneau arrière (E), en utilisant la goujon de bois (DD) et les vis M3 x 38 mm (CC).
- Página 22 INSTRUCTIONS DE MONTAGE 10. Fixer le tiroir gauche (N) et le tiroir droit (O) au tiroir arrière (P), serrer avec les vis M3 x 38 mm (CC). Quincaillerie utilisée Vis M3 x 38 mm 11. Insérer le tiroir Bas (Q) dans le tiroir gauche (N), le tiroir droit (O) et le tiroir arrière (P).
- Página 23 INSTRUCTIONS DE MONTAGE 13. Fixer la poignée (MM) à la front du tiroir (S) à l’aide de boulons 5/32” x 15 mm (II). Utiliser un petite attache camloc (NN) pour serrer la front du tiroir (S), le tiroir gauche (N) et le tiroir droit (O). Quincaillerie utilisée Boulon 5/32”...
-
Página 24: Soin Et Entretien
SOIN ET ENTRETIEN • Utiliser un linge doux et propre qui ne rayera pas la surface lors de l’époussetage. • L’utilisation de poli à meuble n’est pas nécessaire. Le cas échéant, tester d’abord une surface peu visible. • L’utilisation de solvants de quelque nature que ce soit sur le meuble peut en endommager le fi ni. •... -
Página 25: Liste Des Pièces De Remplacement
LISTE DES PIÈCES DE REMPLACEMENT Pour obtenir des pièces de rechange, communiquez avec notre service à la clientèle au 1 866 439-9800, entre 8 h et 20 h (HNE), du lundi au dimanche.Vous pouvez également nous con- tacter à partsplus@lowes.com. PIÈCE DESCRIPTION PIÈCE... - Página 26 LISTE DES PIÈCES DE REMPLACEMENT Date: 2021-11-15 Rév 0001-A Imprimé au Vietnam...
- Página 27 • sophisticated • inspiring ARTÍCULO #4143022 MESA MODELO #LWS44PSD Français p. 14 Español p. 27 ADJUNTAR SU RECIBO AQUÍ Fecha de compra Número de serie ¿Preguntas, problemas, piezas faltantes? Antes de volver a la tienda, llame a nuestro Departamento de Servicio al Cliente al 1-866-439-9800, de lunes a domingo de 8 a.m.
-
Página 28: Funcionamiento Del Sistema De Cerrojo De Leva
ÍNDICE Funcionamiento del sistema de cerrojo de leva..............28 Contenido del paquete......................29 Contenido de herraje......................30 Información de seguridad....................31 Preparación..........................31 Instrucciones de ensamblaje....................32 Cuidado y mantenimiento ....................37 Garantía limitada.........................37 Lista de piezas de repuesto ....................38 FUNCIONAMIENTO DEL SISTEMA DE CERROJO DE LEVA DETALLE A DETALLE B CERROJO... -
Página 29: Contenido Del Paquete
CONTENIDO DEL PAQUETE PARTE DESCRIPCIÓN CANTIDAD PARTE DESCRIPCIÓN CANTIDAD Panel superior Riel lateral inferior Marco lateral izquierdo Riel central inferior Marco lateral derecho Camilla trasera Tubo de soporte Parte izquierda de cajón metálico izquierdo Panel trasero Parte derecha de cajón Panel lateral izquierdo Parte trasera de cajón Fondo del cajón... -
Página 30: Contenido De Herraje
CONTENIDO DE HERRAJE (no se muestran en tamaño real) Cerrojo de leva Perno de leva Tornillo Espiga de madera grande M3 x 38 mm Qty. 18 Qty. 30 Qty. 26 Qty. 31 Perno de 1/4” Arandela de Perno de 1/4” Arandela 1/4”x 32 mm seguridad 1/4”... -
Página 31: Información De Seguridad
INFORMACIÓN DE SEGURIDAD Por favor lea y comprenda el manual entero antes de intentar ensamblar o instalar el producto. 1. Por favor, lea las instrucciones de ensamble antes de usar la unidad. 2. Para evitar daños, ensamble la unidad sobre una superfi cie fi rme, nivelada y no abrasiva. 3. -
Página 32: Instrucciones De Ensamblaje
INSTRUCCIONES DE ENSAMBLAJE 1. Inserte los pernos de leva (BB) en el panel superior (A). Herraje Utilizado Perno de leva 2. Inserte los pernos de leva (BB) en el panel trasero (E), el panel lateral izquierdo (F) y el panel lateral derecho (G). Herraje Utilizado Perno de leva 3. - Página 33 INSTRUCCIONES DE ENSAMBLAJE 4. Fije el panel lateral izquierdo fijo (F), el panel lateral derecho (G),el panel divisorio (H), el panel trasero (E) al panel superior (A), utilizando el cerrojo de leva grande (AA) y la espiga de madera (DD). Herraje Utilizado Cerrojo de leva grande x 12...
- Página 34 INSTRUCCIONES DE ENSAMBLAJE 7. Fije la barra inferior trasera (I), la barra inferior delantera (J), la barra inferior lateral (K) y la barra inferior central (L) al panel fijo lateral izquierdo (F), al panel lateral derecho (G), al panel divirosio (H) y al panel trasero (E),utilizando espiga de madera (DD) y tornillos M3 x 38 mm (CC).
- Página 35 INSTRUCCIONES DE ENSAMBLAJE 10. Fije el cajón izquierdo (N) y el cajón derecho (O) a la parte trasera del cajón (P), apriete con tornillos M3 x 38 mm (CC). Herraje Utilizado Tornillo M3 x 38 mm 11. Introduzca el fondo del cajón (Q) en la parte izquierda (N), la parte derecha (O) y el fondo del cajón (P).
- Página 36 INSTRUCCIONES DE ENSAMBLAJE 13. Fije el manija (MM) al frente del cajón (S) utilizando per- nos de 5/32” x 15 mm (II). Use el pequeña cerrojo de leva (NN) para apretar el frente del cajón (S), la parte izquierda (N) y la parte derecha (O). Herraje Utilizado Perno de 5/32”x 15 mm Manija...
-
Página 37: Cuidado Y Mantenimiento
CUIDADO Y MANTENIMIENTO • Utilice un paño suave y limpio para que no se raye la superfi cie cuando limpia el polvo • El uso de ceras para muebles no es necesario. Si decide utilizar ceras, checar un área poco visible. -
Página 38: Lista De Piezas De Repuesto
LISTA DE PIEZAS DE REPUESTO Para obtener piezas de repuesto, llame a nuestro Departamento de Servicio al Cliente al 1-866-439-9800, de lunes a domingo de 8 a.m. a 8 p.m., hora estándar del Este. También puedes ponerte en contacto con nosotros en partsplus@lowes.com. PIEZA DESCRIPCIÓN PIEZA #... - Página 39 LISTA DE PIEZAS DE REPUESTO Fecha: 2021-11-15 Rev. 0001-A Impreso en Vietnam...