Tabla de contenido
Publicidad
Idiomas disponibles
Idiomas disponibles
Enlaces rápidos
Publicidad
Tabla de contenido

Manuales relacionados para Nvidia GEFORCE RTX 4090


Resumen de contenidos para Nvidia GEFORCE RTX 4090
- Página 1 Quick Start Guide...
-
Página 2: System Specifications
SYSTEM SPECIFICATIONS Thank you for choosing the NVIDIA GeForce RTX 4090 graphics card. ® ® Before you begin, please review the following System Specifications to ensure your PC has the appropriate hardware and software for your new graphics card. System Specifications >... - Página 3 > System Power Supply: · 850 W power rating minimum. · Supported power connector configurations: At least three PCIe 8-pin cables (with RTX 4090 PCIe Gen 5 Power Connector Adapter). One 450 W or greater PCIe Gen 5 Cable (16-pin). >...
- Página 4 EQUIPMENT The following equipment is included in the NVIDIA GeForce RTX 4090 graphics card box. NVIDIA PCIe Quick Start Support Gen5 16-pin power Guide Guide connector adapter Attention: Use only the included NVIDIA power connector adapter for your GeForce RTX 40 Series Founders Edition graphics card.
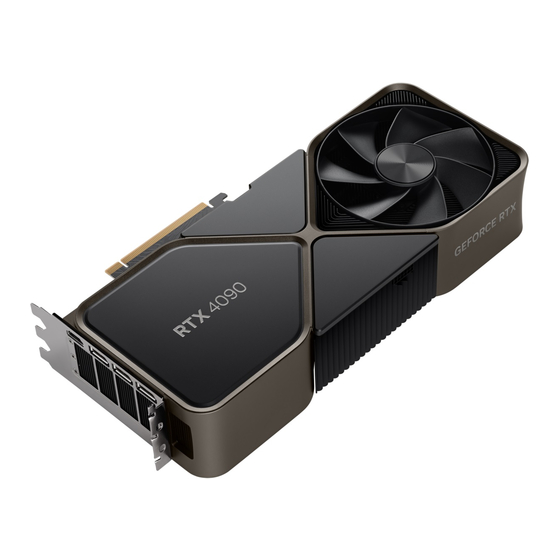
- Página 5 PCIe Gen5 16-pin Power Connector DisplayPort Connectors (x3) HDMI Connector GeForce RTX 4090 Graphics Card...
-
Página 6: Hardware Installation
HARDWARE INSTALLATION Turn off your computer, disconnect the power cord and remove any existing graphics card(s). Attention: It is very important that you wait until the graphics card has cooled before taking the card out of the system. - Página 7 Remove three slot covers if there was no existing graphics card. Remove three adjacent slot covers that correspond to the PCI Express slot you are installing the graphics card in.
- Página 8 Install the GeForce RTX 4090 graphics card into the primary PCI Express x16 slot on your motherboard. Install your GeForce RTX 4090 into the Primary PCI Express x16 slot (the Primary slot is the one closest to the CPU). Attention: This GPU card should not be installed with the I/O...
- Página 9 Connect the 16-pin plug of NVIDIA power connector adapter to the power receptacle on the top of the GeForce RTX 4090 graphics card. Connect at least three independent dedicated cables with 8-pin PCI Express plugs from the system power supply to the NVIDIA power connector adapter.
- Página 10 CONNECTING TO THE DISPLAY Connect the display(s) to the graphics card. Reconnect your power cord to the PC. DisplayPort Connectors HDMI Connector...
-
Página 11: Software Installation
Experience software to update your drivers and optimize your games. Download and install GeForce Experience software. · Go to http://www.geforce.com/geforce-experience and click Download Now. · Accept the NVIDIA software license agreement by selecting Agree and Continue. GeForce Experience software begins to install. · Select Close to finish the installation. - Página 12 Optimize your installed games. · Open GeForce Experience and click Scan for Games and click OK to scan your installed games. · Click on Optimize All to optimize your game settings. Get the latest drivers. · Open GeForce Experience, log in, and select the Drivers tab. ·...
- Página 13 Congratulations! Your GeForce graphics card is now ready to use! Note: If you have any questions about your NVIDIA product you can Chat live with NVIDIA Customer Care at www.nvidia.com/support or call 1-800-797-6530 (US) or 0800 404 7747 (UK).
- Página 14 SPÉCIFICATIONS SYSTÈME Merci d’avoir choisi la carte graphique NVIDIA GeForce RTX 4090. ® ® Avant de commencer, veuillez verifier les spécifications système suivantes pour vous assurer que votre PC dispose du matériel et des logiciels appropriés pour votre nouvelle carte graphique.
- Página 15 > System Power Supply: · Puissance minimale de 850 W. · Configurations d’alimentation prises en charge : Au moins trois câbles PCIe à 8 broches (avec adaptateur d’alimentation RTX 4090 PCIe Gen 5). Un câble RTX PCIe Gen 5 de 450 W ou plus (16 broches). >...
- Página 16 L’équipement suivant est inclus avec votre carte graphique NVIDIA GeForce RTX 4090. Adaptateur Guide de Guide d’alimentation PCIe démarrage rapide d’assistance Gen5 à 16 broches de NVIDIA Attention: Utilisez exclusivement l’adaptateur d’alimentation de NVIDIA fourni avec votre carte graphique GeForce RTX série 40 Founders Edition.
- Página 17 Connecteur d’alimentation PCIe Gen 5 à 16 broches. Connecteurs DisplayPort (x3) HDMI Connector Carte graphique GeForce RTX 4090...
-
Página 18: Installation Du Matériel
INSTALLATION DU MATÉRIEL Veuillez éteindre votre ordinateur avant de déconnecter le câble d’alimentation et de retirer toute carte graphique existante installée sur la carte mère. Attention: Ne débranchez jamais une carte graphique à chaud. Veuillez attendre son refroidissement complet avant de la retirer du système. - Página 19 Retirez trois caches pour logement si aucune carte graphique ne se trouve dans votre boîtier. Retirez les trois caches adjacents pour logement d’extension qui correspondent au logement PCI Express dans auquel vous souhaitez installer votre carte graphique.
- Página 20 Installez la carte graphique GeForce RTX 4090 dans le slot primaire PCI Express x16 de votre carte mère. Installez votre première GeForce RTX 4090 dans le slot primaire PCI Express x16 (le slot primaire est celui qui est le plus proche du CPU).
- Página 21 Connectez la fiche à 16 broches de l’adaptateur d’alimentation de NVIDIA au connecteur d’alimentation qui se trouve sur le haut de la carte graphique GeForce RTX 4090. Connectez au moins trois câbles indépendants et dédiés (dotés de fiches PCI Express à 8 broches) de l’alimentation du système à...
- Página 22 CONNEXION AU PÉRIPHÉRIQUE D’AFFICHAGE Connectez votre (ou vos) périphérique(s) d’affichage sur la carte graphique. Reconnectez le câble d’alimentation de votre PC. DisplayPort Connectors HDMI Connector...
-
Página 23: Installation Des Logiciels
Téléchargez et installez le logiciel GeForce Experience. · Rendez-vous sur http://www.nvidia.fr/object/geforce experience-fr. html et cliquez sur TÉLÉCHARGER. · Acceptez l’accord de licence du logiciel NVIDIA en sélectionnant Accepter et continuer. La procédure d’installation du logiciel GeForce Experience commence. · Sélectionnez Fermer pour terminer l’installation. - Página 24 Optimisez les jeux installés sur votre système. · Lancez le logiciel GeForce Experience. Cliquez sur Vérifier jeux puis sur OK. · Cliquez sur Tout optimiser afin d’optimiser les paramètres de vos jeux. Mettez à jour vos pilotes. · Lancez le logiciel GeForce Experience puis cliquez sur l’onglet Pilotes.
- Página 25 Félicitations ! Votre carte graphique GeForce est prête à l’emploi ! Remarque: Si vous avez la moindre question sur votre produit NVIDIA, vous pouvez contacter directement l’un des conseillers NVIDIA sur www.nvidia.com/support ou au 33 9 75 18 67 97.
-
Página 26: Requisiti Di Sistema
REQUISITI DI SISTEMA Grazie per aver scelto una scheda grafica NVIDIA GeForce RTX 4090. ® ® Prima di iniziare, per cortesia consultare le specifiche di sistema per assicurarti che il tuo PC abbia l’hardware e il software appropriati per latua nuova scheda grafica. - Página 27 > Alimentatore di sistema: · Potenza nominale minima 850 W. · Configurazioni del connettore di alimentazione supportate: Almeno tre cavi PCIe a 8 pin (con adattatore per connettore di alimentazione RTX 4090 PCIe Gen 5). Un cavo PCIe Gen 5 da 450 W o superiore (16 pin). >...
- Página 28 I seguenti accessori sono inclusi nella confezione della scheda grafica NVIDIA GeForce RTX 4090. Adattatore per Guida di connettore di Guida rapida supporto alimentazione NVIDIA PCIe Gen5 16-pin Attention: Usa solo l'adattatore per connettore di alimentazione NVIDIA per le schede grafiche GeForce RTX serie 40 Founders Edition.
- Página 29 Connettori di alimentazione PCIe Gen5 a 16 pin Connettori DisplayPort (x3) Connettore HDMI 2.1 Scheda grafica GeForce RTX 4090...
-
Página 30: Installazione Dell'hardware
INSTALLAZIONE DELL’HARDWARE Spegnere il computer, scollega il cavo di alimentazione e rimuovi qualsiasi scheda grafica esistente. Attenzione: è molto importante attendere che la scheda grafica si raffreddi prima di estrarla dal sistema. - Página 31 Rimuovi le tre coperture dello slot se non c'era già una scheda grafica. Rimuovi le tre coperture dello slot adiacente che corrisponde allo slot PCI Express in cui stai installando la scheda grafica.
- Página 32 Installa la tua GeForce RTX 4090 nello slot principale PCI Express x16 della tua scheda madre. Installa la tua nuova GeForce RTX 4090 nello slot principale PCI Express x16 (lo slot principale e’ quello piu’ vicino alla CPU). Attention: La GPU non deve essere installata con le fasce I/O rivolte...
- Página 33 Collega la spina dell'adattatore per connettore di alimentazione NVIDIA a 16 pin alla presa sulla parte superiore della scheda grafica GeForce RTX 4090. Collega almeno tre cavi indipendenti dedicati con spine PCI Express a 8 pin dalla fonte di alimentazione del sistema all'adattatore per connettore di alimentazione NVIDIA.
- Página 34 COLLEGAMENTO AL DISPLAY Collegare uno o più display alla scheda grafica. Ricollegare il cavo di alimentazione al PC. Connettori DisplayPort Connettore HDMI...
-
Página 35: Installazione Del Software
Download and install GeForce Experience software. · Visita l’indirizzo http://www.geforce.com/geforce-experience e fai clic su Download Now. · Accetta l’accordo di licenza software di NVIDIA selezionando Agree and Continue. L’installazione del software GeForce Experience ha inizio. · Seleziona Close per finire l’installazione. - Página 36 Ottimizza i giochi installati. · Apri GeForce Experience e fai clic su Cerca giochi quindi fai clic su OK per eseguire una scansione dei giochi installati. · Fai clic su Ottimizza tutto per ottimizzare le impostazioni di gioco. Scarica i driver più aggiornati. ·...
- Página 37 Congratulazioni! Ora la tua scheda grafica GeForce è pronta per l’uso! Note: se hai altre domande in merito al tuo prodotto NVIDIA puoi chattare live con il Servizio clienti NVIDIA all’indirizzo www.nvidia.com/support o chiama il numero 39 02 9475 7110.
- Página 38 SYSTEMSPEZIFIKATIONEN Vielen Dank, dass Sie sich für eine NVIDIA -GeForce RTX -4090- ® ® Grafikkarte entschieden haben. Bevor Sie starten, kontrollieren Sie bitte die folgenden Systemspezifikationen, um sicherzustellen, dass Ihr PC die nötigen Hard- und Softwarevoraussetzungen für Ihre neue Grafikkarte erfüllt.
- Página 39 > Systemstromversorgung: · Mindestleistung von 850 W. · Unterstützte Stromanschlusskonfigurationen: Mindestens drei PCIe-8-polige Kabel (mit RTX-4090-PCIe-Gen-5-Netzadapter). Ein PCIe-Gen-5-Kabel mit 450 W oder mehr (16-polig). > Operating System: · Microsoft Windows 11 64-Bit, empfohlen oder Microsoft ® ® ® Bei Windows 10 ist das Update v1803 von April 2018 oder ®...
-
Página 40: Lieferumfang
LIEFERUMFANG Der Lieferumfang der Grafikkarte NVIDIA GeForce RTX 4090 umfasst folgende Komponenten: NVIDIA PCIe- Kurzanleitung Supportanleitung Netzadapter, 16-polig Achtung: Verwende nur den mitgelieferten NVIDIA-Netz adapter für deine Founders Edition-Grafikkarte der GeForce RTX 40-Serie. - Página 41 PCIe-Gen-5-16-poliger Stromanschluss Adapter für DisplayPort (3x) Adapter für HDMI GeForce RTX 4090 Graphics Card...
- Página 42 HARDWAREINSTALLATION Den Computer ausschalten, das Netzkabel abtrennen und eventuell installierte Grafikkarten entfernen. Achtung: Bevor die Grafikkarte aus dem Computer herausgenommen wird, unbedingt solange warten, bis sich die Karte abgekühlt hat.
- Página 43 Entferne drei Steckplatzabdeckungen, wenn keine Grafikkarte vorhanden war. Entferne drei benachbarte Steckplatzabdeckungen, die dem PCI Express-Steckplatz entsprechen, in dem du die Grafikkarte installierst.
- Página 44 Installieren Sie die GeForce RTX-4090-Grafikkarte im primären PCI-Express-x16-Steckplatz auf Ihrer Hauptplatine. Installieren Sie Ihre GeForce RTX 4090 im primären (Primary) PCI- Express-x16-Steckplatz (der Primary-Steckplatz ist der Steckplatz, der der CPU am nächsten liegt). Achtung: Die Grafikkarte nicht mit den I/O-Slotblechen nach unten...
- Página 45 Stecke den 16-poligen Anschluss des NVIDIA-Netzadapters in die Buchse oberhalb der GeForce RTX 4090-Grafikkarte. Schließe mindestens drei unabhängig dedizierte Kabel mit einem 8-poligen PCI-Express-Anschluss vom Systemnetzteil an den NVIDIA-Netzadapter an. Attention: Verwende nur den mitgelieferten NVIDIA-Netz adapter für deine Founders Edition-Grafikkarte der GeForce RTX 40-Serie.
- Página 46 ANSCHLIESSEN DES BILDSCHIRMS Den Bildschirm (oder die Bildschirme) an der Grafikkarte anschließen. Das Netzkabel wieder am PC anschließen. Adapter für DisplayPort Adapter für HDMI...
- Página 47 Die Software GeForce Experience herunterladen und installieren. · Auf http://www.geforce.com/geforce-experience gehen und auf Download Now (Jetzt herunterladen) klicken. · Die NVIDIA-Softwarelizenzvereinbarung durch Markieren von Agree and Continue (Zustimmen und fortfahren) akzeptieren. GeForce Experience wird nun installiert. · Auf Close (Schließen) klicken, um die Installation abzuschließen.
- Página 48 Die installierten Spiele optimieren. · GeForce Experience öffnen und auf Scan for Games (Spiele durchsuchen) klicken. Dann auf OK klicken, um die installierten Spiele zu durchsuchen. · Auf Optimize All (Alle optimieren) klicken, um die Spieleinstellungen zu optimieren. Die aktuellsten Treiber besorgen. ·...
- Página 49 · Nach erfolgter Treiberinstallation auf CLOSE (SCHLIEßEN) klicken. Herzlichen Glückwunsch! Ihre GeForce Grafikkarte ist nun einsatzbereit! Hinweis: Sollten Sie noch Fragen zu Ihrem NVIDIA-Produkt haben, können Sie auf www.nvidia.com/support oder telefonisch über 49 40 30806888 direkt mit dem NVIDIA-Kundendienst sprechen.
-
Página 50: Especificaciones
ESPECIFICACIONES Gracias por elegir la NVIDIA GeForce RTX 4090. Antes de ® ® comenzar, por favor revisa las siguientes especificaciones para asegurar que tu PC posee el hardware y software necesario para tu nueva tarjeta gráfica. Especificaciones > Placa base: Slot gráfico PCI Express requerido. - Página 51 > System Power Supply: · 850 W de potencia mínima. · Configuraciones de conectores de alimentación compatibles: Como mínimo tres cables PCIe de 8 pines (con adaptador de conector de alimentación RTX 4090 PCIe Gen 5) Un cable PCIe Gen 5 de 450 W o superior (16 pines) >...
-
Página 52: Documentacióny Accesorios
DOCUMENTACIÓN Y ACCESORIOS La caja de la tarjeta NVIDIA GeForce RTX 4090 incluye los siguientes elementos. Adaptador de conector Guía de inicio Guía de de alimentación PCIe de rápido soporte 5ª generación de 8 pines de NVIDIA Atención: Utiliza solo el adaptador de conector de alimentación de NVIDIA incluido para la tarjeta gráfica GeForce RTX serie 40... - Página 53 Conector de alimentación PCIe Gen 5 de 16 pines. Conectores DisplayPort (x3) HDMI Connector Tarjeta gráfica GeForce RTX 4090...
-
Página 54: Instalación
INSTALACIÓN DE LA TARJETA Apaga el ordenador, desconecta el cable de alimentación y retira cualquier tarjeta gráfica que tenga instalada. Atención: es muy importante que esperes a que la tarjeta se haya enfriado antes de extraerla del sistema. - Página 55 Quita las tres tapas de ranuras si no había una tarjeta gráfica existente. Quita las tres tapas de ranuras adyacentes correspondientes a la ranura PCI Express en la que estés instalando la tarjeta gráfica.
- Página 56 Instala la GeForce RTX 4090 en el slot PCI-Express x16 primario de tu placa base. Instala la GeForce RTX 4090 en el slot PCI- Express x16 primario (el slot primario es el más cercano a la CPU). Atención: Esta tarjeta gráfica no debe instalarse con los soportes de...
- Página 57 NVIDIA. Atención: Utiliza solo el adaptador de conector de alimentación de NVIDIA incluido para la tarjeta gráfica GeForce RTX serie 40 Founders Edition. Vuelve a colocar la cubierta del ordenador y a conectar los ca-...
-
Página 58: Conexión De La Pantalla
CONEXIÓN DE LA PANTALLA Conecta la pantalla (o pantallas) a la tarjeta gráfica. Vuelve a conectar el cable de alimentación al PC. Conectores DisplayPort Conector HDMI... - Página 59 · Ve a http://www.nvidia.es/object/geforce-experience-es.html y haz clic en Descargar ahora. · Acepta el acuerdo de licencia del software de NVIDIA seleccionando Aceptar y continuar. Se iniciará la instalación de GeForce Experience. · Haz clic en Cerrar para concluir el proceso.
- Página 60 Optimiza los juegos que tengas instalados. · Abre GeForce Experience, haz clic en Buscar juegos y luego en Aceptar para iniciar la búsqueda de juegos instalados. · Selecciona Optimizar todos para optimizar los ajustes de juego. Descarga los últimos controladores. ·...
- Página 61 ¡Enhorabuena! Tu tarjeta GeForce ya está lista para su uso. Nota: Si tienes alguna pregunta sobre el producto, puedes hablar por chat con el servicio de atención al cliente de NVIDIA a través de www.nvidia.com/support o llamar al 34 911 88 00 35.
- Página 62 СИСТЕМНЫЕ СПЕЦИФИКАЦИИ Благодарим вас за выбор видеокарты NVIDIA GeForce RTX 4090. ® ® Перед началом работы настоятельно рекомендуем ознакомиться с системными спецификациями, чтобы убедиться в том, что ваш компьютер соответствует минимальным программным и аппаратным требованиям для работы видеокарты. Системные спецификации...
- Página 63 > Питание: · Минимальная номинальная мощность 850 Вт · Поддерживаемые конфигурации подключения питания: Не менее трех 8-контактных кабелей PCIe (с переходником разъема питания RTX 4090 PCIe Gen 5). Один (16-контактный) кабель PCIe Gen 5, рассчитанный на мощность не менее 450 Вт. >...
- Página 64 КОМПЛЕКТАЦИЯ В комплекте с видеокартой NVIDIA GeForce RTX 4090 также поставляется: 16-контактный Краткое Руководство переходник разъема руководство по технической питания NVIDIA PCIe пользователя поддержке Gen5 Важно: Используйте только входящий в комплект переходник NVIDIA для подключения видеокарты GeForce RTX 40 Founders Edition.
- Página 65 16-контактный разъем питания PCIe Gen 5 Разъемы DisplayPort (x3) Разъем HDMI Видеокарта GeForce RTX 4090...
-
Página 66: Установка Оборудования
УСТАНОВКА ОБОРУДОВАНИЯ Выключите ПК, вытащите шнур питания из розетки и извлеките старую видеокарту(-ы). Важно: Обязательно дождитесь, пока видеокарта остынет, прежде чем извлекать ее из системы. - Página 67 Если до этого в системе не была установлена видеокарта, вытащите три заглушки. Удалите три заглушки со слота PCI Express, в который вы устанавливаете видеокарту.
- Página 68 Установите видеокарту RTX 4090 в первый PCI Express x16 слот на материнской плате. Установите видеокарту RTX 4090 в первый PCI Express x16 слот (первым считается слот, ближе всего расположенный к центральному процессору). Важно: Не устанавливайте видеокарту в положение, при котором сторона...
- Página 69 Подключите 16-контактный штекер переходника разъема питания NVIDIA к разъему питания в верхней части видеокарты GeForce RTX 4090. Подключите не менее трех отдельных специальных кабелей с 8-контактными разъемами PCI Express от системного блока питания к переходнику разъема питания NVIDIA. Важно: Используйте только входящий в комплект переходник NVIDIA для...
- Página 70 ПОДКЛЮЧЕНИЕ ДИСПЛЕЯ Подключите дисплей к видеокарте. Подключите шнур питания к ПК. Коннекторы DisplayPort Разъем HDMI...
- Página 71 вашей видеокарты и оптимизировать игровые настройки. Скачайте и установите приложение GeForce Experience. · Зайдите на http://www.nvidia.ru/object/geforce-experience-ru.html и нажмите Скачать сейчас. · Примите соглашение об использовании лицензионного программного обеспечения NVIDIA, нажав кнопку Согласиться и продолжить. Начнется установкаприложения GeForce Experience. · После завершения установки нажмите Закрыть.
- Página 72 Оптимизируйте игры на своем ПК. · Откройте приложение GeForce Experience. · выберите Сканировать и нажмите OK, чтобы начать сканирование установленных на вашем ПК игр. · Нажмите Оптимизировать все, чтобы оптимизировать настройки всех игр. Обновляйте драйверы своей видеокарты. · Откройте GeForce Experience и выберите вкладку Драйверы. ·...
- Página 73 После завершения установки драйвера нажмите ЗАКРЫТЬ Поздравляем! Теперь ваша видеокарта GeForce готова к работе! Внимание: Если у вас возникли вопросы по продукту, обратитесь в службу технической поддержки NVIDIA на вебсайте www.nvidia.com/support позвоните по тел 1-800-797-6530 (США) или 0800 404 7747 (Великобритания).
- Página 74 SPECYFIKACJA SYSTEMU Dziękujemy za wybranie karty graficznej NVIDIA GeForce RTX 4090. ® ® Zanim zaczniesz, zobacz specyfikacje systemu, aby upewnić się, że Twój komputer ma odpowiedni sprzęt i oprogramowanie dla nowej karty graficznej. Specyfikacja systemu > Płyta główna: Wymagane gniazdo PCI Express®.
- Página 75 > Zasilanie systemu: · Minimalna moc 850 W · Obsługiwane konfiguracje podłączenia zasilania: co najmniej trzy 8-pinowe kable PCIe (z adapterem zasilania PCIe Gen5 RTX 4090). jeden kabel PCIe Gen5 (16-pinowy) pozwalający dostarczyć moc rzędu 450 W i więcej. > System operacyjny: ·...
- Página 76 SKŁADOWE ZESTAWU Do karty graficznej NVIDIA GeForce RTX 4090 dołączone są następujące elementy wyposażenia. Przewodnik Adapter zasilania Podręcznik szybkiego NVIDIA PCIe Gen5 użytkownika uruchamiania (16-pinowy) Uwaga: Korzystaj wyłącznie z adaptera zasilania NVIDIA, dołączonego do karty graficznej GeForce RTX z serii 40 Founders Edition.
- Página 77 16-pinowe złącze zasilania PCIe Gen5 Złącza DisplayPort (x3) Złącze HDMI GeForce RTX 4090 Graphics Card...
-
Página 78: Instalacja Sprzętu
INSTALACJA SPRZĘTU Wyłącz komputer, odłącz przewód zasilający i odłącz obecnie zainstalowaną dedykowaną kartę graficzną (karty graficzne). Uwaga: przed odłączeniem karty graficznej, koniecznie zaczekaj, aż karta ostygnie. - Página 79 Usuń trzy zaślepki slotów, jeśli wcześniej nie zamontowano karty graficznej. Usuń trzy sąsiadujące zaślepki slotów odpowiadające gniazdu PCI Express, w którym instalujesz kartę graficzną.
- Página 80 Zainstaluj kartę graficzną GeForce RTX 4090 w głównym gnieździe PCI Express x16 na płycie głównej. Zainstaluj swoją kartę GeForce RTX 4090 w gnieździe głównym PCI Express x16 (gniazdo główne jest najbliżej procesora). Uwaga: Tej karty graficznej nie należy montować śledziem...
- Página 81 8-pinowymi wtyczkami PCI Express, prowadzące od zasilacza. Uwaga: Korzystaj wyłącznie z adaptera zasilania NVIDIA, dołączonego do karty graficznej GeForce RTX z serii 40 Founders Edition. Ponownie załóż osłony w swoim komputerze i podłącz no nowo wszelkie podłączone wcześniej kable.
- Página 82 PODŁĄCZANIE WYŚWIETLACZA Podłącz wyświetlacz(e) do karty graficznej. Ponownie podłącz kabel zasilający do komputera. Złącza DisplayPort Złącze HDMI...
- Página 83 Pobierz i zainstaluj oprogramowanie GeForce Experience. · Przejdź na stronę http://www.geforce.com/geforce-experience i kliknij przycisk Pobierz teraz. · Zaakceptuj umowę licencyjną oprogramowania NVIDIA wybierając opcję Akceptuj i kontynuuj. Rozpocznie się instalacja oprogramowania GeForce Experience. · Wybierz opcję Zamknij, aby dokończyć instalację.
- Página 84 Optymalizuj ustawienia w swoich zainstalowanych grach. · Uruchom oprogramowanie GeForce Experience i kliknij Szukaj gier, a następnie kliknij OK, aby przeskanować swoje zainstalowane gry. · Kliknij przycisk Optymalizuj wszystko, aby zoptymalizować ustawienia w swoich grach. Pobierz najnowsze sterowniki. · Uruchom oprogramowanie GeForce Experience i wybierz zakładkę...
- Página 85 Po zakończeniu procesu instalacji sterownika kliknij przycisk ZAMKNIJ. Congratulations! Your GeForce graphics card is now ready to use! Uwaga: Jeśli masz jakiekolwiek pytania odnośnie produktu NVIDIA, możesz porozmawiać na żywo z pracownikiem Działu Obsługi Klienta NVIDIA na stronie www.nvidia.com/support lub zadzwonić pod numer...
- Página 86 系统参数 感谢您选购 NVIDIA 4090 显卡。 在开始 GeForce RTX ® ® 使用之前, 请查看以下系统参数以确保您电脑的软件和硬 件符合新显卡的需求 系统参数 主板: > 主板需要支持 PCI Express® 显卡插槽。 主板规格 (意指主板上插槽间距尺寸) : > 必须为304mm (L) x 137mm (W) x 61mm (H) 的显卡预留出安装空间, 建议在风扇前多留一个插槽的空间, 以获得更好的气流。...
- Página 87 系统电源: > 最低额定功率850W · 支持的电源接口规格 · 至少三根独立 8-Pin PCIe 电源线 (搭配 RTX 4090 第 5 代 PCIe 电源接口转接线) 一根支持450 W 及以上 的第 5 代 PCIe 16-Pin 电源线 操作系统: > 推荐使用 Microsoft® Windows®11 64 位, 或 Microsoft® · Windows® 10 64 位 2018 年 4 月 v1803 版本或更新版本 Linux, 64 位。...
- Página 88 设备 以下设备包含在 NVIDIA GeForce RTX 4090 显卡包装盒内。 快速入门指南 支持指南 NVIDIA PCIe Gen5 16 针电源插口适配器 注意: GeForce RTX 40 系列 Founders Edition 显卡需搭配包装内 电源接口适配器使用。...
- Página 89 第 5 代PCIe 16-Pin 电源接口适配器 (转接线) DisplayPort 接口 (x3) HDMI 接口 GeForce RTX 4090 Graphics Card...
- Página 90 硬件安装 关闭电脑, 断开电源线并移除所有现有显卡。 注意: 请务必等显卡冷却后再将其从系统中取出。...
- Página 91 在未安装显卡的情况下, 如有 PCI Express 插槽盖, 请移除三个插槽盖。 移除对应于您要安装显卡的 PCI Express 插槽的三个相邻插槽挡板...
- Página 92 将 GeForce RTX 4090 安装至主板上的主 PCI Express x16 插槽。 将 GeForce RTX 4090 安装至主 PCI Express x16 插槽 (主插槽位于最接近 CPU 的位置) 注意: 安裝此 GPU 产品时, 请勿将 I/O 背板朝下。...
- Página 93 将 NVIDIA 电源接口适配器的 16-Pin 插头接入位于 GeForce RTX 4090 显卡 上方的电源接口。 将系统电源提供的至少三根独立 8-Pin 电源线与 NVIDIA 电源适配 器 (转接线) 连接 注意: GeForce RTX 40 系列 Founders Edition 显卡需搭配包装内电源接 口适配器使用 将插槽盖装回去, 然后重新连接好之前拔下的所有线缆...
- Página 94 连接显示器 连接显示器与显卡。 重新将电源线连接至 PC. DisplayPort 接口 HDMI 接口...
- Página 95 安装完硬件后, 最后一步是安装 GeForce Experience 软件来更新 驱动程序并优化游戏体 下载并安装 GeForce Experience 软件。 · 转至 http://www.geforce.cn/geforce-experience, 然后单击 “Download Now” ( 立即下载) 。 · 选择 “Agree and Continue (” 同意并安装) , 接受 NVIDIA 软件许可协 议。 GeForce Experience 软件即开始安装。 · 选择 “Close (” 关闭) 完成安装。...
- Página 96 优化已安装的游戏。 · 打开 GeForce Experience, 单击 “Scan for Games” ( 扫描游戏) , 然后单击 “OK” ( 确定) 扫描已安装的游戏 · 单击 “Optimize All” ( 全部优化) 来优化您的游戏设置。 下载最新版驱动程序。 . · 打开 GeForce Experience, 然后选择 “Drivers” ( 驱动程序) 选项卡。 · 选择 “Download Driver” ( 下载驱动程序) 。 您的 GPU 驱动程序即开始 下载。...
- Página 97 恭喜! 您现在可以使用 GeForce 显卡了! 注意: : 如果您对 NVIDIA 产品有任何疑问, 请访问 www.nvidia.com/support 与 NVIDIA 客户服务团队进 行实时聊天。...
- Página 98 系統規格 感謝您選擇 NVIDIA 4090 顯示卡 。 在您開始使用前 , 請先閱 GeForce RTX ® ® 讀系統規格以確保您的電腦有合 適的硬體與軟體可使用您的新顯示卡 。 系统参数 主板: > 主板需要支持 PCI Express® 显卡插槽 。 主板规格 (意指主板上插槽间距尺寸) : > 必須為 304mm (L) x 137mm (W) x 61mm (H) 的顯示卡留出安裝空間 。 建議在風扇前多留一個插槽間隙 , 以獲得更好的氣流 。...
- Página 99 推薦 Microsoft® Windows® 11 64 位元 , 或 Microsoft® · Windows® 10 64 位元 2018 年 4 月更新 v1803 或更高版本 。 Linux, 64 位元 。 · 驅動程式安裝: 連接 NVIDIA 電源連接轉接器的 16 針插頭 , 連接到 > GeForce RTX 4090 顯示卡頂部的電源插座 。 .
- Página 100 設備 NVIDIA GeForce RTX 4090 繪圖卡盒內包含以下設備 。 快速入門指南 支援指南 NVIDIA PCIe Gen5 16 針電源插座轉接器 請注意: GeForce RTX 40 系列 創始版顯示卡僅能搭配 NVIDIA 電源連結轉接頭 。 .
- Página 101 PCIe Gen5 16 針電源插座 DisplayPort 接頭 (x3)) HDMI 接頭 GeForce RTX 4090 繪圖卡...
- Página 102 硬體安裝 關閉電腦 , 拔除電源線 , 並移除任何現有的繪圖卡 。 請注意: 請等待繪圖卡冷卻後 , 再移除主機中的繪圖卡 , 這一 點很重要 。...
- Página 103 如果沒有現有的顯示卡 , 請移除三個插槽保護蓋 。 移除您要安裝顯示卡的 PCI Express 插槽與 其旁邊三個相鄰插槽的保護蓋...
- Página 104 在主機板上將您的 GeForce RTX 4090 安裝到主要 PCI Express x16 插槽 。 將您的 GeForce RTX 4090 安裝到主要 PCI Express x16 插槽 (最靠近 CPU 的 x16 插 槽為主要插槽) 。 請注意: 安裝此 GPU 卡 , 請勿將 I/O 背板朝下 。...
- Página 105 連接 NVIDIA 電源連接轉接器的 16 針插頭 , 連接到 GeForce RTX 4090 顯示卡頂部的電源插座 。 將至少三條帶有 8 針 PCI Express 插頭的獨立專用電 線從系統電源連接到 NVIDIA 電 源連接轉接器 請注意: GeForce RTX 40 系列 創始版顯示卡僅能搭配 NVIDIA 電源連結轉接頭 。 將電腦機殼蓋板裝回 , 並重新接上之前拔除的所有纜線 。 .
- Página 106 連接顯示器 連接顯示器與繪圖卡 。 將 PC 的電源線接上 。 DisplayPort 接頭 HDMI 接頭...
- Página 107 硬體安裝完成後 , 最後的步驟就是安裝 GeForce Experience 應用軟體 , 以便您更新驅動程式並將遊戲最佳化 。 Download and install GeForce Experience software. · 請前往 http://www.geforce.com.tw/geforce-experience , 按一下 [立即下載] 。 · 選取 [同意並繼續] 接受 NVIDIA 同意並安裝 。 GeForce Experience 應 用軟體隨即開始安裝 。 · 選取 [Close] (關閉) 完成安裝 。...
- Página 108 將您已安裝的遊戲最佳化 。 · 開啟 GeForce Experience , 按一下 [Scan for Games] (掃描遊戲) , 再 按一下 [OK] (確定) 掃描已安裝的遊戲 。 · 按一下 [Optimize All] (全部最佳化) 以將遊戲設定最佳化 。 取得最新的驅動程式 。 . · 開啟 GeForce Experience , 選取 [Drivers] (驅動程式) 索引標籤 。 · 選取...
- Página 109 恭喜您 ! 您現在即可開始使用 GeForce 繪圖卡 ! 備註: 若您對於 NVIDIA 產品有任何疑問 , 可至 www.nvidia.com/support 線上詢問 NVIDIA 客戶服務人員 。...
- Página 110 システム仕様 4090 グラフィ ックスカードをご購入頂きありがとうご NVIDIA GeForce RTX ® ® ざいます。 ご使用を開始する前に お使い のパソコンに適切なハードウェアとソ フ トウェアが搭載されて いるかシステム仕様をご確認ください システム仕様 マザーボード: > PCI Express® グラフィ ックススロッ トが必要です クリアランス: > 304mm (L) x 137mm (W) x 61mm (H) のグラフィ ックスカード設置スペ ースが必要です。 また、 より良いエアフローを確保するために、 ファンの前に...
- Página 111 システム電源: > 最小定格電力 850W · 対応する電源コネクタの構成。 · 少なく とも 3 本の PCIe 8 ピン ケーブル (RTX 4090 PCIe Gen 5 電源コネクタアダプタ使用時) 1 本の 450W 以上の PCIe Gen 5 ケーブル (16 ピン) オペレーティングシステム: > Microsoft® Windows® 11 64ビッ トを推奨、 または Microsoft® ·...
- Página 112 付属品 NVIDIA GeForce RTX 4090 グラフィ ックスカードには、 以下の付属品が 同梱されています。 クイック サポート NVIDIA PCIe Gen5 16 ピン電源コネクタアダプタ スタートガイド ガイド 注意: GeForce RTX 40 シリーズ ファウンダーズエディション グラ フィ ックスカードには、 付属の NVIDIA 電源コネクタアダプタのみ をご使用ください。...
- Página 113 PCIe Gen 5 16 ピン 電源コネクタ ディ スプレイポート コネクタ (3個) HDMIコネクタ GeForce RTX 4090 グラフィ ックスカード...
- Página 114 ハードウェアのインス トール コンピュータの電源をオフにして、 電源コードを抜き、 すでにインス ト ール されているグラッフィクスカードを取り外します。 注意: グラッフィクカードの温度が十分に下がったのを確認し、 グラッフィクス カードを システムから取り外し て ください...
- Página 115 既存のグラフィ ックスカードがない場合は、 3 つのスロッ トカバ ーを取り外します。 グラフィ ックスカードを取り付ける PCI Express スロッ トに隣接する 3 つのスロ ッ トカバーを取り外します。...
- Página 116 GeForce RTX 4090 グラフィ ックスカードをマザーボード上のプライマ リ PCI Express x16 スロッ トにインス トールします GeForce RTX 4090 をプライ マリPCI Express x16 スロッ トにインストールします (プラ イマリスロッ トは CPU に最も 近いスロッ トです) 注意: このグラフィ ックス カードの I/O ブラケッ トを下向きにして取り付けな いでください。...
- Página 117 NVIDIA 電源コネクタアダプタの 16 ピンプラグを GeForce RTX 4090 グラフィ ックスカード上部の電源リセプタクルに接続します。 システム電源から NVIDIA 電源 コネクタアダプタまで、 少なく と も 3 本独立した専用 8 ピン PCI Express プラグの専用ケーブルを 接続します。 注意: GeForce RTX 40 シリーズ ファウンダーズエディション グラフィ ックス カードには、 付属の NVIDIA 電源コネクタアダプタのみをご使用ください。 コンピュータのカバーを取り付け、 取り外したすべてのケーブルを 接続 し直します...
- Página 118 ディ スプレイとの接続 ディ スプレイをグラフィ ックスカードに接続します。 . 電源コードを パソコン に接続し直します。 . ディ スプレイポート コネクタ HDMI コネクタ...
- Página 119 ソフ トウェアのインス トールと設定 ハードウェアを取り付けたら、 最後のステップとして、 GeForce Experience ソフ トウェアをインストールしてドライバを更新し、 ゲームを最適化します。 GeForce Experience ソフ トウェアをダウンロードしてインス トールします · http://www.geforce.com/geforce-experience にアクセスして [今すぐ ダウンロードする] をクリ ックします。 · [同意して続行する] を選択して、 NVIDIA ソフ トウェアライセンス契約を受 け入れます。 GeForce Experience ソフ トウェアのインストー ルが開始さ れます · [閉じる] を選択して、 インストールを終了します。...
- Página 120 インストール済みのゲームを最適化します。 · GeForce Experience を開いて、 [ゲームのスキャン] をクリ ックし、 [OK] をクリ ックしてインストール済みのゲー ムをスキャンします · [すべてを最適化] をクリ ックしてゲーム設定を最適化します。 最新のドライバを入手します · GeForce Experience を開いて、 ログインし、 [ドライバ] タブを選択しま す. · ドライバのダウンロード] を選択します。 GPU ドライバのダウンロードが 開始されま · ダウンロードが完了したら、 [高速インス トール] を選択します。 GeForce Experience がグラフィ ックスドライバのインス トールを開始し ます.
- Página 121 メモ: インス トールが終わるまで数分かかる場合があります。 インス トール中 に画面が数秒間真っ暗になることがありますが、 問題ありません。 · ドライバのインストールが完了したら、 [閉じる] をクリ ックします。 おめでとうございます。 ソフ トウェアのインストールと設定が完了しました。 メモ: NVIDIA 製品に関する質問については、 www.nvidia.com/support で NVIDIA カスタマーケアとチャ ッ トにてお問合せ頂けます。...
- Página 122 시스템 사양 4090 그래픽 카드를 구매해 주셔서 감사합니다. NVIDIA GeForce RTX ® ® 제품을 사용하기 전, 새 그래픽 카드에 적합한 하드 웨어 및 소프트웨어가 PC 에 설치되어 있는지 다음 시스템 사양 을 통해 확인하십시오. 시스템 사양 머더보드: > PCI Express® 그래픽 슬롯이 필요합니다...
- Página 123 시스템 전원 공급 장치: > 최소 850W 정격 전력 · 지원되는 전원 커넥터 구성: · 최소 3개의 PCIe 8-pin 케이블 (RTX 4090 PCIe Gen 5 전원 커넥터 어댑터). 450 W 이상의 PCIe Gen 5 케이블 1개 (16-pin). > Operating System: Microsoft®...
- Página 124 장비 NVIDIA GeForce RTX 4090 그래픽 카드 상자에 들어 있는 내용물은 다음과 같습니다. 빠른 시작 가이드 지원 가이드 NVIDIA PCIe Gen5 16 핀 전원 커넥터 어댑터 주의: 동봉되어 있는 NVIDIA 파워 커넥터 어댑터를 GeForce RTX 40-시리즈 파운더스 에디션 그래픽 카드에 사용하시기 바랍니다. 타사 파워 커넥터 어댑터을...
- Página 125 PCIe Gen5 16-pin 전원 커넥터 디스플레이포트 커넥터 (x3) HDMI 커넥터 GeForce RTX 4090 Graphics Card...
- Página 126 하드웨어 설치 컴퓨터를 끄고 전원 코드를 분리한 다음 기존 그래픽 카드를 꺼냅니다. 주의: 그래픽 카드가 식을 때까지 기다린 후 시스템에서 꺼내야합니다.
- Página 127 기존 그래픽 카드가 없는 경우 슬롯 커버 3개를 제거합니다. 그래픽 카드를 설치할 PCI Express 슬롯에 해당하는 인접한 슬롯 커버 3개를 제거합니다.
- Página 128 GeForce RTX 4090 그래픽 카드를 메인 보드의 기본 PCI Express x16 슬롯에 설치하십시오. GeForce RTX 4090 을 기본 PCI Express x16 슬롯에 설치하십시오 (기본 슬롯은 CPU 에 가장 가까운 슬롯입니다). 주의: 이 GPU 카드는 I/O 브래킷이 아래쪽을 향하도록 설치해서는 안됩니다.
- Página 129 NVIDIA 전원 커넥터 어댑터의 16핀 플러그를 GeForce RTX 4090 그래픽 카드 상단에 있는 전원 콘센트에 연결합니다. 시스템 전원 공급 장치에서 NVIDIA 전원 커넥터 어댑터에 8 핀 PCI Express 플러그가 있는 독립 전용 케이블을 3개 이상 연결합니다. 주의: 동봉되어 있는 NVIDIA 파워 커넥터 어댑터를 GeForce RTX 40-시리즈...
- Página 130 디스플레이에 연결 디스플레이를 그래픽 카드에 연결합니다. 전원 코드를 PC 에 다시 연결합니다. 디스플레이포트 커넥터 HDMI 커넥터...
- Página 131 설치하여 드라이버를 업데이트하고 게임을 최적화해야 합니다. GeForce Experience 소프트웨어를 다운로드하여 설치합니다. · http://www.geforce.com/geforce-experience 로 이동하여 Download Now 를 클릭합니다. · Agree and Install 을 선택하여 NVIDIA 소프트웨어 사용권 계약에 동의합니다. GeForce Experience 소프트웨어 설치가 시작됩니다. · Close 를 선택하여 설치를 완료합니다.
- Página 132 설치된 게임을 최적화합니다. · GeForce Experience 를 열고 Scan for Games 를 클릭한 다음 OK 를클릭하여 설치된 게임을 검사합니다. · Optimize All 을 클릭하여 게임 설정을 최적화합니다. 최신 드라이버를 다운로드합니다. · GeForce Experience 를 열고, 로그인한 후 Drivers 탭을 선택합니다. · Download Driver 를...
- Página 133 · 드라이버 설치가 완료되면 CLOSE 를 클릭합니다. 축하합니다. 이제 GeForce 그래픽 카드를 사용할 준비가 되었습니다. 참고: NVIDIA 제품에 대해 궁금한 점이 있으면 www.nvidia.com/support 에서 지원되는 NVIDIA 고객 지원 서비스를 받아보시기 바랍니다.
- Página 134 COMPLIANCES The NVIDIA GeForce RTX 4090 graphics card (Compliance Model: PG136D) is compliant with the following regulations: > Federal Communications Commission (FCC) > Underwriters Laboratories (UL) > Innovation, Science and Economic Development Canada (ISED) > European Conformity; Conformité Européenne (CE) >...
- Página 135 UNITED STATES Federal Communications Commission (FCC) This device complies with part 15 of the FCC Rules. Operation is subject to the following two conditions: (1) this device may not cause harmful interference, and (2) this device must accept any interference received, including any interference that may cause undesired operation of the device.
- Página 136 However, there is no guarantee that interference will not occur in a particular installation. If this equipment does cause harmful interference to radio or television reception, which can be determined by turning the equipment off and on, the user is encouraged to try to correct the interference by one or more of the following measures: >...
- Página 137 Underwriters Laboratories (UL) CANADA Innovation, Science and Economic Development Canada (ISED) CAN ICES-003(B)/NMB-003(B) This device complies with Innovation, Science and Economic Development Canada (ISED) license-exempt RSS standard(s). Operation is subject to the following two conditions: (1) this device may not cause interference, and (2) this device must accept any interference, including interference that may cause undesired operation of the device.
- Página 138 Le présent appareil est conforme aux CNR d’Innovation, Sciences et Développement économique Canada applicables aux appareils radio exempts de licence. L'exploitation est autorisée aux deux conditions suivantes : (1) l'appareil ne doit pas produire de brouillage, et (2) l'utilisateur de l'appareil doit accepter tout brouillage radioélectrique subi, même si le brouillage est susceptible d'en compromettre le fonctionnement.
- Página 139 > RoHS Directive 2011/65/EU for hazardous substances A copy of the Declaration of Conformity to the essential requirements may be obtained directly from NVIDIA GmbH (Bavaria Towers – Blue Tower, Einsteinstrasse 172, D-81677 Munich Germany). AUSTRALIA AND NEW ZEALAND Australian Communications and Media Authority (RCM) This product meets the applicable EMC requirements for Class B, I.T.E...
- Página 140 SI 2012/3032: The Restriction of the Use of Certain Hazardous Substances in Electrical and Electronic Equipment (As Amended) A copy of the Declaration of Conformity to the essential requirements may be obtained directly from NVIDIA Ltd. (100 Brook Drive, 3rd Floor Green Park, Reading RG2 6UJ, United Kingdom).
- Página 141 JAPAN Voluntary Control Council for Interference (VCCI)
- Página 142 Japan RoHS Material Content Declaration 日本工業規格 JIS C 0950:2008 により、 2006 年7月1日以降に販売される特定分野の電気および電子機器について、 製 造者による含有物質の表示が義務付けられます。 機器名称: グラフィックカード 特定化学物質記号 主な分類 Cr(VI) PBDE PCB ボード パッシブ電子部品 除外項目 アクティブ電子部品 除外項目 プロセッサー メモリ 機械部品 除外項目 ケーブル/コネクター...
- Página 143 はんだ付け材料 フラックス、 クリームはんだ、 ラベル、 その他消耗品 注: 1. 「 0」 は、 特定化学物質の含有率が日本工業規格 JIS C 0950:2008 に記載されている含有率基準値より低いこ とを示します。 2. 「 除外項目」 は、 特定化学物質が含有マークの除外項目に該当するため、 特定化学物質について、 日本工業規格 JIS C 0950:2008 に基づく含有マークの表示が不要であることを示します。 3. 「 0.1wt% 超」 または 「 0.01wt% 超」 は、 特定化学物質の含有率が日本工業規格 JIS C 0950:2008 に記載されている 含有率基準値を超えていることを示します。...
- Página 144 Active components Exempt Processor Memory Mechanicals Exempt Cables/Connectors Soldering material Flux, Solder Paste, label and other consumable materials Notes: 1. “0” indicates that the level of the specified chemical substance is less than the threshold level specified in the standard, JIS C 0950: 2008. 2.
- Página 145 KOREA Korea Certification (KC) R-R-NVA-PG136D B급 기기 이 기기는 가정용(B급) 전자파적합기기로서 주 로 가정에서 사용하는 것을 목적으로 하며, 모 든 지역에서 사용할 수 있습니다.
- Página 146 Korea RoHS Material Content Declaration 확인 및 평가 양식은 제품에 포함 된 유해 물질의 허용 기준의 준수에 관한 앤비디아홍콩홀딩즈리미티드 상xxXXXXx호 : 법인등록번호 (영업소) 110181-0036373 문 준비 대표자성명 카렌테레사번즈 사업자등록번호: 120-84-06711 주소 서울특별시 강남구 영동대로 511, 2101 호 ( 삼성동, 코엑스무역타워) 제품...
- Página 147 엔비디아의 그래픽 카드제품은 전기 전자제품 및 자동차의 자원순환에 관한 법률 시행령 제 11조 제 1항에 의거한 법 시행행규칙 제 3조에에따른 유해물질함유 기준을 확인 및 평가한 결과, 이를 준수하였음을 공표합니다. 구비서류 : 없음 작성방법 ① 제품의 종류는 “전기.전자제품 및 자동차의 자원순환에관한 법률 시행령” 제 8조 제 1항 및 제 2 항에 따른 품목별로 구분하여 기 재합니다.
- Página 148 Burns Representative: Number: Address 2788 San Tomas Expressway, Santa Clara, CA 95051 Product Information Name of Prod- Product Category: Graphic Card uct: Date of first Detailed Product Model Name (Number): market release: Manufacturer Weight of Product: NVIDIA Corporation and/or Importer:...
- Página 149 NVIDIA has evaluated and confirmed that the products comply with the standards for the content of hazardous substances in accordance with Article 3 of the ‘Act on Resource Circulation of Electrical and Electronic Equipment and Vehicles’ pursuant to the Enforcement Regulations of Article 11, Paragraph 1 in the statute.
- Página 150 TAIWAN Bureau of Standards, Metrology & Inspection (BSMI) Taiwan RoHS Material Content Declaration 限用物質含有情况標示聲明書 Declaration of the presence condition of the Restricted Substances Marking 設備名稱: 繪圖卡 Equipment Name: Graphic Card 限用物質及其化學符號 Restricted substances and its chemical symbols 單元 多溴聯 多溴二 铅...
- Página 151 PCB板 被動電子零件 Passive components 主動電子零件 Active components 處理器 Processor 內存 Memory 結構件以及風扇 Mechanical parts and Fan 線材/連接器 Cables/Connectors 焊接金屬 Soldering material 助焊劑, 錫膏, 標籤及耗材 Flux, Solder Paste, label and other consumable materials...
- Página 152 備考1: O: 系指該限用物質未超出百分比含量基準值 Note 1: O: indicates that the percentage content of the restricted substance does not exceed the percentage of reference value of presence. 備考2: O: 系指該项限用物質为排外项目。 Note 2: O: indicates that the restricted substance corresponds to the exemption. 此表中所有名稱中含...
- Página 153 CHINA China RoHS Material Content Declaration 产品中有害物质的名称及含量 The Table of Hazardous Substances and their Content 根据中国 《电器电子产品有害物质限制使用管理办法》 as required by Management Methods for Restricted Use of Hazardous Substances in Electrical and Electronic Products 有害物质 部件名称 Hazardous Substances 铅 汞 镉 六价铬...
- Página 154 结构件以及风扇 Mechanical parts and Fan 线材/连接器 Cable/Connectors 焊接金属 Soldering material 助焊剂, 锡膏, 标签及耗材 Flux, Solder Paste, label and other consumable materials...
- Página 155 本表格依据SJ/T 11364-2014 的规定编制 The table according to SJ/T 11364 O: 表示该有害物质在该部件所有均质材料中的含量均在GB/T 26572 标准规定的限量要求以下。 O: Indicates that this hazardous substance contained in all of the homogeneous materials for this part is below the limit requirement in GB/T 26572. X: 表示该有害物质至少在该部件的某一均质材料中的含量超出GB/T 26572 标准规定的限量要求。 X: Indicates that this hazardous substance contained in at least one of the homogeneous materials used for this part is above the limit requirement in GB/T 26572.
- Página 156 INDIA India RoHS Material Content Declaration This product, as well as its related consumables and spares, complies with the reduction in hazardous substances provisions of the “India E-waste (Management and Handling) Rule 2016”. It does not contain lead, mercury, hexavalent chromium, polybrominated biphenyls or polybrominated diphenyl ethers in concentrations exceeding 0.1 weight % and 0.01 weight % for cadmium, except for where allowed pursuant to the exemptions set in Schedule 2 of the Rule.
- Página 157 UKRAINE Ukraine Technical Regulations (UA TR) Цей пристрій відповідає наступним технічним регламентам: > Технічного регламенту з електромагнітної сумісності обладнання > Технічного регламенту обмеження використання деяких небезпечних речовин в електричному та електронному обладнанні MOROCCO Moroccan regulatory framework (CMIM)
- Página 158 NVIDIA does not accept any liability related to any default, damage, costs or problem which may be based on or attributable to: [ii the use of the NVIDIA product in any manner that is contrary to this specification, or [ii) customer product designs.
- Página 159 NVIDIA, the NVIDIA logo, NVIDIA CUDA, NVIDIA GeForce, GeForce RTX, Ge Force Experience, NVIDIA NVLink, GigaThread, Lumenex, PureVideo, and PhysX Technology are trademarks or registered trademarks of NVIDIA Corporation. Other company product names may be trademarks of the respective companies with which they are associated.
- Página 160 © 2022 NVIDIA Corporation. All rights reserved.