Publicidad
Idiomas disponibles
Idiomas disponibles
Enlaces rápidos
Instructions For Use - Original Instructions / Instrucciones de uso / Mode d' emploi
READ THIS BOOK
LEA ESTE MANUAL
LISEZ CE MANUEL
This book has important information for the use and safe operation of this machine. Failure to read this book prior to oper-
ating or attempting any service or maintenance procedure to your Clarke machine could result in injury to you or to other
personnel; damage to the machine or to other property could occur as well. You must have training in the operation of this
machine before using it. If your operator(s) cannot read this manual, have it explained fully before attempting to operate this
machine.
All directions given in this book are as seen from the operator's position at the rear of the machine.
02/2018 REV D
Form No. 56091130
CA30 20B
Model: CLARKE510B
English (A2 - A18)
EN
Español (B2 - B18)
ES
Français (C2 - C18)
FR
Publicidad

Manuales relacionados para Clarke 510B


Resumen de contenidos para Clarke 510B
- Página 1 This book has important information for the use and safe operation of this machine. Failure to read this book prior to oper- ating or attempting any service or maintenance procedure to your Clarke machine could result in injury to you or to other personnel;...
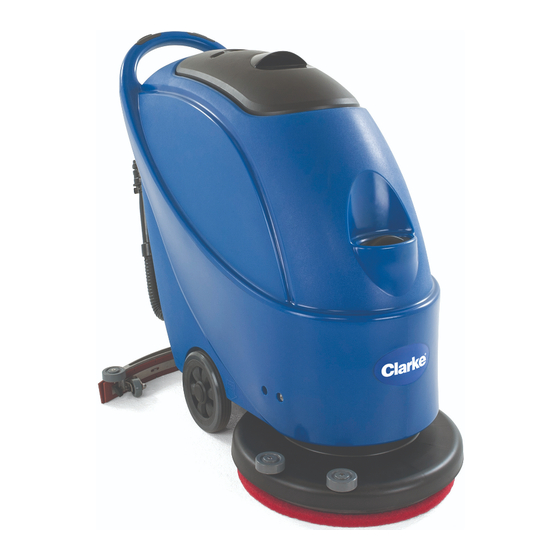
- Página 2 A - ENGLISH INSTRUCTIONS FOR USE TABLE OF CONTENTS Page Introduction ................A-3 Contents ..................A-3 Purpose ..................A-3 Spare Parts and Maintenance ...........A-3 Changes and Improvements .............A-3 Machine Application ..............A-3 Unpacking/Transport ..............A-3 Safety Guides ................A-4 Technical Data ................A-5 Machine Components ............A-6 – A-7 Control Panel ..............
- Página 3 If service, parts or accessories are needed, please contact your local Clarke distributor. CHANGES AND IMPROVEMENTS CLARKE makes continuous improvements on its products. CLARKE reserves the right to change and improve the machines. All changes / improvements should be performed by and authorized Clarke service provider.
- Página 4 In case of machine malfunction, please make sure that it is not caused by lack of maintenance. If it is caused by other conditions, contact your local Clarke authorized service center. If it is confi rmed that spare parts must be replaced, please secure the genuine parts from your local Clarke distributor.
- Página 5 INSTRUCTIONS FOR USE ENGLISH - A TECHNICAL DATA Model CA30 20B Machine Height 980mm Solution tank capacity 40 litre Recovery tank capacity 40 litre Diameter of transport wheel 200mm Diameter of guide wheel 76mm Power of vacuum system motor 350w Maximum gradient when working 2% (Max) Sound pressure level at workstation...
- Página 6 A - ENGLISH INSTRUCTIONS FOR USE MACHINE COMPONENTS Safety switch button Handle Control panel Serial number plate/Technical data Control cover Cable holder (*) Battery charging indication light Reset switch Battery connector Battery cover Drain hose Squeegee lift cable Battery connector safety cover Squeegee lift handle Drain cap Squeegee knob...
- Página 7 INSTRUCTIONS FOR USE ENGLISH - A 12/2015 56091130 - CA30 20B A - 7...
- Página 8 A - ENGLISH INSTRUCTIONS FOR USE CHARGER INDICATOR LIGHTS (FIGURE 3) (Optional, applicable to models with built-in charger) When charging starts, the red indication light (45) fl ashes a few times and then steadies to become a permanent red indication light, entering into the fi rst stage of charging. After charging for a period of time, the red light (45) will go out.
- Página 9 ENGLISH - A IF YOU NEED TO REPLACE THE BATTERIES Contact your local authorized Clarke distributor for proper batteries. Set the machine and the on-board charger (if equipped) according to the type of batteries (WET or GEL/AGM). Follow battery installation instructions as outlined below.
- Página 10 A - ENGLISH INSTRUCTIONS FOR USE INSTALLING BATTERIES (CONTINUED) Install the battery with specially made battery installation tools (A, Figure 7). After the battery is installed, remove the battery installation tools, and install the battery fi xation bracket (B, Figure 7). FIGURE 7 Put the battery connector (C, Figure 7) through the hole on the top of the battery box cover, put the drain hose through the right hole of the battery box cover, attach the battery box cover with 4 screws, and then install the squeegee lift cable, drain hose, and the squeegee...
- Página 11 INSTRUCTIONS FOR USE ENGLISH - A FIGURE 9 SOLUTION TANK FILLING CAUTION ! Only low foam, nonfl ammable detergents may be used. These detergents must be suitable for the use of scrubbers. Open the water inlet cover (27) and add water to solution tank. Do not overfi ll the tank. When preparing the cleaning solutions, please follow °...
- Página 12 A - ENGLISH INSTRUCTIONS FOR USE TURNING OFF THE MACHINE When you have fi nished using the machine, fi rst remove the brush/pad-holder (refer to the steps mentioned above) Release the safety switch (1) to turn off the brush/pad holder and solenoid valve. Press the Vacuum switch (42) to the “Off”...
- Página 13 INSTRUCTIONS FOR USE ENGLISH - A RECOVERY TANK EMPTYING Turn off the machine. Raise the squeegee assembly (14). Move the machine to a dedicated draining location. Grasp the handle (2) and tilt the machine backward until the guide wheel touches the fl oor. Remove the drain hose from the clip, bend the top end of draining hose (A, Figure 13), and then remove the drain hose cap.
- Página 14 All maintenance should be done by qualifi ed personnel or authorized Clarke service centers. This manual only relates the simplest and the most common maintenance procedures. For any maintenance procedures other than those stated in this table of planned maintenance, please contact your local Clarke distributor. SCHEDULED MAINTENANCE TABLE...
- Página 15 INSTRUCTIONS FOR USE ENGLISH - A WARNING ! Particular care must be taken when charging the battery because there may be leakage of acid during the charging process. Battery acid is corrosive. If contact is made with skin or eyes, please fl ush with clean water and seek medical attention. Open recovery tank lid (25) and observe if recovery tank is empty or not.
- Página 16 A - ENGLISH INSTRUCTIONS FOR USE SQUEEGEE BLADE CHECK AND REPLACEMENT Following the methods related in the previous section clean the squeegee (Figure 15) Check the edge (E, Figure 15) of the front squeegee blade and the edge (F) of the rear squeegee blade (D). On the whole length, they should be level.
- Página 17 INSTRUCTIONS FOR USE ENGLISH - A WATER TANK AND FLOAT FILTER MESH CLEANING Move the machine to a dedicated draining area. Press the power switch (41) to the position “O” to turn off the machine. Open recovery tank lid (A, Figure 16), and remove the fl oat device (36) from inside the tank. Use clean water to rinse the recovery tank lid (A), the tank (B and C), and the fl...
- Página 18 A - ENGLISH INSTRUCTIONS FOR USE SOLUTION FILTER CLEANING Drain all the water from Solution tank as previously outlined. Move the machine to a fl at and smooth surface. Press the power switch (41) to the “O” position to turn off the machine. Turn off the draining ball valve (A, Figure 17) (located at the bottom of the machine, behind the wheels).
- Página 20 B - ESPAÑOL INSTRUCCIONES DE USO ÍNDICE Página Introducción ................B-3 Contenido ..................B-3 Objetivo ..................B-3 Repuestos y mantenimiento ............B-3 Cambios y mejoras ..............B-3 Aplicación de la máquina ............B-3 Desembalaje y transporte ............B-3 Guías de seguridad ..............B-4 Información técnica ..............B-5 Componentes de la máquina ...........B-6 – B-7 Panel de control ...............B-6 –...
- Página 21 Si se necesitan servicios, piezas o accesorios, por favor póngase en contacto con su distribuidor local de Clarke. CAMBIOS Y MEJORAS CLARKE constantemente hace mejoras en sus productos. CLARKE se reserva el derecho de cambiar y mejorar las máquinas. Todos los cambios / mejoras deben ser realizados por un servicio técnico autorizado de Clarke.
- Página 22 En caso de mal funcionamiento de la máquina, por favor asegúrese de que éste no es causado por falta de mantenimiento. Si es causada por otras condiciones, póngase en contacto con su centro local de servicio autorizado Clarke. Si se confi rma que las piezas de repuesto deben ser sustituidas, por favor asegúrese que sean piezas originales de su distribuidor local de Clarke.
- Página 23 INSTRUCCIONES DE USO ESPAÑOL - B DATOS TÉCNICOS Modelo CA30 20B Altura de la máquina 980mm Capacidad del depósito para la solución 40 litros Capacidad del depósito de recogida 40 litros Diámetro de la rueda de transporte 200mm Diámetro de la rueda de guía 76mm Potencia del motor del sistema de aspiración 350w...
- Página 24 B - ESPAÑOL INSTRUCCIONES DE USO COMPONENTES DE LA MÁQUINA Botón de seguridad Panel de control Placa con número de serie y datos técnicos Tapa de control Soporte para cable (*) Indicador luminoso de carga de batería Interruptor de reinicio Conector de batería Tapa de batería Tubo de drenaje...
- Página 25 INSTRUCCIONES DE USO ESPAÑOL - B 12/2015 56091130 - CA30 20B B - 7...
- Página 26 B - ESPAÑOL INSTRUCCIONES DE USO INDICADORES LUMINOSOS DE CARGA (FIGURA 3) (Opcional, aplicable a modelos con cargador incorporado) Cuando se inicia la carga, la luz indicadora de color rojo (45) parpadea unas cuantas veces y luego se estabiliza en una luz permanente de aviso roja, entrando en la primera etapa de la carga.
- Página 27 SI USTED NECESITA REEMPLAZAR LAS BATERÍAS Póngase en contacto con su distribuidor local autorizado de Clarke para obtener las baterías adecuadas. Ajuste la máquina y el cargador incorporado (si está instalado), según el tipo de baterías (WET o GEL / AGM). Siga las instrucciones de instalación de la batería como se indica a continuación.
- Página 28 B - ESPAÑOL INSTRUCCIONES DE USO INSTALACIÓN DE BATERÍAS (CONTINUACIÓN) Instale la batería con las herramientas fabricadas especialmente para la instalación de baterías (A, Figura 7). Una vez instalada la batería, quitar las herramientas de instalación de la batería, e instalar el soporte de fi jación de la batería (B, Figura 7). FIGURA 7 Coloque el conector de la batería (C, Figura 7) a través del agujero en la parte superior de la tapa de la caja de la batería, inserte el tubo de desagote en el orifi...
- Página 29 INSTRUCCIONES DE USO ESPAÑOL - B FIGURA 9 LLENADO DEL DEPÓSITO DE SOLUCIÓN ¡PRECAUCIÓN! Usar solamente detergentes de baja espuma, no infl amables. Estos detergentes deben ser adecuados para el uso en fregadoras. Abra la tapa de entrada de agua (27) y añada agua al depósito de solución. No sobrecargue el depósito. Cuando prepare las soluciones de limpieza, por favor, siga las medidas de dilución suministradas por el fabricante de productos químicos.
- Página 30 B - ESPAÑOL INSTRUCCIONES DE USO APAGAR LA MÁQUINA Cuando haya terminado de usar la máquina, primero retire el cepillo/portabayetas (consulte los pasos mencionados anteriormente) Suelte el interruptor de seguridad (1) para desactivar el soporte del cepillo/almohadilla y la válvula de solenoide. Presione el interruptor de aspiración (42) a la posición “Off”, y la aspiración se retrasará...
- Página 31 INSTRUCCIONES DE USO ESPAÑOL - B VACIADO DEL DEPÓSITO DE RECUPERACIÓN Apague la máquina. Levante el conjunto de la escobilla (14). Corra la máquina a una zona dedicada al drenaje. Tome el mango (2) e incline suavemente la máquina hacia atrás hasta que la rueda de guía toque el suelo.
- Página 32 Antes de realizar con cualquiera de los procedimientos de mantenimiento, por favor estudie detenidamente las secciones relacionadas con la seguridad. Todo el mantenimiento debe ser realizado por personal cualifi cado o centros de servicio autorizados por Clarke. Este manual sólo se refi ere a los procedimientos de mantenimiento más simples y comunes.
- Página 33 INSTRUCCIONES DE USO ESPAÑOL - B ¡ADVERTENCIA! Debe tomarse especial cuidado al cargar la batería, ya que puede haber fugas de ácido durante el proceso de carga. El ácido de la batería es corrosivo. Si toma contacto con la piel o los ojos, por favor, enjuague con agua limpia y solicite asistencia médica. Abra la tapa del depósito de recuperación (25) y observe si el tanque de recuperación está...
- Página 34 B - ESPAÑOL INSTRUCCIONES DE USO VERIFICACIÓN Y REEMPLAZO DE LA HOJA DE LA ESCOBILLA Seguir los métodos relacionados en el apartado anterior limpiar la escobilla (Figura 15) Compruebe el borde (E, Figura 15) de la hoja de la escobilla delantera y el borde (F) de la hoja de la escobilla trasera (D). En toda la longitud, que deben estar al mismo nivel.
- Página 35 INSTRUCCIONES DE USO ESPAÑOL - B DEPÓSITO DE AGUA Y MALLA DE LIMPIEZA DEL FILTRO FLOTANTE Corra la máquina a una zona dedicada al drenaje. Presione el interruptor de encendido (41) en la posición “O” para apagar la máquina. Abra la tapa del depósito de recuperación (A, Figura 16), y saque el dispositivo de fl otación (36) desde el interior del tanque. Use agua limpia para enjuagar la tapa del depósito de recuperación (A), el depósito (B y C), y el bastidor de soporte del fi...
- Página 36 B - ESPAÑOL INSTRUCCIONES DE USO LIMPIEZA DEL FILTRO DE SOLUCIÓN Drene toda el agua del depósito de solución como se indicó anteriormente. Sitúe la máquina en una superfi cie plana y lisa. Presione el interruptor de encendido (41) en la posición “O” para apagar la máquina. Cierre la válvula de bola de drenaje (A, Figura 17) (que se encuentra en la parte inferior de la máquina, detrás de las ruedas).
- Página 38 C - FRANÇAIS MODE D‘ EMPLOI TABLE DES MATIÈRES Page Introduction ..................C-3 Avant-propos .................. C-3 Objet ....................C-3 Pièces détachées et maintenance ..........C-3 Modifi cations et améliorations ............C-3 Utilisation de la machine ..............C-3 Déballage/Transport ............... C-3 Consignes de sécurité...
- Página 39 MODIFICATIONS ET AMÉLIORATIONS CLARKE s’emploie à améliorer sans cesse ses produits. CLARKE se réserve le droit de modifi er et d’apporter des améliorations à ses machines. Toute modifi cation ou amélioration doit être réalisée par un prestataire agréé par Clarke.
- Página 40 être remplacées, veillez à bien prendre des pièces d’origine chez votre distributeur local Clarke. Afi n de garantir le bon fonctionnement de la machine, il est conseillé de faire appel à un prestataire agréé Clarke pour effectuer les opérations de maintenance planifi ée conformément au programme de maintenance détaillé dans ce manuel.
- Página 41 MODE D‘ EMPLOI FRANÇAIS - C CARACTÉRISTIQUES TECHNIQUES Modèle CA30 20B Hauteur de la machine 980 mm Capacité du réservoir de solution 40 litres Capacité du réservoir de récupération 40 litres Diamètres des roues 200 mm Diamètres de la roue de guidage 76 mm Puissance du moteur du système d’aspiration 350 w...
- Página 42 C - FRANÇAIS MODE D‘ EMPLOI COMPOSANTS DE LA MACHINE/NOMENCLATURE Interrupteur de sécurité Poignée Panneau de commande Plaque d’identifi cation (Numéro de série)/Caractéristiques techniques Capot de protection Support de câble (*) Voyant du niveau de charge de la batterie Interrupteur de réinitialisation Connecteur batterie Couvercle de protection des batteries Tuyau de vidange...
- Página 43 MODE D‘ EMPLOI FRANÇAIS - C 12/2015 56091130 - CA30 20B C - 7...
- Página 44 C - FRANÇAIS MODE D‘ EMPLOI VOYANTS DU CHARGEUR (FIGURE 3) (en option, valable uniquement sur les modèles équipés d’un chargeur intégré) Lors de la mise en charge, le voyant rouge (45) clignote pendant un petit moment puis devient fi xe (rouge) ; la batterie commence alors à charger. Au bout d’un certain temps, le voyant rouge (45) s’éteint.
- Página 45 REMPLACEMENT DES BATTERIES Contactez votre distributeur local Clarke agréé pour plus de détails sur les batteries à utiliser. Réglez la machine et le chargeur intégré (le cas échéant) en fonction du type de batterie (HUMIDE ou GEL/AGM). Suivez les instructions d’installation des batteries détaillées ci-dessous.
- Página 46 C - FRANÇAIS MODE D‘ EMPLOI MISE EN PLACE DES BATTERIES (SUITE) Installez la batterie en utilisant les outils spécialement prévus à cet effet (A, Figure 7). Une fois la batterie en place, enlevez l’outil et placez le support de fi xation de la batterie (B, Figure 7). FIGURE 7 Passez le connecteur de batterie (C, Figure7) par le trou situé...
- Página 47 MODE D‘ EMPLOI FRANÇAIS - C FIGURE 9 REMPLISSAGE DU RÉSERVOIR DE SOLUTION ATTENTION ! N’utilisez que des détergents qui moussent peu et qui sont ininfl ammables. Ces détergents doivent être adaptés pour une utilisation sur des nettoyeuses. Ouvrez le couvercle d’admission d’eau (27) et ajoutez de l’eau dans le réservoir de solution.
- Página 48 C - FRANÇAIS MODE D‘ EMPLOI POUR ÉTEINDRE LA MACHINE. Une fois le nettoyage terminé, commencez par enlever la brosse / le porte-disque (voir les instructions correspondantes, plus haut). Relâchez l’interrupteur de sécurité (1) de façon à arrêter la brosse ou le porte-disque et à couper l’électrovalve.
- Página 49 MODE D‘ EMPLOI FRANÇAIS - C VIDANGE DU RÉSERVOIR DE RÉCUPÉRATION Eteignez la machine. Relevez la raclette (14). Amenez la machine à l’endroit prévu pour vidanger les réservoirs. Saisissez la poignée (2) et inclinez la machine vers l’arrière, jusqu’à ce que la roue de guidage touche le sol.
- Página 50 à ces interventions, veuillez lire attentivement les chapitres de ce manuel ayant trait à la sécurité. Toute intervention de maintenance doit être réalisée par du personnel qualifi é ou un centre d’entretien agréé Clarke. Ce manuel ne traite que des opérations de maintenance les plus simples et les plus courantes.
- Página 51 MODE D‘ EMPLOI FRANÇAIS - C AVERTISSEMENT ! Soyez particulièrement vigilant lors de la mise en charge de la batterie, car des fuites d’acide peuvent se produire pendant que la batterie est en charge. L’acide de batterie est corrosif. En cas de contact avec la peau ou les yeux, rincez à l’eau claire et consultez un médecin.
- Página 52 C - FRANÇAIS MODE D‘ EMPLOI VÉRIFICATION ET REMPLACEMENT DE LA LAME DE LA RACLETTE Suite à la procédure décrite au chapitre précédent pour nettoyer la raclette (Figure 15) Vérifi ez le bord (E, Figure 15) de la lame avant de la raclette et le bord (F) de la lame arrière (D). Celles-ci doivent être régulières sur toute leur longueur.
- Página 53 MODE D‘ EMPLOI FRANÇAIS - C NETTOYAGE DU RÉSERVOIR D’EAU ET DU TAMIS DU FILTRE DU FLOTTEUR Amenez la machine dans un endroit prévu pour la vidange. Appuyez sur l’interrupteur principal (41) pour le mettre sur “O” et éteindre la machine. Ouvrez le couvercle du réservoir de récupération (A, Figure 16) et démontez le mécanisme du fl...
- Página 54 C - FRANÇAIS MODE D‘ EMPLOI NETTOYAGE DU FILTRE DE SOLUTION Vidangez toute l’eau du réservoir de solution en procédant comme indiqué précédemment. Amenez la machine sur une surface lisse et plane. Appuyez sur l’interrupteur principal (41) pour le mettre sur “O” et éteindre la machine. Fermez le clapet à...
- Página 56 PARTS LIST TANK SYSTEM 11/2019 D - 2 CA30 20B - 56091130...
- Página 57 PARTS LIST TANK SYSTEM Item Ref. No. Qty Description Item Ref. No. Qty Description VF90412A 1 Handle, Recovery Tank Cover VF90308 2.5” Hub Cap VF90503A 1 Recovery Tank Cover VF90314 Transport Wheel Shaft VA80758 Screw VF90510 Retainer Plate VF90504 Gasket VF90235 Screw Tm4x10 VF90619A 1...
- Página 58 PARTS LIST CONTROL SYSTEM AND ELECTRICAL SYSTEM 11/2019 D - 4 CA30 20B - 56091130...
- Página 59 PARTS LIST CONTROL SYSTEM AND ELECTRICAL SYSTEM Item Ref. No. Qty Description Item Ref. No. Qty Description GT13091 SCREW PB3.5x9.5 VF90203A 2 Safety Switch Knob VF90238-1 1 17” Control Circuit Board VV68303 Screw KT3.5x15 VF90209 PCB Housing VF90201A 1 Safety Switch Cover Left VF90237 Nylon Cable Hook VF90286...
- Página 60 PARTS LIST WHEELS AND SOLUTION SYSTEM 11/2019 D - 6 CA30 20B - 56091130...
- Página 61 PARTS LIST WHEELS AND SOLUTION SYSTEM Item Ref. No. Qty Description VF89203 Wheel Cover VF14563 Leville Washer VF14554 12 Washer VF90304 Wheel Shaft VF82172 Spring 70° VF90305 8” Wheel VF14552 Ring D 17 VF90282 Solenoid Valve Kit VV10114 Clamp VF90440 Tubing L=260mm VF90604 Filter Base...
- Página 62 PARTS LIST BRUSH SYSTEM 11/2019 D - 8 CA30 20B - 56091130...
- Página 63 PARTS LIST BRUSH SYSTEM Item Ref. No. Qty Description Item Ref. No. Qty Description VF90257 20” Brush Motor VV13604 Screw, Shoulder M8x20 VF90424 Nut M20 VF90408 Belt VF90282 Solenoid Valve Kit VF13503 Nut Lock M8 VF90418 Solenoid Valve Bracket VF14057A 3 Nut , M12 VV13650A 4 Screw M4x10...
- Página 64 PARTS LIST SQUEEGEE SYSTEM 11/2019 D - 10 CA30 20B - 56091130...
- Página 65 PARTS LIST SQUEEGEE SYSTEM Item Ref. No. Qty Description VF14547 Screw Lock M10 VF85143 Hand Wheel VF13514A 2 Washer Φ8xΦ16.5x1 VF14503 Nut M8 VF90133 Spacer VF90110 Back-Squeegee-Support VF14516 Nut Lock M8 VF14506 Nut M6 VF13533 Washer Flat Ø6 VF90111 Front-Squeegee-Support VF85336 Washer Nylon VF14525...
- Página 66 PARTS LIST WIRING DIAGRAM Item Ref. No. Qty Description Battery CH VF90227-US 1 Charger VF90238-1 1 17” Control Circuit Board VF90238-2 1 Led Board VF90230 Contactor VF90282 Solenoid Valve ZD48325 Brush Circuit Breaker ZD48325 Vacuum Circuit Breaker VF90257 20” Brush Motor VF90520 Vacuum Motor VV60153...
- Página 68 Nilfisk Inc. 9435 Winnetka Avenue North Minneapolis, MN 55445 https://www.clarkeus.com/ ©2013 Nil sk Inc. fi A Nilfi sk Brand...