Tabla de contenido
Publicidad
Idiomas disponibles
Idiomas disponibles
Enlaces rápidos
Publicidad
Capítulos
Tabla de contenido
Solución de problemas

Manuales relacionados para Yamaha CD-C600


Resumen de contenidos para Yamaha CD-C600
- Página 1 Compact Disc Changer OWNER’S MANUAL MANUAL DE INSTRUCCIONES...
- Página 2 Yamaha will not be held responsible for any damage resulting from use of this unit with a voltage other than specified.
-
Página 3: Tabla De Contenido
CONTENTS INTRODUCTION CONTROLS AND FUNCTIONS ......2 Front panel ..............2 Rear panel connections ..........4 Remote control............5 OPERATION LOADING AND PLAYING DISCS ..... 8 Program playback Audio CD ........8 PLAYXCHANGE ............. 8 PLAYING BACK iPod/USB DEVICE ....9 Connecting iPod/USB devices........ -
Página 4: Introduction
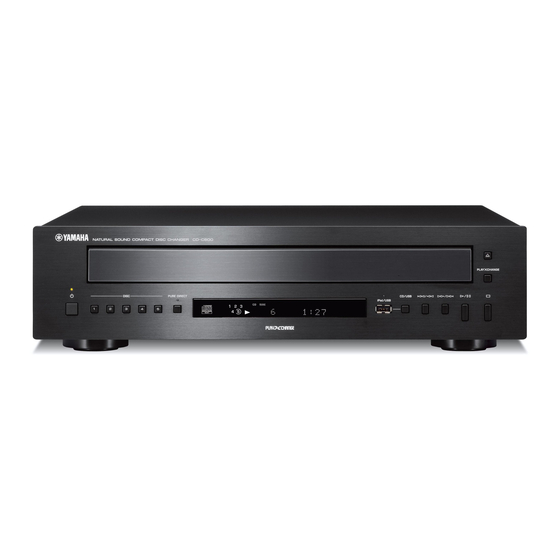
INTRODUCTION CONTROLS AND FUNCTIONS Front panel 1 Disc tray 7 Remote control sensor Loads a disc. Receives signals from the remote control. 8 iPod/USB port (Open/Close) Opens or closes the disc tray. For loading and unloading Connect your iPod or USB device. See page 9 for details. discs, see page 8. - Página 5 CONTROLS AND FUNCTIONS E Disc select indicator I Time and playback mode indicator The numbers corresponding to the trays containing discs Indicates the current playback mode and the status of the light up. The enclosed number indicates the currently time display (see pages 5 and 8 for playback modes, and selected disc.
-
Página 6: Rear Panel Connections
CONTROLS AND FUNCTIONS Rear panel connections CAUTION Before making any connection, switch OFF the power to the unit, the amplifier and any other component. Connect the supplied power cable into the AC IN inlet on the rear panel when all AC IN inlet RS-232C terminal REMOTE CONTROL... - Página 7 CONTROLS AND FUNCTIONS Remote control 4 PROGRAM Turns on or off the program playback mode. See “Program playback” on page 8. 5 DIMMER Each time you press DIMMER, the brightness level changes by 4 levels. This setting is retained even if you turn off this unit. 6 Numeric buttons Use to select directly a track on the disc or a file in the current folder.
- Página 8 CONTROLS AND FUNCTIONS E REPEAT H CLEAR Repeats playback of a single track or all tracks. Each time Erases the programmed track. you press REPEAT during playback, the repeat playback I ENTER mode changes as follows: Confirms a track number entered when you are •...
-
Página 9: Installing Batteries In The Remote Control
CONTROLS AND FUNCTIONS ■ Installing batteries in the remote control ■ Notes on batteries • Change all of the batteries if you notice that the operation range of the remote control decreases. • Use AA, R6, UM-3 batteries. • Make sure that the polarities are correct. See the illustration inside the battery compartment. -
Página 10: Operation
OPERATION LOADING AND PLAYING DISCS You can load or replace five discs at a time. Press PROGRAM while playback is stopped. This unit is set to the program editing mode. Press OPEN/CLOSE to open the disc tray and load discs. Use the disc guides to align the discs correctly in the Select a disc with one of the DISC (1-5) tray. -
Página 11: Playing Back Ipod/Usb Device
PLAYING BACK iPod/USB DEVICE Connecting iPod/USB devices Notes iPod • Use the USB cable supplied with your iPod. If no USB cable is supplied, purchase one from Apple Inc. • Turn off your iPod. • Do not use a USB hub. Connect your USB device or iPod via USB cable Playing back iPod Playing back USB devices... -
Página 12: Disconnecting Ipod/Usb Devices
Infringement of copyright is prohibited by law. • Yamaha and suppliers accepts no liability for the loss of data saved on iPod connected to this unit. As a precaution, it is recommended that the files are made backup copies. -
Página 13: Additional Information
ADDITIONAL INFORMATION PLAYABLE DISC AND FILE FORMAT ■ Playable MP3 and WMA files (USB ■ Playable discs Use compact discs bearing the marks below. device and Data Disc) Compact discs (digital audio) ..Sampling Bitrate Format frequency ..CD-R, CD-RW digital audio discs (kbps) (kHz) •... -
Página 14: Handling Compact Discs
PLAYABLE DISC AND FILE FORMAT ■ Handling compact discs • Always handle with care so that the playing surface is not scratched. Do not warp discs. • To keep clean the playing surface, wipe with a clean, dry cloth. Do not use any type of disc cleaner, spray, or any other chemical-based liquid. -
Página 15: Using The Advanced Setup
USING THE ADVANCED SETUP This unit is equipped with the following four special To activate and configure Advanced setup, follow the modes, which may be useful for special purposes at stores steps below. Use the buttons on the front panel. or offices. -
Página 16: Troubleshooting
If the unit fails to operate normally, check the following points to determine whether the problem can be corrected by the simple measures suggested. If it cannot be corrected, or if the problem is not listed in the Problems column, disconnect the power cable and contact your authorized Yamaha dealer or service center for help. Refer to... -
Página 17: Specifications
TROUBLESHOOTING Refer to Problems Possible Causes Solutions page This unit is being subjected to vibrations or Relocate this unit. Sound “skips”. — impacts. The disc is dirty. Clean the disc. Improper cable connections. Securely connect the audio cables. If the Sound “hums”. - Página 18 Yamaha no se hará para la clase 1. responsable de ningún daño debido al uso de este aparato con una tensión diferente de la especificada.
-
Página 19: Accesorios Incluidos
CONTENIDO INTRODUCCIÓN CONTROLES Y FUNCIONES......2 Panel delantero............2 Conexiones del panel posterior........4 Control remoto............5 FUNCIONAMIENTO CARGA Y REPRODUCCIÓN DE DISCOS ..8 Programación de reproducción Audio CD ....8 PLAYXCHANGE ............. 8 REPRODUCIR UN iPod/DISPOSITIVO USB ... 9 Conectar un iPod/dispositivos USB...... -
Página 20: Introducción
INTRODUCCIÓN CONTROLES Y FUNCIONES Panel delantero 1 Bandeja de discos 7 Sensor del control remoto Carga un disco. Recibe señales del control remoto. (Apertura/Cierre) 8 Puerto iPod/USB Abre o cierra la bandeja de discos. Para cargar y descargar Conecte aquí su iPod o dispositivo USB. Consulte la discos, consulte la página 8. - Página 21 CONTROLES Y FUNCIONES E Indicador de selección de disco I Indicador del modo de reproducción y tiempo Los número de las bandejas con discos se iluminan. El Indica el modo de reproducción actual y el estado de la número enmarcado indica el disco seleccionado en ese visualización del tiempo (consulte páginas 5 y 8 para momento.
-
Página 22: Conexiones Del Panel Posterior
CONTROLES Y FUNCIONES Conexiones del panel posterior PRECAUCIÓN Antes de realizar las conexiones, apague la unidad, el amplificador y cualquier otro componente. Una vez realizadas todas las conexiones, conecte el cable de alimentación incluido en la Toma AC IN Terminal RS-232C Terminales REMOTE toma de CA del panel CONTROL IN/OUT... -
Página 23: Control Remoto
CONTROLES Y FUNCIONES Control remoto Este ajuste se conserva, aunque apague la unidad. 4 PROGRAM Activa o desactiva el modo de programación de reproducción. Consulte “Programación de reproducción” en la página 8. 5 DIMMER Cada vez que pulse DIMMER, el brillo cambiará en 4 niveles. Este ajuste se conserva, aunque apague la unidad. - Página 24 CONTROLES Y FUNCIONES E REPEAT H CLEAR Repite la reproducción de una sola pista o de todas las pistas. Borra la pista programada. Cada vez que pulse REPEAT durante la reproducción, el modo I ENTER reproducción con repetición cambiará de la siguiente manera: Confirma un número de pista introducido durante la •...
-
Página 25: Instalar Las Pilas En El Control Remoto
CONTROLES Y FUNCIONES ■ Instalar las pilas en el control remoto ■ Notas acerca de las pilas • Cambie todas las pilas si nota que el margen de control del mando a distancia se reduce. • Use pilas AA, R6, UM-3. •... -
Página 26: Funcionamiento
FUNCIONAMIENTO CARGA Y REPRODUCCIÓN DE DISCOS Puede cargar o sustituir cinco discos simultáneamente. Pulse PROGRAM cuando la reproducción esté detenida. Pulse OPEN/CLOSE para abrir la bandeja de La unidad entra en el modo de edición de la discos y cargar discos. programación. -
Página 27: Reproducir Un Ipod/Dispositivo Usb
REPRODUCIR UN iPod/DISPOSITIVO USB Conectar un iPod/dispositivos USB Notas iPod • Utilice el cable USB suministrado con su iPod. Si no se entrega ningún cable USB, adquiera uno en Apple Inc. • Desactive el iPod. • No utilice un concentrador USB. Conecte su dispositivo USB o su iPod con un cable Reproducir el iPod Reproducir dispositivos USB... -
Página 28: Desconectar Un Ipod/Dispositivos Usb
La infracción del copyright está prohibida por ley. • Yamaha y sus proveedores rechazan cualquier responsabilidad por la pérdida de datos guardados en el iPod conectado a la unidad. Como precaución, se recomienda realizar copias de seguridad de los archivos. -
Página 29: Información Adicional
INFORMACIÓN ADICIONAL FORMATO DE ARCHIVOS Y DISCOS REPRODUCIBLES ■ Archivos WMA y MP3 reproducibles ■ Discos reproducibles Utilice discos compatibles con las marcas siguientes. (dispositivo USB y Data Disc) Discos compactos (audio digital) ..Velocidad Frecuencia Formato de bits de muestreo .. -
Página 30: Manipular Los Discos Compactos
FORMATO DE ARCHIVOS Y DISCOS REPRODUCIBLES ■ Manipular los discos compactos • Manipule siempre los discos con cuidado de no rayar la superficie de reproducción. No flexione los discos. • Para mantener la superficie de reproducción limpia, pásele un trapo seco y limpio. No utilice ningún tipo de producto de limpieza para discos, spray o cualquier otro líquido químico. -
Página 31: Utilizar La Configuración Avanzada
UTILIZAR LA CONFIGURACIÓN AVANZADA Esta unidad está equipada con los cuatro modos Para activar y configurar la configuración avanzada, siga siguientes, que pueden ser útiles para fines específicos en los siguientes pasos. Utilice los botones del panel frontal. tiendas u oficinas. POWER OFF Configuración Nota... -
Página 32: Solución De Problemas
Si el problema no se puede corregir o si no figura en la columna Problemas, desconecte el cable de alimentación y póngase en contacto con un distribuidor o un centro de servicios autorizado de Yamaha para solicitar asistencia. -
Página 33: Especificaciones
SOLUCIÓN DE PROBLEMAS Consulte Problemas Causas posibles Soluciones la página La unidad está expuesta a vibraciones o Coloque la unidad en otro lugar. Se producen — impactos. “saltos” en el sonido. El disco está sucio. Limpie el disco. Las conexiones de los cables no son correctas. Conecte firmemente los cables de audio. - Página 34 CAUTION Use of controls or adjustments or performance of CAUTION – VISIBLE AND / OR INVISIBLE LASER RADIATION WHEN OPEN. AVOID EXPOSURE TO BEAM. procedures other than those specified herein may result VARNING – SYNLIG OCH / ELLER OSYNLIG LASERSTRÅLNING NÄR DENNA DEL ÄR ÖPPNAD.
- Página 35 © 2009 Yamaha Corporation All rights reserved. Printed in Malaysia WS19270-1...