HORI Tactical Assault Commander Pro Manual De Instrucciones
Ocultar thumbs
Ver también para Tactical Assault Commander Pro:
- Manual de instrucciones (12 páginas)
Publicidad
Enlaces rápidos
Thank you for purchasing this product. Before using this product please read the instructions carefully. After
reading the instruction manual, please keep it for reference.
/ Merci d'avoir acheter ce produit. Lisez attentivement les instructions avant d'utiliser ce produit.
Après avoir lu le feuillet d'instructions, conservez le bien pour future référence.
/ Vielen Dank, dass Sie sich fur dieses Produkt entschieden haben.Bevor Sie dieses Produkt verwenden, lesen
Sie bitte die Kurzanleitung sorgfältig durch. Heben Sie die Kurzanleitung zu Ihrer Information auf.
/ Grazie per aver scelto questo prodotto. Prima di utilizzare questo prodotto, leggere attentamente le istruzioni.
Una volta lette le istruzioni, conservarle per riferimenti futuri.
/ Te agradecemos la compra de este producto. Antes de usar este producto, por favor lea detenidamente las
instrucciones. Después de leer la hoja de instrucciones, por favor, guárdelo para futuras referencias.
■ Platform / Plateform / Plattform / Piattaforma / Plataforma
PlayStation
EN
Please note that the information provided is for the PlayStation
Please refer to PlayStation
This product does not feature light bar, motion sensors, or force feedback.
PlayStation
FR
Notez bien que les renseignements fournis sont pour la PlayStation
Merci de vous référer au manuel de la système PlayStation
Ce produit ne dispose pas de fonction pour barre lumineuse, détecteurs de
mouvement, ou retour de force.
PlayStation
DE
Bitte beachten Sie, dass die zur Verfügung gestellten Informationen für die PlayStation
PlayStation
3 systeme.
®
Weitere Informationen finden Sie im Handbuch für die PlayStation
Dieses Produkt verfügt nicht über Lichtbalken, Bewegungssensoren, für Force-Feedback.
PlayStation
IT
Si prega di notare che le informazioni fornite sono il PlayStation
Per maggiori informazioni, vedi manuale di istruzioni per l'uso della sistema PlayStation
Questo prodotto non dispone di cuffie luce bar, sensori di movimento, per Force feedback.
PlayStation
ES
Tenga en cuenta que la información proporcionada es para la consola PlayStation
Consulte el manual de la sistema PlayStation
Este producto no dispone de light bar, sensores de movimiento, o Force Feedback.
Also compatible with PC* (Windows 10/8.1/8/7/Vista).
Spare PC USB port required / Port USB / USB-Anschluss / Porta USB / Puerto USB *PC
Compatibility not tested nor endorsed by Sony Interactive Entertainment Europe.
Instruction Manual / Mode d'emploi / Bedienungsanleitung
/ Manuale di istruzioni / Manual de Instrucciones
4 / PlayStation
®
4 and PlayStation
®
4 / PlayStation
®
4 / PlayStation
®
4 / PlayStation
®
4 / PlayStation
®
3
®
3 system manuals for more information.
®
3
®
3 pour plus d'information.
®
3
®
3
®
3
®
3 si desea más información.
®
4 and PlayStation
3 systems.
®
®
4 et PlayStation
®
®
3 system.
®
4 e PlayStation
3 sistema.
®
®
3 y PlayStation
®
1901-53UK
3 systèmes.
4 und
®
3.
®
4 sistemas.
®
Publicidad

Manuales relacionados para HORI Tactical Assault Commander Pro


Resumen de contenidos para HORI Tactical Assault Commander Pro
- Página 1 1901-53UK Instruction Manual / Mode d'emploi / Bedienungsanleitung / Manuale di istruzioni / Manual de Instrucciones Thank you for purchasing this product. Before using this product please read the instructions carefully. After reading the instruction manual, please keep it for reference. / Merci d'avoir acheter ce produit.
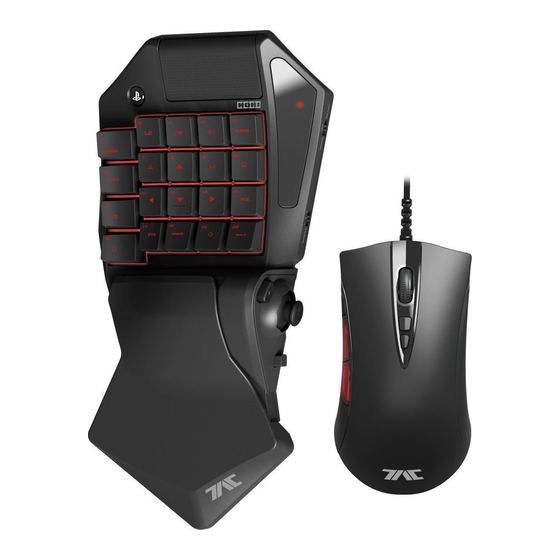
- Página 2 ■ Includes / Inclus / inklusive / Incluso / Incluye Mouse & Keyboard Controller / Contrôleur Souris & Clavier / Maus- & Tastatur-Controller / Mouse & Keyboard Controller / Controlador por teclado y ratón Instruction manual Mode d'emploi Bedienungsanleitung / Foglio di istruzioni / Hoja de Instrucciones Quick Start Guide / Guide de démarrage rapide...
- Página 3 ■ Layout / Connectique / Bezeichnung der Teile / Layout / Diseño...
- Página 5 PlayStation®4 / PlayStation®3 OPTIONS button Botón rápido Botón △ PlayStation 4 : L2 button ® Stick izquierdo (↑) PlayStation 3 : L1 button ® PlayStation 4 : Botón L1 ® PlayStation 4 : R2 button ® PlayStation 3 : Botón L2 PlayStation 3 : R1 button ®...
- Página 6 Tasto R3 Pannello display Pulsante Snipe porte USB PlayStation 4 : Tasto R2 ® Tasto ○ Tasto regolazione PlayStation 3 : Tasto R1 ® PlayStation 4 : Tasto L2 ® Pulsante Cammina Tasto direzionale PlayStation 3 : Tasto L1 ® PlayStation 4 : Tasto L1 ®...
-
Página 7: Config Switch / Interrupteur De Configuration Des Boutons
1.Inserire il connettore USB del mouse alla porta USB del controller tastiera. Oltre al mouse inclusi, può essere utilizzato topi conformi altro USB. ※ Non è compatibile con tutti i mouse. * La compatibilità non testato né approvato da Sony Interactive Entertainment Europe. 2. - Página 8 / Schalter für Tasteneinstellungen / Button Configuration Switch / Interruptor de configuración de botones Comment Configurer les Boutons You can remap the function of each button using this feature. Veuillez placer l'interrupteur de configuration sur la How to remap buttons position "ASSIGN".
- Página 9 Solo para "NC" el LED del panel de visualización no se encenderá. 5. Suelta el botón cuando se encienda la función que quieres asignar. 6. Vuelve a poner el interruptor de configuración en posición OFF. ■ Button configuration settings and sensitivity settings / Changer de profil / Profil-Schalter / Interrutore di profilo / Interruptor de perfil You can save up to 3 profiles each for the PlayStation 4 or PlayStation...
- Página 10 Quando si sposta il mouse lentamente l'accelerazione sarà minimo, mentre si fa così in fretta questo sarà più alto. 1. Posizionare la configurazione dello switch ADJUST. 2. Per regolare l'accelerazione nel piano orizzontale, premere i pulsanti dil pad direzionale Up / Down mentre il pulsante L2. Per regolare l'accelerazione nel piano verticale, premere i pulsanti UP/Down dil pad direzionale mentre il tasto R2.
- Página 11 ■ Expansion port / Prise casque / Headset-Anschluss / Port Extension / Toma de auriculares Connect the headset into the Expansion port Before placing a headset onto your ears, make sure to lower the volume completely. Headset usage at high volumes for extended periods of time may result in permanent hearing damage. It is important to keep the volume at a safe and comfortable level.
- Página 12 / Botón FN / Stick izquierdo / Bouton FN / Bouton multidirectionnel / FN-Taste / Steuerkreuz / Tasto FN / Tasto direzionale...
- Página 13 ※ Falls den Richtungstasten auf der Tastatur eine andere / Botón FN / Mando de dirección Funktion zugewiesen wurde, hat die programmierte Funktion Vorrang. È possibile effettuare i tasti freccia della tastiera si comportano come un ragno o il joystick a sinistra. ※...
- Página 14 ■ Quick button / Bouton rapide / Quick-Taste / Tasto rapido / Botón rápido Pressing the quick button maximizes mouse output value. Movement of the mouse translates to maximum lateral movement of the first person view. Le bouton Rapide permet d'augmenter la vitesse de déplacement latérle de la souris. Utiliser cette fonction permet de donner un maximum d'amplitude à...
- Página 15 ○-Taste gedrückt halten. Um die vertikale Empfindlichkeit anzupassen, drücken Sie die Auf- / Ab-Tasten, während Sie die ○ Button / Bouton ○ / Snipe-Taste gedrückt halten. ○-Taste / Pulsante ○ / DOWN Botón de ○ 4. Schalten Sie 3. Die Farbe auf der Anzeigetabel ändert sich je nach Empfindlichkeit. (Siehe Tabelle unten.) den Tasteneinstellungsschalter auf "OFF".
- Página 16 Vous pouvez ajuster la zone morte et par conséquent la réactivité de la souris lors de l'ADS (mode visée). 1. Placez l'interrupteur de configuration sur la position "ADJUST". 2. Appuyez sur les touches Haut ou Bas du pavé directionnel tout en maintenant la touche "○". 3.
- Página 17 You can lock into ADS (Aim Down Sight) mode with a right-click. 1.Turn the Config Switch to “ADJUST”. 2.While pressing down on the × button, hold Right-click. One of the LED for ADS function (L1, L2, R1 or R2) will turn on. Right-click ※Default ADS function may differ by software or in-game setting.
- Página 18 2. Mantén pulsado el botón PS durante 3 segundos. Se encenderán todos los LED y los botones recuperarán su configuración fábrica. 3. Vuelve a ajustar el interruptor de configuración a la posición OFF. Reset sensitivity to default settings OPTIONS button / Touche OPTIONS Sensitivity settings for each Profile can also be reset.
- Página 19 HORI warrants to the original purchaser that the product purchased new in its original packaging shall be free of any defects in material and workmanship HORI mandats à l'acheteur original que le produit acheté neuf dans son emballage d'origine doivent être exempts de tout défaut de matériel et for a period of two years from the original date of purchase.