Tabla de contenido
Publicidad
Idiomas disponibles
Idiomas disponibles
Enlaces rápidos
INSTRUCTION MANUAL ENCLOSED
MANUEL D'INSTRUCTIONS À L'INTÉRIEUR
MANUAL DE INSTRUCCIONES ADJUNTO
STOP
IF YOU HAVE ANY PROBLEMS OR QUESTIONS, EMAIL
OR CALL CUSTOMER SERVICE BEFORE YOU RETURN
THIS PRODUCT TO THE STORE WHERE IT WAS PURCHASED.
ARRÊT
SI VOUS AVEZ DES PROBLÈMES OU QUESTIONS,
ENVOYEZ UN COURRIEL AU SERVICE À LA CLIENTÈLE OU
APPELEZ LE SERVICE À LA CLIENTÈLE AVANT DE RETOURNER
CE PRODUIT OÙ VOUS L'AVEZ ACHETÉ.
PARE
SI TIENE ALGÚN PROBLEMA O PREGUNTAS, ENVÍE UN
MENSAJE DE CORREO ELECTRÓNICO O LLAME AL SERVICIO
DE ATENCIÓN AL CLIENTE ANTES DE DEVOLVER ESTE
PRODUCTO A LA TIENDA EN LA QUE LO COMPRÓ.
de lunes a viernes, de 8:30 a.m. a 5:30 p.m. (hora estándar del Este)
INSTRUCTION MANUAL ENCLOSED
MANUEL D'INSTRUCTIONS À L'INTÉRIEUR
MANUAL DE INSTRUCCIONES ADJUNTO
ATTENTION
For Customer Service:
www.twinstarhome.com
in English Call: 866-661-1218
8:30 a.m. - 5:30 p.m., EST, Monday-Friday
ATTENTION
Pour le service à la clientèle :
www.twinstarhome.com
pour le service en français : 866-661-1219
entre 8 h 30 et 17 h 30 (HNE), du lundi au vendredi
ATENCIÓN
Servicio de atención al cliente:
www.twinstarhome.com
Línea para llamadas en español: 866-661-1219
STOP
ARRÊT
PARE
Publicidad
Capítulos
Tabla de contenido
Solución de problemas

Manuales relacionados para Twin-Star International 34HF601GRA


Resumen de contenidos para Twin-Star International 34HF601GRA
- Página 1 INSTRUCTION MANUAL ENCLOSED MANUEL D’INSTRUCTIONS À L’INTÉRIEUR MANUAL DE INSTRUCCIONES ADJUNTO ATTENTION STOP STOP IF YOU HAVE ANY PROBLEMS OR QUESTIONS, EMAIL OR CALL CUSTOMER SERVICE BEFORE YOU RETURN THIS PRODUCT TO THE STORE WHERE IT WAS PURCHASED. For Customer Service: www.twinstarhome.com in English Call: 866-661-1218 8:30 a.m.
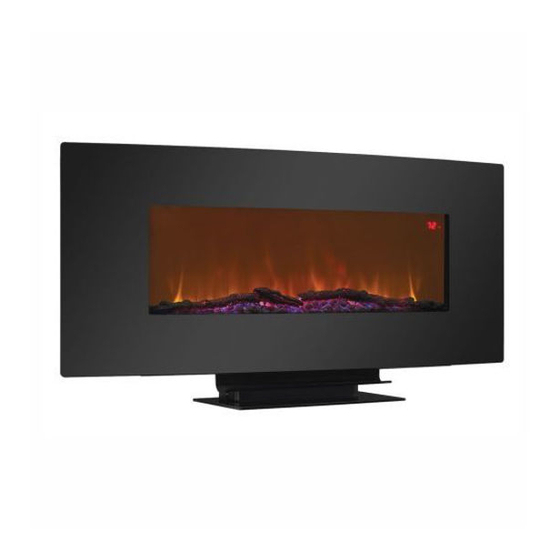
- Página 2 ITM./ART. 639575 DUAL MOUNT ELECTRIC FIREPLACE INSTRUCTION MANUAL MODEL # 34HF601GRA Français p. 15 IMPORTANT: Español p. 29 RETAIN FOR FUTURE REFERENCE READ CAREFULLY For Customer Service: Questions, problems, missing parts? www.twinstarhome.com Twin-Star International, Inc. 866-661-1218 Delray Beach, FL 33445 Made in China 8:30 a.m.
-
Página 3: Tabla De Contenido
TABLE OF CONTENTS Product Specifications ......................... 2 Important Information ........................... 3 Package Contents ..........................5 Hardware Contents..........................5 Preparation ............................6 Installation Instructions ......................... 6 Operating Instructions ........................10 Care and Maintenance ........................12 Troubleshooting ..........................12 Warranty ............................. 13 Replacement Parts .......................... -
Página 4: Important Information
IMPORTANT INFORMATION Please read and understand this entire manual before attempting to assemble, operate or install the product. If you have any question regarding the product, please call customer service at 1-866-661-1218, 8:30 a.m.-5:30 p.m., EST, Monday-Friday. When using electrical appliances, always follow basic precautions to reduce the risk of fire, electrical shock, and injury to persons including the following: 1. - Página 5 IMPORTANT INFORMATION 22. Always plug heater directly into a wall outlet/receptacle. Never use with an extension cord or relocatable power tap (outlet/power strip). 23. Reference Figure 1. for grounding instructions. This heater is for use on 120 volts. The cord has a plug as shown in Figure 1A.
-
Página 6: Package Contents
PACKAGE CONTENTS Part Description Quantity Mounting Bracket Fireplace Front Glass Base Bracket Base Remote Control Decorative Rocks Varies HARDWARE CONTENTS Description Quantity Picture Part Screw 0.2 in. x 1.5 in. 0.5 cm x 3.8 cm Wall Anchors 0.3 in. x 1.5 in. 0.7 cm x 3.8 cm Screw 0.25 in. -
Página 7: Preparation
PREPARATION Before beginning installation of product make sure all parts are present. Compare parts with package contents list and drawing above. If any part is missing or damaged, do not attempt to assemble, install or operate the product. Contact customer service for replacement parts. Estimated Assembly Time: 15 minutes Tools Required for Assembly (not included): Phillips screwdriver, Drill, Hammer, Level WARNING! Do not use this electric fireplace if any part has... - Página 8 2. Choose a wall location to attach the mounting Fig. 2 bracket (A). Position the mounting bracket (A) in the desired location. Use a level to align the bracket and mark the four holes with a pencil (Fig. 2). 3. Drill 4 holes 0.3 in / 0.7cm in the wall. Insert Fig.
- Página 9 INSTALLING THE FRONT GLASS Fig. 6 6. Remove the two retaining screws on top of the fireplace (B). Hang the front glass (C) on the fireplace and gently push on the lower part of the frame until it snaps into place. Secure the top frame hooks with the two retaining screws (Fig.
- Página 10 2. Mount the fireplace to the base bracket (D) Fig. 9 by hooking the clips into position (Fig.9). 3. Fasten the base bracket (D) to the fireplace Fig. 10 with the provided screw (DD) (Fig 10). Hardware Used Screw 0.25 in / 0.6 cm x 0.5 in / 1.2 cm Fig.
-
Página 11: Operating Instructions
Cold climate installation recommendation: When installing this unit against a non-insulated exterior wall or chase the outer walls must be insulated to conform to applicable insulation codes. OPERATING INSTRUCTIONS The fireplace can be operated by either the remote control or the control panel. CAUTION! The unit power cord must be connected to a properly grounded and protected 120V outlet. -
Página 12: Replacing The Remote Control Battery
REPLACING THE REMOTE CONTROL BATTERY When the remote control stops operating, or it’s range seems reduced, it is time to replace the batteries. To extend the life of the batteries remove the batteries if the remote control won’t be used for a long period of time. -
Página 13: Care And Maintenance
CARE AND MAINTENANCE CLEARANCE TO COMBUSTIBLES Keep electrical cords, drapery, furniture and other combustibles at least 3 ft / 91.4 cm from the front of the heater and away from the sides. CLEANING TRIM Clean the metal trim using a soft cloth, slightly dampened with a citrus oil-based product and buff. Do not use brass polish or household cleaners as these products will damage the metal trim. -
Página 14: Warranty
1-YEAR LIMITED WARRANTY The manufacturer warrants that your new electric fireplace is free from manufacturing and material defects for a period of one year from date of purchase, subject to the following conditions and limitations. 1. Install and operate this electric fireplace in accordance with the installation and operating instructions furnished with the product at all times. -
Página 15: Replacement Parts List And Exploded View
REPLACEMENT PARTS LIST AND EXPLODED VIEW For replacement parts, call our customer service department at 1-866-661-1218, 8:30 a.m.-5:30 p.m., EST, Monday-Friday. I.D. No. Description Part No. Control Panel 5 Buttons Y12-S84-P85 Spinner Motor P10-Q Right Backlight PCBA Y12-S84-P49R Thermostat Sensor 34HF-NTC Left Backlight PCBA Y12-S84-P49L... - Página 16 ITM./ART. 639575 CHEMINEE ELECTRIQUE A DOUBLE MONTAGE MODÈLE # 34HF601GRA IMPORTANT : À CONSERVER POUR UNE English p.1 CONSULTATION FUTURE Español p. 30 LISEZ ATTENTIVEMENT Des questions, un problème, des pièces manquantes ? Pour service à la clientèle : Twin-Star International, Inc.
-
Página 17: Caractéristiques Du Produit
TABLE DES MATIÈRES Caractéristiques du produit ....................... 16 Information importante........................17 Contenu de l’emballage ........................19 Quincaillerie incluse..........................19 Préparation ............................20 Instructions pour l’installation ......................20 Mode d’emploi ........................... 24 Entretien ............................. 26 Dépannage ............................26 Garantie .............................. 27 Pièces de rechange .......................... -
Página 18: Information Importante
INFORMATION IMPORTANTE Assurez-vous de lire et de comprendre l’intégralité de ce manuel avant de tenter d’assembler, d’utiliser ou d’installer le produit. Si vous avez des questions concernant ce produit, veuillez communiquer avec le service à la clientèle au 1 866 661-1219, entre 8 H 30 à 17 h 30 (HNE), du lundi au vendredi. Afin de réduire les risques d’incendie, de choc électrique et de blessure lorsque vous utilisez un appareil électrique, respectez les mesures de sécurité... - Página 19 INFORMATION IMPORTANTE 20. N’utilisez cet appareil que pour l’usage prévu dans ce manuel. Toute autre utilisation de l’appareil qui n’est pas prévue par le fabricant peut provoquer un incendie, un choc électrique ou des blessures. 21. À l’intérieur de cet appareil se trouve un limiteur. Lorsque l’appareil surchauffe ou que sa température devient anormalement élevée, le dispositif de protection du thermostat coupe l’alimentation électrique afin d’éliminer les risques d’endommager le foyer ou de causer un incendie.
-
Página 20: Contenu De L'emballage
CONTENU DE L’EMBALLAGE Pièce Description Qté Support de fixation Foyer Façade Vitrée Equerre du Socle Socle Télécommande Pierres Décoratives varie QUINCAILLERIE INCLUSE Illustration Description Quantité Pièce 0,2 po x 1,5 po 0.5 cm x 3.8 cm Cheville d’ancrage 0,3 po x 1,5 po 0.7 cm x 3.8 cm 0.25 po x 0,7 po 0.6 cm x 1.7 cm... -
Página 21: Préparation
PRÉPARATION Avant de commencer l’installation du produit, assurez-vous d’avoir toutes les pièces. Comparez les pièces dans l’emballage avec la liste et le tableau ci-dessus. S’il y a des pièces manquantes ou endommagées, ne tentez pas d’assembler, d’installer ou d’utiliser le produit. Communiquez avec le service à... -
Página 22: Instructions Pour L'assemblage
INSTRUCTIONS POUR L’ASSEMBLAGE 2. Choisir un emplacement au mur pour fixer Fig. 2 le support de fixation (A). Positionner le support de fixation (A) à l’endroit désiré. Utiliser un niveau pour aligner le support et marquer les quatre trous à l’aide d’un crayon (Fi g. 2). 3. - Página 23 INSTALLATION DU VERRE AVANT Fig. 6 6. Fixer le cadre frontal sur le foyer (B). Pousser doucement sur la partie basse du cadre jusqu’à ce que le cadre (C) se loge en place. Sécuriser les crochets du haut du cadre avec les deux vis. (Fig.
- Página 24 2. Fixer le foyer sur le socle (D) en l’accrochant Fig. 9 sur les clips (Fig. 9). Fig. 10 3. Visser l’équerre du socle (D) au foyer au moyen des vis fournis (DD) (Fig. 10). Quincaillerie utilisée 0.25 po / 0.6 cm x 0.5 po / 1.2 cm 4.
-
Página 25: Mode D'emploi
Recommandations pour l’installation en climat froid : Lors de l’installation de ce foyer contre un mur extérieur non isolé ou un mur de service, les murs extérieurs doivent être isolés en respectant les normes en vigueur relatives à l’isolation. MODE D’EMPLOI La cheminée peut être commandée par la télécommande ou par le panneau de commandes. -
Página 26: Remplacement Des Piles De La Télécommande
REMPLACEMENT DES PILES DE LA TÉLÉCOMMANDE Lorsque la télécommande ne fonctionne plus ou si sa portée semble réduite, il est temps de remplacer les piles. Retirez les piles si vous ne prévoyez pas utiliser la télécommande durant une période prolongée. 1. -
Página 27: Entretien
ENTRETIEN DISTANCE MINIMALE D’UNE SOURCE DE COMBUSTIBLE Assurez-vous que les matières combustibles, comme les cordons d’alimentation, les rideaux et les meubles se trouvent à une distance d’au moins 90 cm (3 pi) de l’avant du foyer et qu’ils ne sont pas en contact avec les côtés de celui-ci. -
Página 28: Garantie
GARANTIE LIMITÉE DE 1 AN Le fabricant garantit que votre nouveau foyer électrique est exempt de défaut de fabrication ou de matériaux durant une année à partir de la date d’achat, en tenant compte des conditions et des restrictions suivantes. 1. -
Página 29: Pièces De Rechange
LISTE DES PIÈCES DE RECHANGE ET VUE ÉCLATÉE Pour obtenir des pièces de rechange, appelez notre service à la clientèle au 1 866 661-1219, entre 8:30 h et 17:30 h (HNE), du lundi au vendredi. Pièce Description Numéro de pièce Qté... -
Página 30: Para Servicio Del Cliente
ITM./ART. 639575 CHIMENEA ELÉCTRICA DE MONTAJE DUAL MOUNT MODELOS # 34HF601GRA English p. 1 Français p. 15 IMPORTANTE: GUARDAR PARA FUTURA CONSULTA LEER ATENTAMENTE Para servicio del cliente: Preguntas, problemas, piezas faltantes? www.twinstarhome.com Twin-Star International, Inc. English Call: 866-661-1218 Delray Beach, FL 33445 Español /Français Call: 866-661-1219... -
Página 31: Especificaciones Del Producto
ÍNDICE Especificaciones del producto ......................30 Información importante ........................31 Contenido del paquete ........................33 Aditamentos............................33 Preparación ............................34 Instrucciones de instalación ....................... 34 Instrucciones de funcionamiento ....................... 38 Cuidado y mantenimiento ........................40 Solución de problemas ........................40 Garantía.............................. -
Página 32: Información Importante
INFORMACIÓN IMPORTANTE Lea y comprenda completamente este manual antes de intentar ensamblar, usar o instalar el producto. Si tiene alguna pregunta sobre el producto, comuníquese con Servicio al Cliente al 1-866-661-1219, de lunes a viernes, de 9 a.m. a 5 p.m. (hora estándar del Este). Cuando utilice electrodomésticos, siempre tome medidas de precaución básicas para evitar incendios, descargas eléctricas y lesiones personales. - Página 33 INFORMACIÓN IMPORTANTE 21. Hay un limitador del termostato dentro del calentador. Cuando ocurre un sobrecalentamiento de la temperatura interna o un calentamiento anormal, el dispositivo protector del termostato cortará la alimentación de energía para evitar un daño en la chimenea o un riesgo de incendio. 22.
-
Página 34: Contenido Del Paquete
CONTENIDO DEL PAQUETE Pieza Descripción Cantidad Abrazadera de montaje Chimenea Cristal Frontal Soporte de la Base Base Control Remoto Rocas Decorativas varía ADITAMENTOS Descripción Cantidad Imagen Pieza Tornillo 0.2 in. x 1.5 in. 0.5 cm x 3.8 cm Tarugo 0.3 in. x 1.5 in. 0.7 cm x 3.8 cm Tornillo 0.25 in. -
Página 35: Preparación
PREPARACIÓN Antes de comenzar a instalar el producto, asegúrese de tener todas las piezas. Compare las piezas con la lista del contenido del paquete y el diagrama. No intente ensamblar, instalar ni usar el producto si falta alguna pieza o si éstas están dañadas. Póngase en contacto con el Departamento de Servicio al Cliente para obtener piezas de repuesto. - Página 36 INSTRUCCIONES DE INSTALACIÓN 2. Elija un lugar de pared para montar el soporte Fig. 2 de montaje (A). Coloque el soporte (A) en la ubicación deseada. Use un nivel para alinear el soporte y marque los cuatro agujeros con un lápiz (Fig.
-
Página 37: Instalación Del Cristal Delantero Fig
INSTALACIÓN DEL CRISTAL DELANTERO Fig. 6 6. Cuelgue el marco frontal de la chimenea (B). Empuje suavemente en la parte inferior del marco (C) hasta que el marco encaje en su lugar. Fije los ganchos del marco superior con los dos tornillos. (Fig. 6 y 7) Aditamentos utilizados Tornillo 0.2 po / 0.5 cm x... -
Página 38: Aditamentos Utilizados
2. Monte la chimenea a la base (D) mediante la Fig. 9 conexión de los clips en su posición (Fig. 9). 3. Fije el soporte de la base (D) a la chimenea con los tornillos incluidos (DD) (Fig. 10). Fig. 10 Aditamentos utilizados Tornillo 0.25 po / 0.6 cm x... -
Página 39: Instrucciones De Funcionamiento
Recomendación de instalación para climas fríos: Cuando instale esta unidad en una pared exterior o ducto no aislados, es obligatorio aislar la paredes exteriores para cumplir con los códigos de aislamiento correspondientes. INSTRUCCIONES DE FUNCIONAMIENTO La chimenea puede funcionar ya sea por el control remoto o el panel de control. ¡PRECAUCIÓN! El cable de alimentación de la unidad debe estar conectado a un tomacorriente de 120 V correctamente protegido y con descarga a tierra. -
Página 40: Reemplazo De La Batería Del Control Remoto
REEMPLAZO DE LA BATERÍA DEL CONTROL REMOTO Cuando el control remoto deja de funcionar o su rango parece reducido, es el momento de cambiar las baterías por unas nuevas. Retire las baterías si el control remoto no se va a utilizar por un período largo. 1. -
Página 41: Cuidado Y Mantenimiento
CUIDADO Y MANTENIMIENTO DISTANCIA DE SEPARACIÓN CON ELEMENTOS INFLAMABLES Mantenga los cables eléctricos, cortinas, muebles y demás elementos inflamables a una distancia de 0,91 m (3 pies) como mínimo de la parte frontal y de los lados del calentador. REBORDES DE LIMPIEZA Limpie el reborde de metal con un paño suave levemente humedecido con un producto cítrico a base de aceite y pula con un paño limpio y suave. -
Página 42: Garantía Limitada De 1 Año
GARANTÍA LIMITADA DE 1 AÑO El fabricante garantiza que su nueva estufa eléctrica no presentará defectos de fabricación ni materiales durante un período de un año a partir de la fecha de compra, siempre y cuando se cumplan las siguientes condiciones y limitaciones. 1. -
Página 43: Lista De Piezas De Repuesto Y Vista Despiezada
LISTA DE PIEZAS DE REPUESTO Y VISTA DESPIEZADA Para obtener piezas de repuesto, llame a nuestro Departamento de Servicio al Cliente al 1-866-661-1219, de lunes a viernes de 8:30 a.m. a 5:30 p.m., hora estándar del Este. Pieza Descripción Pieza No. Cant.