
Manuales relacionados para FALMEC DOWNDRAFT


Resumen de contenidos para FALMEC DOWNDRAFT
- Página 1 LIBRETTO ISTRUZIONI INSTRUCTIONS BOOKLET BEDIENUNGSSANLEITUNG LIVRET D’INSTRUCTIONS MANUAL DE INSTRUCCIONES àçëíêìäñàü èé ùäëèãìÄíÄñàà INSTRUKCJE OBSŁUGI Ed. 2010...
- Página 2 Gentile Signora/Signore, congratulazioni! Lei ha acquistato una cappa di prestigio e di sicura qualità. Perché Lei possa ottenere le migliori prestazioni, Le suggeriamo di seguire con attenzione le istruzioni per l’uso e manutenzione che troverà in questo libretto; inoltre, per ordinare i filtri di ricambio al carbone attivo utilizzi l’apposito tagliando che troverà...
- Página 3 Fig. A...
- Página 4 Fig. 1 Fig. 2...
- Página 5 Fig. 3a Fig. 3b...
- Página 6 Fig. 4a Fig. 4b Fig. 4c...
- Página 7 Fig. H3 Fig. I1...
- Página 8 Fig. 5 ANTENNA...
- Página 9 LIBRETTO ISTRUZIONI AVVERTENZE È molto importante che questo libretto istruzioni sia conservato insieme all’apparecchiatura per qualsiasi futura consultazione. Se l’apparecchio dovesse essere venduto o trasferito ad un’altra persona, assicurarsi che il libretto venga fornito assieme, in modo che il nuovo utente possa essere messo al corrente del funzionamento della cappa e delle avver- tenze relative.
-
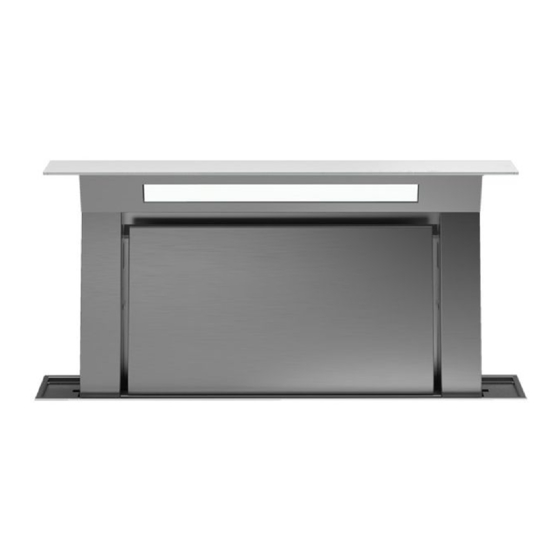
Página 10: Caratteristiche Tecniche
Non posizionare pentole, manici di pentole o qualsiasi altro oggetto nel raggio di azione del movimento del carrello mobile della cappa come sopra specificato. Fare attenzione che le parti accessibili della cappa potrebbero essere calde durante o al termine della cottura. Il vetro superiore VS e il pannello proteggi luce VL sono fissati al corpo cappa mediante magneti. - Página 11 senza spina; in questo caso, la spina da utilizzare deve essere dei tipo “nor- malizzato” tenendo conto che: - il filo giallo-verde deve essere utilizzato per la messa a terra, - il filo blu deve essere utilizzato per il neutro, - il filo marrone deve essere utilizzato per la fase, il cavo non deve entrare in contatto con parti calde aventi temperature superiori a 70 °C.
- Página 12 Controllare che i filtri al carbone attivo siano montati sul motore, in caso nega- tivo applicarli come indicato nelle istruzioni al punto H. Se la cappa viene predisposta in versione filtrante rimuovere la valvola di non ritorno montata sul raccordo di uscita del motore. Per il miglior rendimento si consiglia di utilizzare la terza velocità...
- Página 13 Con questa funzione attivata non si possono selezionare le altre velocità. Per togliere questa funzione, tenere premuto per almeno 3 secondi il tasto T2. 3: 2° VELOCITÀ Se il motore è ad una velocità diversa dalla 2°, la pressione del tasto aziona la 2°...
- Página 14 Per la sostituzione dei filtri al carbone attivo (C) si proceda come indicato dalla figura H3. Per ordinare i nuovi filtri servirsi del tagliando allegato al libretto o rivolgersi al distributore. Codice filtro carbone per downdraft: 101080159. ILLUMINAZIONE MONTAGGIO E SOSTITUZIONE La cappa è...
-
Página 15: Pulizia Esterna
attraversa. L’aria depurata per successivi passaggi attraverso i filtri viene rimessa nell’ambiente cucina. l filtri al carbone attivo non possono essere lavati e vanno sostituiti mediamente ogni 3-4 mesi (dipende poi dall’uso). Per la sostituzione dei filtri al carbone attivo seguire le istruzioni come al punto H2. - Página 16 nell’apposito libretto istruzioni e concernenti, specialmente, le avvertenze in tema di installazione, uso e manutenzione dell’apparecchio. GARANZIA La sua nuova apparecchiatura è coperta da garanzia. Le condizioni di garanzia sono riportate per esteso sull’ulti ma pagina di coper- tina di questo libretto. La casa costruttrice non risponde delle possibili ine sattezze, imputabili ad errori di stampa o di trascrizio ne, contenute nel presente libretto.
- Página 17 glia di evacuazione verso l’ambiente interno della cucina predisposta sul mobile contenente la cappa. - Eseguire le connessioni elettriche fra scatola elettronica SC e blocco dei connettori della cappa secondo lo schema di fig. 5. - Fissare SC in posizione idonea sulla base del pensile. - Collegare il cavo di alimentazione del motore alla rete elettrica rispettando le norme vigenti.
- Página 18 INSTRUCTIONS BOOKLET WARNINGS This instruction booklet must be kept together with the appliance for future reference. If the appliance is sold or consigned to other parties, check that the booklet is supplied with it, to ensure that the new user has the correct information on the operation of the range hood and is aware of the warnings.
-
Página 19: Technical Specifications
The top glass VS (TG) and the light-shielding glass panel VL (LG) are fixed to the range hood’s body with magnets. In case of detachment of VS VL (LG) from the range hood’s body due to accidental causes, check its wholeness and position it back in its place. - Página 20 For appliances that come supplied with cable and plug please ensure they are plugged into a circuit suitable for this appliance. Please refer to a qualifed person. (See technical specifications in point B). The manufacturer declines all liability if the safety standards are not ob- served.
- Página 21 shut-down after 15 minutes. At the end of the 15’ the motor and the light will switch off and the mobile part will close. The red LED flashes to indicate that the function is active. The countdown does not stop by varying the motor speed.
- Página 22 The 4° (4th) speed is timed; if the user does not change the speed, the motor will remain in 4° (4th) for 14 minutes and then shift into 3° (3rd). The T5 key will switch off and the T4 key will light up. 6: LIGHT - REMOTE BINDING Light: Briefly pressing key T6 will turn the light on and off.
-
Página 23: Maintenance And Cleaning
To replace charcoal filters (C) proceed as indicated in illustration H3. To order new filters, use the coupon enclosed with this booklet or provided by the distributor. Carbon filter code for downdraft: 101080159. LIGHTING ASSEMBLY AND REPLACEMENT The range hood is equipped with high efficiency, low consumption LED strips with extremely long duration under normal use conditions. -
Página 24: Cleaning The Inside Of The Appliance
4. CLEANING THE INSIDE OF THE APPLIANCE The electrical parts or parts of the motor assembly inside the range hood must not be cleaned using liquids or solvents. Do not use abrasive products. All the above operations must be performed after having disconnected the appliance from the mains power supply. - Página 25 - Fix the range hood supports at the bottom of the unit after checking for ver- tical and horizontal alignment (see ill.2). - Find installation type for outside exhaust version: a) With motor unit (UM) (MU) fixed on the range hood: remove frontal blind plug TC (BP) (see ill.
- Página 26 BEDIENUNGSANLEITUNG HINWEISE Diese Bedienungsanleitung muss unbedingt zusammen mit dem Gerät auf- bewahrt werden, um in Zukunft nachgeschlagen werden zu können. Sollte das Gerät verkauft bzw. einer anderen Person übergeben werden, muss die Bedienungsanleitung unbedingt mitgeliefert werden, damit der neue Benu- tzer mit dem Betrieb der Dunstabzugshaube und den diesbezüglichen Hinwei- sen vertraut werden kann.
-
Página 27: Technische Merkmale
vom auf der Möbelbasis fixierten Rahmen (Abb. A) abgegrenzte und mobile Kappen-Fahrgestells zu bringen, ist es strengstens verboten. Bringen Sie keine Pfannen, Pfannengriffe oder irgend einen anderen Gegen- stand in den Aktionsbereich des Kappen-Fahrgestells. Seien Sie vorsichtig, die zugänglichen Teile der Kappe während oder am Ende des Kochens können heiß... - Página 28 Geräteleistung entsprechen (siehe technische Spezifikationen in Punkt B). Einige Gerätetypen können mit einem Kabel ohne Stecker ausgestattet sein, in diesem Fall ist ein „genormter“ Stecker zu verwenden, wobei folgendes zu beachten ist: - Der gelb/grüne Draht ist für die Erdung zu benutzen; - der blaue Draht ist für den Nullleiter, und - der braune Draht für die Phase bestimmt.
- Página 29 tet, und erst wieder ausgeschaltet werden, wenn der Raum vollkommen geruchsfrei ist. ARBEITSWEISE 1: TIMER - RESET FILTER - KLAPPE ÖFFNEN - KLAPPE SCHLIESSEN Timer: Bei eingeschaltetem Motor wird durch die Betätigung der Taste das zeitgeregel- te Ausschalten des Motors nach 15 Minuten aktiviert. Nach Ablauf der 15 Minu- ten schalten sich der Motor und die Lichter aus und der bewegliche Teil schließt sich.
- Página 30 gewählt werden. Um aus dieser Funktion auszutreten, hält man die Taste T2 3 Sekunden lang gedrückt. 3: 2° GESCHWINDIGKEIT Wenn der Motor mit einer Geschwindigkeit betrieben wird, die von der 2°ab- weicht, wird durch die Betätigung der Taste die Geschwindigkeit 2° aktiviert und die Taste T3 leuchtet auf.
- Página 31 Aktiv-Kohlefilter auswechseln müssen. Für die Bestellung der neuen Filter können sie den dem Handbuch beigeleg- ten Talon verwenden oder wenden Sie sich direkt an die Verkaufsstelle. Aktiv-Kohlefilter für Downdraft: 101080159. BELEUCHTUNG MONTAGE UND ERSATZ Die Kappe ist mit einem Hochleistungs-Led-Beleuchtungsstreifen versehen, der bei normalen Gebrauchskonditionen einen niedrigen Stromverbrauch und eine äußerst lange Lebensdauer garantiert.
- Página 32 1. METALL-FETTFILTER Diese Filter haben die Aufgabe, die schwebenden Fettteilchen zurückzuhal- ten, sie sollten daher jeden Monat mit warmem Wasser. Gereinigt werden, wobei darauf zu achten ist, dass sie nicht geknickt werden. Für den Aus- und Einbau wird auf die Anleitungen unter Punkt H1 verwiesen. Die Reini- gung muss unbedingt regelmäßig durchgeführt werden.
- Página 33 Die Friteusen während der Benutzung kontrollieren: das überhitzte Öl könnte sich entzünden. Für eine ausreichende Lüftung im Raum sorgen, wenn die Dunstabzugshaube zusammen mit anderen Geräten, die mit Brennstoffen und ähnlichen Stoffen arbeiten, verwendet wird. - Kein offenes Feuer unter der Haube anzünden. - Das Gerät auf keinen Fall an die Ablassleitungen von Rauch, das durch Ver- brennung entsteht (Heizkessel, Kamine, usw...), anschließen.
- Página 34 Vergewissern Sie sich dass der Blindtampon (Abb. 4a) auf die Kappe montiert ist, entfernen Sie den des gewünschten Ausgangs entsprechende rechteckige Tampon und montieren Sie den mitgelieferten Flansch für das rechteckige Rohr FR (Abb. 4b). Fixieren Sie den Flansch FM auf UM und positionieren Sie den UM in der gewünschten Position.
-
Página 35: Avertissements
LIVRET D’INSTRUCTIONS AVERTISSEMENTS Conserver cette notice avec l’appareil pour pouvoir la consulter en cas de be- soin. Si l’appareil est vendu ou cédé à tiers, veiller à ce que la notice soit fournie en même temps pour que le nouvel utilisateur puisse avoir toutes les indications concernant le fonctionnement de la hotte et les avertissements correspon- dants. -
Página 36: Caractéristiques Techniques
Ne pas positionner de casseroles ou tout autre objet dans le rayon d’action du mouvement du chariot mobile de la hotte citée ci-dessus. Faire attention aux parties accessibles de la hotte qui pourraient être chaudes pendant ou à la fin de la cuisson. La vitre supérieure VS et le panneau de protection de la lumière VL sont fixés au corps de la hotte par des aimants. - Página 37 Certains appareils peuvent être munis d’un câble sans fiche; la fiche à utiliser doit dans ce cas être de type «standardisé» en tenant compte que: - le fil jaune-vert doit être utilisé pour la mise à la terre; - le fil bleu doit être utilisé pour le neutre; - le fil marron doit être utilisé...
- Página 38 Vérifier si les filtres au charbon actif sont montés sur le moteur, si ce n’est pas le cas, les monter comme indiqué au point H. Lorsque la hotte est en modalité de filtrage enlevez la soupape de non retour placée sur le raccordement du moteur en sortie. Pour que le rendement soit optimal, il est conseillé...
- Página 39 reste allumée durant 1 heure à la 1 ère vitesse, elle s’arrête ensuite pendant 3 heures et reprend à fonctionner pendant encore une heure. Ces cycles se répè- tent jusqu’au time out. Avec cette fonction activée on ne peut pas activer les autres vitesses. Pour enlever cette fonction, maintenir appuyée pendant au moins 3 secondes la touche T2.
- Página 40 Pour remplacer les filtres aux charbons actifs (C), veuillez procéder comme indiqué sur la figure H3. Pour commander de nouveaux filtres, veuillez vous servir du coupon joint au manuel ou vous adresser au distributeur. Code filtre charbons pour downdraft : 101080159 ÉCLAIRAGE MONTAGE ET REMPLACEMENT La hotte est pourvue d’éclairage à...
-
Página 41: Nettoyage Intérieur De La Hotte
graisses ne nuisent aux surfaces en acier. Nettoyer la hotte avec un chiffon humide et un peu de détergent liquide neutre ou avec de l’alcool dénaturé. Ne nettoyer qu’avec un chiffon souple trempé dans de l’eau contenant du savon neutre si la surface a subi un traitement anti-empreinte (Fasteel), en ayant soin de rincer et d’essuyer soigneusement. - Página 42 Le fabricant décline toute responsabilité pour les inexactitudes, imputables à des erreurs d’impression ou de transcription, contenues dans cette notice. Il se réserve le droit d’apporter les modifications qu’il juge nécessaires ou utiles à ses produits, même dans l’intérêt de l’utilisateur, sans pour autant compromettre les caractéristiques essentielles relatives au fonctionnement et à...
- Página 43 MANUAL DE INSTRUCCIONES ADVERTENCIAS Es muy importante conservar este libro de instrucciones junto al aparato para cualquier consulta futura. Si el aparato tuviera que ser vendido o traspasado a otra persona, asegúrese que el libro vaya incluido, de modo que el nuevo usuario pueda ponerse al corriente del funcionamiento de la campana y de las advertencias correspon- dientes.
-
Página 44: Características Técnicas
(véase figura A). No colocar ollas, asas de ollas o cualquier otro objeto en el radio de acción del movimiento del carro móvil de la campana como antes especificado. Prestar atención ya que las partes accesibles de la campana podrían estar ca- lientes durante o al final de la cocción. -
Página 45: Ecampana Extractora En La Versión Con Evacuación Exterior
en este caso, use un tipo de clavija «normalizado» teniendo en consideracion que: - debe utilizar el hilo amarillo – verde para la puesta a tierra. - debe utilizar el hilo azul para el neutro. - debe utilizar el hilo marrón para la fase, el cable no debe entrar en contacto con partes calientes con temperaturas superiores a los 70 °C. -
Página 46: Funcionamiento
Para obtener el mejor rendimiento le aconsejamos utilizar la tercera velo- cidad en presencia de fuertes olores y vapores, la segunda velocidad para condiciones normales y la primera velocidad para mantener el aire limpio con bajos consumos de energía eléctrica. Le aconsejamos encender la campana extractora cuando empiece a cocer y no apagarla hasta la desaparición de los olores. - Página 47 Con esta función activada no se pueden seleccionar las otras velocidades. Para quitar esta función, mantenga presionada durante al menos 3 segundos la tecla 3: 2° VELOCIDAD Si el motor tiene una velocidad diferente a la 2°, presionando la tecla se acciona la 2°...
-
Página 48: Iiluminación
H3. Para solicitar nuevos filtros usar el talón que se adjunta con el libreto o dirigirse al distribuidor. Código del filtro de carbón para Downdraft: 101080159 ILUMINACIÓN MONTAJE Y SUSTITUCIÓN La campana está dotada de iluminación con cinta de led de alta eficiencia, ba- jo consumo y duración muy elevada en condiciones de utilización normal. -
Página 49: Filtros De Carbón Activo
2. FILTROS DE CARBÓN ACTIVO Su función es retener los olores presentes en el flujo del aire que pasa por ellos. El aire depurado, mediante sucesivos pasajes a través de los filtros, retorna al ambiente cocina. Los filtros de carbón activo no pueden lavarse y deben sustituirse en media cada 3 –... -
Página 50: Garantía
rivados de la omisión de las prescripciones indicadas en el libro de instruc- ciones adjunto y concernientes especialmente, a las indicaciones en tema de instalación, uso y mantenimiento del aparato. GARANTÍA La nueva instrumentación está cubierta por una garantía. Recurrir al distribuitor. El fabricante no responde por las posibles inexactitudes, imputables a errores de imprenta o de trascripción, contenidas en este manual. - Página 51 Para su colocación véase la sec. H2. Montar UM como indicado en la Fig. 3b y conectar la salida del motor de UM a la rejilla de evacuación hacia el ambiente interior de la cocina preparada en el mueble que contiene la campana.
- Página 52 àçëíêìäñàü èé ùäëèãìÄíÄñàà åÖêõ èêÖÑéëíéêéÜçéëíà é˜Â̸ ‚‡ÊÌÓ, ˜ÚÓ·˚ ‰‡ÌÌÓ êÛÍÓ‚Ó‰ÒÚ‚Ó ÔÓ ˝ÍÒÔÎÛ‡Ú‡ˆËË ı‡ÌËÎÓÒ¸ ‚ÏÂÒÚÂ Ò ‡ÔÔ‡‡ÚÛÓÈ ‰Îfl ‚ÓÁÏÓÊÌÓÈ ÌÂÓ·ıÓ‰ËÏÓÒÚË ÍÓÌÒÛθڇˆËË ‚ ·Û‰Û˘ÂÏ. èË ÔÓ‰‡Ê ÔË·Ó‡ ËÎË Ô‰‡˜Â Â„Ó ‰Û„ÓÏÛ ÎËˆÛ Í ÔË·ÓÛ Ó·flÁ‡ÚÂθÌÓ ‰ÓÎÊÌÓ ÔË·„‡Ú¸Òfl êÛÍÓ‚Ó‰ÒÚ‚Ó, ˜ÚÓ·˚ ÌÓ‚˚È ÔÓθÁÓ‚‡ÚÂθ ·˚Î ‚ ÍÛÒ ÚÓ„Ó, Í‡Í ÔÓθÁÓ‚‡Ú¸Òfl ‚˚ÚflÊÍÓÈ Ë Í‡ÍË ÒÓÓÚ‚ÂÚÒÚ‚Û˛˘ËÂ...
- Página 53 зоне действия работы подвижной каретки вытяжки, как указано выше. Обратить внимание на то, что доступные части вытяжки могут быть горя- чими во время, или по окончании, приготовления пищи. Верхнее стекло VS и защитная панель освещения VL закреплены на кор- пусе вытяжки магнитами. При случайном отсоединении Vs или VL от корпуса...
- Página 54 ·˚Ú¸ “Òڇ̉‡ÚÌÓ„Ó” ÚËÔ‡ Ò Û˜ÚÓÏ ÚÓ„Ó, ˜ÚÓ: - ÊÎÚÓ-ÁÎÌ˚È ÔÓ‚Ó‰ ‰ÓÎÊÌ ËÒÔÓθÁÓ‚‡Ú¸Òfl ‰Îfl Á‡ÁÏÎÌËfl, - „ÓÎÛ·ÓÈ ÔÓ‚Ó‰ ‰ÓÎÊÌ ËÒÔÓθÁÓ‚‡Ú¸Òfl ‰Îfl ÌÈڇθÌÓ„Ó ÔÓ‚Ó‰‡, - ÍÓ˘̂˚È ÔÓ‚Ó‰ ‰ÓÎÊÌ ËÒÔÓθÁÓ‚‡Ú¸Òfl ‰Îfl Ù‡Á˚, ¯ÌÛ Ì ‰ÓÎÊÌ Í‡Ò‡Ú¸Òfl ̇„Ú˚ı ˜‡ÒÚÈ, ËÏ˛˘Ëı ÚÏÔ‡ÚÛÛ ·ÓÎ 70°C. - ÛÒÚ‡ÌÓ‚ËÚ Ì‡ ¯ÌÛ ˝ÎÍÚÓÔËÚ‡ÌËfl ‚ËÎÍÛ, ÔË„Ó‰ÌÛ˛ ‰Îfl ̇„ÛÁÍË, Ë ‚ÒÚ‡‚¸Ú...
- Página 55 êÄÅéíÄ 1: Таймер/Неисправность фильтров Немигающий КРАСНЫЙ световой индикатор означает, что сработала аварийная остановка фильтров масляных веществ (после 30 часов), для выключения данной тревоги и обнуления счетчиков держать нажатой кнопку в течение 3-х секунд. Мигающий КРАСНЫЙ световой индикатор означает, что включена фун- кция...
- Página 56 скорости нажатие кнопки не приведет ни к какому действию. При включенном световом индикаторе нажатие кнопки 3 не приведет к никаким действиям. Чтобы выключить вытяжку, надо сначала выбрать 1-ую скорость, затем нажать снова на данную кнопку. 4: 3-ая скорость В случае выключенного светового индикатора и уже включенной иной скорости...
- Página 57 2. ФИЛЬТРЫ С АКТИВИРОВАННЫМ УГЛЁМ Для замены фильтров с активированным углём (C), проследовать, как указано на рис. H3. Для заказа новых фильтров, использовать купон, прилагаемей к буклету или обратиться к распространителю. Код встрамого углевого фильтра для встроенной вытяжки Downdraft: 101080159. éëÇÖôÖçàÖ ìëíÄçéÇäÄ à áÄåÖçÄ...
- Página 58 óàëíäÄ à ìïéÑ ë‚Ó‚ÏÌÌ˚È ÛıÓ‰ „‡‡ÌÚËÛÚ ıÓÓ¯Û˛ ‡·ÓÚÛ Ë ·Óθ¯ÓÈ ÒÓÍ ÒÎÛÊ·˚. éÒÓ·ÌÌÓ ‚ÌËχÌË ÌÓ·ıÓ‰ËÏÓ Û‰ÎflÚ¸ ÏÚ‡Î΢ÒÍËÏ ÙËÎ¸Ú‡Ï ‰Îfl Á‡ı‚‡Ú‡ Êˇ Ë ÙËÎ¸Ú‡Ï Ò ‡ÍÚË‚ËÓ‚‡ÌÌ˚Ï Û„ÎÏ, ‰ÈÒÚ‚ËÚθÌÓ, ˜‡ÒÚ‡fl Ó˜ËÒÚ͇ ÙËθÚÓ‚ Ë ÏÒÚ Ëı ÍÔÎÌËfl „‡‡ÌÚËÛÚ, ˜ÚÓ ‚ ‚˚ÚflÊÍ Ì ÒӷˇÚÒfl ÊË, ÍÓÚÓ˚È...
- Página 59 Û͇Á‡ÌÌÓÏÛ Ì‡ Ú‡·Î˘ÍÂ, ÔËÍÂÔÎÂÌÌÓÈ ‚ÌÛÚË ‚˚ÚflÊÍË. Ç ˆÂÎflı ·ÂÁÓÔ‡ÒÌÓÒÚË ‡ÒÒÚÓflÌË ÓÚ ‚‡Ó˜ÌÓÈ ÔÓ‚ÂıÌÓÒÚË ‰Ó ‚˚ÚflÊÍË ‰ÓÎÊÌÓ ÒÓÒÚ‡‚ÎflÚ¸ Ì ÏÂÌ 65 ÒÏ. çÂθÁfl „ÓÚÓ‚ËÚ¸ ÔË˘Û Ì‡ ÓÚÍ˚ÚÓÏ Ó„Ì ÔÓ‰ ‚˚ÚflÊÍÓÈ. ëΉËÚ Á‡ ÙËÚ˛Ìˈ‡ÏË: Ô„ÂÚÓ χÒÎÓ ÏÓÊÂÚ Á‡„ÓÂÚ¸Òfl. - ì·Â‰ËÚÂÒ¸ ‚ ÚÓÏ, ˜ÚÓ ‚ ÔÓÏ¢ÂÌËË ËÏÂÂÚÒfl ‰ÓÒÚ‡ÚӘ̇fl ‚ÂÌÚËÎflˆËfl, ÂÒÎË ‚˚ÚflÊ͇...
- Página 60 помещения: определить тип выхода воздуха: - Боковой или нижний с трубами прямоугольного сечения 90x220 мм (рис. 4a). Убедиться в том, что заглушка слепого отверстия TC установлена на вытяжке, удалить прямоугольную заглушку в соответствии с желаемым выходом и установить прилагающийся фланец для прямоугольной трубы...
- Página 61 INSTRUKCJA OBSŁUGI INSTRUKCJA OBSŁUGI OSTRZEŻENIA OSTRZEŻENIA Ta instrukcja obsługi musi być przechowywana razem z urządzeniem w celu przyszłego wykorzystywania. Jeżeli urządzenie jest sprzedawane lub przesyłane innym stronom, sprawdzić, czy wraz z nim przekazy- wana jest ta instrukcja, dla zapewnienia, że nowy użytkownik posiada prawidłowe informacje o działaniu okapu kuchennego i zna ostrzeżenia.
- Página 62 Nie umieszczać garnków, ich uchwytów ani żadnego innego przedmiotu w polu działania ruchomego okapu, jak podano powyżej. Uważać na dostępne części okapu, które mogą być rozgrzane podczas albo po zakończeniu gotowania. Górne szkło VS oraz panel ochronny światła VL przymocowane są do okapu magnesami.
- Página 63 - przewód niebieski musi być używany dla linii zerowej (neutral); - przewód brązowy musi być używany jako fazowy; kabel nie może stykać się z częściami gorącymi (powyżej 70 o C). - zakładać wtyczkę, która jest odpowiednia dla obciążenia kabla zasilania i podłączać...
- Página 64 OBSŁUGA OBSŁUGA 1: Timer/Reset Filtra/Otwarcie klapy/Zamknięcie klapy Timer: Naciśnięcie tego przycisku przy włączonym silniku aktywuje funkcję automa- tycznego wyłączenia się silnika po upływie 15 minut. Po 15 minutach pracy nastąpi automatyczne wyłączenie silnika i oświetlenia. Migająca czerwona dioda LED oznacza, że funkcja ta jest aktywna. Zmiana prędkości silnika nie przerywa odliczania czasu.
- Página 65 cisku uruchamia drugą prędkość, co sygnalizowane jest zaświeceniem się przycisku T3. Jeśli silnik jest nieruchomy, przycisk ten jest nieaktywny. 4: Trzecia Prędkość Jeżeli silnik porusza się z prędkością inną niż trzecia, naciśnięcie tego przy- cisku uruchamia trzecią prędkość, co sygnalizowane jest zaświeceniem się przycisku T4.
- Página 66 Aby wymienić filtry z aktywnym węglem (C), należy wykonać, co przedstawiono na rysunku H3. Aby zamówić nowe filtry, należy skorzystać z kuponu załączonego do instrukcji lub zwrócić się do dystrybutora. Kod filtra z węglem do downdraft: 101080159. OŚWIETLENIE OŚWIETLENIE MONTAŻ I WYMIANA Okap wyposażony jest w oświetlenie ze strip LED o wysokiej wydajności,...
- Página 67 1. METALOWE FILTRY ZATRZYMUJĄCE TŁUSZCZ Zatrzymują one cząstki tłuszczu zawieszone w powietrzu, a więc powinny być czyszczone co miesiąc w gorącej wodzie z detergentem, bez ich wyginania. W celu wyjęcia i wymiany filtrów, postępować zgodnie z instrukcjami w punkcie H1. Ta operacja powinna być przeprowadzana regularnie. Filtry metalowe mogą...
- Página 68 podanym na tabliczce znamionowej umieszczonej wewnątrz okapu kuchennego. Minimalna odległość bezpieczeństwa pomiędzy płytą kuchenną a okapem kuchennym musi wynosić przynajmniej 65 cm. Pod okapem kuchennym nigdy nie gotować na „otwartych” płomieniach. Sprawdzać frytkownice podczas ich użytkowania: przegrzany olej może być palny.
- Página 69 - Określić rodzaj montażu dla wersji wyciągowej: a) Z jednostką silnikową (UM) przymocowaną do okapu: wyjąć przedni element TC (patrz rys. 3 a). Znaleźć kierunek wypływu powietrza korzystając z obrotów kołnierza FL jednostki silnikowej. Przymocować UM do okapu zgodnie z rys. 3b (wyjście górne, dolne lub boczne). Podłączyć wyjście silnika UM do zewnętrznego przewodu spustowego powietrza.
- Página 70 Note...
- Página 71 Note...
- Página 72 Note...
- Página 73 Non saranno evasi ordini i cui tagliandi risulteranno incompleti, poco chiari o mancanti del suddetto codice fiscale. Tagliare lungo la linea tratteggiata e spedire in busta chiusa a: FALMEC S.p.A. - Via dell’Artigianato, 42 Zona Industriale - 31029 VITTORIO VENETO (TV) Indicare la tipologia di filtro da ordinare: ❑...
- Página 74 - Via dell’Artigianato, 42 Zona Industriale - 31029 VITTORIO VENETO (TV) Spettabile ditta FALMEC S.p.A. vi prego di inviarmi numero _________ filtri carbone come ricambio per la cappa che ho in casa al prezzo di € 7 (sette) cadauno IVA compresa più...
-
Página 75: Condizioni Di Garanzia
- relativamente ai dati medesimi potete esercitare i diritti previsti dall’art. 7 del d. lgs.vo n. 196/2003 (di cui viene allegata copia) nei limiti ed alle condizioni previste dagli articolo 8, 9 e 10 del citato decreto legislativo; - titolare del trattamento dei dati è Falmec s.p.a. - Via dell’Artigianato, 42 - Vittorio Veneto (TV). Il titolare del trattamento... -
Página 76: Certificato Di Garanzia
In caso necessiti intervenire per anomalie di funzionamento, si prega di telefonare alla ditta Falmec indicando i codici sotto riportati, la quale Vi farà pervenire un tec- nico per la riparazione (vedere condizioni di garanzia all’interno). CERTIFICATO DI GARANZIA...