Tabla de contenido
Publicidad
Idiomas disponibles
Idiomas disponibles
Enlaces rápidos
CalIbre DIGItal / CalIbrO
DIGItale
CalIbre DIGItal
Instrucciones de utilización y de seguridad
CalIbrO DIGItale
Indicazioni per l'uso e per la sicurezza
paquíMetrO DIGItal
Instruções de utilização e de segurança
DIGItal CallIper
Operation and Safety Notes
DIGItaler MesssCHIeber
Bedienungs- und Sicherheitshinweise
IAN 103604
Publicidad
Capítulos
Tabla de contenido

Manuales relacionados para Powerfix Profi Z22855


Resumen de contenidos para Powerfix Profi Z22855
- Página 1 CalIbre DIGItal / CalIbrO DIGItale CalIbre DIGItal Instrucciones de utilización y de seguridad CalIbrO DIGItale Indicazioni per l’uso e per la sicurezza paquíMetrO DIGItal Instruções de utilização e de segurança DIGItal CallIper Operation and Safety Notes DIGItaler MesssCHIeber Bedienungs- und Sicherheitshinweise IAN 103604...
- Página 2 Instrucciones de utilización y de seguridad Página IT / MT Indicazioni per l’uso e per la sicurezza Pagina Instruções de utilização e de segurança Página GB / MT Operation and Safety Notes Page DE / AT / CH Bedienungs- und Sicherheitshinweise Seite...
-
Página 5: Tabla De Contenido
Introducción Uso conforme a su finalidad .........Página 6 Volumen de suministro ..........Página 6 Descripción de las partes ........Página 6 Datos técnicos ............Página 6 Indicaciones de seguridad ....Página 7 Indicaciones de seguridad sobre las pilas ...Página 8 Antes de la puesta en servicio Insertar / Cambiar la pila ........Página 8 Preparar el pie de rey ..........Página 9 Puesta en servicio... -
Página 6: Introducción
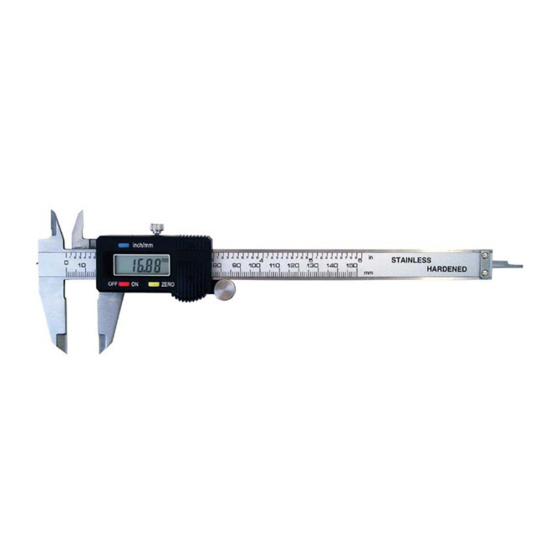
CALIBRE DIGITAL Introducción Uso conforme a su finalidad Sólo para uso privado. No para uso comercial. Volumen de suministro 1 x pie de rey digital 1 x pila 1 x caja para guardar 1 x manual de instrucciones Descripción de las partes Superficies de medición Picos de medición internos Tecla de pulgadas/ mm... -
Página 7: Indicaciones De Seguridad
Indicaciones de seguridad ¡LEER EL MANUAL DE INSTRUCCIONES ANTES DE UTILIZAR EL PRODUCTO! ¡CONSERVAR CUIDADOSAMENTE EL MANUAL DE INSTRUCCIONES! ¡CUIDADO! ¡PELIGRO DE LESIONES! EL PRODUCTO NO DEBE CAER EN MANOS DE NIÑOS. ¡ESTE PRODUCTO NO ES UN JUGUETE! Este producto no debe ser empleado por niños cuando estén sin vigilancia. -
Página 8: Indicaciones De Seguridad Sobre Las Pilas
Indicaciones de seguridad sobre las pilas ¡CUIDADO! ¡PELIGRO DE EXPLOSIÓN! ¡Nunca recargue las pilas! Las pilas no deben ser cortocircuitadas. Esto puede ocasionar sobrecalentamiento, peligro de incendio o explosión. Retire inmediatamente la pila agotada del producto. ¡Existe elevado peligro de derrame! Mantenga las pilas alejadas de los niños, no las eche al fuego, no las ponga... -
Página 9: Preparar El Pie De Rey
está descargada / vacía. Advertencia: al cambiar la pila se pueden ocasionar averías en el indicador LCD. Retire la pila e insértela nuevamente luego de transcurridos más de 30 segundos. abra la tapa del compartimiento de pilas (véase fig. B). Retire la pila gastada. -
Página 10: Medición Del Objeto Por El Interior
Medición del objeto por el interior: Coloque los picos de medición internos en el objeto a ser medido por el interior. gire la rueda de ajuste hacia afuera en sentido contrario a las manecillas del reloj. Separe los picos de medición internos hasta que toquen el objeto en ambos lados internos. -
Página 11: Subsanar Errores
Medición del espesor de la base de un objeto (véase fig. E): Mida primero la profundidad del objeto. Deje la coliza para medidas de profundidades en esta posición y pulse el botón para posición cero (ZERO) Tome ahora las medidas de todo el objeto.El indicador LCD le mostrará... -
Página 12: Mantenimiento Y Limpieza
Ninguna indica- 1. El indicador 1. Encienda el indica- ción en el indica- LCD está des- dor LCD pulsando dor LCD conectado. el botón encender / 2. La pila no tie- apagar. ne contacto 2. Retire la pila e in- correcto o ha sértela siguiendo sido colocada... -
Página 13: Garantía
Las pilas usadas no deben desecharse en la basura doméstica. Pueden contener metales pesados venenosos y requieren de un tratamiento de basura especial. Los símbolos químicos de los metales pesados son los siguientes: Cd = cadmio, Hg = mercurio, Pb = plomo. Por ello, entregue las pilas usadas en un punto de recogida municipal. - Página 14 Introduzione Utilizzo determinato ..........Pagina 15 Volume di spedizione ........... Pagina 15 Descrizione dei pezzi .......... Pagina 15 Dati tecnici ............Pagina 15 Misure di sicurezza ........Pagina 16 Misure di sicurezza per le pile ......Pagina 17 Prima della messa in funzione Inserite / sostituite le pile ........
-
Página 15: Introduzione
CALIBRO DIGITALE Introduzione Utilizzo determinato Solo per uso privato. Non è adatto per l‘uso professionale. Volume di spedizione 1 x metro digitale 1 x pila 1 x scatola di custodia 1 x istruzione d‘uso Descrizione dei pezzi Superfici di misurazione Becchi interni Tasto di commutazione pollici / mm Vite di sicurezza... -
Página 16: Misure Di Sicurezza
Misure di sicurezza LEGGERE L‘ISTRUZIONE D‘USO PRIMA DELL‘UTILIZZO! CONSERVARE PER BENE L‘ISTRUZIONE D‘USO! ATTENZIONE! PERICOLO DI LESIONE! IL PRODOTTO NON È ADATTO PER ANDARE IN MANO AI BAMBINI. QUESTO PRODOTTO NON È UN GIOCATTOLO! Questo prodotto non può essere usato dai bambini se non in presenzai di adulti. -
Página 17: Misure Di Sicurezza Per Le Pile
Misure di sicurezza per le pile ATTENZIONE! PERICOLO D‘ESPLOSIONE! Non ricaricate mai le pile! Le pile non possono essere mai messe sotto cortocircuito. Surriscaldamento, pericolo di fuoco o scoppi ne possono essere la conseguenza. Togliete subito una pila scarica dal prodotto. -
Página 18: Prima Della Messa In Funzione
Prima della messa in funzione Inserite / sostituite le pile Avvertenza: cifre lampeggianti indicano che le pile sono scariche / vuote. Avvertenza: nel momento in cui sostituite le pile possono comparire dei disturbi al display LCD . Rimuovete le pile e rimettetele dopo 30 secondi. -
Página 19: Esempi D'impiego
l‘interno. Unite i becchi di misurazione esterni fino a che tocchino l‘oggetto da misurare su ambedue i lati. Fate attenzione a non esercitare troppa pressione, altrimenti potreste danneggiare l‘oggetto da misurare. Misurazione interna dell‘oggetto: applicate i becchi di misurazione interni all’interno sull’oggetto da misurare. -
Página 20: Rimuovere L'errore
Misurazione dello spessore del piano di fondo di un oggetto (vedi immagine E): Misurate prima la profondità dell’oggetto. Lasciare la pala di profondità in questa posizione e premere il tasto d‘azzeramento (ZERO) Prendete dunque le misure dell‘intero oggetto. Il display indica dunque lo spessore del piano di fondo dell‘oggetto. -
Página 21: Manutenzione E Cura
Il display LCD Collegamento Togliete le pile e reinse- non continua a errato. ritele dopo 30 secondi. misurare. Nessun‘indicazio- 1. Il display LCD è 1. accendete il di- ne sul display spento. splay LCD, premen- 2. Le pile non do il tasto ON/OFF hanno un giusto contatto oppu- 2. -
Página 22: Garanzia
Vi possono essere conseguenze negative per l’ambiente a seguito di uno smaltimento non corretto delle batterie! Le batterie non devono essere smaltite nella spazzatura domestica. Esse possono contenere metalli pesanti velenosi e devono essere trattate quali rifiuti speciali. I simboli chimici dei metalli pesanti sono i seguenti: Cd = Cadmio, Hg = mercurio, Pb = piombo. - Página 23 Introdução Utilização adequada ..........Página 24 Material fornecido ..........Página 24 Descrição das peças ..........Página 24 Dados técnicos ............Página 24 Indicações de segurança ......Página 25 Indicações de segurança relacionadas com a pilha ........Página 26 Antes da colocação em funcionamento Colocar / Substituir a pilha ........Página 26 Preparar o paquímetro ..........Página 27 Colocação em funcionamento Utilizar o paquímetro ..........Página 27...
-
Página 24: Introdução
PAQUÍMETRO DIGITAL Introdução Utilização adequada Indicado apenas para o uso privado. Não é adequado a uma utilização comercial. Material fornecido 1 x paquímetro digital 1 x pilha 1 x estojo de arrumação 1 x manual de instruções Descrição das peças Encostos de medição Orelhas de medição interior Botão inch (polegada) / mm... -
Página 25: Indicações De Segurança
Indicações de segurança ANTES DE UTILIZAR, LEIA O MANUAL DE INSTRUÇÕES! CONSERVE CUIDADOSAMENTE O MANUAL DE INSTRUÇÕES! CUIDADO! PERIGO DE FERIMENTOS! O ARTIGO NÃO DEVE SER UTILIZADO POR CRIANÇAS. ESTE ARTIGO NÃO É NENHUM BRINQUEDO! Este artigo não pode ser utilizado por crianças sem uma devida vigilância. -
Página 26: Indicações De Segurança Relacionadas Com A Pilha
Indicações de segurança relacionadas com a pilha CUIDADO! PERIGO DE EXPLOSÃO! Nunca recarregue as pilhas! as pilhas não podem ser sujeitas a curto- circuito. Como consequência, as pilhas podem sobreaquecer, explodir ou verificar-se um perigo de incêndio. Remova imediatamente a pilha gasta do interior do artigo. -
Página 27: Preparar O Paquímetro
Indicação: as casas dos algarismos a piscar indica que a pilha está descarregada / vazia. Indicação: ao se substituir a pilha, poder-se-ão verificar falhas no monitor LCD . Remova a pilha e coloque-a de novo após terem decorrido novamente mais de 30 segundos. Desloque a tampa do compartimento da pilha (ver fig. -
Página 28: Exemplos De Utilizações
medido. Tenha atenção para que o objecto a ser medido não seja danificado devido a um excesso de pressão. Medir o interior de um objecto: Encoste as orelhas de medição interior no interior do objecto a ser medido. Rode a roda de ajustamento para fora, no sentido contrário ao dos ponteiros do relógio. -
Página 29: Eliminação De Avarias
objecto e a medida do objecto de referência (a). Medir a espessura da base de um objecto (ver fig. Meça em seguida a profundidade do objecto. Mantenha a haste de profundidade nessa posição e carregue no botão de reposição (ZERO) Retire agora a medida do objecto total. -
Página 30: Manutenção E Limpeza
O monitor LCD Ligação incorrec- Remover a pilha e não continua voltar a colocá-la a medir. novamente após 30 segundos. Não existe nenhu- 1. O monitor LCD 1. Ligue o monitor ma mensagem no está desligado. LCD, carregando monitor LCD 2. -
Página 31: Garantia
com a directiva 2006 / 66 / EC. Entregue as pilhas e / ou o aparelho nos locais específicos destinados à sua recolha. Danos ambientais devido à eliminação incorrecta das pilhas! as pilhas não podem ser eliminadas no lixo doméstico. Estas podem conter metais pesados tóxicos e são consideradas resíduos perigosos. - Página 32 Introduction Intended use ..............Page 33 Scope of delivery ............Page 33 Description of parts ............Page 33 Technical data .............Page 33 Safety instructions ..........Page 34 Safety instructions for batteries .........Page 35 Before start of operation Insert / replace battery ..........Page 36 Preparing the calliper ..........Page 36 Starting up the device Using the calliper ............Page 36 Examples of use ............Page 37...
-
Página 33: Introduction
DIGITAL CALLIPER Introduction Intended use Only for private use. Not for commercial use. Scope of delivery 1 x digital calliper 1 x battery 1 x storage box 1 x instruction for use Description of parts measuring surfaces internal measuring jaws Inch / mm key locking screw LCD display... -
Página 34: Safety Instructions
Safety instructions BEFORE USING THIS DEVICE, PLEASE READ THE DIRECTIONS FOR USE! PLEASE KEEP THE DIRECTIONS FOR USE IN A SAFE PLACE! CAUTION! RISK OF INJURY! KEEP THE PRODUCT OUT OF THE REACH OF CHILDREN. THIS PRODUCT IS NOT A TOY! This product should never be used by children unsupervised. -
Página 35: Safety Instructions For Batteries
Safety instructions for batteries CAUTION! RISK OF EXPLOSION! Never recharge the batteries! Batteries must not be short-circuited. This could result in over-heating and risk of fire or explosion. Remove a depleted battery from the product immediately; otherwise there is an increased risk of leakage! Keep batteries out of the reach of children;... -
Página 36: Before Start Of Operation
Before start of operation Insert / replace battery Tip: Flashing numbers indicate a discharged / flat battery. Tip: When changing the battery, the LCD display experience faults. Remove the battery and insert it again after waiting more then 30 seconds. Push open the lid to the battery compartment (see Fig. -
Página 37: Examples Of Use
Measuring an object from the inside: Place the internal measuring jaws against the object you want to measure. Turn the handwheel outwards anti-clockwise. Move the internal measuring jaws apart until they touch the object on both its inner sides. Please ensure that you do not damage the object you want to measure by subjecting it to too much pressure. -
Página 38: Troubleshooting
to obtain the zero position (ZERO) Now measure the entire object. The LCD display shows the thickness of the floor of the object. Measuring the distance between two identical holes (see fig. F): First measure one of the two, equally sized holes. Leave the measuring jaws in this position and press the key to obtain the zero position (ZERO) -
Página 39: Cleaning And Maintenance
Failure Cause Solution Nothing is dis- 1. LCD display is 1. Switch the LCD played on the switched off. display on by LCD display 2. Battery is the wrong pressing the ON / way round or the OFF key battery contact is 2. -
Página 40: Warranty
Environmental damage through incorrect disposal of the batteries! Batteries may not be disposed of with the usual domestic waste. They may contain toxic heavy metals and are subject to hazardous waste treatment rules and regulations. The chemical symbols for heavy metals are as follows: Cd = cadmium, Hg= mercury, Pb = lead. - Página 41 Einleitung Bestimmungsgemäße Verwendung ......Seite 42 Lieferumfang ...............Seite 42 Teilebeschreibung ............Seite 42 Technische Daten ............Seite 42 Sicherheitshinweise ........Seite 43 Sicherheitshinweise zu Batterien .......Seite 44 Vor der Inbetriebnahme Batterie einsetzen / austauschen .......Seite 45 Messschieber vorbereiten ..........Seite 45 Inbetriebnahme Messschieber verwenden ..........Seite 45 anwendungsbeispiele ..........Seite 46 Fehler beheben ............Seite 47 Wartung und Reinigung...
-
Página 42: Einleitung
DIGITALER MESSSCHIEBER Einleitung Bestimmungsgemäße Verwendung Nur zur privaten Nutzung. Nicht für den gewerblichen Einsatz. Lieferumfang 1 x Digitaler Messschieber 1 x Batterie 1 x aufbewahrungsbox 1 x Bedienungsanleitung Teilebeschreibung Schrittmessflächen Innere Messschnäbel Inch / mm-Taste Sicherungsschraube LCD-anzeige Tiefenmessschaufel Stellrad für Messschnäbel Batteriefachdeckel Taste für Nullstellung (ZERO) EIN- / aUS-Taste (ON / OFF) -
Página 43: Sicherheitshinweise
Sicherheitshinweise VOR GEBRAUCH BITTE DIE BEDIENUNGSANLEITUNG LESEN! BEDIENUNGSANLEITUNG BITTE SORGFÄLTIG AUFBEWAHREN! VORSICHT! VERLETZUNGSGEFAHR! DAS PRODUKT GEHÖRT NICHT IN KINDERHÄNDE. DIESES PRODUKT IST KEIN SPIELZEUG! Dieses Produkt sollte von Kindern nicht ohne aufsicht benutzt werden. LEBENS- UND UNFALLGEFAHR FÜR KLEINKINDER UND KINDER! Lassen Sie Kinder niemals unbeaufsichtigt mit dem Verpackungsmaterial. -
Página 44: Sicherheitshinweise Zu Batterien
trocken. Flüssigkeit kann den Messschieber beschädigen. Sicherheitshinweise zu Batterien VORSICHT! EXPLOSIONSGEFAHR! Laden Sie Batterien niemals wieder auf! Batterien dürfen nicht kurzgeschlossen werden. Überhitzung, Brandgefahr oder Platzen können die Folge sein. Entfernen Sie eine erschöpfte Batterie umgehend aus dem Produkt. Es besteht erhöhte auslaufgefahr! Halten Sie die Batterie von Kindern fern, werfen Sie sie nicht ins Feuer, schließen... -
Página 45: Vor Der Inbetriebnahme
Vor der Inbetriebnahme Batterie einsetzen / austauschen Hinweis: Blinkende Ziffern weisen auf eine entladene / leere Batterie hin. Hinweis: Beim Wechseln der Batterie kann es zu Störungen der LCD-anzeige kommen. Entnehmen Sie die Batterie und setzen Sie sie nach mehr als 30 Sekunden wieder ein. Schieben Sie den Batteriefachdeckel auf (siehe abb. -
Página 46: Anwendungsbeispiele
Drehen Sie das Stellrad im Uhrzeigersinn nach innen. Schieben Sie so die äußeren Messschnäbel so weit zusammen, bis sie den zu messenden gegenstand an beiden Seiten berühren. achten Sie darauf, dass Sie den zu messenden gegenstand nicht durch zu viel Druck beschädigen. -
Página 47: Fehler Beheben
und drücken Sie die Taste zur Nullstellung (ZERO) Nehmen Sie anschließend die Maße des zweiten gegenstandes. Die LCD-anzeige zeigt nun die abweichung der Maße des zweiten gegenstandes zu der Maße des Referenzgegenstandes (a) an. Messen der Dicke des Bodens eines Gegenstandes (siehe Abb. -
Página 48: Wartung Und Reinigung
Fehler Ursache abhilfe Fünf Stellen sprin- Die Batteriespan- Tauschen Sie die Bat- gen gleichzeitig nung liegt unter terie gemäß Kapitel einmal pro 2,75 V. „Batterie einsetzen / Sekunde um. austauschen“ aus. Die LCD-anzeige Fehlerhafte Schal- Batterie herausnehmen zählt nicht tung. und nach 30 Sekun- weiter. -
Página 49: Garantie
zu. Über Sammelstellen und deren Öffnungszeiten können Sie sich bei Ihrer zuständigen Verwaltung informieren. Defekte oder verbrauchte Batterien müssen gemäß Richtlinie 2006 / 66 / EC recycelt werden. geben Sie Batterien und / oder das gerät über die angebotenen Sammeleinrichtungen zurück. Umweltschäden durch falsche Entsorgung der Batterien! Batterien dürfen nicht über den Hausmüll entsorgt werden. - Página 50 OWIM GmbH & Co. KG Stiftsbergstraße 1 D-74167 Neckarsulm Model No.: Z22855 Version: 10 / 2014 IAN 103604...