Tabla de contenido
Publicidad
Idiomas disponibles
Idiomas disponibles
Enlaces rápidos
BAU- UND HOLZFEUCHTE-
MESSGERÄT / MOISTURE
METER / HUMIDIMÈTRE
BAU- UND HOLZFEUCHTEMESSGERÄT
Bedienungs- und Sicherheitshinweise
MOISTURE METER
Operation and Safety Notes
HUMIDIMÈTRE
Instructions d'utilisation et consignes de sécurité
BOUW- EN HOUTVOCHTIGHEIDSMETER
Bedienings- en veiligheidsinstructies
MĚŘIČ VLHKOSTI DŘEVA A
STAVEBNÍCH MATERIÁLŮ
Pokyny pro obsluhu a bezpečnostní pokyny
MEDIDOR DE HUMEDAD PARA MADERA Y
MATERIALES DE CONSTRUCCIÓN
Instrucciones de utilización y de seguridad
APARELHO DE MEDIÇÃO DA HUMIDADE DA
PEDRA E DA MADEIRA
Instruções de utilização e de segurança
IAN 278296
Publicidad
Capítulos
Tabla de contenido
Solución de problemas

Manuales relacionados para Powerfix Profi HG01701C


Resumen de contenidos para Powerfix Profi HG01701C
- Página 1 BAU- UND HOLZFEUCHTE- MESSGERÄT / MOISTURE METER / HUMIDIMÈTRE BAU- UND HOLZFEUCHTEMESSGERÄT Bedienungs- und Sicherheitshinweise MOISTURE METER Operation and Safety Notes HUMIDIMÈTRE Instructions d‘utilisation et consignes de sécurité BOUW- EN HOUTVOCHTIGHEIDSMETER Bedienings- en veiligheidsinstructies MĚŘIČ VLHKOSTI DŘEVA A STAVEBNÍCH MATERIÁLŮ Pokyny pro obsluhu a bezpečnostní...
- Página 2 DE / AT / CH Bedienungs- und Sicherheitshinweise Seite GB / IE Operation and Safety Notes Page FR / BE Instructions d‘utilisation et consignes de sécurité Page NL / BE Bedienings- en veiligheidsinstructies Pagina Pokyny pro obsluhu a bezpečnostní pokyny Strana Instrucciones de utilización y de seguridad...
-
Página 5: Tabla De Contenido
Einleitung ...........Seite Bestimmungsgemäße Verwendung ..Seite Teilebeschreibung .........Seite Technische Daten ........Seite Lieferumfang ..........Seite Allgemeine Sicherheitshinweise ....Seite Sicherheitshinweise für Batterien ..Seite Vor der Inbetriebnahme ..Seite 10 Batterie einlegen / wechseln ..........Seite 10 Inbetriebnahme ......Seite 11 Bevor Sie eine Messung durchführen ..Seite 11 Messung durchführen ......Seite 11 Batterieanzeige ........Seite 14 Temperaturanzeige .......Seite 14... -
Página 6: Einleitung
Bau- und Holzfeuchtemessgerät Einleitung Wir beglückwünschen Sie zum Kauf Ihres neuen Produkts. Sie haben sich damit für ein hochwertiges Produkt entschieden. Die Bedienungsanleitung ist Teil dieses Produkts. Sie enthält wichtige Hinweise für Sicherheit, Gebrauch und Entsorgung. Machen Sie sich vor der Benutzung des Produkts mit allen Bedien- und Sicherheitshinweisen vertraut. -
Página 7: Technische Daten
Batteriefach Display Feuchtigkeitsanzeige in % Materialnummer Batterieanzeige Schlosssymbol (Messwert eingefroren) Temperaturanzeige (°C oder °F) Technische Daten Betriebsspannung: 9 V , 15 mA Batterietyp: 6F22 / 6LR61 (9 V-Blockbatterie) Messgenauigkeit: siehe Kapitel „Messung durchführen“ Betriebstemperatur: 0 °C bis 40 °C Schutzklasse: IP 20 Auflösung: 0,1 %... -
Página 8: Allgemeine Sicherheitshinweise
Allgemeine Sicherheitshinweise Machen Sie sich vor der Benutzung des Produkts mit allen Bedien- und Sicherheitshinweisen vertraut. Händigen Sie alle Unterlagen bei Weitergabe des Produkts mit aus. Kontrollieren Sie das Gerät vor der Inbetrieb- nahme auf Beschädigungen. Nehmen Sie ein beschädigtes Gerät nicht in Betrieb. Setzen Sie das Gerät keiner Feuchtigkeit aus. - Página 9 VORSICHT! EXPLOSIONSGEFAHR! Laden Sie nicht aufladbare Batterien niemals wieder auf, schließen Sie sie nicht kurz und / oder öffnen Sie sie nicht. Werfen Sie Batterien niemals in Feuer oder Wasser. Setzen Sie Batterien keiner mechanischen Belastung aus. Gefahr des Auslaufens der Batterien Im Falle eines Auslaufens der Batterien entfernen Sie diese sofort aus dem Gerät, um Beschädi- gungen zu vermeiden.
-
Página 10: Vor Der Inbetriebnahme
Reinigen Sie Batterie- und Gerätekontakt vor dem Einlegen falls erforderlich. Entfernen Sie verbrauchte Batterien umgehend aus dem Gerät. Vor der Inbetriebnahme Entfernen Sie vor der Inbetriebnahme die Schutzfolie vom Display des Geräts und legen Sie die beiliegende Batterie ein. Batterie einlegen / wechseln Wenn im Display das Batteriesymbol erscheint, ist die eingelegte Batterie nahezu er-... -
Página 11: Inbetriebnahme
Legen Sie die Batterie in das Batteriefach und schließen Sie den Deckel wieder, so dass er hörbar einrastet. Inbetriebnahme Bevor Sie eine Messung durchführen Achten Sie darauf, dass beide Messstifte gleichzeitig die Materialoberfläche berühren. Erhöhen Sie bei rauen Oberflächen ggf. den Druck auf die Messstifte. - Página 12 Umgebungstemperatur in °C und das zuvor gewählte Material (1–6). Halten Sie die -Taste ca. 5 Sekunden gedrückt, um in der Temperaturanzeige zwi- schen °C und °F zu wechseln. Falls das Display nach dem Einschalten nicht „0,0 %“ anzeigt, können Sie eine Kalibrie- rung vornehmen.
- Página 13 Hinweis: Bei Messungen, die unterhalb des Messbereichs liegen, zeigt das Display „0,0 %“ oder „Lo“ an. Bei Messungen, die oberhalb des Messbereichs liegen, zeigt das Display „Hi“ an. Entfernen Sie die Schutzkappe Drücken Sie beide Messstifte gleichzeitig gegen die Oberfläche. Nach ca. 1–2 Sekun- den können Sie den Prozentwert ablesen.
-
Página 14: Batterieanzeige
Wenn Sie in einem Bereich messen, in dem Sie das Display nicht ablesen können, drücken Sie -Taste, um die Anzeige im Display ein- zufrieren. Das Display zeigt dann zusätzlich das Schloss-Symbol an. Drücken Sie die -Taste noch einmal, um eine erneute Messung durchzuführen. Ist die Messung erfolgt, schalten Sie den Feuchtigkeitsmesser mit der -Taste aus. -
Página 15: Fehlerbehebung
Fehlerbehebung Fehler Mögliche Ursache und Lösung Prüfen Sie, ob das Gerät auf Das Messer- gebnis ist of- das korrekte Material einge- fensichtlich zu stellt ist. Prüfen Sie, ob die hoch oder zu Messstifte korrekt gegen niedrig. das Material gedrückt sind. Wiederholen Sie den Messvor- gang. -
Página 16: Reinigung Und Pflege
Reinigung und Pflege Achten Sie darauf, dass keine Flüssigkeit in das Gerät eindringt. Andernfalls besteht Ge- fahr der Sachbeschädigung. Reinigen Sie das Gerät nur mit einem leicht angefeuchteten Tuch und einem milden Spül- mittel. Reinigen Sie die Messspitzen mit einem leicht angefeuchteten Tuch und trocknen Sie sie an- schließend ab. -
Página 17: Garantie
Werfen Sie Ihr Produkt, wenn es aus- gedient hat, im Interesse des Umwelt- schutzes nicht in den Hausmüll, sondern führen Sie es einer fachgerechten Ent- sorgung zu. Über Sammelstellen und deren Öffnungszeiten können Sie sich bei Ihrer zuständigen Verwaltung infor- mieren. - Página 18 Sie erhalten auf dieses Produkt 3 Jahre Garantie ab Kaufdatum. Die Garantiefrist beginnt mit dem Kaufdatum. Bitte bewahren Sie den Original-Kas- senbon gut auf. Diese Unterlage wird als Nach- weis für den Kauf benötigt. Tritt innerhalb von 3 Jahren ab dem Kaufdatum dieses Produkts ein Material- oder Fabrikationsfeh- ler auf, wird das Produkt von uns –...
- Página 19 Introduction ........Page 20 Intended use ..........Page 20 Parts description ........Page 20 Technical Data ........Page 21 Scope of delivery ........Page 21 General safety instructions ........Page 21 Battery safety information .....Page 22 Before using ........Page 23 Inserting / changing the battery ....Page 24 Start-up ..........Page 24 Before you take a measurement ..Page 24...
-
Página 20: Moisture Meter
Moisture Meter Introduction We congratulate you on the purchase of your new product. You have chosen a high quality product. The instructions for use are part of the product. They contain important information con- cerning safety, use and disposal. Before using the product, please familiarise yourself with all of the safety information and instructions for use. -
Página 21: Technical Data
Moisture indicator in % Material number Battery indicator Lock symbol (Measured value frozen) Temperature display (°C or °F) Technical Data Operating voltage: , 15 mA Battery type: 6F22/6LR61 (9 V block battery) Precision: see chapter ‚Making measurements‘ Operating temperature: 0 °C to 40 °C Protection class: IP 20 Resolution:... -
Página 22: Battery Safety Information
Please include all documentation when passing this product on to others. Check the device for damage before use. If the device is damaged do not use it. Do not expose the device to moisture. Other- wise the device could be damaged. This device may be used by children age 8 years and up, as well as by persons with reduced physical, sensory or mental capacities, or... -
Página 23: Before Using
Risk of battery leakage In the event the batteries leak, remove them from the device immediately to prevent damage. Do not let the fluid from a leaking battery come into contact with your skin, eyes or mucous membranes. In the event of contact with bat- tery acid, thoroughly flush the affected area with clean water and seek immediate medical attention. -
Página 24: Changing The Battery
Inserting / changing the battery If the battery symbol appears in the display the inserted battery is almost drained and must be replaced. Empty batteries can falsify the measured result. To insert the battery proceed as follows: Open the battery compartment cover on the back of the device. -
Página 25: Taking A Measurement
Note: The measuring pins are sharp and may dent or damage the surface. Rub the damp residue on the surface before taking the measurement. Measure several places and take an average value. Be aware that salts can increase the conduc- tivity of water. - Página 26 Wood moisture approximate value for firewood ideal for heating – 6–15 high heating value restricted heating – O 16–20 low heating value not suitable for hea- X 21–44 ting – further drying necessary 26 GB/IE...
-
Página 27: Battery Display
Note: When measuring under the measure- ment range, the display shows ‚0.0%‘ or ‚Lo‘. For measurements above the measure- ment range, the display shows ‚Hi‘. Remove the protective cap Press both measuring pins against the surface at the same time. After 1-2 seconds you can read the percentage value. -
Página 28: Troubleshooting
Troubleshooting Error Possible causes and solutions The measure- Check whether the device is ment is obvi- set to the correct material. ously too high Check if the measuring pins or low. are correctly pressed against the material. Repeat the measurement process. The measurement range has The display been exceeded or you have... -
Página 29: Storage
Check the device for visible external damage before every use. Check the measuring pins for damage before every use. Storage Always attach the protective cap to the device when not in use. Always remove the batteries if the device will not be used for extended periods. -
Página 30: Warranty
Improper disposal of batteries can harm the environment! Never dispose of batteries in your household waste. They may contain toxic heavy metals and are sub- ject to hazardous waste regulations. The chemical symbols of the heavy metals are: Cd = cadmium, Hg = mercury, Pb = lead. - Página 31 fragile parts, e.g. switches, rechargeable batteries or glass parts. GB/IE...
- Página 32 Introduction ........Page 33 Utilisation conforme ......Page 33 Descriptif des pièces ......Page 33 Caractéristiques techniques ....Page 34 Contenu de la livraison ......Page 34 Instructions générales de sécurité ........Page 35 Instructions de sécurité relatives aux piles ........Page 36 Avant la mise en service ..Page 37 Mise en place / remplacement de la pile...
-
Página 33: Introduction
Humidimètre Introduction Nous vous félicitons pour l‘achat de votre nouveau produit. Vous avez opté pour un produit de grande qualité. Le mode d‘emploi fait partie intégrante de ce produit. Il contient des indications impor- tantes pour la sécurité, l’utilisation et la mise au rebut. -
Página 34: Caractéristiques Techniques
Compartiment à piles Écran Affichage de l‘humidité en % Numéro de matériau Affichage de l’usure des piles Symbole cadenas (valeur de mesure gelée) Affichage de la température (°C ou °F) Caractéristiques techniques Tension de fonctionnement : 9 V , 15 mA Type de pile : 6F22 / 6LR61 (pile 9 V) -
Página 35: Instructions Générales De Sécurité
Instructions générales de sécurité Avant d‘utiliser le produit, veuillez prendre connaissance de toutes les instructions d’utilisa- tion et de sécurité. Lorsque vous remettez l‘appa- reil à d‘autres utilisateurs, veuillez également leur transmettre tous les documents liés à celui-ci. Avant chaque utilisation, vérifiez le bon état de l’appareil. -
Página 36: Instructions De Sécurité Relatives Aux Piles
Instructions de sécurité relatives aux piles DANGER DE MORT ! Les piles ne doivent pas être manipulées par des enfants. En cas d‘ingestion, consultez immédiatement un médecin. ATTENTION ! RISQUE D’EXPLOSION ! Ne rechargez jamais les piles non rechar- geables, ne les court-circuitez pas, et / ou ne les ouvrez pas. -
Página 37: Avant La Mise En Service
Risque de dégâts matériels Utilisez exclusivement le type de pile spécifié ! Lors de la mise en place des piles, veillez à respecter la polarité ! Celle-ci est indiquée dans le compartiment à piles. Si nécessaire, nettoyez les contacts des piles et de l’appareil avant l‘insertion. -
Página 38: Mise En Marche
P lacez les contacts de la pile 9 V sur les contacts des fiches. Vérifiez que la polarité est correcte. Celle-ci dépend de la forme des contacts. Veillez impérativement à ce que la bande de tissu ne se trouve pas en-dessous de la pile. -
Página 39: Opération De Mesure
Opération de mesure Appuyez sur la touche , afin d‘allumer s‘affiche „0,0 %“, l‘hygromètre. Sur l‘écran la température ambiante en °C ainsi que le matériau qui a été présélectionné (1–6). Maintenez la pression sur la touche durant 5 secondes env., afin de basculer l‘af- fichage de la température entre °C et °F. - Página 40 Remarque : Lors de mesures qui se situent en-dessous de la plage de mesure, l‘écran af- fiche „0,0 %“ ou „Lo“. Remarque : Lors de mesures qui se situent au-dessus de la plage de mesure, l‘écran affiche „Hi“. Retirez le capuchon de protection Appliquez simultanément les deux broches contre la surface.
-
Página 41: Affichage De L'usure De La Pile
Si vous effectuez la mesure dans un environ- nement où vous ne pouvez pas consulter l‘écran, appuyez sur la touche , afin de ge- ler l‘affichage sur l‘écran. L‘écran affiche en- suite le symbole supplémentaire du cadenas. Rappuyez une nouvelle fois sur la touche , afin de pouvoir opérer une nouvelle mesure. -
Página 42: Dépannage
Dépannage Dysfonc- Cause possible tionnement et solution Vérifiez que l'appareil est réglé Le résultat de la mesure est sur le bon matériau. Vérifiez manifestement que les broches sont cor- trop élevé ou rectement appliquées contre le trop faible. matériau. Renouvelez l'opération de mesure. La plage de mesure n'est pas L'écran atteinte, ou est dépassée. -
Página 43: Rangement
Avant chaque utilisation de l‘appareil, contrô- lez la présence de dommages externes et vi- sibles. Avant chaque utilisation de l‘appareil, véri- fiez le bon état des broches. Rangement Remettez toujours le cache de protection sur l‘appareil lorsque vous ne l‘utilisez plus. Retirez toujours les piles de l‘appareil si vous ne comptez pas l‘utiliser durant une période prolongée. -
Página 44: Garantie
considérées comme des déchets spé- ciaux. Les symboles chimiques des mé- taux lourds sont les suivants : Cd = cadmium, Hg = mercure, Pb = plomb. Pour cette raison, veuillez toujours dé- poser les piles usagées dans les conte- neurs de recyclage de la commune. Garantie L’appareil a été... - Página 45 dommages sur des composants fragiles, comme des interrupteurs, des batteries et des éléments fabriqués en verre. FR/BE...
- Página 46 Inleiding ......... Pagina 47 Correct gebruik ......... Pagina 47 Beschrijving van de onderdelen ..Pagina 47 Technische gegevens ......Pagina 48 Omvang van de levering ....Pagina 48 Algemene veiligheidsinstructies ... Pagina 49 Veiligheidsinstructies voor het gebruik van batterijen ....Pagina 50 Voor de ingebruikname ...
-
Página 47: Inleiding
Bouw- en houtvochtigheidsmeter Inleiding Hartelijk gefeliciteerd met de aankoop van uw nieuwe product. U heeft voor een hoogwaardig product gekozen. De gebruiksaanwijzing is een deel van het product. Deze bevat belangrijke aanwijzingen voor veiligheid, gebruik en verwij- dering. Maakt U zich voor de ingebruikname van het product met alle bedienings- en veiligheids- voorschriften vertrouwd. -
Página 48: Technische Gegevens
Batterijvak Display Vochtweergave in % Materiaalnummer Batterij-indicator Slotsymbool (meetwaarde vastgezet) Temperatuurindicatie (°C of °F) Technische gegevens Voedingsspanning: , 15 mA Batterijtype: 6F22 / 6LR61 (9 V-blokbatterij) Meetnauwkeurigheid: zie hoofdstuk „Meting uitvoeren“ Bedrijfstemperatuur: 0 °C tot 40 °C Beschermingsklasse: IP 20 Resolutie: 0,1 % Luchtvochtigheid:... -
Página 49: Algemene Veiligheidsinstructies
Algemene veiligheidsinstructies Maak u voor de ingebruikname van het product vertrouwd met alle bedienings- en veiligheidsvoor- schriften! Geef alle documenten mee wanneer u het product aan derden geeft! Controleer het product voor de ingebruikname op beschadigingen! Neem een beschadigd product niet in gebruik! Stel het apparaat niet bloot aan vocht! Het apparaat kan hierdoor worden beschadigd. -
Página 50: Veiligheidsinstructies Voor Het Gebruik Van Batterijen
Veiligheidsinstructies voor het gebruik van batterijen LEVENSGEVAAR! Houd batterijen uit de buurt van kinderen. Raadpleeg bij inslikken onmiddellijk een arts! VOORZICHTIG! EXPLOSIE- GEVAAR! Laad niet-oplaadbare batterijen nooit op, sluit ze niet kort en/of open ze niet! Gooi batterijen nooit in vuur of water! Stel de batterijen nooit aan mechanische belastingen bloot! Gevaar dat de batterijen lekken... -
Página 51: Gevaar Voor Beschadiging Van Het Apparaat
Gevaar voor beschadiging van het apparaat Gebruik uitsluitend het aangegeven batterijtype! Let bij het plaatsen van de batterijen op de juiste polariteit! Deze wordt aangegeven in het batterijvakje! Reinig de contacten van het product en van de batterijen zo nodig voordat u de batterijen plaatst! Verwijder verbruikte batterijen direct uit het apparaat! -
Página 52: Ingebruikname
hierbij op de juiste polariteit. Deze wordt door de profielvorm van de contacten weer- gegeven. Let erop dat de stofstrip zich onder de batterij bevindt. P laats de batterij in het batterijvak en sluit het deksel weer, zodat deze hoorbaar vastklikt. Ingebruikname Voordat u een meting uitvoert Let erop, dat beide meetpinnen... -
Página 53: Meting Uitvoeren
Meting uitvoeren Druk op de -knop , om de vochtmeter in te schakelen. Op het display verschijnt „0,0 %“, de omgevingstemperatuur in °C en het eerder geselecteerde materiaal (1–6). Houd de -knop ca. 5 seconden inge- drukt om de temperatuurweergave te veran- deren tussen °C en °F. - Página 54 Opmerking: bij metingen, die onder het meetbereik liggen, toont het display „0,0 %“ of „Lo“. Bij metingen, die boven het meetbe- reik liggen, verschijnt „Hi“ op het display. Verwijder de beschermkap Druk de beide meetpinnen gelijktijdig tegen het oppervlak. Na ca. 1–2 seconden kunt u de procentuele waarde aflezen.
-
Página 55: Batterijweergave
om de waarde op het display vast te houden. Op het display verschijnt tevens het slotsymbool. Druk nog een keer op de -knop, om een nieuwe meting uit te voeren. Als de meting is afgerond, schakelt u de vochtmeter de -knop uit. -
Página 56: Storingen Oplossen
Storingen oplossen Storing Mogelijke oorzaak en oplossing Controleer, of het apparaat is Het meetresul- taat is duide- ingesteld op het juiste materi- lijk te hoog of aal. Controleer, of de meetpin- te laag. correct tegen het materiaal worden gedrukt. Herhaal het meetproces. Het display Het meetbereik is onder- toont "Lo"... -
Página 57: Bewaren
Reinig de meetpinnen met een ietwat vochtig doekje en droog ze vervolgens af. Controleer het apparaat voor ieder gebruik op uiterlijke, zichtbare beschadigingen. Controleer de meetpunten voor ieder gebruik op beschadigingen. Bewaren Plaats de beschermkap altijd op het apparaat als u het niet gebruikt. Verwijder de batterijen altijd als u het appa- raat gedurende een langere periode niet gebruikt. -
Página 58: Garantie
Defecte of verbruikte batterijen moeten volgens de richtlijn 2006 / 66 / EG en diens veranderingen wor- den gerecycled. Geef de batterijen en /of het ap- paraat af bij de daarvoor bestemde verzamelstations. Milieuschade door verkeerde afvoer van batterijen! Batterijen mogen niet via het huisvuil worden weggegooid. - Página 59 onze keuze – gratis voor u gerepareerd of ver- vangen. Deze garantie komt te vervallen als het product beschadigd wordt, niet correct gebruikt of onderhouden wordt. De garantie geldt voor materiaal- en productiefou- ten. Deze garantie is niet van toepassing op pro- ductonderdelen, die onderhevig zijn aan normale slijtage en hierdoor als aan slijtage onderhevige onderdelen gelden (bijv.
- Página 60 Úvod ...........Strana 61 Použití ke stanovenému účelu....Strana 61 Popis dílů ..........Strana 61 Technické údaje .........Strana 62 Obsah dodávky .........Strana 62 Všeobecná bezpečnostní upozornění ........Strana 62 Bezpečnostní upozornění k bateriím ...Strana 63 Před uvedením do provozu ........Strana 64 Vložení / výměna baterie ..Strana 65 Uvedení...
-
Página 61: Úvod
Měřič vlhkosti dřeva a stavebních materiálů Úvod Blahopřejeme Vám ke koupi nového výrobku. Rozhodli jste se pro kvalitní produkt. Návod k obsluze je součástí tohoto výrobku. Obsahuje důležité pokyny pro bezpečnost, použití a likvi- daci. Před použitím výrobku se seznamte se všemi pokyny k obsluze a bezpečnostními pokyny. -
Página 62: Technické Údaje
Číslo materiálu Zobrazení stavu baterie Symbol zámku (měřená hodnota zafixována) Zobrazení teploty (°C nebo °F) Technické údaje Provozní napětí: , 15 mA Typ baterie: 6F22 / 6LR61 (9 V bloková baterie) Přesnost měření: viz kapitola „Měření“ Provozní teplota: 0 °C až 40 °C Druh krytí: IP 20 Rozlišení:... -
Página 63: Bezpečnostní Upozornění K Bateriím
upozorněními! Při předávání výrobku třetí osobě předávejte současně i všechny jeho podklady! Před uvedením do provozu zkontrolujte výrobek, jestli není poškozený! Poškozený výrobek neuvádějte do provozu! Nevystavujte přístroj vlhkosti! Může se tím poškodit. Tento přístroj mohou používat děti starší než 8 let, osoby se sníženými fyzickými, sen- zorickými nebo duševními schopnosti nebo s nedostatečnými zkušenostmi a znalostmi o... -
Página 64: Před Uvedením Do Provozu
Nikdy neházejte baterie do ohně nebo do vody! Nevystavujte baterie mechanickému zatížení! Nebezpečí vytečení baterií V případě vytečení baterií je ihned vyjměte z výrobku, abyste zamezili jeho poškození! Vyhýbejte se kontaktu baterií nebo uniklé kyseliny s pokožkou, očima a sliznicemi! Po kontaktu s kyselinou baterií... -
Página 65: Vložení/ Výměna Baterie
Vložení/ výměna baterie Když se na displeji zobrazí symbol baterie je vložená baterie téměř vybitá a musí se vyměnit. Vybité baterie mohou zkreslit výsledek měření. Při vkládání baterie postupujte následovně: O tevřete víko schránky na baterie zadní straně přístroje. S pomocí proužku látky, který... -
Página 66: Měření
Před měřením vysušte povrch materiálu. Měřte na různých místech a určete průměr- nou hodnotu. Dbejte na to, že soli vodivost vody zvyšují. Tím se naměřené hodnoty mohou zkreslit a být vyšší. Pokud je to zapotřebí odstraňte u krbového dřeva kůru. Zatlačte měřící hroty na různých místech do dřeva příčně... - Página 67 Omezeně vhodné O 16–20 na topení – nízké spalné teplo Nevhodné na to- X 21–44 pení – další sušení zapotřebí Poznámka: při naměřených hodnotách, které leží pod dolní hranicí rozsahu měření...
-
Página 68: Zobrazení Stavu Baterie
ukazuje displej „0,0 %“ nebo „Lo“. Při na- měřených hodnotách, které leží nad horní hranicí rozsahu měření ukazuje displej „Hi“. Odstraňte krytku Přitlačte oba měřící hroty současně na po- vrch. Po cca 1 až 2 vteřinách můžete odečíst hodnotu v procentech. Jestliže měříte s přístrojem v poloze, při které... -
Página 69: Odstranění Poruch
Odstranění poruch Chyba Možná příčina a řešení Naměřená Zkontrolujte nastavení přístroje hodnota je na správný materiál. Kontro- zřejmě příliš lujte, jestli jsou měřící hroty vysoká nebo správně přitlačené na materiál. příliš nízká. Opakujte měření. Naměřená hodnota překračuje Displej nebo podkročuje měřící ukazuje „Lo“... -
Página 70: Skladování
Před každým použitím přístroj zkontrolujte, jestli nemá vnější, viditelná poškození. Před každým použitím kontrolujte i měřící hroty, jestli nejsou poškozené. Skladování Při nepoužívání přístroje vždy nasaďte krytku na hroty. V případě delšího nepoužívání přístroje z něho vyjměte baterie. Přístroj uchovávejte v suchém prostředí. Odstranění... -
Página 71: Záruka
Škody na životním prostředí způsobené nesprávným od- straněním baterií do odpadu! Baterie se nesmějí vyhazovat do domovního od- padu. Mohou obsahovat jedovaté těžké kovy a musejí se zpracovávat jako zvláštní odpad. Che- mické symboly těžkých kovů: Cd = kadmium, Hg = rtuť, Pb = olovo. Proto odevzdejte vybité baterie u komunální... - Página 72 poškození křehkých, choulostivých dílů, např. vy- pínačů, akumulátorů nebo dílů zhotovených ze skla. 72 CZ...
- Página 73 Introducción ........ Página 74 Uso adecuado ........Página 74 Descripción de las piezas ....Página 74 Características técnicas ....Página 75 Contenido .......... Página 75 Indicaciones generales de seguridad ......Página 76 Indicaciones de seguridad acerca de las pilas ......Página 77 Antes de la puesta en marcha ........
-
Página 74: Medidor De Humedad Para Madera Y Materiales De Construcción
Medidor de humedad para madera y materiales de construcción Introducción Enhorabuena por la adquisición de su nuevo producto. Ha optado por un producto de alta calidad. El manual de instrucciones forma parte de este producto. Contiene importantes indicacio- nes sobre seguridad, uso y eliminación. Antes de usar el producto, familiarícese con todas las indi- caciones de manejo y de seguridad. -
Página 75: Características Técnicas
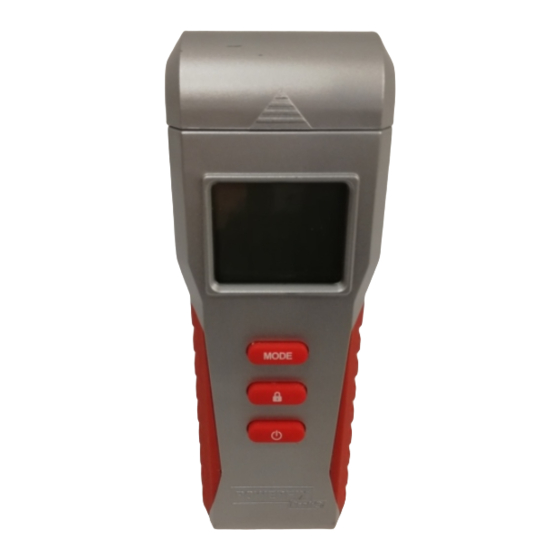
Botón (mantener el resultado de medición en pantalla, °C o °F previamente selecciona- dos) Botón (ON/ OFF) Compartimento de las pilas Pantalla Indicador de humedad en % Número del material Indicación del estado de la pila Candado (valor registrado congelado) Indicador de temperatura (°C o °F) Características técnicas Tensión de... -
Página 76: Indicaciones Generales De Seguridad
1 medidor de humedad para madera y materiales 1 pila de bloque de 9 V 1 manual de instrucciones Indicaciones generales de seguridad Antes de usar el producto, familiarícese con todas las indicaciones de manejo y seguridad. En caso de entregar el producto a terceros, adjunte igual- mente toda la documentación. -
Página 77: Indicaciones De Seguridad Acerca De Las Pilas
protectora. ¡En caso contrario los usuarios pueden sufrir lesiones! Indicaciones de seguridad acerca de las pilas ¡PELIGRO DE MUERTE! No deje las pilas al alcance de los niños. ¡En caso de ingesta, acuda inme- diatamente a un médico! ¡CUIDADO! ¡PELIGRO DE EX- PLOSIÓN! ¡No recargar nunca pilas no recargables, no poner en cortocircuito ni abrirlas! -
Página 78: Antes De La Puesta En Marcha
Peligro de daños en el aparato ¡Utilice exclusivamente el tipo de pila indicado! ¡Cuando coloque la pila preste atención a la polaridad correcta! ¡Ésta se indica en el compartimento de las pilas! ¡Si fuera necesario, limpie los contactos de las pilas y del aparato antes de introducirlas! ¡Extraiga inmediatamente las pilas agotadas del aparato! Antes de la puesta en marcha... -
Página 79: Puesta En Funcionamiento
Observe que la polaridad es la correcta. Ésta viene indicada por la forma perfilada de los contactos. Observe también que la tira de tela se encuentra debajo de la pila. I nserte la pila en el compartimento de las pilas y cierre la tapa de modo que encaje haciendo clic. -
Página 80: Realizar Medición
Realizar medición Pulse el botón , para encender el medi- dor de humedad. En la pantalla apare- cerá „0,0 %“, la temperatura ambiental en °C y el último material seleccionado (1–6). Mantenga pulsado el botón unos 5 segundos para cambiar el indicador de temperatura entre °C y °F. - Página 81 Nota: La pantalla muestra „0,0 %“ o „Lo“ si las medidas se encuentran por debajo del rango de medición. La pantalla muestra „Hi“ si las medidas se encuentran por encima del rango de medición. Retire la tapa de protección Presione los dos sensores de medición simultáneamente contra la superficie.
-
Página 82: Indicación De Estado De La Pila
Si se encuentra en un lugar en el que no puede leer la pantalla, pulse el botón para congelar el indicador de la pantalla. Enton- ces en la pantalla aparecerá el símbolo del candado. Vuelva a pulsar el botón para realizar otra medición. -
Página 83: Solución De Problemas
Solución de problemas Problema Posible causa y solución El resultado Compruebe si el aparato está de la medi- configurado para el material ción es evi- adecuado. Compruebe si los dentemente sensores de medición están demasiado bien presionados contra el alto o bajo. material. -
Página 84: Almacenamiento
Limpie los sensores de medición con un paño ligeramente humedecido y séquelos poste- riormente. Antes de usar el aparato compruebe que no haya daños visibles exteriores en el mismo. Antes de usar el aparato compruebe que los sensores de medición estén en perfecto estado. -
Página 85: Garantía
sobre los puntos de recogida de resi- duos y sus horarios. Las pilas defectuosas o usadas deben ser recicla- das según lo indicado en la directiva 2006 / 66 / CE y en sus modificaciones. Recicle las pilas y/o el aparato en los puntos de recogida adecuados. - Página 86 compra original. Este documento se requerirá como prueba de que se realizó la compra. Si en el plazo de tres años a partir de la fecha de compra se produce un fallo de material o fabricación en este producto, repararemos el pro- ducto o lo sustituiremos gratuitamente por un pro- ducto nuevo (según nuestra elección).
- Página 87 Introdução ........Página 88 Utilização adequada ......Página 88 Descrição das peças ......Página 88 Dados técnicos ........Página 89 Material fornecido ......Página 89 Indicações gerais de segurança ......Página 90 Indicações de segurança relativas às pilhas ......Página 91 Antes da utilização ....
-
Página 88: Introdução
Aparelho de medição da humidade de pedra e madeira Introdução Damos-lhe os parabéns pela aquisição do seu novo produto. Acabou de adquirir um produto de grande qualidade. O manual de instruções é parte integrante deste produto. Contém indica- ções importantes referentes à segurança, utiliza- ção e eliminação. -
Página 89: Dados Técnicos
Compartimento de pilhas Visor Indicador de humidade em % Número do material Indicador de pilhas Símbolo de cadeado (valor de medição congelado) Indicador de temperatura (°C ou °F) Dados técnicos Tensão de serviço: , 15 mA Tipo de bateria: 6F22 / 6LR61 (9 V-Bateria de bloco) Precisão de medição: veja capítulo „Fazer medição“... -
Página 90: Indicações Gerais De Segurança
Indicações gerais de segurança Familiarize-se com todas as indicações de utiliza- ção e de segurança do artigo! Se entregar o pro- duto a terceiros, entregue também os respetivos documentos! Antes da colocação em funcionamento, verifi- que o produto quanto a danos! Nunca coloque um produto danificado em funcionamento! Não exponha o aparelho a humidades! Ele poderá... -
Página 91: Indicações De Segurança Relativas Às Pilhas
Indicações de segurança relativas às pilhas PERIGO DE MORTE! As pilhas não devem ser manuseadas por crianças. Se a pilha for ingerida, contacte imediatamente um médico! CUIDADO! PERIGO DE EXPLOSÃO! Nunca recarregue pilhas não recarregáveis, não provoque curto-circuito nem as abra! Nunca atire pilhas para o fogo ou água! Não exponha as pilhas a uma carga mecâ- nica demasiado elevada! -
Página 92: Antes Da Utilização
Ao colocar as pilhas, tenha em atenção a polaridade correta! Esta é indicada no com- partimento das pilhas! Se necessário, limpe os contactos das pilhas e do aparelho antes da sua colocação! Remova de imediato as pilhas usadas do aparelho! Antes da utilização Antes da colocação em funcionamento, re- mova a película de proteção do visor... -
Página 93: Colocação Em Funcionamento
contactos. Certifique-se também de que a tira de tecido se encontra por baixo da pilha. I nsira a pilha no compartimento das pilhas e volte a fechar a tampa até ouvir o som de encaixe. Colocação em funcionamento Antes de fazer uma medição Esteja atento para que ambos os pinos de medição toquem na superfície ao mesmo... -
Página 94: Fazer A Medição
Fazer a medição Prima o botão para ligar o medidor de humidade. No visualizador aparece „0,0 %“, a temperatura do ambiente em °C e o material anteriormente selecionado (1–6). Pressione o botão por cerca de 5 segundo para mudar a temperatura entre °C e °F. - Página 95 Aviso: Medições abaixo do espectro de medição mostram „0,0 %“ ou „Lo“ no visualizador. Medições acima do espectro de medição mostram „Hi“ no visualizador. Retire a tampa de protecção Pressione ambos os pinos de medição mesmo tempo contra a superfície. Após cerca de 1–2 segundos podes ler o valor percentual.
-
Página 96: Indicação Das Pilhas
Ao fazer uma medição em um local no qual não podes ver o visualizador pressione o bo- tão para congelar o valor no visualizador. O visualizador mostra adicionalmente o símbolo do cadeado. Pressione o botão novamente para fazer mais uma medição. Após a medição, desligue o medidor de humidade pressionando o botão . -
Página 97: Resolução De Avarias
Resolução de avarias Erro Possíveis causas e soluções Verifique se o aparelho está O resultado de medição é ajustado para o material cor- obviamente reto. Verifique se os pinos de alto ou baixo medição estão corretamente demais. pressionados contra o material. Repita o processo de medição. -
Página 98: Armazenamento
Limpe o aparelho apenas com um pano ligeira- mente humedecido e com um detergente suave. Limpe as sondas com um pano ligeiramente humedecido e seque-as depois com um pano seco. Antes de cada utilização, verifique o apare- lho quanto a danos exteriores visíveis. Antes de cada utilização, verifique as sondas quanto a danificações. -
Página 99: Garantia
As pilhas avariadas ou gastas têm de ser recicla- das de acordo com a diretiva 2006 / 66 /CE e as suas alterações. Entregue as pilhas e / ou o aparelho nos locais específicos destinados à sua recolha. Danos ambientais devido à eli- minação incorreta das pilhas! As pilhas não podem ser eliminadas no lixo doméstico. - Página 100 de material ou de fabrico, o aparelho será repa- rado ou substituído por nós – segundo a nossa escolha – e sem qualquer custo. Esta garantia ex- pira se o aparelho estiver danificado, se não for devidamente utilizado ou se não for efectuada a devida manutenção.
- Página 101 OWIM GmbH & Co. KG Stiftsbergstraße 1 D-74167 Neckarsulm Model-No.: HG01701C Version: 09 / 2016 Stand der Informationen · Last Information Update · Version des informations · Stand van de informatie · Stav informací Estado de las informaciones Estado das informações: 08 / 2016 Ident.-No.: HG01701C082016-8...