
Manuales relacionados para LiftMaster Cloud CAP2D


Resumen de contenidos para LiftMaster Cloud CAP2D
- Página 1 LiftMaster Cloud Connected Access Portal 2-Door Controller INSTALLATION MANUAL...
-
Página 2: Tabla De Contenido
Electrical Ratings............6 Wire Specifi cations ............7 PRE-INSTALL Internet Service ............. 8 CP# for Controller ............8 Setup a LiftMaster Cloud Account ......... 8 Mount the Bracket ............9 WIRING Connect Power ............10 NETWORK Connect Internet ............11 ACCESS CONTROL Admin Mode .............. -
Página 3: Introduction
INTRODUCTION PRE-INSTALL WIRING NETWORK ACCESS CONTROL INSTALL Safety Safety Symbol and Signal Word Review When you see these Safety Symbols and Signal Words on MECHANICAL the following pages, they will alert you to the possibility of serious injury or death if you do not comply with the warnings that accompany them. -
Página 4: Controller Overview
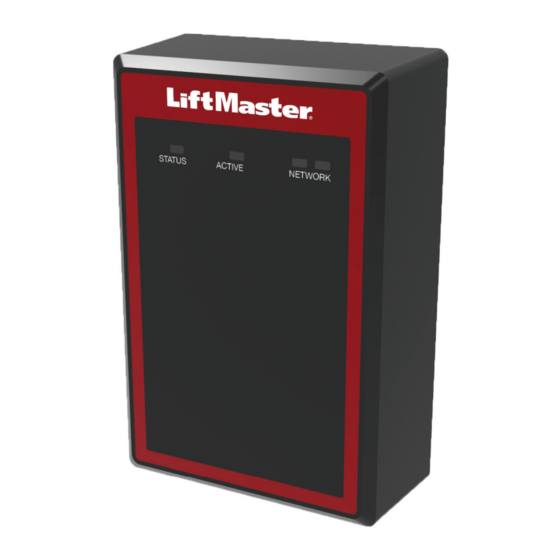
INTRODUCTION PRE-INSTALL WIRING NETWORK ACCESS CONTROL INSTALL Controller Overview FRONT VIEW ACTIVE LED OFF/Solid: System is starting STATUS LED Blinking: System operational. Solid: System has power NETWORK LED Orange LED: 100MBit Link Blue LED: Network activity Right Blue LED: Good connection to the network Control Board Overview LAN/PoE Connector ADMINISTRATIVE USB... -
Página 5: Carton Inventory
INTRODUCTION PRE-INSTALL WIRING NETWORK ACCESS CONTROL INSTALL Carton Inventory • Door Controller • USB Cable • Diodes • Installation Manual Tools Needed • PH2 Phillips Screwdriver • Precision 1/8" Flat or PH0 Phillips Screwdriver • 1/4" Nut Driver • Drill/Driver •... -
Página 6: Specifi Cations
INTRODUCTION PRE-INSTALL WIRING NETWORK ACCESS CONTROL INSTALL Specifi cations CAP2D Capacity People: 25,000 / Events: 8,000 CAP2D Operating Temperature Range 32°F to 125°F (0°C to 49°C) CAP2D Operational Humidity 5% to 95% non-condensing Storage and Shipping Temperature Range -40°F to 149°F (-40°C To 65°C) Wiegand Inputs (2) 26Bit, 30Bit. -
Página 7: Wire Specifi Cations
Up to 24 feet (7.3 m) Local Area Network (LAN) 8-Conductor, 24 AWG Twisted pair 328 feet* (100 m) CAT 5/6 Network Cable Door Strike/LiftMaster Gate Operator 2-Conductor 18-22 AWG Shielded 100 - 250 feet (30.5 - 76.2 m) Magnetic Lock 2-Conductor 18-22 AWG 50 - 125 feet (15.2 - 38.1 m) -
Página 8: Internet Service
If you do not have a LiftMaster Cloud Account, call LiftMaster Customer Care at 800.323.2276 to activate a LiftMaster Hosted Cloud Service account. You will get a welcome email from LiftMaster. Accept the email invitation and register or login to your account. -
Página 9: Mount The Bracket
INTRODUCTION PRE-INSTALL WIRING NETWORK ACCESS CONTROL INSTALL Mount the Bracket Install an electrical box in the desired mounting location. NOTE: Use 4" square electrical box (minimum of 1 1/2" deep) with a single-gang plaster ring. Use Wiremold ® V5744S or BW35 for surface-mount installations. -
Página 10: Connect Power
INTRODUCTION PRE-INSTALL WIRING NETWORK ACCESS CONTROL INSTALL Connect Power USING PoE (POWER OVER ETHERNET): DO NOT connect a DC power supply if Power Over Ethernet (PoE) is selected Connect Ethernet cable to the Ethernet port on the control board. and connected. Board may be damaged Move PoE jumper to Power over Ethernet (PoE) setting. -
Página 11: Connect Internet
Modem Static IP (Optional) LiftMaster recommends the CAP2D be used in Dynamic IP (DHCP) mode, but it can be set to Static IP if required. 1. Connect the CAP2D to your laptop using the included c. The login page displays: USB connector. -
Página 12: Admin Mode
“Door Closed” condition. • This circuit provides door status information (open/closed) to the control panel so LiftMaster Cloud can take appropriate action locally, or send email notifi cations if necessary. 2. Wire the DOOR LOCK RELAY terminal block. -
Página 13: Wiring Rex And Doors
6. Install MOVs. a. For LiftMaster Gate operators, install the MOV across the NC and Common terminals, as close as possible to the electric strike or latch. This will normally be at the connection from the fi eld-installed wiring to the pigtail or screw terminals of the electronic strike or latch. -
Página 14: Operation
Normal Standby Operation: The CAP2D is always in ready state and is monitoring its inputs for changes. If any of the inputs change state, the CAP2D responds locally and communicates the change to LiftMaster Cloud. Reader/Keypad Operation: The CAP2D is designed to work with an approved reader and keypad using standard 26 bit Wiegand format. -
Página 15: Gate Access
INTRODUCTION PRE-INSTALL WIRING NETWORK ACCESS CONTROL INSTALL Gate Access Disconnect power BEFORE making electrical connections. Below is an example of a wiring setup for gate access. Gate access can be wired to Door 1 or 2. NOTE: Power Supplies shall be UL Listed Commercial 294 or 603 power limited output Power Supplies. NOTES: •... -
Página 16: Door Access
INTRODUCTION PRE-INSTALL WIRING NETWORK ACCESS CONTROL INSTALL Door Access Disconnect power BEFORE making electrical connections. Below is an example of a wiring setup for door access. Door access can be wired to Door 1 or 2. NOTE: Power Supplies shall be UL Listed Commercial 294 or 603 power limited NOTES: •... -
Página 17: Install The Cap2D
I received an email saying the CAP2D was offl ine. Check LiftMaster Cloud for latest online/offl ine status. If still offl ine check local Internet connection and power to the CAP2D. Sometimes this is also triggered during regular maintenance on the LiftMaster Cloud Servers. CAP2D stores the database locally and continues to provide access control without an Internet connection. -
Página 18: Confi Guration Sheet
Confi guration Sheet Record device information and confi guration settings below. Controller Name: NOTE: Any user of the system is subject to the terms outlined in the product EULA. Notes: DEVICE CONFIGURATION: DOOR 1 DOOR/GATE NAME: WIEGAND STATUS INPUTS EOL (Y / N) PRIMARY RELAY AUXILIARY RELAY OUTPUTS... -
Página 19: Legal Disclaimers
Warranty LiftMaster (“Seller”) warrants to the fi rst purchaser of this product, for the structure in which this product is originally installed, that it is free from defect in materials and/or workmanship for a period of two years from the date of purchase. - Página 20 Contrôleur de 2 portes à portail d’accès connecté LiftMaster Cloud MANUEL D’INSTALLATION...
- Página 21 Caractéristiques électriques .......... 6 Caractéristiques techniques du câblage ......7 PRÉINSTALLATION Service Internet ............. 8 CP pour contrôleur ........... 8 Confi guration d’un compte LiftMaster Cloud ....8 Montage du support ............9 CÂBLAGE Connecter l’alimentation ..........10 RÉSEAU Connecter l’appareil à Internet........11 CONTRÔLE D’ACCÈS...
-
Página 22: Sécurité
INTRODUCCION PRÉINSTALLATION CÂBLAGE RÉSEAU CONTRÔLE D'ACCÈS CONTRÔLE D'ACCÈS Sécurité Examen des symboles de sécurité et des mots de signalement ATTENTION MÉCANIQUE Les symboles de sécurité et mots de signalement qui fi gurent sur les pages suivantes avisent le lecteur de la possibilité de blessures graves ou de mort en cas de non-conformité... -
Página 23: Présentation Du Contrôleur
INTRODUCCION PRÉINSTALLATION CÂBLAGE RÉSEAU CONTRÔLE D'ACCÈS CONTRÔLE D'ACCÈS Présentation du contrôleur VUE AVANT DEL ACTIVE ÉTEINTE/En continu : Le système démarre Diode d’état Clignotante : Le système est fonctionnel. En continu : Le système est sous tension DEL DU RÉSEAU DEL orange : Lien 100MBit DEL bleu : Activité... -
Página 24: Contenu De L'emballage
INTRODUCCION PRÉINSTALLATION CÂBLAGE RÉSEAU CONTRÔLE D'ACCÈS CONTRÔLE D'ACCÈS Contenu de l’emballage • Contrôleur de porte • Câble USB • Diodes • Manuel d’installation Outils nécessaires • Tournevis cruciforme PH2 • Tournevis à tête plate de précision 1/8 po ou cruciforme PH0 •... -
Página 25: Caractéristiques Électriques
INTRODUCCION PRÉINSTALLATION CÂBLAGE RÉSEAU CONTRÔLE D'ACCÈS CONTRÔLE D'ACCÈS Spécifi cations Capacité du CAP2D Personnes : 25 000, événements : 8 000 Plages de températures de service du CAP2D 0 °C à 49 °C (32 °F à 125 °F) Humidité de service du CAP2D 5 % à 95 % sans condensation Plage de températures de rangement et -40 °C à... -
Página 26: Caractéristiques Techniques Du Câblage
100* m (328 pi) CAT 5/6 câble de réseau Barre antipanique/actionneur de barrière à 2 conducteurs, blindé 18 à 22 AWG 30,5 à 76,2 m (100 à 250 pi) LiftMaster Verrouillage magnétique à 2 conducteurs, 18 à 22 AWG 15,2 à 38,1 m (50 à 125 pi) INTRODUCCION PRÉINSTALLATION CÂBLAGE RÉSEAU... -
Página 27: Service Internet
été créé, le compte LiftMaster Cloud utilisera le même mot de passe. 1. Si aucun compte LiftMaster Cloud n’a été créé, appeler l’assistance à la clientèle au 800 323.2276 pour activer un compte LiftMaster de service hébergé dans l’infonuagique. -
Página 28: Montage Du Support
INTRODUCCION PRÉINSTALLATION CÂBLAGE RÉSEAU CONTRÔLE D'ACCÈS CONTRÔLE D'ACCÈS Montage du support Installer un coffret de branchement à l’emplacement de montage désiré. REMARQUE : Se servir d’un coffret de branchement carré de 10 cm (4 po) (d’une profondeur minimale de 3,8 cm ou 1 1/2 po) avec un anneau à plâtre simple. Utiliser Wiremold ®... -
Página 29: Connecter L'alimentation
INTRODUCCION PRÉINSTALLATION CÂBLAGE RÉSEAU CONTRÔLE D'ACCÈS CONTRÔLE D'ACCÈS Connecter l’alimentation PAR PoE (ALIMENTATION PAR CÂBLE ETHERNET) : NE PAS connecter une alimentation c. c. si l’alimentation par câble Ethernet (PoE) a été 1. Connecter le câble Ethernet au port Ethernet sur le tableau de sélectionnée et connectée. -
Página 30: Connecter L'appareil À Internet
à un ordinateur. IP statique (en option) LiftMaster recommande que le CAP2D soit utilisé en mode d’IP dynamique (DHCP), mais il peut être réglé à une IP statique au besoin. 1. Connecter le CAP2D à un ordinateur avec le connecteur c. -
Página 31: Mode Admin
• Ce circuit indique l’état de la porte (ouverte/fermée) au tableau de commande AVERTISSEMENT afi n que LiftMaster Cloud prenne la mesure appropriée localement ou envoie des avis par courriel s’il y a lieu. 2. Brancher le bornier du RELAIS DE SERRURE DE PORTE. - Página 32 DEL rouge. 6. Installer les varistances (MOV). a. Pour les actionneurs de barrière LiftMaster, installer les varistances aux bornes NC et communes, aussi près que possible de la barre antipanique ou de la serrure coup de poing. Elles s’installent normalement sur la connexion venant du câblage du site sur les bornes vissées ou en tire-bouchon du pêne ou de la...
-
Página 33: Opération
Fonctionnement de veille normal : Le CAP2D est toujours prêt à l’emploi et surveille ses entrées pour détecter tout changement. Si une entrée quelconque change d’état, le CAP2D réagit localement et communique le changement à LiftMaster Cloud. Fonctionnement du lecteur/clavier : Le CAP2D a été conçu pour fonctionner avec un lecteur et un clavier utilisant le format Wiegand standard de 26 bits. -
Página 34: Accès À La Barrière
INTRODUCCION PRÉINSTALLATION CÂBLAGE RÉSEAU CONTRÔLE D'ACCÈS CONTRÔLE D'ACCÈS Accès à la barrière Déconnecter l’alimentation AVANT d’effectuer des connexions électriques. Un exemple de confi guration de câblage pour accès à la barrière est présenté ci-dessous. L’accès à la barrière peut être câblé à la porte 1 ou 2. REMARQUE : Les sources d’alimentation doivent être des sources commerciales homologuées UL 294 ou 603 à... -
Página 35: Accès À La Porte
INTRODUCCION PRÉINSTALLATION CÂBLAGE RÉSEAU CONTRÔLE D'ACCÈS CONTRÔLE D'ACCÈS Accès à la porte Déconnecter l’alimentation AVANT d’effectuer des connexions électriques. Un exemple de confi guration de câblage pour accès à la porte est présenté ci-dessous. L’accès à la porte peut être câblé à la porte 1 ou 2. REMARQUE : Les sources d’alimentation doivent être des sources commerciales homologuées REMARQUES : UL 294 ou 603 à... -
Página 36: Dépannage
ADD DEVICES régulière des serveurs LiftMaster Cloud ait pour effet de déclencher ce message. Le CAP2D stocke la base de données localement et continue de fournir un contrôle de l’accès sans connexion à Internet. Les changements d’activité et de la base de données ne sont échangés avec LiftMaster Cloud que lorsque le CAP2D est en ligne. -
Página 37: Fiche De Confi Guration
Fiche de confi guration Noter l’information sur l’appareil et les paramètres de confi guration ci-dessous. Nom du contrôleur : REMARQUE : Tout utilisateur de ce système est soumis aux conditions décrites dans l’accord d’utilisation du produit. Remarques : CONFIGURATION DU DISPOSITIF : PORTE 1 NOM DE LA PORTE/BARRIÈRE : WIEGAND... -
Página 38: Avis Légaux
Pour les applications homologuées C-UL, l’unité doit être installée conformément à la partie 1 du Code canadien de l’électricité. Déni de responsabilité et restrictions concernant la documentation L’information contenue dans ce document peut être modifi ée sans préavis et ne constitue pas un engagement de la part de LiftMaster. Pour obtenir l’information la plus à jour, visiter www.LiftMaster.com. - Página 39 Controlador de 2 puertas del Portal de acceso conectado LiftMaster Cloud MANUAL DE INSTALACIÓN...
- Página 40 Especifi caciones del cable ..........7 PREINSTALACIÓN Servicio de Internet ............8 # de panel de control para el controlador ...... 8 Confi gurar una Cuenta Cloud de LiftMaster....8 Montaje de la ménsula ..........9 CABLEADO Conectar la alimentación ..........10 Conectar a Internet ............
-
Página 41: Introducción
INTRODUCCIÓN PREINSTALACIÓN CABLEADO CONTROL DE ACCESO INSTALACIÓN Seguridad Revisión de los símbolos y términos de seguridad. Estas advertencias y símbolos de seguridad que aparecen a lo largo de este manual le alertarán de la existencia de riesgo de MECÁNICA una lesión seria o de muerte si no se siguen las instrucciones correspondientes. -
Página 42: Descripción General Del Controlador
INTRODUCCIÓN PREINSTALACIÓN CABLEADO CONTROL DE ACCESO INSTALACIÓN Descripción general del controlador VISTA FRONTAL LED ACTIVO APAGADO/sólido: El sistema se está iniciando LED DE ESTADO Parpadeo: El sistema está operativo. Sólido: El sistema tiene alimentación LED DE LA RED LED naranja: Enlace de 100MBit STATUS ACTIVE NETWORK... -
Página 43: Contenido De La Caja
INTRODUCCIÓN PREINSTALACIÓN CABLEADO CONTROL DE ACCESO INSTALACIÓN Contenido de la caja • Controlador de puerta • Cable USB • Diodos • Manual de instalación Herramientas necesarias • Destornillador Phillips PH2 • Destornillador Phillips de precisión de 1/8 pulg. plano o PH0 •... -
Página 44: Especifi Caciones
INTRODUCCIÓN PREINSTALACIÓN CABLEADO CONTROL DE ACCESO INSTALACIÓN Especifi caciones Capacidad del CAP2D Personas: 25,000 / Eventos: 8,000 Rango de temperatura de servicio del CAP2D 32 °F a 125 °F (0 °C a 49 °C) Humedad operativa del CAP2D de 5% a 95% sin condensación Rango de temperatura de almacenamiento y -40 °F a 149 °F (-40 °C a 65 °C) transporte... -
Página 45: Especifi Caciones Del Cable
CAT 5/6 Cerradura de la puerta/Operador de portón 2 Conductores de 18-22 AWG blindado 30.5 - 76.2 m (100 - 250 pies) LiftMaster Bloqueo magnético 2 Conductores de 18-22 AWG 15.2 - 38.1 m (50 - 125 pies) Cierre de contacto seco (la mayoría de los 2 Conductores de 18-22 AWG blindado 152.4 - 762 m (500 - 2500 pies) -
Página 46: Servicio De Internet
® , su cuenta LiftMaster Cloud tendrá la misma contraseña. Si no tiene una cuenta LiftMaster Cloud, llame al Centro de Atención al Cliente de LiftMaster al 800.323.2276 para activar una cuenta de Servicio en la Nube hospedada por LiftMaster. -
Página 47: Montaje De La Ménsula
INTRODUCCIÓN PREINSTALACIÓN CABLEADO CONTROL DE ACCESO INSTALACIÓN Montaje de la ménsula Instale una caja eléctrica en la ubicación de montaje deseada. NOTA: Use una caja eléctrica cuadrada de 10 cm (4 pulg.) (con una profundidad mínima de 3.8 cm o 1 1/2 pulg.) y un anillo de salida única. -
Página 48: Cableado
INTRODUCCIÓN PREINSTALACIÓN CABLEADO CONTROL DE ACCESO INSTALACIÓN Conectar la alimentación SI USA PoE (ALIMENTACIÓN A TRAVÉS DE ETHERNET): NO conecte un suministro de energía de CC si Alimentación a través de Ethernet (PoE) 1. Conecte el cable Ethernet al puerto Ethernet en la tarjeta de control. está... -
Página 49: Conectar A Internet
PC. IP estática (Opcional) LiftMaster recomienda usar el CAP2D en modo de IP dinámica (DHCP), pero se puede confi gurar con IP estática si es necesario. 1. Conecte el CAP2D a su computadora portátil con el c. -
Página 50: Modo Administrador
• Este circuito brinda información sobre el estado de la puerta (abierta/cerrada) al panel de control, de modo que LiftMaster Cloud pueda adoptar una acción adecuada de manera local, o enviar notifi caciones por correo electrónico si es necesario. - Página 51 6. Instale MOV. a. En los operadores de portón LiftMaster, instale el MOV en los terminales NC y Común, lo más cerca posible de la cerradura o enganche eléctricos. Esto normalmente se encontrará en la conexión desde el cableado instalado en campo hasta los terminales roscados o de tornillo de la cerradura o enganche electrónicos.
-
Página 52: Operación
Funcionamiento normal en espera: El CAP2D siempre está preparado y monitoreando si se producen cambios en las entradas. Si alguna de las entradas cambia de estado, el CAP2D responde localmente y comunica el cambio a LiftMaster Cloud. Funcionamiento con lector/teclado: El CAP2D está diseñado para trabajar con un lector y un teclado aprobados que usan un formato estándar Wiegand de 26 bits. -
Página 53: Acceso De Portón
INTRODUCCIÓN PREINSTALACIÓN CABLEADO CONTROL DE ACCESO INSTALACIÓN Acceso de portón Desconecte la alimentación ANTES de realizar las conexiones eléctricas. A continuación encontrará un ejemplo de una confi guración de cableado para el acceso de portón. El acceso de portón se puede conectar por cable a la puerta 1 o 2. NOTA: Las fuentes de alimentación deberán ser de salida limitada de potencia 294 o 603 comerciales con certifi... -
Página 54: Acceso De Puerta
INTRODUCCIÓN PREINSTALACIÓN CABLEADO CONTROL DE ACCESO INSTALACIÓN Acceso de puerta Desconecte la alimentación ANTES de realizar las conexiones eléctricas. A continuación encontrará un ejemplo de una confi guración de cableado para el acceso de puerta. El acceso de puerta se puede conectar por cable a la puerta 1 o 2. NOTA: Las fuentes de alimentación deberán ser de salida limitada de potencia 294 o 603 comerciales con certifi... -
Página 55: Instalación
Recibí un correo electrónico donde decía que el CAP2D estaba fuera de línea. Consulte en LiftMaster Cloud el último estado en línea o fuera de línea. Si aún está fuera de línea verifique la conexión local a Internet y el suministro de energía al CAP2D. A veces, esto también sucede durante el mantenimiento regular en los servidores de LiftMaster... -
Página 56: Hoja De Confi Guración
Hoja de confi guración A continuación, registre la información del dispositivo y los ajustes de confi guración. Nombre del controlador: NOTA: Todo usuario del sistema está sujeto a los términos que se detallan en el Contrato de Licencia de Usuario Final (EULA). Notas: CONFIGURACIÓN DEL DISPOSITIVO: PUERTA 1... -
Página 57: Avisos Legales
LiftMaster. La información contenida en este documento o dentro del mismo producto se considera propiedad exclusiva de LiftMaster. Toda la información de este documento o dentro de los productos de hardware y software en sí está protegida por los derechos de autor u otras leyes de propiedad intelectual de los Estados Unidos.