
Manuales relacionados para Oster TSSTTVCG02


Resumen de contenidos para Oster TSSTTVCG02
- Página 1 Countertop Oven User Manual Horno para Manual de Instrucciones Mostrador TSSTTVCG02 MODEL/MODELO Visit us at www.oster.com P.N. 157157...
-
Página 2: Important Safeguards
IMPORTANT SAFEGUARDS When using electrical appliances, basic safety precautions should always be followed, including the following: READ AND SAVE THESE INSTRUCTIONS • R EAD ALL INSTRUCTIONS, PRODUCT LABELS AND WARNINGS BEFORE USING THE COUNTERTOP OVEN. • D o not touch hot surfaces. Always use oven mitts when handling hot materials and allow metal parts to cool before cleaning. Allow the unit to cool thoroughly before putting in or taking off parts. Always use the oven handles when moving the unit. NOTE: When opening the oven, be sure to grasp the center of the handle as the ends of the handle are hot. • W hen the unit is not in use and before cleaning, unplug the countertop oven from the wall outlet. NOTE: Make sure the oven is turned off before unplugging. • T o protect against risk of electrical shock, do not immerse the appliance in water or any other liquids. - Página 3 • A fire may occur if the countertop oven is covered or touching flammable materials, including curtains, draperies, walls, etc., when in operation. Do not store any items on top of the appliance when in operation. • W hen using countertop oven, pull the unit out a minimum of 6 inches away from the wall or other cords. • D o not store any materials, other than manufacturer’s recommended accessories, in this unit when not in use. • D o not place any flammable materials in oven, such as paper, cardboard, plastic or any materials that may catch fire or melt. • D o not cover the oven tray with metal foil. This will cause overheating of the appliance. • O versized foods or metal utensils must not be inserted in the appliance as they may create a fire or risk of electrical shock. • D o not clean with metal scouring pads. Pieces can break off the pad and touch electrical parts involving a risk of electrical shock. • U se extreme caution when removing pan or disposing of hot grease or other hot liquids. • T o turn this appliance off, return all controls to the “OFF” position and remove cord from outlet.
-
Página 4: L Earning A Bout Y Our C Ountertop O Ven
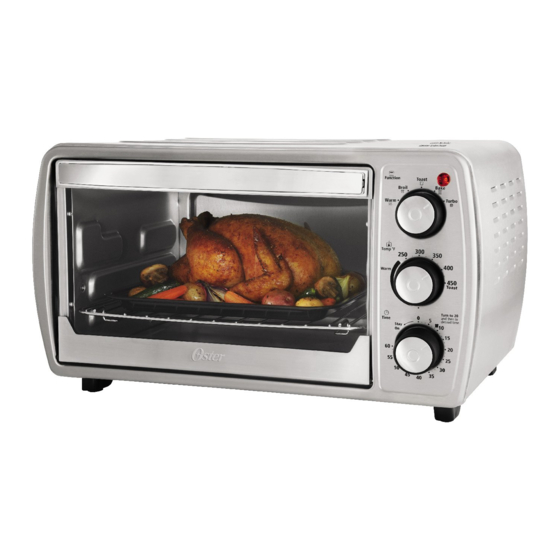
earning bout ountertop 1. Function Selector Knob – Select cooking function by turning knob to desired setting. (See Figure 1) 2. Temperature Control Knob – Adjust the dial thermostat to the desired temperature. (See Figure 2) 3. Timer Control Knob with Bell Signal – Set cooking time up to 60 minutes. Will automatically turn the oven OFF at the end of the cooking time. - Página 5 Figure 1 Figure 2 Figure 3 8. Baking Pan & Cookie sheet in one – Use for all your baking needs. See “Positioning Pan” section. 9. Easy Clean Interior Walls – Allows fast clean up. reparing ountertop ven for the irst NOTE: During initial start up you may detect a slight smell and/or smoke.
- Página 6 . 4) se the oast unCtion Select desired rack position. (See “Positioning Rack” Section) NOTE: Different types of bread require different settings. Lighter breads and waffles require lighter setting. Darker breads, muffins and English muffins require a darker setting. Step 1. Place food on Wire Racks. Step 2.
- Página 7 bout urbo onveCtion What is Turbo Convection Heat? Answer: In your Countertop Oven there is a built in fan that circulates the hot air in the oven chamber cooking your food faster and more evenly. How do I adjust the time for Turbo Convection? Answer: On average, the Turbo function will shorten the cooking time, but it varies by food.
- Página 8 . 7) se the unCtion Step 1. Place baking pan with food inside on wire rack. Step 2. Close glass door completely. Step 3. Turn the Function dial to Warm. Step 4. Turn the Temperature dial past “Warm”. Step 5. Turn the Timer to desired warming time.* Step 6.
- Página 9 ositioning • To accommodate a wide variety of foods the oven has two rack positions. The rack can be inserted in the oven in the upper or lower rack guides. The rack will fit into either of the rack guides inside of the Countertop Oven. (See Figure Below) •...
-
Página 10: C Leaning Y Our C Ountertop
ositioning • To accommodate a wide variety of foods the oven has two pan positions. The pan can be placed on top of the rack or inserted into the guide rails below the rack. (See Figure Below) • Before removing the pan allow the unit to cool. •... - Página 11 Combine the sugar, margarine and cinnamon in a small bowl with a fork until well blended. Spread each bread slice with equal portions of the mixture. In an Oster Toaster Oven, toast until the sugar is melted and the bread is ®...
- Página 12 1 or 2 sprigs each of fresh rosemary 1 ½ cups chicken broth and fresh thyme Preheat Oster Toaster Oven to 450°F. Sprinkle vegetables in bottom of an ® 11 inch baking pan with 1 ½ - 2 inches sides and top with turkey breast.
- Página 13 3 tablespoons fresh rosemary, stemmed and chopped Preheat Oster Toaster Oven to 375°F. Coat pork with Dijon mustard. In ® a small bowl, combine 2 tablespoons of rosemary, 2 tablespoons of thyme, salt, pepper and garlic. Spread over pork tenderloins and place in a large baking dish that fits comfortably inside toaster oven.
-
Página 14: Potential Cause
eLpfuL roubLeshooting PROBLEM POTENTIAL CAUSE SOLUTION Overcooked / Undercooked • I ncorrect temperature • Y ou may have to adjust the Foods. or time setting. time and temperature to desired taste. • B ecause your Countertop Oven is smaller than your regular oven, it will heat up faster and generally cook in shorter periods of time. • R efer to “Positioning Rack” • Rack placement. Section, Page English-9. Rack may need to be adjusted to accommodate food. Burnt Smell. • F ood build-up inside • R efer to “Cleaning Your oven, on heating Countertop Oven” Section, elements or in crumb Page English-10. - Página 15 otes English-15...
- Página 16 1 Year Limited Warranty Sunbeam Products, Inc. doing business as Jarden Consumer Solutions or if in Canada, Sunbeam Corporation (Canada) Limited doing business as Jarden Consumer Solutions (collectively “JCS”) warrants that for a period of one year from the date of purchase, this product will be free from defects in material and workmanship.
- Página 17 This warranty gives you specific legal rights, and you may also have other rights that vary from province to province, state to state or jurisdiction to jurisdiction. How To Obtain Warranty Service In the U.S.A. If you have any question regarding this warranty or would like to obtain warranty service, please call 1-800-334-0759 and a convenient service center address will be provided to you.
-
Página 18: Precauciones Importantes
PRECAUCIONES IMPORTANTES Cuando use aparatos eléctricos, siempre deben tomarse algunas precauciones básicas de seguridad, incluyendo las siguientes: LEA Y GUARDE ESTAS INSTRUCCIONES • L EA TODAS LAS INSTRUCCIONES, LAS ETIQUETAS EN EL PRODUCTO Y LAS ADVERTENCIAS, ANTES DE USAR EL HORNO TOSTADOR. • N o toque las superficies calientes. Siempre use guantes cuando maneje materiales calientes y permita que las partes metálicas se enfríen antes de limpiar. Permita que la unidad se enfríe completamente antes de poner o quitar partes. Siempre use las asas del horno cuando mueva la unidad. NOTA: Cuando abra el horno, asegúrese de agarrar la manilla por el centro ya que los extremos están calientes. • D esconecte el horno tostador del tomacorriente cuando la unidad no esté en uso y antes de limpiarla. NOTA: Verifique que el horno tostador esté apagado antes de desconectar. - Página 19 • P uede ocurrir un incendio si el horno tostador está en operación y está en contacto o cubierto con materiales inflamables, incluyendo cortinas, tapicería, paredes, etc. No coloque ningún objeto sobre el aparato cuando esté en operación. • Al usar hornos para mostrador, asegurar de posicionarlo a un mínimo de 6 pulgadas de distancia de la pared u de otros cables. • C uando esta unidad no esté en operación, no almacene dentro de él ningún material que no sea un accesorio recomendado por el fabricante. • N o coloque dentro del horno ningún material inflamable como papel, cartón, plástico o cualquier material que se pueda incendiar o derretir. • N o cubra la charola para migajas o ninguna parte del horno con papel aluminio o metálico. Esto puede causar el sobrecalentamiento del aparato. • L os alimentos grandes o utensilios metálicos no deben ser introducidos en el horno tostador ya que pueden causar incendios o descargas eléctricas. • N o limpie con esponjas o fibras metálicas. Se pueden desprender trozos de la esponja o fibra y tocar partes eléctricas creando el riesgo de descargas eléctricas. • U se extrema precaución cuando retire la sartén o cuando deseche la grasa caliente u otro líquido caliente. • P ara apagar este aparato, regrese todos los controles a la posición de APAGADO (“OFF”) y remueva el cordón del tomacorriente.
- Página 20 nformaCión obre su orno para ostrador 1. Perilla selectora de función - Seleccione la función de cocción girando la perilla a la graduación deseada. (Ver la Figura 1) 2. Perilla de control de temperatura - Ajusta el termostato a la temperatura deseada.
- Página 21 Figura 1 Figura 2 Figura 3 8. Combinación de bandeja para hornear y bandeja para galletas - Úselas para todas sus tareas de horneado y asado. Consulte la sección de “Posicionamiento de la Bandeja”. 9. Paredes interiores fáciles de limpiar - Permiten la limpieza rápida. reparaCión para orno para ostrador por...
- Página 22 so de La unCión de oastar . 4) er La Elija la posición deseada para la rejilla. (Consulte la sección “Posicionamiento de la rejilla”) NOTA: la graduación variará dependiendo del tipo de pan. Los panes más blancos y los gofres (waffle) requieren graduaciones de tostado más claro.
- Página 23 sar La unCión de urbo ) (v . 5) orneado por onveCCión er La La función de Turbo (horneado por convección) enciende un ventilador incorporado que circula el aire caliente en la cámara del horno cocinando su comida más rápido y más parejo.
- Página 24 reguntas freCuentas sobre La funCión urbo horneado por ConveCCión ¿Qué es Turbo (horneado por convección)? Respuesta: En su horno para mostrador existe un ventilador incorporado que circula el aire caliente en la cámara del horno cocinando su comida más rápido y más parejo.
- Página 25 so de La unCión de aLentar . 7) er La Paso 1. Coloque una bandeja para horneado con alimento en la rejilla de alambre. Paso 2. Cierre completamente la puerta de vidrio. Paso 3. Gire la perilla de función a la posición “Warm” (Calentar).
- Página 26 ** ADVERTENCIA: Los alimentos cocidos y la rejilla de metal pueden estar muy calientes, manipule con cuidado. No deje el horno para mostrador sin supervisión. osiCionamiento de La ejiLLa • Para poder contener una amplia variedad de alimentos el horno tiene una rejilla reversible y dos posiciones para la rejilla.
- Página 27 osiCionamiento andeja • El horno posee dos posiciones para colocar la bandeja lo cual le permite adaptarse a una amplia variedad de alimentos. La bandeja puede colocarse sobre la rejilla o introducirse por las guías debajo de la rejilla. (Ver la figura abajo) •...
- Página 28 6 onzas de queso Brie ¼ de taza de queso parmesano rayado 1 cebolla pequeña picada Fije el horno tostador Oster a “broil” (asar) y pre caliente. Arregle el pan ® en una capa en un molde para hornear, luego unte los lados de arriba con dos cucharadas de aceite de oliva y sazone con sal y pimienta.
- Página 29 Unte cada tajada de pan con porciones iguales de la mezcla. En un Horno Tostador Oster, ponga a tostar hasta que el azúcar se derrita y el pan quede dorado de acuerdo a su gusto.
- Página 30 ¼ de pulgada (0.6cm) 1 limón, cortado por la mitad 1 ½ taza de caldo de gallina Precaliente el horno tostador Oster a 450°F. Esparza los vegetales al fondo ® de un molde para hornear de 11 pulgadas (28 cm) por 1 ½ a 2 pulgadas (3.5 a 5 cm) de alto y ponga encima la pechuga de pavo.
- Página 31 3 cucharadas de romero fresco, adicional para las papas cocido al vapor y picado Precaliente el horno tostador Oster a 375°F. Cubra el cerdo con la mostaza ® Dijón. En un tazón pequeño, combine 2 cucharadas de romero, 2 cucharadas de tomillo, sal, pimienta y ajos.
-
Página 32: Posibles Causas
Ú onsejos tiLes iagnóstiCo de robLemas PROBLEMA POSIBLES CAUSAS SOLUCIÓN Alimentos crudos/ • T emperatura o • T al vez tenga que ajustar el tiempo pasados de cocción. programación del y la temperatura a gusto. tiempo incorrectas. • D ebido a que su horno para mostrador es más pequeño que su horno común, se calentará más rápido y generalmente cocinará en períodos más cortos. • Ubicación de la rejilla. • V ea la sección “Colocación de la rejilla”, en la página español-26. La rejilla puede necesitar ajustes para contener los tipos de alimentos. Olor a quemado. • A limentos atascados • V ea la sección “Limpieza del dentro del horno, horno para mostrador”, página... - Página 33 otas Español-33...
- Página 34 Garantía Limitada de 1 Año Sunbeam Products, Inc. operando bajo el nombre de Jarden Consumer Solutions, o en Canadá, Sunbeam Corporation (Canada) Limited operando bajo el nombre de Jarden Consumer Solutions, (en forma conjunta, “JCS”), garantiza que por un período de un año a partir de la fecha de compra, este producto estará...
- Página 35 JCS no será responsable de ningún tipo de daño que resulte de la compra, uso o mal uso del producto, o por la imposibilidad de usar el producto, incluidos los daños incidentales, especiales, emergentes o similares, o la pérdida de ganancias, ni de ningún incumplimiento contractual, sea de una obligación esencial o de otra naturaleza, ni de ningún reclamo iniciado contra el comprador por un tercero.
- Página 36 For product questions contact: Jarden Consumer Service USA: 1.800.334.0759 Canada: 1.800.667.8623 www.oster.com © 2012 Sunbeam Products, Inc. doing business as Jarden Consumer Solutions. All rights reserved. Distributed by Sunbeam Products, Inc. doing business as Jarden Consumer Solutions, Boca Raton, Florida 33431.