
Manuales relacionados para universalblue UVTBLANCO19-52


Resumen de contenidos para universalblue UVTBLANCO19-52
- Página 1 MANUAL DE INSTRUCCIONES INSTRUCTION MANUAL UVTBLANCO19-52 Ventilador de techo Ceiling fan www.universalblue.es P.I. Media Legua C/Decenio,1 30565 Las Torres de Cotillas (Murcia)
-
Página 2: Tabla De Contenido
Ventilador de techo Ceiling fan ÍNDICE ESPAÑOL INSTRUCCIONES DE SEGURIDAD ................3 CARACTERÍSTICAS DEL PRODUCTO ................. 4 MONTAJE E INSTALACIÓN ..................6 FUNCIONAMIENTO ....................15 LIMPIEZA Y MANTENIMIENTO ................. 16 SERVICIO POSTVENTA ....................16 INFORMACION INHERENTE AL MEDIOAMBIENTE ..........17 ENGLISH IMPORTANT SAFEGUARDS .................. -
Página 3: Español
ESPAÑOL Felicidades por haber adquirido este producto. Le recomendamos que dedique algún tiempo a leer cuidadosamente este Manual de Instrucciones / Instalación con el fin de hacer un buen uso del mismo. Lea cuidadosamente todas las instrucciones de seguridad antes de utilizar el aparato y conserve este Manual de Instrucciones / Instalación para poder consultarlo en el futuro. -
Página 4: Debido Al Movimiento Natural Del Ventilador, Algunas
pared o el techo. Tenga en cuenta que cuanto mayor sea este espacio mejor será el flujo de aire del ventilador. No usar en un espacio abierto ni donde pueda ser expuesto al agua o la humedad. No conectar el motor del ventilador a un regulador de intensidad. -
Página 6: Características Uvtblanco19
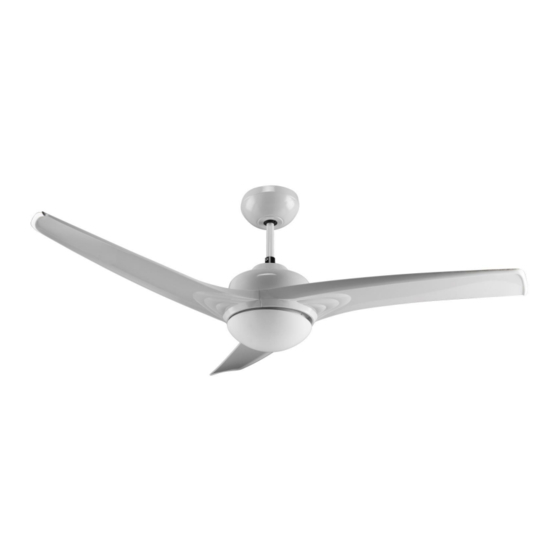
F. Cristal G. Soporte del receptor del mando a distancia H. Tornillos de sujeción I. Receptor de señal del mando a distancia J. Mando a distancia CARACTERÍSTICAS UVTBLANCO19-52 Dimensión 52” : 132 cm 3 aspas Material aspas: Plástico Color: Blanco Con control remoto Con 2 porta lámparas (Bombillas no incluidas) -
Página 7: Donde Instalar
DONDE INSTALAR Asegúrese que el lugar en el que se vaya a instalar el ventilador sea bastante amplio, ya que esto permitirá un mejor flujo del aire y que las aspas del mismo no entren en contacto con cualquier objeto, espacio mínimo de 0,6m por cada lado. - Página 8 Montaje del soporte bombillas (C) 3. Desenrosque los 3 tornillos que hay en la parte inferior de la estructura de la lámpara (B). Dependiendo del modelo adquirido, los 3 tornillos estarán dispuestos como la imagen de abajo (3) o bien en forma triangular en el centro de la estructura del ventilador.
- Página 9 blanco con cable blanco). Será necesario aflojar levemente los tornillos de la regleta a justarlos nuevamente una vez se haya introducido los cables. 6. Quite el tornillo superior del cuerpo y coloque la barra de sujeción (E) junto con el florón superior (D).
- Página 10 Montaje al techo 7. Desenrosque los tornillos laterales del soporte del receptor (G) tal y como se indica en la imagen de abajo. 8. Realice los agujeros pertinentes en el techo para poder anclar el soporte del receptor (G) al techo. Tenga en cuenta las anotaciones previamente enumeradas que hacen referencia a los tipos de techo.
- Página 11 Coloque el receptor de señal del mando a distancia (J) en la posición correcta entre el soporte del receptor (H) y el ventilador. Los cables deben quedar en el lado de la regleta del receptor (H). En el receptor de señal del mando a distancia (I) verá 2 cables en un lateral del receptor y 3 cables salientes del lateral contrario, tal y como muestra la imagen orientativa inferior:...
- Página 12 Los 3 cables salientes del receptor (I) (banco, negro y azul) deberán empalmarse con los cables salientes de la barra de sujeción (E) . Una vez realizado el empalme, séllelo con los capuchones provistos, tal y como muestra la imagen inferior. Tras hacer las conexiones entre los cables, por favor sellen el empalme con los capuchones incluidos junto con este aparato, para que los diferentes cables no se toquen entre ellos ni con el florón ni con otros componentes.
- Página 13 Montaje del cristal Coloque las bombillas (no incluidas) El ventilador utiliza bombillas E27 de 60W. Cuando se coloque las bombillas asegúrese que no toquen la cubierta de la lámpara ni el soporte de la lámpara. Coloque el cristal (F) con mucho cuidado pues se trata de una pieza muy frágil. El cristal (F) se enrosca en el soporte bombilla (C).
-
Página 15: Funcionamiento
4. FUNCIONAMIENTO Este aparato es muy fácil de utilizar y no requiere de grandes conocimientos. No obstante, le aconsejamos que se familiarice con las instrucciones más abajo detalladas. El ventilador cuenta con 3 niveles de potencia que podrán seleccionarse a través del mando a distancia. -
Página 16: Limpieza Y Mantenimiento
Para hacer uso de la garantía acuda al centro donde compró este producto o bien contacte con nosotros de cualquiera de las siguientes formas: A través del email sat@universalblue.es adjuntando la factura de compra e indicando sus datos de contacto y brevemente qué problema presenta su termo eléctrico. -
Página 17: Informacion Inherente Al Medioambiente
Por favor acuda a la papelera de reciclaje más cercana de su localidad o tienda habitual. Se ruega cumplir con sus obligaciones legales y contribuir a la protección de nuestro medio ambiente. Puedes descargar este manual en nuestra página web: www.universalblue.es... -
Página 18: English
ENGLISH Congratulations on the purchase of your product. We recommend you to spend some time to read this Instruction Manual in order to fully understand how to use it correctly. Read all the safety instructions carefully before use and keep this Instruction / Installation Manual for future reference. -
Página 19: Product Features
This device is not designed to be used by people (including children) with reduced physical, sensory or mental abilities or lack of knowledge, unless they are receiving supervision or instruction regarding the use of the device by a responsible person. -
Página 21: Installation
FEATURES UVTBLANCO19-52 Blades Dimension 52” 3 blades Blades raw material: Plastic Colour: White With remote control With 2 lamps (Bulbs not included) With Winter function – Inverse motor With timer Power: 70W INSTALLATION Before installing the appliance, make sure that the appliance is unplugged from the mains. - Página 22 If the chosen location does not have a suitable support beam capable of supporting 45Kg, install a 2"x4" support between the roof beams as a support medium. Make sure that bracket for hanging the fan to the ceiling or other suitable structure is capable of supporting at least 45Kg, with the...
- Página 23 Mounting the bulb holder structure (C) 3. Unscrew the 3 screws at the bottom of the lamp structure (B). Depending on the model purchased, the 3 screws will be arranged as shown below (3) or in a triangular shape in the centre of the fan frame. 4.
- Página 24 5. Make the electrical connection between the lamp structure (B) and the bulb holder structure (C). To do it, connect the terminal cables according to their colour, connecting the terminal cables of the same colour to each other through the strip (blue wire with blue wire;...
- Página 25 6. Unscrew the screw allocated in the upper part of the lamp structure (B) and place the support rod (E) together with the upper canopy (D). Fix the lamp structure (B) with the support rod (E) using the screw removed previously. The connecting cables should be run through the inside of the support rod (E) to the opposite end.
- Página 26 Place the remote control signal receiver (I) in the correct position between the receiver bracket (G) and the fan. The cables should be on the side of the receiver strip (G). On the signal receptor (I) you will see 2 cables on one side of the receiver and 3 cables protruding from the opposite side, as shown in the image below:...
- Página 27 The 3 cables coming out of the signal receptor (I) (white, black and blue) must be connected with the cables coming out of the support rod (E) . Once the joint has been made, fix it with the caps provided, as shown in the image below: After making the connections between the cables, please seal the joint with the caps included with this appliance, so that the different cables do not touch each other with the fleuron or other components.
- Página 28 Glass installation Place the bulbs (not included) The fan uses 60W E27 bulbs. When placing the bulbs, make sure they do not touch the lamp cover or lamp holder. Place the glass (E) very carefully as it is a very fragile piece. The glass (E) is screwed into the bulb holder (D).
-
Página 30: Using This Appliance
USING THIS APPLIANCE This device is very easy to use and does not require great knowledge. However, we advise you to familiarize yourself with the instructions detailed below. The fan has 3 power levels that can be selected through the remote control. It also has a timer from 1 to 8 hours and a winter function, as detailed below. -
Página 31: Cleaning And Maintenance
8H: Setting for the fan to turn off automatically after 8 hours of operation In order to be able to use the ceiling fan through the remote control, the receptor included with this device must be installed before, as explained in the installation section of this manual. -
Página 32: Environmental Information
Please go to the nearest recycling bin in your local or usual store. Please comply with your legal obligations and contribute to the protection of our environment. You can download this manual from our website: www.universalblue.es... - Página 33 www.universalblue.es...